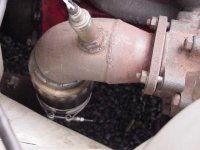
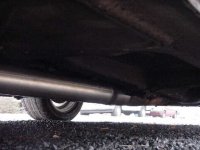
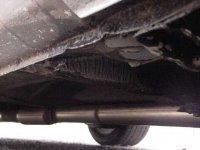
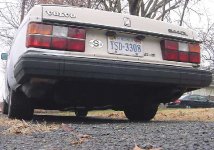
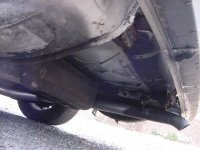
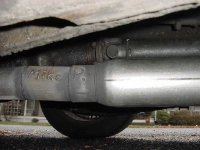
Started with a solid 3" downpipe, 3" PaceSetter flex section, no-name 3" v-band, Dynomax bullet muffler, two 4' sections of aluminized 3" pipe, and a 3" Catco cat. It took about 6-7hr to mark, cut, grind, wire-wheel, belt-sand, fit, tack, support, adjust, weld, and hang the exhaust. It didn't bang or clunk once on the drive home (~2hr), yet it has very good ground clearance. With a cat in place, I hope to pass emissions in January.
Here's what we did all day Saturday:
1. Cut off the old, smashed flex section.
2. Cut out the vertical section and put in a new flex with a v-band at the bottom.
3. Cut end of downpipe off to place cat immediately after the 2nd bend in the downpipe. It's forward of the stock location, but fits better because it's not up against the trans cross member.
4. Cut short piece to go after the cat.
5. Take 4' section of pipe and wedge the end that meets the cat to direct it towards the center of the car. Cut two notches to create slight bends in the pipe to hug close to the floor.
6. Tack the muffler in place.
7. Size up the two 45? bends that follow around the side of the gas tank and mark them.
8. Cut and tack short piece after muffler to make the 45s hit right.
9. Raise axle ~1" and support on passengers side to build exhaust so it hits the axle at droop.
10. Wedge a few ends of pipes to get the angles right.
11. Cut tailpipe section to length and wedge the end to angle it slightly away from the spare tire well.
12. Tack on tailpipe. Tack on turn-down tip that was cut from a damaged 90? that was part of the original downpipe.
13. From the v-band, drop the full exhaust for welding on the bench.
14. Reinstall exhaust and build a center hanger at the front of the muffler and at the tailpipe. Still might need to add a hanger up front to take some weight off the flex pipe.
15. Wire brush the welds as best as possible and shoot a quick coat of high temp spray paint. Eventually I'll paint the whole exhaust black after the cat. This was very effective at preventing rust on my previous welded exhaust.
16. Start car and immediately worry that it's too loud...and it's only idling.
On the drive home we realized that it's loud outside the car, but at cruise it's actually not bad at all inside the car. No droning or buzzing at all at steady RPM. It's loud and deep at low RPM acceleration with a slight buzz passing 2500RPM. Plenty of popping when I let off the gas, but it is muffled so it's nothing like a gun shot backfire. Similar to my old side exit single-muffler exhaust in that respect, but the 3" pipe does make it more noticable. So far I like it a lot.
Here's what we did all day Saturday:
1. Cut off the old, smashed flex section.
2. Cut out the vertical section and put in a new flex with a v-band at the bottom.
3. Cut end of downpipe off to place cat immediately after the 2nd bend in the downpipe. It's forward of the stock location, but fits better because it's not up against the trans cross member.
4. Cut short piece to go after the cat.
5. Take 4' section of pipe and wedge the end that meets the cat to direct it towards the center of the car. Cut two notches to create slight bends in the pipe to hug close to the floor.
6. Tack the muffler in place.
7. Size up the two 45? bends that follow around the side of the gas tank and mark them.
8. Cut and tack short piece after muffler to make the 45s hit right.
9. Raise axle ~1" and support on passengers side to build exhaust so it hits the axle at droop.
10. Wedge a few ends of pipes to get the angles right.
11. Cut tailpipe section to length and wedge the end to angle it slightly away from the spare tire well.
12. Tack on tailpipe. Tack on turn-down tip that was cut from a damaged 90? that was part of the original downpipe.
13. From the v-band, drop the full exhaust for welding on the bench.
14. Reinstall exhaust and build a center hanger at the front of the muffler and at the tailpipe. Still might need to add a hanger up front to take some weight off the flex pipe.
15. Wire brush the welds as best as possible and shoot a quick coat of high temp spray paint. Eventually I'll paint the whole exhaust black after the cat. This was very effective at preventing rust on my previous welded exhaust.
16. Start car and immediately worry that it's too loud...and it's only idling.

On the drive home we realized that it's loud outside the car, but at cruise it's actually not bad at all inside the car. No droning or buzzing at all at steady RPM. It's loud and deep at low RPM acceleration with a slight buzz passing 2500RPM. Plenty of popping when I let off the gas, but it is muffled so it's nothing like a gun shot backfire. Similar to my old side exit single-muffler exhaust in that respect, but the 3" pipe does make it more noticable. So far I like it a lot.

