
vvpete
New member
- Joined
- Jan 31, 2005
- Location
- Land of Enchantment
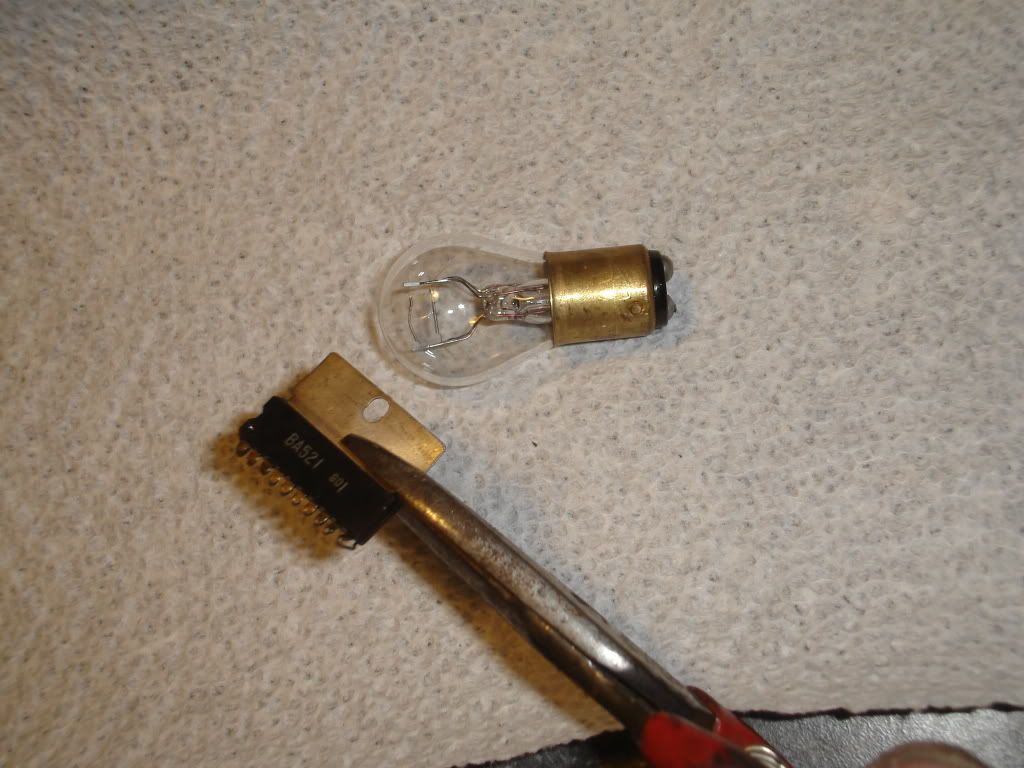
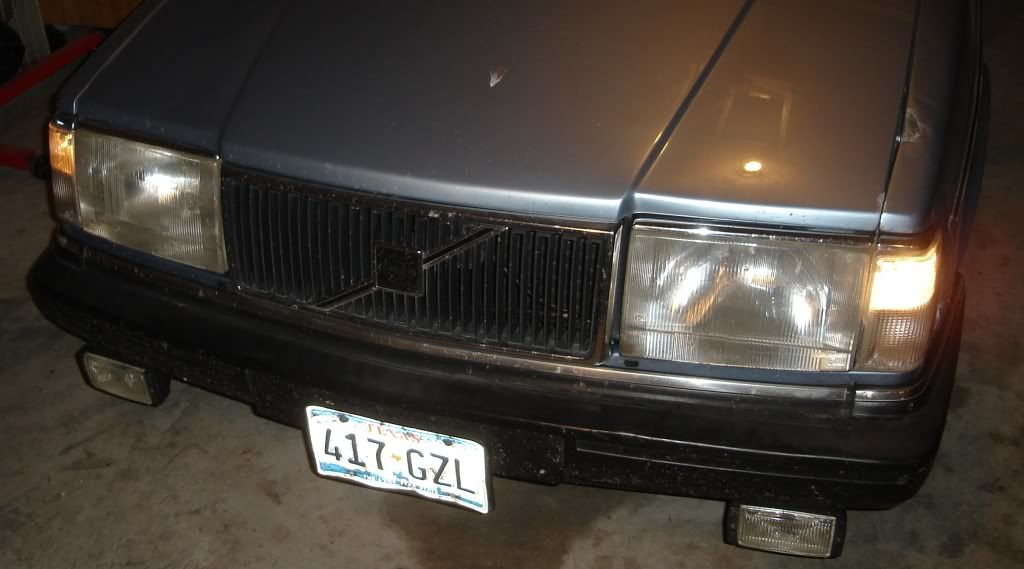
This is a modification to the 240 parking lights, which in Europe are wired for both low wattage parking lights and high wattage daytime running lights. For many of you who have aftermarket E-codes in the US spec cars, you have a choice of using either of the filaments of the 2357 bulb that resides in your parking lamp assembly. If you still have the OEM Volvo Cibe's It's there whether it is an e-code or not, US spec still uses the same 2357 bulb and socket on '85-93, but only powers up the low wattage filament.
Here is a very simple mod to improve the utterly worthless US spec parking light, and by using both of the filaments of the 2357 bulb can get some decent fog/running lights out of them. IIRC the 2357 is a 5w low, and 21w hi filament bulb, so by combining the two, can get a 26w lamp which actually works for front illumination:
Take a piece of metal and cut it into the shape of the base of the bulb. I used a piece of metal from an old IC heat sink which is silver plated copper, but any piece of metal will do, like a piece of beer can.
Glue the piece of metal to the bottom of the bulb using silicone adhesive, 'Goop" great stuff!! love it!!
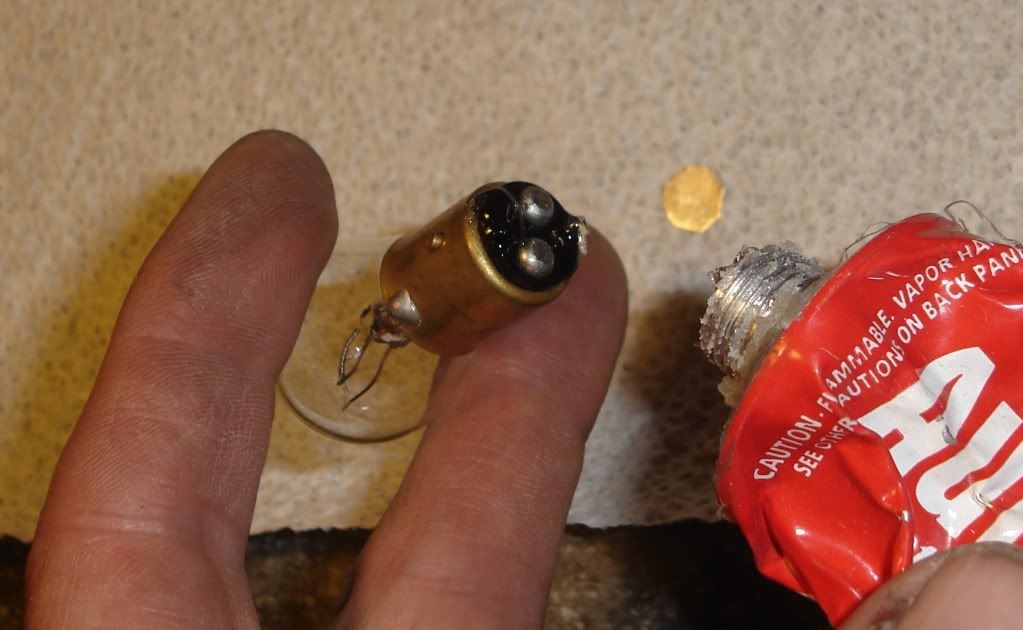
The piece of metal needs to contact both nubs on the bottom of the bulb without glue touching either nub. I filed down each nub a bit to make a good contact surface
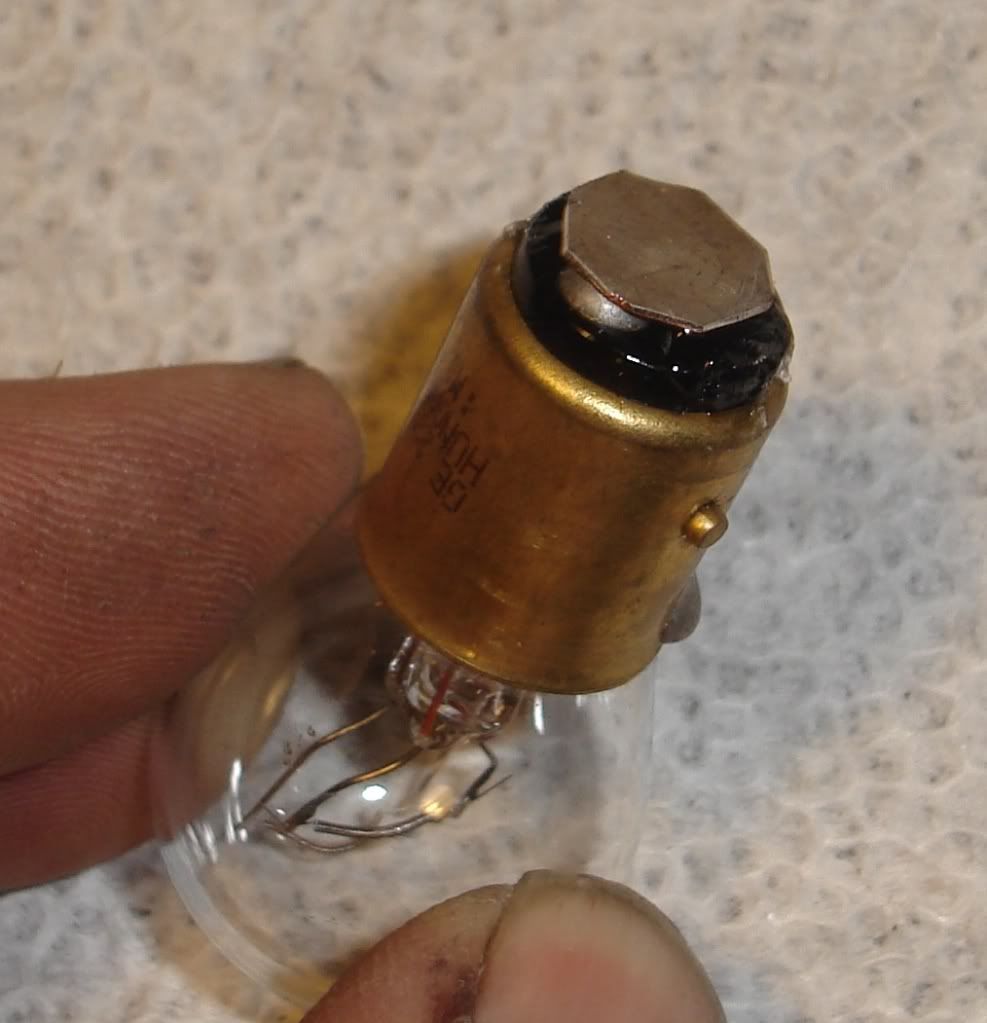
Both filaments are powered with the mod, which is so simple and doesn't require any wiring changes
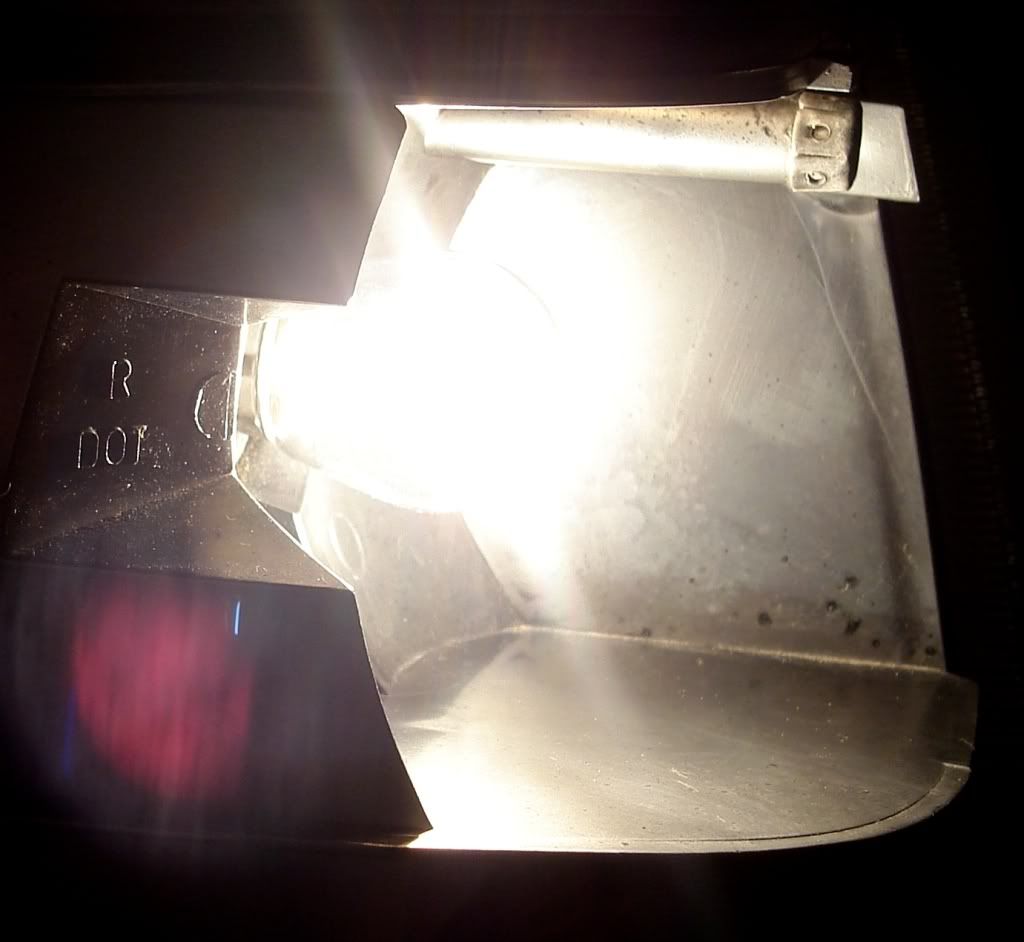
The lamp gets a bit hotter than it would with just the low wattage burning, and so far after 1/2 hr in my garage no problems with wires or fuses, (the 16 amp on the circuit is more than enough to handle the current). The bulb out warning isn't affected as the front parking lights are not on the circuit.
I had the e-codes previously and missed the brightness of the running lights in place of the weak parking lights, so decided to do something about it. Done.
Mod's if you think this should be in 'write-up' section, please feel free to move it wherever.
Here is a very simple mod to improve the utterly worthless US spec parking light, and by using both of the filaments of the 2357 bulb can get some decent fog/running lights out of them. IIRC the 2357 is a 5w low, and 21w hi filament bulb, so by combining the two, can get a 26w lamp which actually works for front illumination:
Take a piece of metal and cut it into the shape of the base of the bulb. I used a piece of metal from an old IC heat sink which is silver plated copper, but any piece of metal will do, like a piece of beer can.
Glue the piece of metal to the bottom of the bulb using silicone adhesive, 'Goop" great stuff!! love it!!
The piece of metal needs to contact both nubs on the bottom of the bulb without glue touching either nub. I filed down each nub a bit to make a good contact surface
Both filaments are powered with the mod, which is so simple and doesn't require any wiring changes
The lamp gets a bit hotter than it would with just the low wattage burning, and so far after 1/2 hr in my garage no problems with wires or fuses, (the 16 amp on the circuit is more than enough to handle the current). The bulb out warning isn't affected as the front parking lights are not on the circuit.
I had the e-codes previously and missed the brightness of the running lights in place of the weak parking lights, so decided to do something about it. Done.
Mod's if you think this should be in 'write-up' section, please feel free to move it wherever.
Last edited:


