4-cyl
In too deep
- Joined
- Aug 23, 2008
- Location
- Seattle, WA
The 240 Turbo was a marvel of the early 80s; fuel injection, a turbocharger, high quality parts, and a strictly functional design. Any concept put into production, however, loses a bit of technology and individuality as bean counters chop away at what is “unnecessary.”
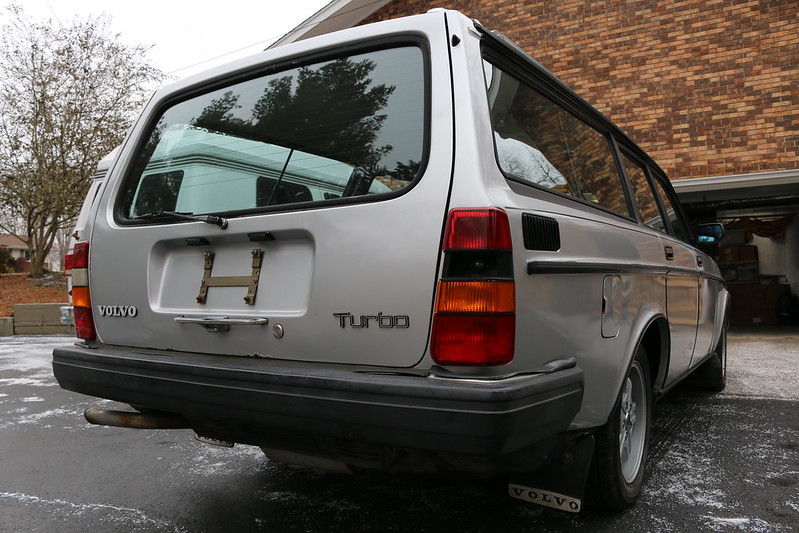
My goal with this 245T is to build it as the engineers and designers would have wanted. It should do everything that a production car should with incredible ease, but those items, both mechanical and cosmetic, that were deemed unnecessary expenditures or simply not available in 1983 (but a better solution), will be incorporated along the way.
Accomplished thus far:
Engine -
Head and valve gaskets
All front and rear oil seals
All vacuum hoses replaced w/ braided fabric line
do88 turbo inlet, intake, and intercooler hoses
New K-jet injectors
New K-jet seals
Used CPR
Fuel filter
Fuel pumps
Fuel accumulator
Throttle body cable
Used Idle-air Control Valve
Battery lines
PCV box
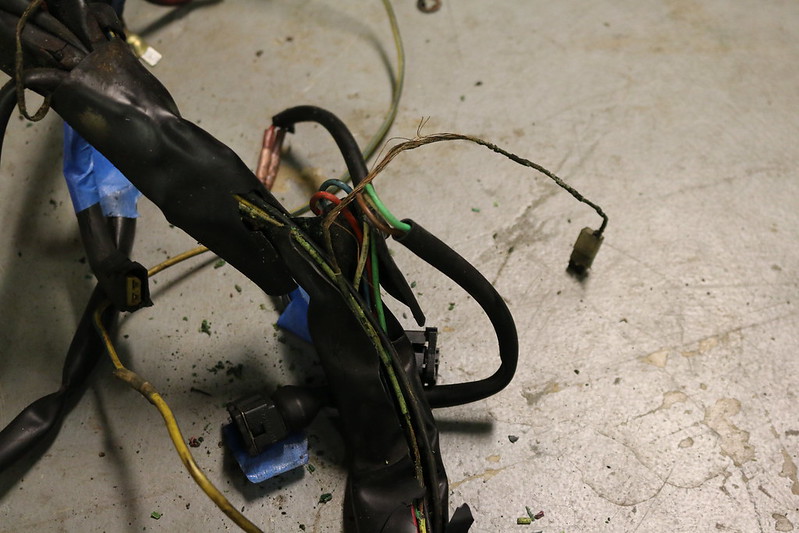
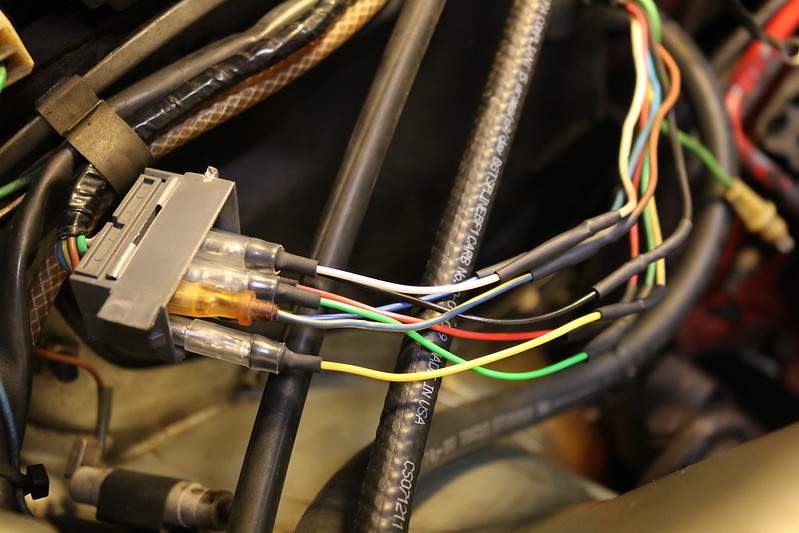
NOS replacement engine wiring harness
Rebuilt turbo-side wiring harness
Engine mounts
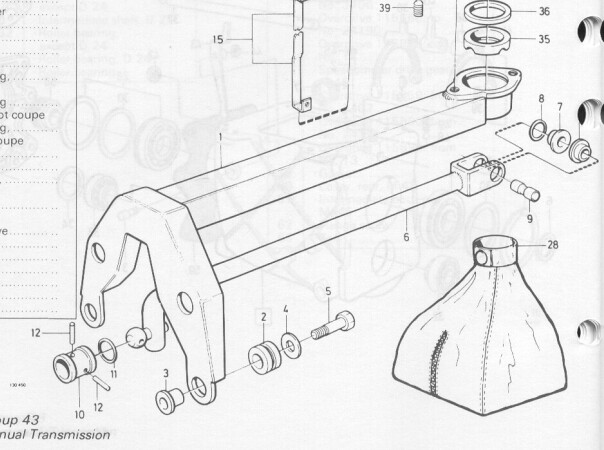
Transmission -
Resealed transmission
HD transmission mount
Suspension -
Full iPD poly set minus the TABs
Bilstein HDs
Ball joints, tie rods, top hats
Brakes -
*Have stainless lines to install
Interior -
New heater core and blower motor
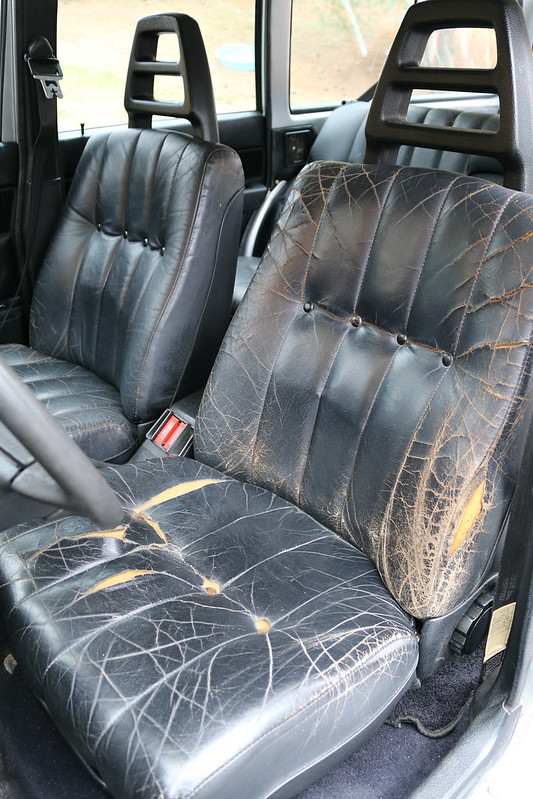
Rebuilt donor black leather interior
Installed VDO boost gauge in PSI to replace clock
Rebuilt power window switches
Exterior -
Rack removed and plugs placed
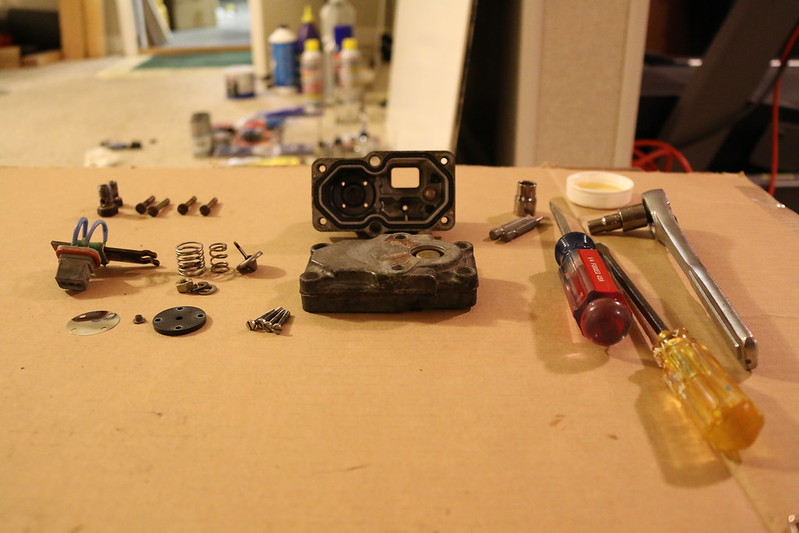
I should mention that my mantra is “Maintenance is key.” This car will by my daily driver. Much of this build thread will focus on maintenance—getting and keeping the wagon at 100%--from K-jet stumbles to the smallest o-ring one can think of.

My goal with this 245T is to build it as the engineers and designers would have wanted. It should do everything that a production car should with incredible ease, but those items, both mechanical and cosmetic, that were deemed unnecessary expenditures or simply not available in 1983 (but a better solution), will be incorporated along the way.
Accomplished thus far:
Engine -
Head and valve gaskets
All front and rear oil seals
All vacuum hoses replaced w/ braided fabric line
do88 turbo inlet, intake, and intercooler hoses
New K-jet injectors
New K-jet seals
Used CPR
Fuel filter
Fuel pumps
Fuel accumulator
Throttle body cable
Used Idle-air Control Valve
Battery lines
PCV box
NOS replacement engine wiring harness
Rebuilt turbo-side wiring harness
Engine mounts
Transmission -
Resealed transmission
HD transmission mount
Suspension -
Full iPD poly set minus the TABs
Bilstein HDs
Ball joints, tie rods, top hats
Brakes -
*Have stainless lines to install
Interior -
New heater core and blower motor
Rebuilt donor black leather interior
Installed VDO boost gauge in PSI to replace clock
Rebuilt power window switches
Exterior -
Rack removed and plugs placed
I should mention that my mantra is “Maintenance is key.” This car will by my daily driver. Much of this build thread will focus on maintenance—getting and keeping the wagon at 100%--from K-jet stumbles to the smallest o-ring one can think of.
Last edited:


 The attention to detail is amazing!! Please keep going with amazing pictures.