nx3xo
New member
- Joined
- Feb 12, 2010
- Location
- Santa Cruz ,Ca
So this idea started with to many overhaulin episodes watched. I planned on making the higher point of the trunk a flat piece of mdf with some black carpet. I had a total turbobricked sub box that worked but was less than a cubic foot of air space with a 12" sub. The plan was to make this back plane and have the sub mounted but conceal the amp and move my remote battery behind this new plane/sub box. Heres some pics of the process. If theres an interest in the planes or subs I might do a small run of them. They are slightly time consuming but I could do a few if the interest is there. I will also make a similar setup for the rear deck lid. I will use thinner mdf and glue it together for strength and to absorb any vibration. Heres some pics.

I used some tool box liner from harbor freight for sound deadening material. Then some 3m spray adhesive.

Cardboard template for mdf cut out.

Sub hole cut out and carpet cut and gluing.

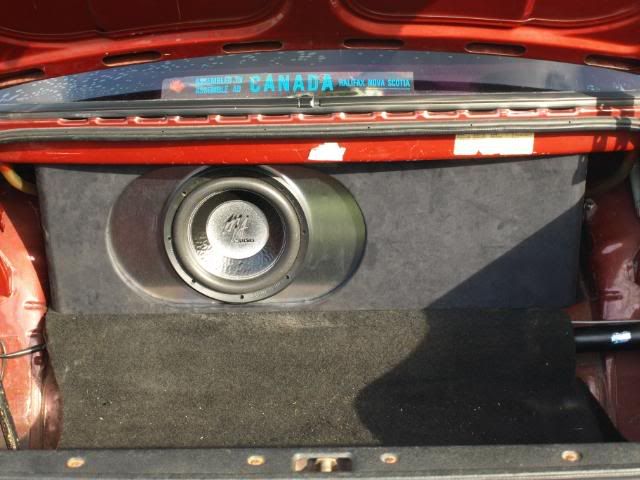
Mounted the sub to see how it looks in place.
One major alteration was the opening is about the height of the sub. So i cut the bottom lip off the sub to avoid contact on the lower part of the deck.

Building the rear portion of the box to seal the sub for a good thump.
This is just figuring the depth of the sub and building around to give the most air volume to seal, the more air the better.


One first mistake was gluing the carpet to early, Ill wait until i get everything screwed down next time.

Mounting my fav amp. Sorting the wires in direction to relation to there connection.

Finished product. I will get a pic of it in place tomorrow once i make the upper deck piece which will move the speakers up, currently they are in the way.
Thanks for checkin this out.
Title should have been "Fun with Mdf"
I used some tool box liner from harbor freight for sound deadening material. Then some 3m spray adhesive.
Cardboard template for mdf cut out.
Sub hole cut out and carpet cut and gluing.
Mounted the sub to see how it looks in place.
One major alteration was the opening is about the height of the sub. So i cut the bottom lip off the sub to avoid contact on the lower part of the deck.
Building the rear portion of the box to seal the sub for a good thump.
This is just figuring the depth of the sub and building around to give the most air volume to seal, the more air the better.
One first mistake was gluing the carpet to early, Ill wait until i get everything screwed down next time.
Mounting my fav amp. Sorting the wires in direction to relation to there connection.
Finished product. I will get a pic of it in place tomorrow once i make the upper deck piece which will move the speakers up, currently they are in the way.
Thanks for checkin this out.
Title should have been "Fun with Mdf"
Last edited: