• Hello Guest, welcome to the initial stages of our new platform!
    You can find some additional information about where we are in the process of migrating the board and setting up our new software here

    Thank you for being a part of our community!

1991 744 Turbo (the Race Car)

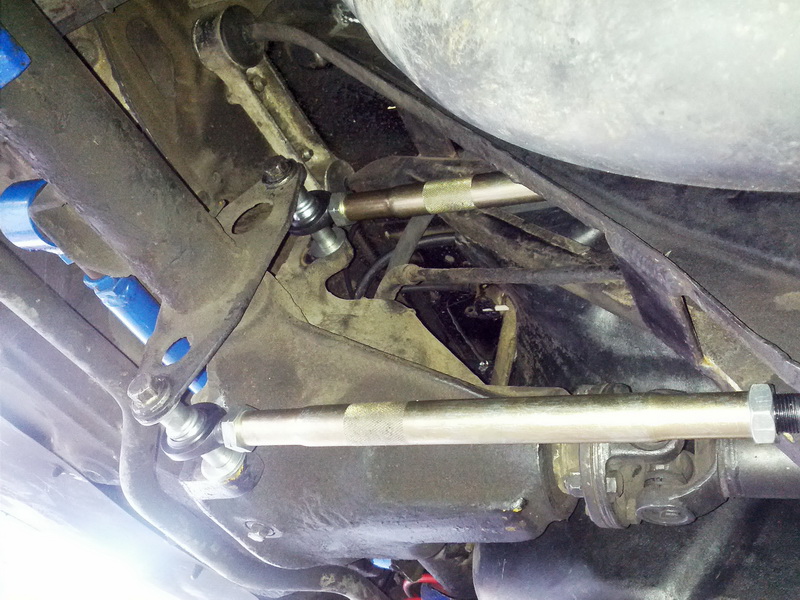
Torque rods installed, I do not know why people say they are noisy as I did not notice any odd new sounds, Also installed two new front tires as my 2+ year old tires had a bit of camber wear on pass side and small line that looked like it was coming apart on the inside. Either way it fixed my vibration issue.

Rear suspension wise new rods seem to feel good so far, I will drive it to work tomorrow and see how it feels. I will re-torque them tomorrow night after I put 100 miles on it.

Sorry for the bad pictures, no idea why the camera was taking such bad pictures today.

SRTR_3292.jpg

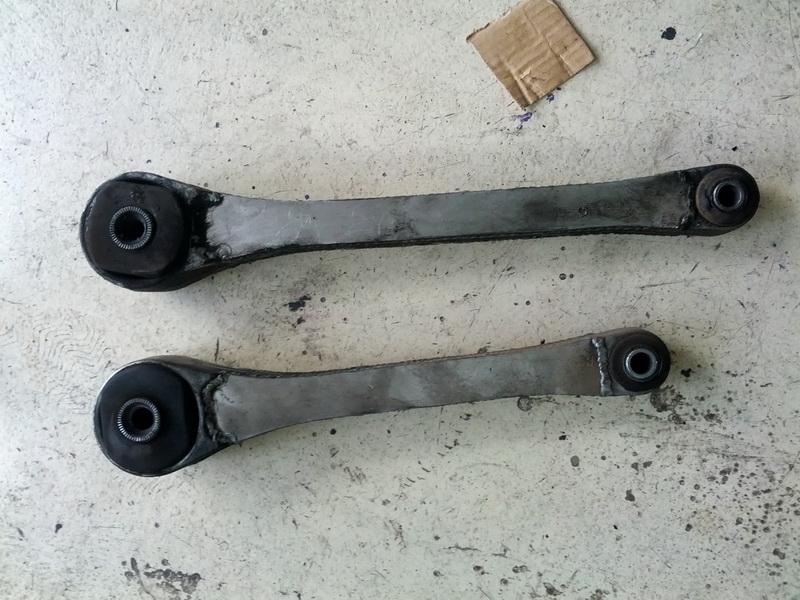
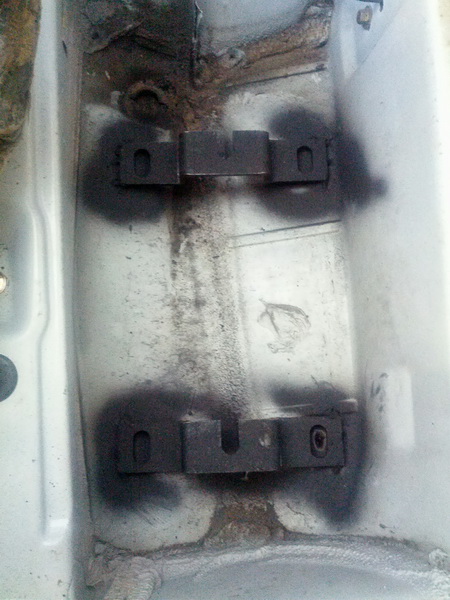
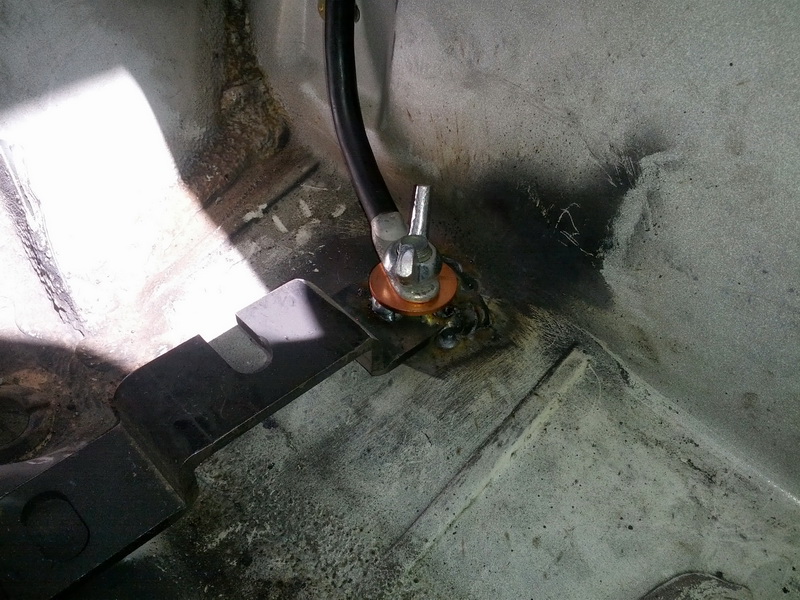
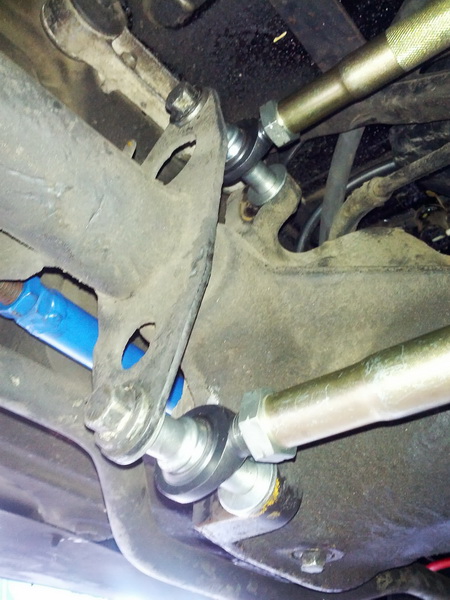
Notice how the big bushing had rotated 90 degrees while installed, very odd, all of those bushings are ~2-3 years old as I installed new when I did the reinforce the subframe.

SRTR_3293.jpg

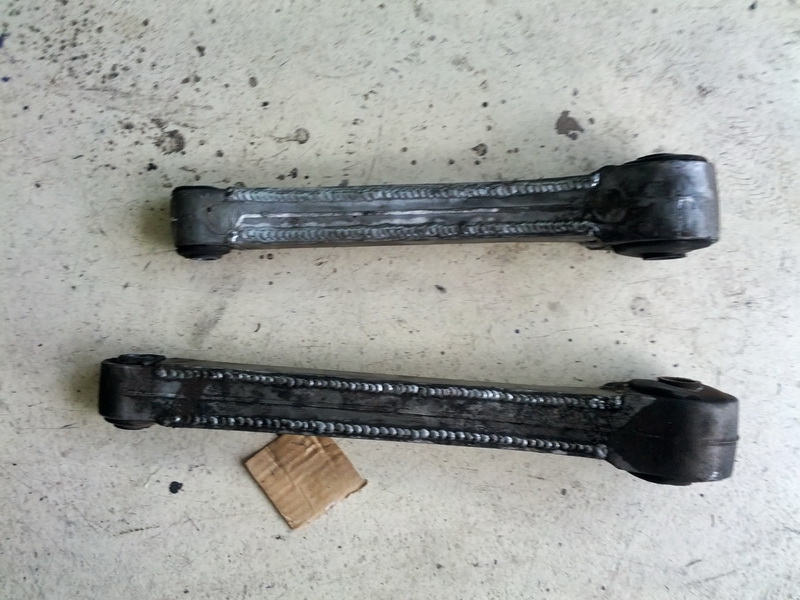
You can see the awesome welding work that Jao did to strengthen these

SRTR_3294.jpg

SRTR_3295.jpg

SRTR_3296.jpg

SRTR_3297.jpg

SRTR_3298.jpg


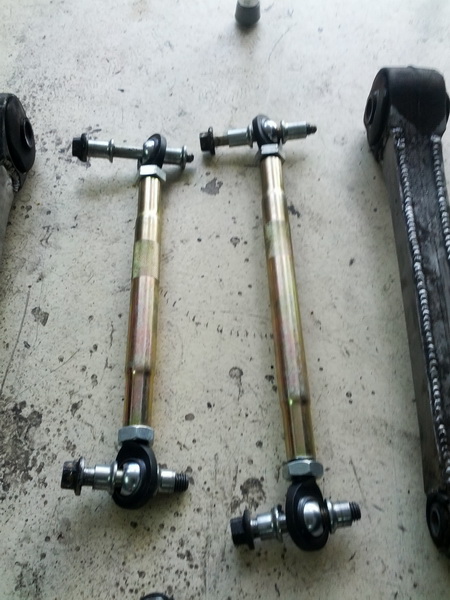
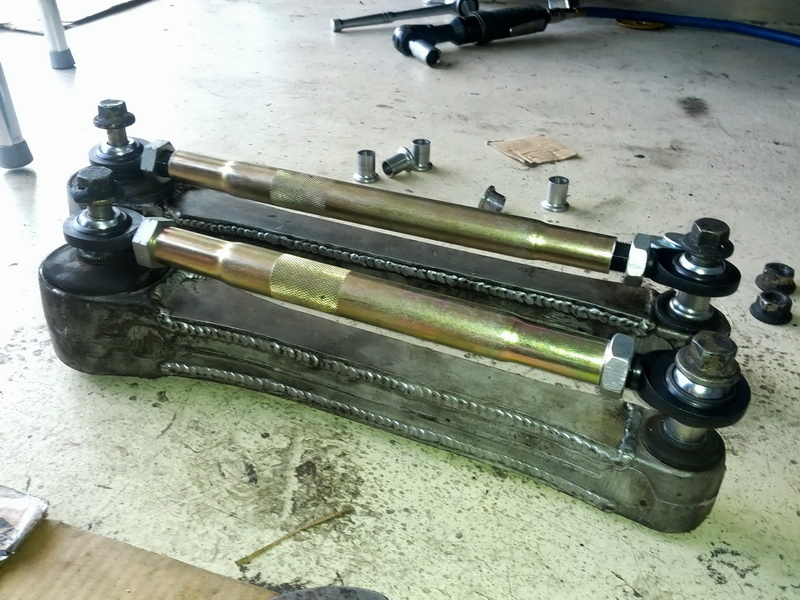
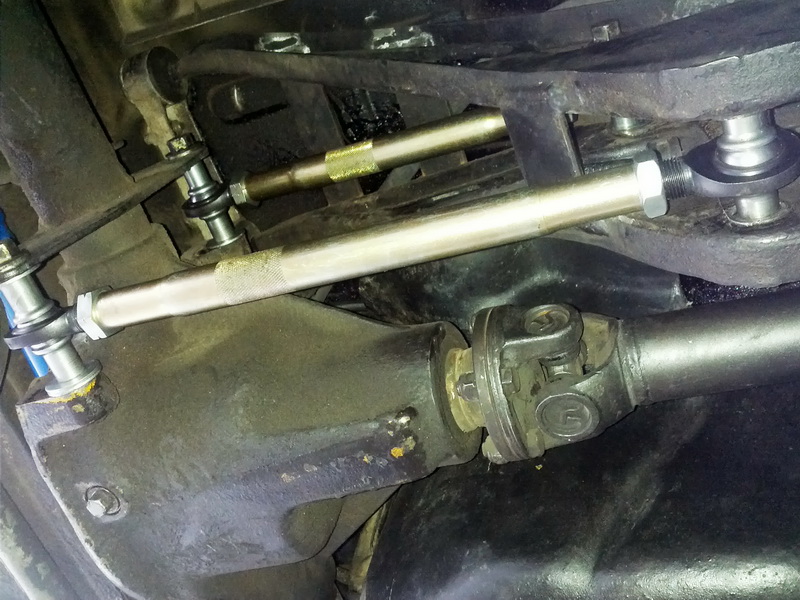
Doing the best I could I measured what looks to be -2 deg on the diff so that is near ideal already, both rods were matched to stock lengths as you can see, but some how my new adjustments were a little off as stock was -.2 and now it is -1.8 deg more so I am going to stick with that for now.
 
Did the same thing but mine clunks on every shift. I also have Super-pro bushings everywhere except the front in-frame bushing for the rear subframe. Not sure if that has something to do with it.

I'm going under it again the next couple of days to verify everything is tight.
 
Where did you get your torque rods from? My next thing I need to do is build a solid bushing of sorts for the front bushing on the subframe.

Got them from Speedway Motors. Joints are solid. Had the noise on the very first drive around the block, checked it right after and couldn't find anything. Now that I drove it around town a bit I'll check again.

I'm swapping exhaust manifolds right now so I can check it while its in the garage.
 
Justlie: here is an idea, what size hole for the heim ends did you use? Did you use any kind of bushing or spacer? I went with 5/8 and then used some split bushing/sleeve from McMaster car that was m16-m14 adapter. I put it in a vise and opened it up and filed off a little of one side so it could be pressed into the 5/8 hole in the joint. This kept the m14 bolt very tight in the joints. Also all of my spacers on the side are 1/2" id and then drilled out to m14 so everything is really tight.

Doug: might just be my mind wanting it to feel better but the car really does feel a bit more tight. Nice and smooth. I still need to drop the konis down in the rear and set them stiffer.

Its not in your head. My old 242 went through torque rods as well.
 
Doug: might just be my mind wanting it to feel better but the car really does feel a bit more tight. Nice and smooth. I still need to drop the konis down in the rear and set them stiffer.


On-Off throttle transitions will be noticeable better. Course you're using an auto so it'll soften that transition some. Still, well done my friend.
 
Justlie: here is an idea, what size hole for the heim ends did you use? Did you use any kind of bushing or spacer? I went with 5/8 and then used some split bushing/sleeve from McMaster car that was m16-m14 adapter. I put it in a vise and opened it up and filed off a little of one side so it could be pressed into the 5/8 hole in the joint. This kept the m14 bolt very tight in the joints. Also all of my spacers on the side are 1/2" id and then drilled out to m14 so everything is really tight.

Doug: might just be my mind wanting it to feel better but the car really does feel a bit more tight. Nice and smooth. I still need to drop the konis down in the rear and set them stiffer.

5/8" to 9/16" sleeve in it. The bolt fit very snug in it, but yes that could be my issue.
 
Started on the rear mounted battery
RMB_3292.jpg

RMB_3293.jpg

RMB_3294.jpg

RMB_3295.jpg

RMB_3296.jpg

RMB_3297.jpg

RMB_3298.jpg

RMB_3299.jpg

RMB_3300.jpg

RMB_3301.jpg

RMB_3302.jpg


As I get more work done I shall post up more pictures, right now I am taking a bit of break to go ship some chips.
 
It is always a good idea to run a circuit breaker, or at least, a fuse, in case the main positive cable becomes shorted. The high amperage can easily start a fire!

Circuit breakers are nice because they're resettable and might allow you to limp a car home.

There is no rule of thumb that I know of when it comes to sizing, but I would imagine something in the 150-200 amp range should suffice. Best rule of thumb is to run the smallest one you can without tripping it during cranking. That will provide the best protection.
 
That's what I do: a fuse on the positive cable right after the battery. I think I started with a 150 and I had to drag the car on the starter motor once and it blew the fuse, so I replaced it with a 200.

My positive line runs under the car. It's tucked up pretty tight but it's still good insurance.
 
Rear mounting point, I now have a #4 wire going from here to the block at the factory mounting point.

RMR2_3292.jpg


Battery somewhat in place

RMR2_3293.jpg


Ghetto mounting block up front, I am planning on cleaning up the wiring a bit, for now I am just getting the car up and running, either way everything works as it should for now.

RMR2_3296.jpg


Final trunk mounting of the switch, as per my other thread, bottom wire goes to the factory alternator exciter wire on the chassis, the top small wire goes to the exciter location on the alternator. Car shuts off just fine with the switch.

RMR2_3297.jpg


So far I am happy, I have zero voltage drop across all of the wiring, Same voltage at the battery as the engine bay. Tomorrow I will drive the car around and check again to see how it is with heat.
 
Back
Top