• Hello Guest, welcome to the initial stages of our new platform!
    You can find some additional information about where we are in the process of migrating the board and setting up our new software here

    Thank you for being a part of our community!

FreeEMS powered 245

Car number eleven ran, a 1932 Ford Deuce coupe:
http://forum.diyefi.org/viewtopic.php?f=55&t=1647

That is a GM DIS ignition engine.

In Volvo news, I built this:
Console_Interface_Panel.jpg

So I can put the computer into firmware load mode, and hook the
laptop to the jack without taking anything apart.

The new Jaguar board is pretty nice, makes my homemade junk look
pretty amateur.

Exciting times.
 
I found the board connector you posted a pic of on digikey. Where is the wire-side connector being sourced? How much is it?

I didn't post that picture actually. Pretty nice connector
though, eh?

As I understand it, that is the connector currently spec'd for
the RavAGE project, one of several hardware projects designed to
run the FreeEMS software.

https://github.com/dvisser/Ravage
http://forum.diyefi.org/viewforum.php?f=58

I'm not sure if they have a BOM completely sorted out yet, but
they are only a few months away from production.

Another of the active hardware projects is the Jaguar board, a
minimal system targeting engines with GM DIS or Ford EDIS
ignition systems.

https://github.com/DeuceEFI/Jaguar
http://forum.diyefi.org/viewforum.php?f=67

The first Jaguar board built ran an engine for the first time
this week. It is the eleventh engine to run under FreeEMS control
so far. Two of the eleven have been Volvo Redblocks.

None of this stuff is ready for general use yet. The hardware
solutions are still being laid out, or are in early alpha
testing. The firmware is high quality, but as yet incomplete.

Constructive criticism is welcome by the developers, and testing
is needed, but the project is not quite ready for wide exposure.

This year should see complete solutions become available for
capable car builders. It's an exciting time.

All of this stuff is completely open. You can fork these designs
and firmware and do your own thing. I see a board targeted at RWD
Volvos as a possiblility one day, plug and play LH 2.2 or 2.4.
Heck, you could drive a digital Control Pressure Regulator and
build a system for K-jet. It sure is cool living in the future.

My EMS is a couple of hacked up perfboard monstrosities that I
made on my own. I made heavy use of the RavAGE schematics for my
design. I use connectors scavenged from old Volvo harnnesses. It
was easily the most complex electronics project that I've
undertaken, and I've screwed up in many ways, while learning
many valuable lessons.

I've been running my daily driver on my homemade EMS for over six
months now.

I will absolutely upgrade to something with a solid design when
the time comes. I'm keen to help develop a hardware solution
targeted at hobbyists, something a person can solder up on their
own, and learn a bunch along the way. In the spirit of the early days
of MS. The sort of thing you can make a kit of, and give to a
teenager and say: "here you go, get this built if you want to get
your car running".

I've asked the developers in IRC about the connector part number
and source. I'll post the details here when the timezones align and I
hear back.
 
Karl, they're Molex CMC 48 and are relatively inexpensive and available. Check molex's site for part numbers and/or search on octopart to see which variants are really readily available and which are more special-order.

Keep up the good work, Sim. You're a star. You're also a pioneer. Maybe you're a hero too? I'm no longer sure, having confused myself near the start of this paragraph and become distracted by the location of my wife's hand near the end.

Fred.

They are a rather nice connector. Self sealing, positive latching. And molex will let you sample the crap out of them ;)
 
Having learned many valuable lessons from my first attempt, I
undertook to rebuild my ECU as a modular set of boards. My
existing board was jam packed and haphazard, and had proven to be
a dead end.

The new ECU is made as stacked boards, and has been laid out
more rationally and less densely. The jumper wires are color coded.

new_boards.jpg


It all bolts together with risers to a metal panel with
connectors mounted. The ECU is further bolted into a large
plastic box.

ECU_Lid_labeled.jpg


The rebuild is much easier to work on, troubleshoot and extend.

The software is progressing also. A rev limiter was added, and
while fooling around with a 5/4.8k rpm spark cut limit, I blew my
tired old exhaust to pieces.
 
DUDE THAT IS AWESOME and funny to look at too!

I giggled looking at that monster and still feeling envious that i don't have one :(
 
New 2.5" exhaust

Well, I destroyed my rusty old exhaust system, and I had to get
the car smogged, so I built the exhaust that I wanted.

The old exhaust was welded all together, not really conducive to
jackstand repairs. It had completely broken just ahead of the
first muffler, so after sawing the pipe off where the first
bolted joint should have been, the middle section just came out.

One of the rubber donuts on the first muffler had broken, and the
other came off easily. A bit of shoving and the rear muffler
dropped right out.

This car is going turbo in the future, so I did not waste time on
a downpipe. I shaped a piece of 2.5" pipe to the 2->1 collector
and welded it to a bolt together flange. (V bands are not in the
budget this time around.)

A turbo downpipe will fit in place of the first section with no
problem in the future. Just a simple matter of fabrication.

I took the opportunity to weld in the bung that came with my LC1.

2.5_inch_collector.jpg


The bung that came in the wideband kit was about twice as long as
it should have been. After looking up the datasheet on the
wideband sensor, I trimmed about an eighth of an inch from the
bung. The picture shows the initial reach, not the final product.

I used four 180 degree mandrel bends that I bought locally, two with
a five inch radius, and two with a four inch radius.

The exhaust was built to fit over the axle and designed to be
installable on jackstands so three bolt together flanges were
used.

I fabbed a hanger piece from stuff in the scrap bin for the mount
just ahead of the axle.

2.5_inch_front_view.jpg


I used a generic Napa oval muffler for the final muffler.

2.5_rear_muffler.jpg


The set-up made it through Aircare just fine. The next week I
added a 2.5" glasspack muffler to the center section where the
original resonator was. The glasspack was not in stock when I
bought the mandrel bends and flanges, but I couldn't wait as I
needed to get the car smogged to renew my insurance.

This new exhaust is perhaps slightly louder than when I bought
the car, but the difference is subtle. It is much quieter than
the broken pipe it replaces. On a long downhill with the throttle
closed it makes a satisfying burble that is quiet enough the
passengers do not perceive it.

I'm not looking for insane power from this car, so 2.5" should be
just fine for the life of it. It would have been nice if I could
have sprung for stainless, or had the skills to weld aluminum,
but this will serve me well for a good number of years, I
suspect.

I have zero data to support me, but judging from the seat of my
pants, the car seems much happier in the top end of the rev
range. It seems like it is happy to pull hard above 4500 RPM.
This comes as a bit of a surprise to me as I was not really
expecting any perceivable gains, just trying to set myself up
properly for the eventual +T.

(I'm running an A cam, stock on this 1979 B21A)

This was a fun project, making this stuff made me feel really
good about myself.
 
DUDE THAT IS AWESOME and funny to look at too!

I giggled looking at that monster and still feeling envious that i don't have one :(

Hey thanks!

It is both awesome and funny, at least in my opinion.

I'm not really doing anything fancy, but the large form factor
makes the construction much simpler for my average brain.

The cool thing about FreeEMS is that the designs (hardware and
software) are all completely open, so a hack like myself has a
good chance of getting it all working without having to have an
electrical engineering background.

This is all alpha level stuff at the moment, don't try this at
home unless you want to experiment. Beta and release level stuff
won't be long though, stay tuned.

Feel free to giggle, I do.

Next step for me is getting the EFI stuff running.
 
Yeah, so I did some stuff this summer.

Wired_up-small.jpg


This is one of the Jaguar version 0.4-Alpha boards. It is in a
case I bought, with some connectors I bought off of the shelf
cheaply at the local Chinese electronics store (love that
place).

It is a purpose-built FreeEMS board, still at alpha-test level.

I bought this one from the designer, with the components
assembled to it, because I'm lazy, and I knew I wouldn't have
time to solder all the little parts on, and test it, myself, in a
timely manner.

The big advantage of the new Jaguar board (EMS build #3 for the
Snot Rocket, if you are counting), is it has injector drivers on
board. My layered build #2 has no injector drivers, and I didn't
really have time to populate the blank veroboard I've had around
with them. I do like the layered approach though, good for hacking.

So, in the car it went.

It ran the ignition in the same way the last build did for a few
weeks (okay maybe two months). Eventually I got around to digging
into the fuel tank and installing the intank main pump I got from
a '95 945 I parted.

1995_940_Main_Pump_Mounted-small.jpg


The rubber lines at each end of the hard fuel line were replaced,
a k-jet style fuel filter was installed on the firewall, and I
added a 5/16" rubber return line.

Kjet_Style_Fuel_Filter-small.jpg


I used a '89 740T intake manifold (has a idle screw on the
throttle body), with a '95 945 fuel rail (has a test port), 740T
FPR, and orange tops from an 850T (headroom for near-term power
goals). Near-term being measured in years...

FreeEMS firmware is currently limited to six fuel or spark
outputs, so I opted to leave the four sequential outputs to the
coils alone, and wire the injectors in semi-sequential batch. In
the future, when the firmware supports more high resolution
outputs, I will be able to convert the injector outputs to full
sequential by resoldering four wires.

There was some fooling around with small measuring cups, a
kitchen scale, and a couple of large fire extinguishers in order
to try and determine the flow and dead-time characteristics of
the injectors. I doubt my tests had enough resolution to be
meaningful, but I had fun, and didn't set the car on fire.

Once I had everything together, the car started on the first
kick. Even with a completely guessed tune, it started and ran
smoother than it ever had for me on the worn out single SU carb.
I realize that this is not a substantial claim.

There was a small hiccough when I got the configuration wrong
and was only getting half the injections per cycle I wanted, but
that was sorted out quickly (VE values over 100% for a NA motor
were a big clue).

With just a few iterations of driving around, analyzing logs and
tweaking the VE table, I had it running pretty nicely.

VE_getting_closer.png


I still have some work to do on the cold start enrichment curve,
and some of the edgier load cells, as well as revisit the
ignition advance table, but the car is running better than it
ever has for me. Better than LH-Jetronic? Probably not, but then
that is not my baseline.

I found myself with a week off work at the end of August, and for
some reason I decided that it would be a great idea to spend it
largely lying on my back in the street in front of my house,
underneath my Volvo. It happened to be the only week of the
summer that we got a substantial amount of rain...

I had a bunch of suspension parts stockpiled and it was annoying
me that they were not installed.

I got them installed.

First was the rear end.
Rear_Springs_and_Shocks-small.jpg


New Koni sport shocks. Eleven inch 250lb/in springs and
adjustable perches from Ben.

Rods-small.jpg


Freshly ploy bushed torque rods (later style) and panhard. I've
had these bushings for at least two years (thanks Gary!).

Fancy new rear trailing arm bushings from Ben, I really like
these, the rear end feels very supple (not science, I changed too
much to know for sure). These things really sucked to
remove/install.

Rubber_VS_Spherical-small.jpg


With all that spring, and an open diff, I opted to remove the
rear swaybar altogether. It had a rear bar from a turbo sedan. It
feels about the same roll-wise with the stiffer springs and no bar.

After getting the rear stuff in and trying it out, I attacked the
front.

I dug out a nice set of non-rusty lower control arms from the
crawlspace and welded plates to the bottom of them.

Plates-small.jpg


Boxed-small.jpg


Bushed them in polyurethane.

LCA_Front_Bushing_Mounts-small.jpg


Fresh_Lower_Control_Arms-small.jpg


And installed it all in the car with fresh ball joints, tie rod
ends (inner and outer), and boots.

I bought some used coilovers from a t-bricker made with re-valved
Bilstein HDs and 315lb/in springs.

These went in with a set of of Ben's camber plates, after cutting
the strut towers.

Strut_Tower_Cut-small.jpg


Strut_Tower_Plated-small.jpg


I'll weld the top plates in after getting it all aligned.

So far, I've driven about 25km on it. It feels really promising.
It needs an alignment. I'm hoping the weather holds out for a
loop of highway 99 or something in the near future. I'm going to
try to get it aligned Saturday.

Some chassis braces are in the near future as well. The
astute may have noticed the bolts sticking out of the captive
nuts I welded to the inside of the rear LCA bushing carriers.

I managed to only lose 1/2"-3/4" ride height with these
modifications. I don't really want to lower the car (oilpan
already has a nice dent), just want to make it go around corners
real good. After all, if you can turn, 80whp is still pretty fun.

So yeah, did some stuff to the wagon this summer, enough to
update the thread.
 
Just as long as you keep passengers' cell phones away from your plastic
box ECU, all will be well and good :-) I still recall getting a disturbed call
from a certain kiwi telling me the ECU had gone wild. Turned out his GFs
iPhone got a text message in her handbag sitting on top of his ECU LOL!

Re fired up with wrong config and VE's over 100, VEs around 100 are
pretty normal depending on the car, but your logs were showing
corrected VE of 180% which is pretty much impossible.

With just a few iterations of driving around, analyzing logs and
tweaking the VE table, I had it running pretty nicely.

This is a screeny of the last data I saw out of the car, scale of
0 - 128% VE in the lower division. As you can see, the error between
current and likely VE is pretty small most of the time. Ignore spikes on
transients, that's turned off for now.

SimVEPrettyCloseAlready.png


Line wrapping just for you, my friend! :-)

Fred.
 
Oh, and by now 22 engines have run on FreeEMS, including a FSAE car.

Three of them Volvos.

Still alpha level, etc, but getting more awesome every month.
 
Well, it's getting close to the end of 2014, and I've managed to
accomplish a few things since I last posted.

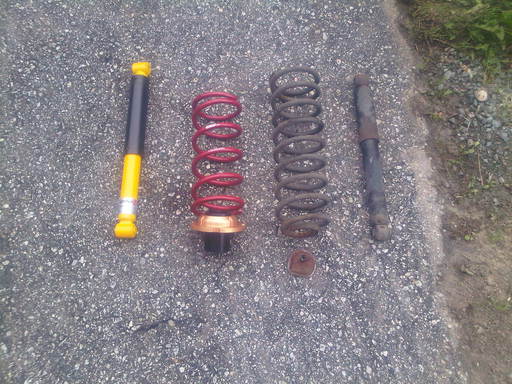
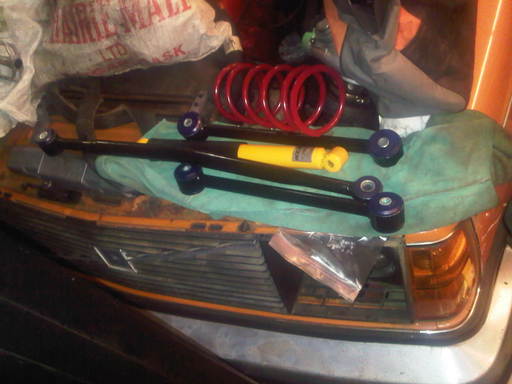
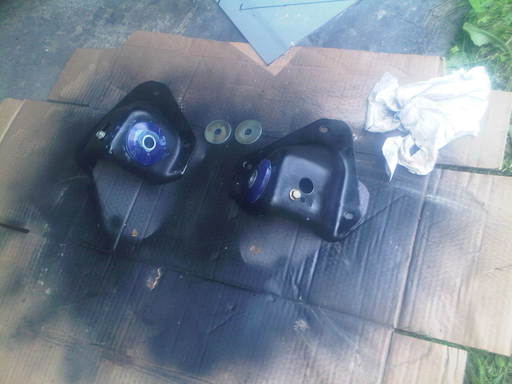
One of the used Bilstein HDs in the front siezed up, so I
replaced them with a set of Koni DA inserts. I put 350in/lb
barrel springs from Ben on there at the same time. I'm quite
happy with the set-up.

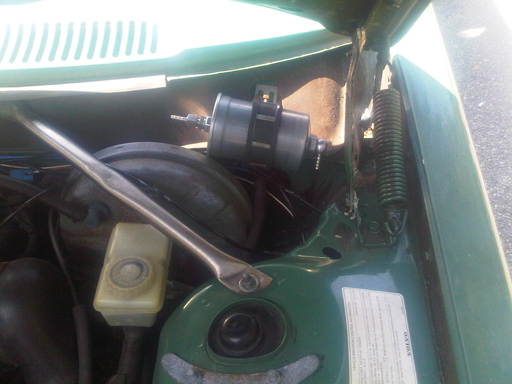
I installed an E-fan from a 940. I cut the shroud down to the
right width, overlapped the pieces and glued and pop-riveted them
together. I don't have a picture apparently, but it works well,
and looks pretty stock until you examine the drivers side
carefully.

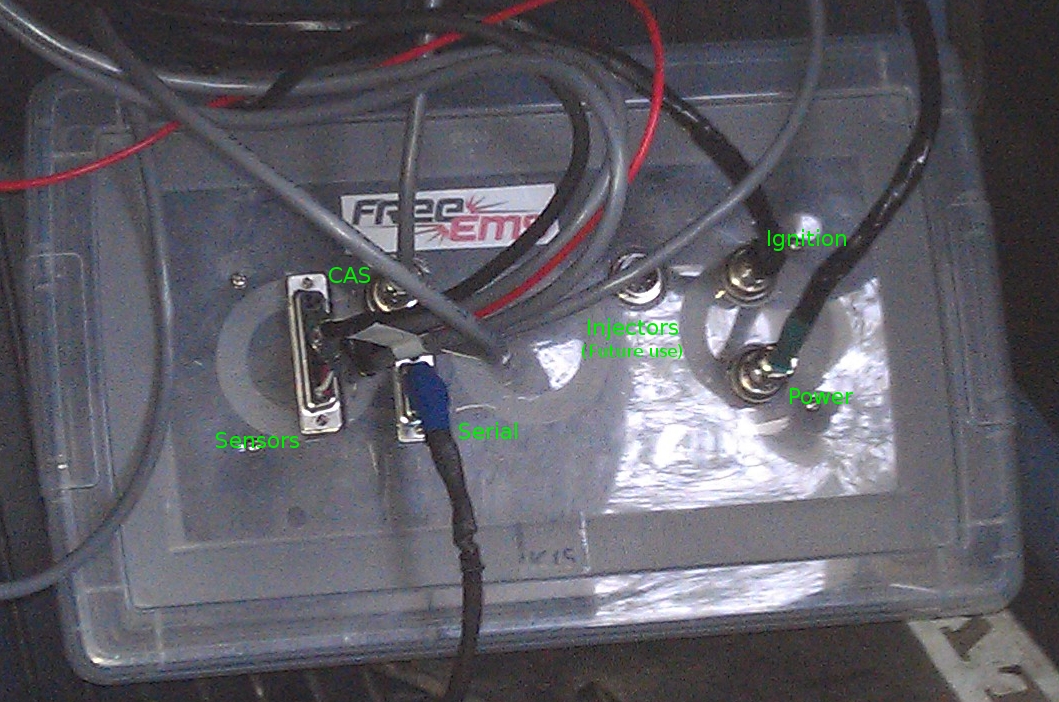
The fan is driven by the stock relay (low speed only) and
switched by the FreeEMS. The output for the fan and software
set-up was done already, so that part was easy.

I don't think that the E-fan is an improvement over the clutch
fan that I removed yet. It certainly uses less power, as the fan
really only runs when the car sits still with the engine running
for a time. The temperature oscillates fairly widely though. It
gets a little hotter than I'd like and then overcools a bit too.
This is expected due to the hystersis in the simple on/off
algorithim, but not really a good situation as the head is
constantly heat cycling ~5+ degrees in city traffic situations.

At speed, the rad has no trouble keeping the engine cool with the
fan off. It actually seems like it cools down more than it did.
I'll be replacing the thermostat soon to see if that resolves
itself.

Ideally, the fan would be controlled through a great big FET with
a PWM signal that ramps up the fan speed as necessary to keep the
temperature closer to constant. I believe that using a VSS signal
to start the fan turning slowly as the car comes to a stop
(iff the coolant is up to temperature) would make a good
difference here as well.

So, the fan needs a transistor switch controlled by a PWM capable
ECU output to replace the stock relay. I need to install a
Vehicle Speed Sensor somewhere (along with a new Trutrac/Wavetrac
in the rear?) And the firmware needs to be improved with a more
sophisticated fan control algorithim. In the meantime, I may
install a dash switch for the high speed side for situations like
cooling the engine bay between autocross runs.

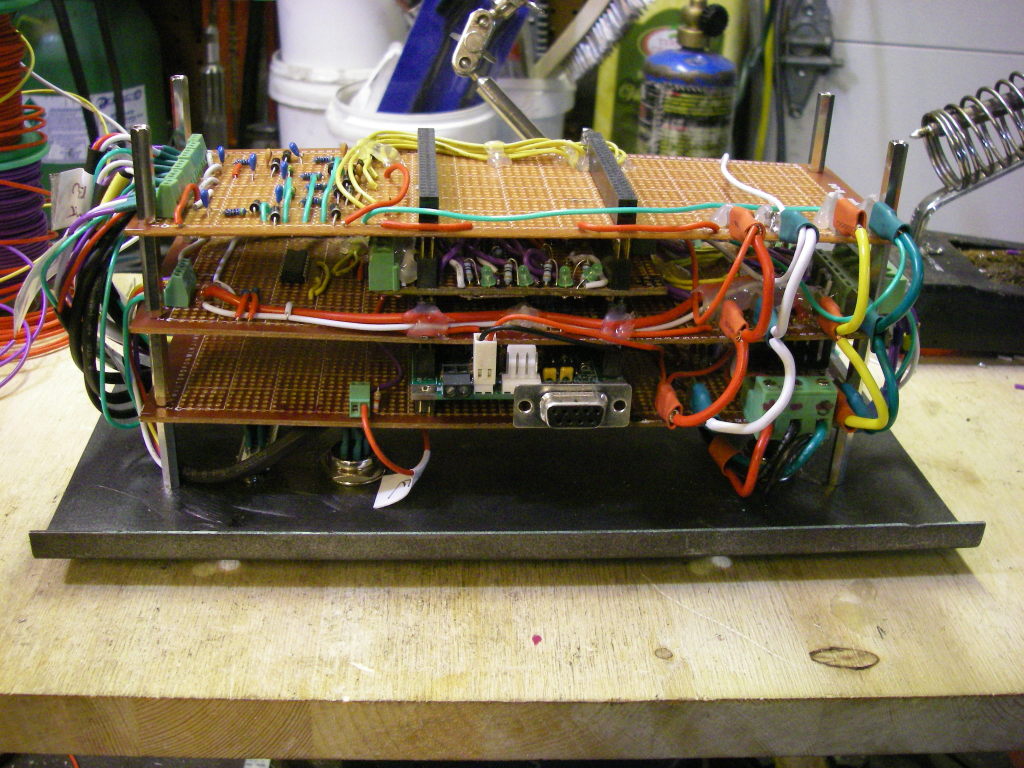
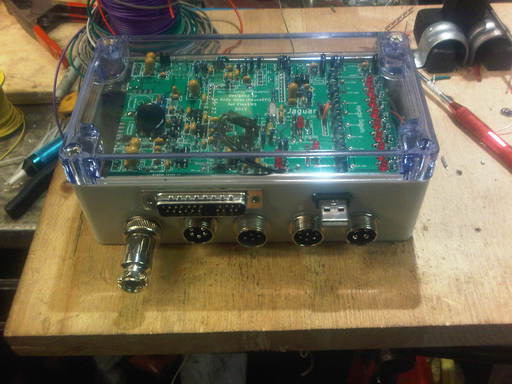
In the spring I also upgraded my shoebox ECU (the second
iteration) with injector drivers and fuel and fan relay drivers
so that I can swap between the Jaguar and the shoebox.

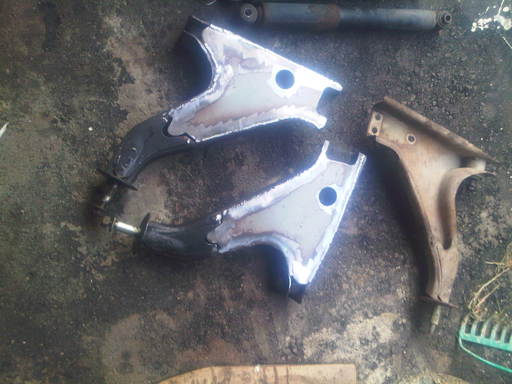
I also found an unpainted black air dam on a black 1980 GT in
good condition at the scrapyard:
Black_GT_Chin_on_Snot_Rocket.jpg

I have some aluminium panels I'm going to use to make up a full
belly pan eventually.

Summer was really busy at work, I barely had time to drive the
car, let alone work on it. I did get out to a Porsche club
autocross event which firmly established that the car is really
slow. It does handle quite well -- for a Volvo 245.


Work has slowed right down in the past few weeks and I've been
able to take some days off. I have a minty 1995 L block on a
stand in the garage nearly ready to go. My plan was to swap the
motor and turbocharge it at the same time. Thinking it over, that
seemed a touch ambitious. I decided to add the plus-T stuff to
the tired old B21A that is in the car instead. Really, most of
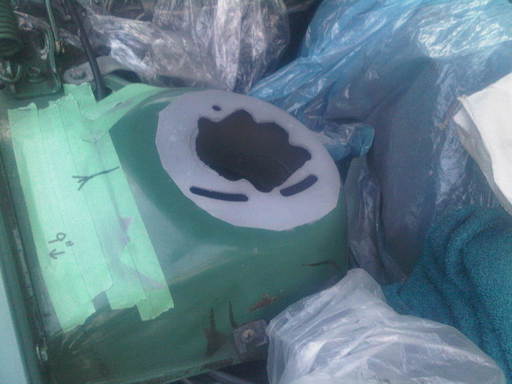
the work needs to be done anyway. The extra work is pulling the
oil galley plug from the front of the block and pulling the oil
pan to weld a fitting to it. The tune will change a bit with the
new motor, as it has an extra 200ccs of displacement, but that
should be fairly straight forward. There is also the advantage of
using the old worn out motor as a scratch monkey; if I blow it
up, it's no great loss, just the cost of a tow home really.

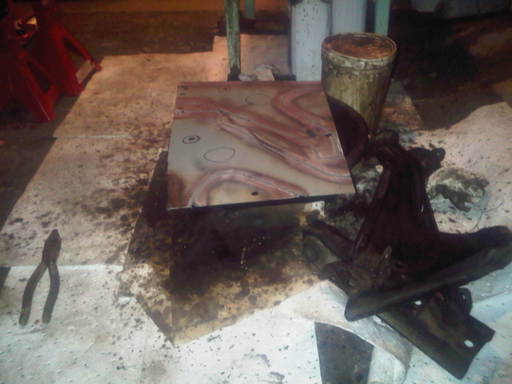
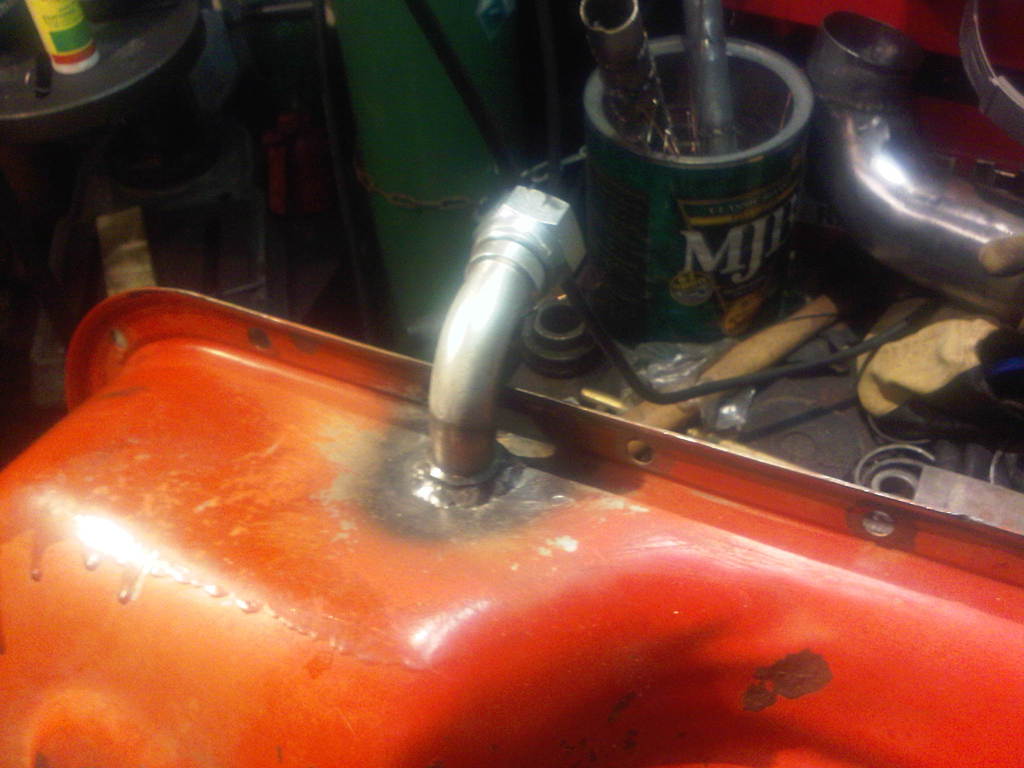
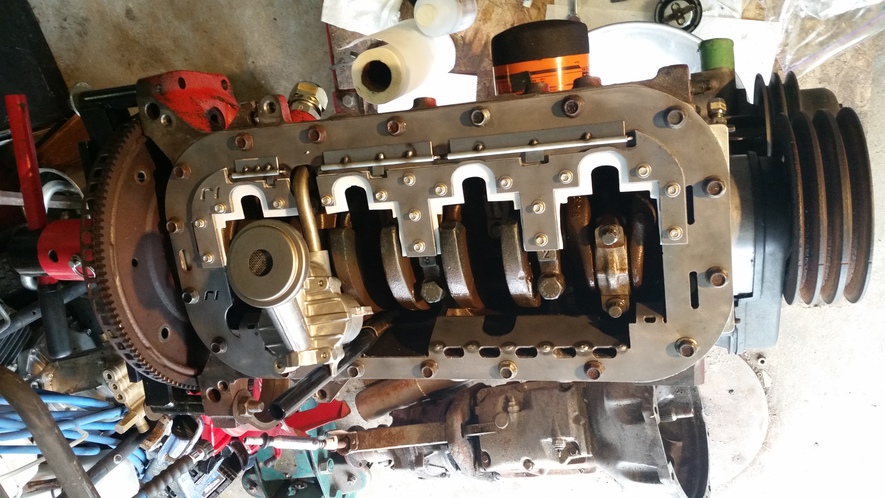
With that decided, I pulled the pan:
Oil-Pan-with-Bung.jpg

Because Turbobricks, I didn't actually test it before putting it
back on the car, and of course, it leaked. So, my plus-T is done
proper turbobricks style with JB weld. There was no way I was
pulling that pan again.

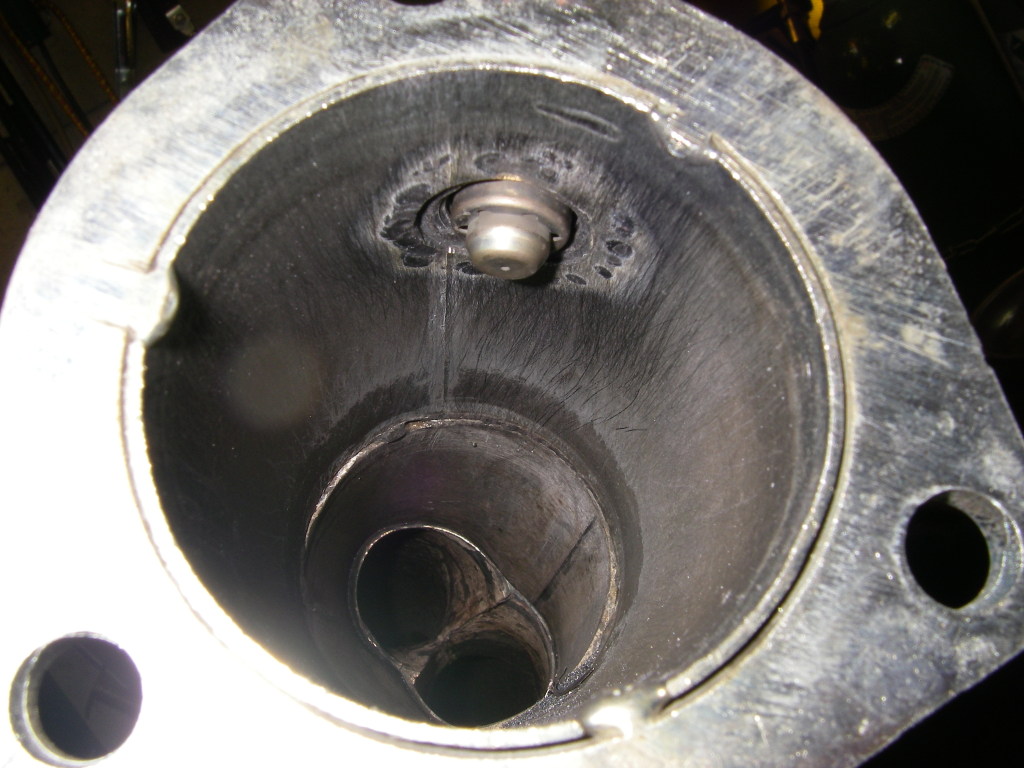
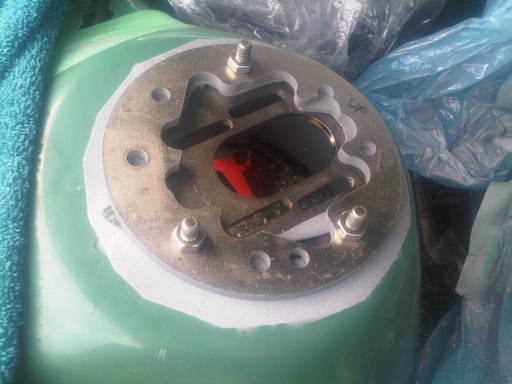
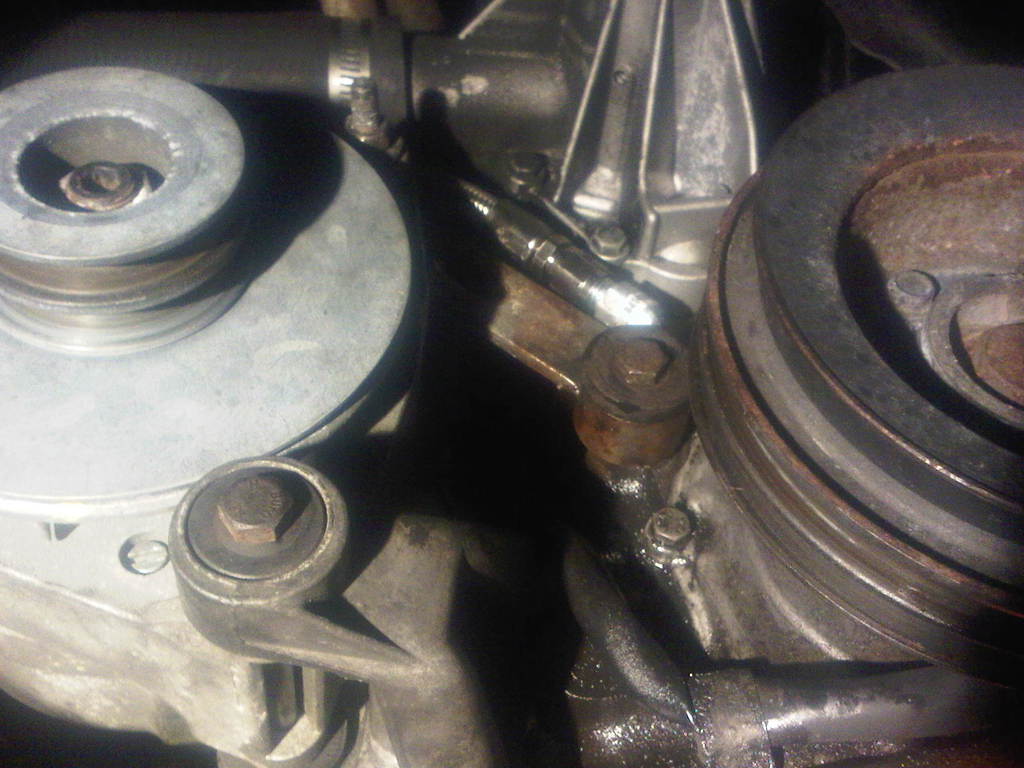
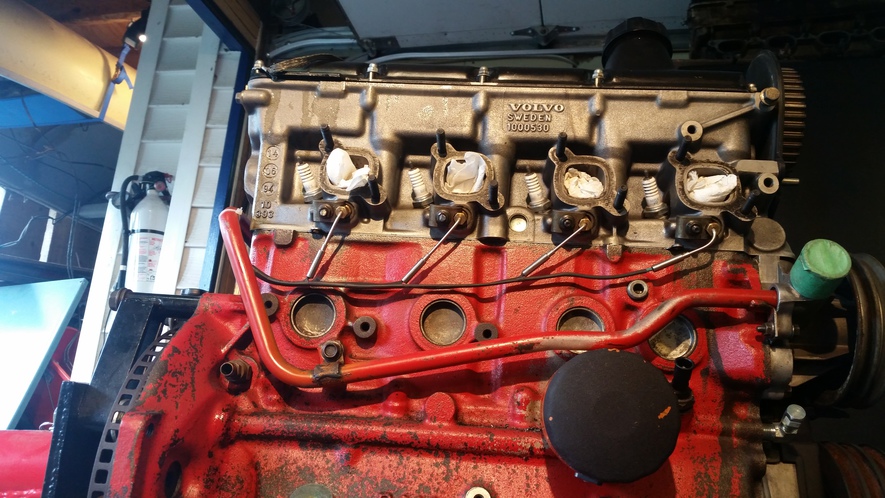
The oil feed is taken from the usual place at the front of the
block. It almost looks like Volvo designed the engine for this:
Oil-Feed-Squeezed.jpg


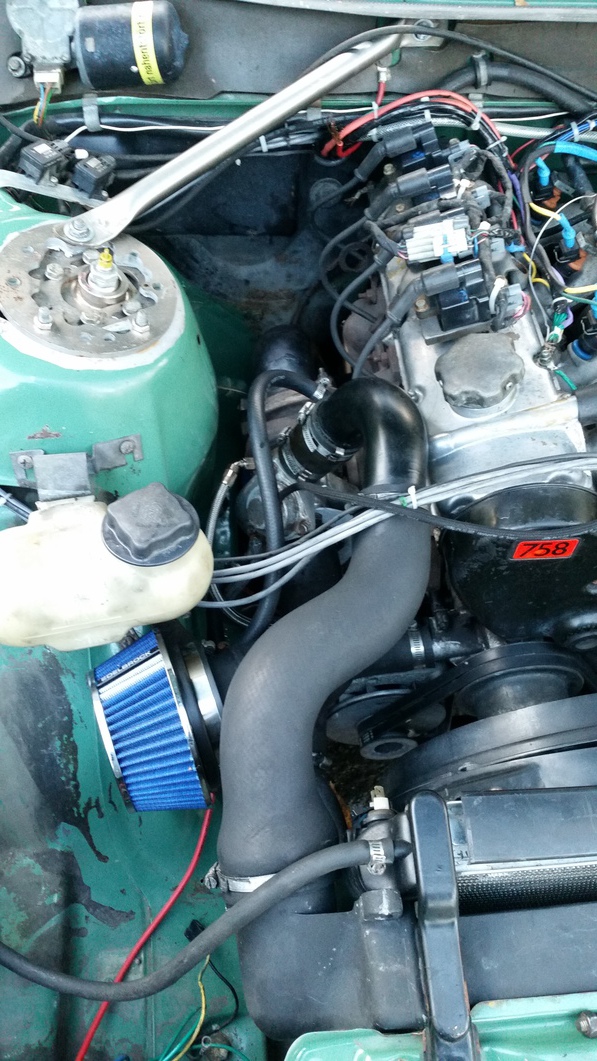
I have a stock turbo airbox from a 740 that I need to modify to
fit. The NPR intercooler is a bit wider than the Volvo piece so
that complicates it a bit too. For now, I used a $15 cone filter.
It makes ridiculous sucking and whooshing noises through it.
Entertaining for now, but sure to become annoying.

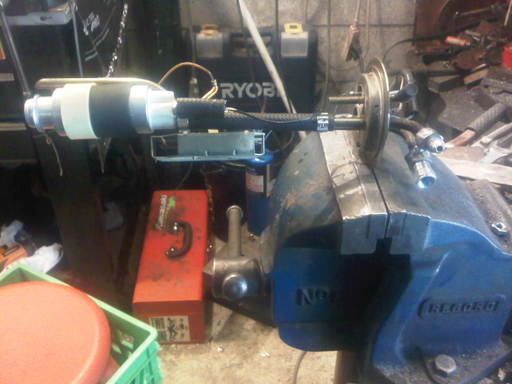
Turbo parts installed:
Turbo_installed.jpg


I'm using a TD04HL-15G with an angled flange housing from a 13T.
The turbine housing is noticably bigger than the flat flange and
the conical flange housing is just a joke. With just a tiny bit
of grinding, a three inch pipe slips right into the downpipe
flange. It does require a funny compound bend to get the downpipe
headed in the correct direction. Worse, the turbine housing needs
some grinding and one stud on the manifold needs to be shortened
to get the last nut on. Even then, it is not easy to get on. I
attached the housing to the manifold on the bench, and had to get
that nut started on the stud with a couple of picks.

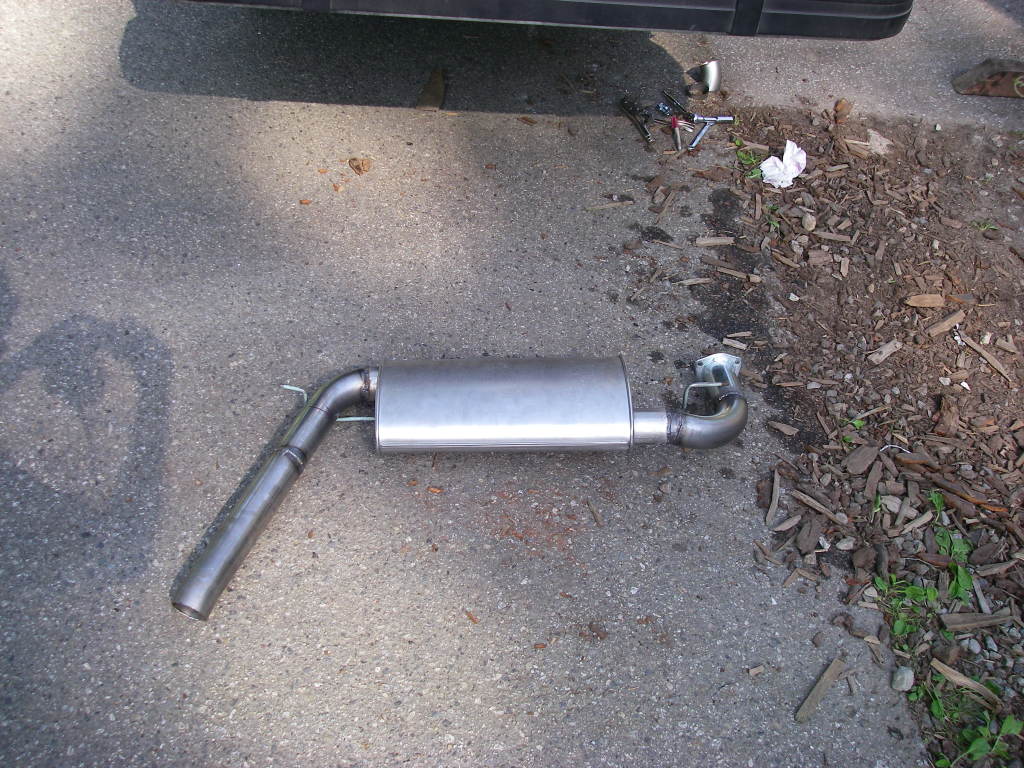
With a 3" downpipe, I was loathe to adapt down to my existing
2.5" exhaust. My exhaust was also not tucked up very well, with a
glasspack hanging down below and scraping on speedbumps. I
decided to redo the entire exhaust in 3", and tuck it better.
This took considerably more time than the +T. Fortunately, the
weather got cold and clear so I wasn't lying on my back on wet
ground at least.
New_3in_exhaust.jpg


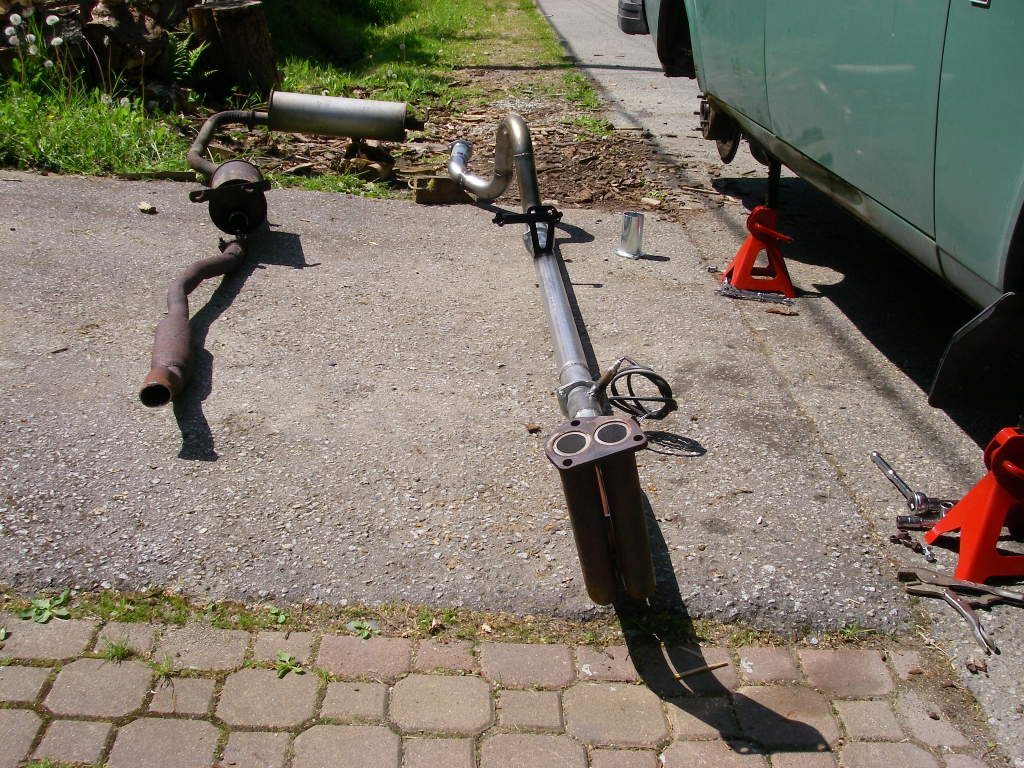
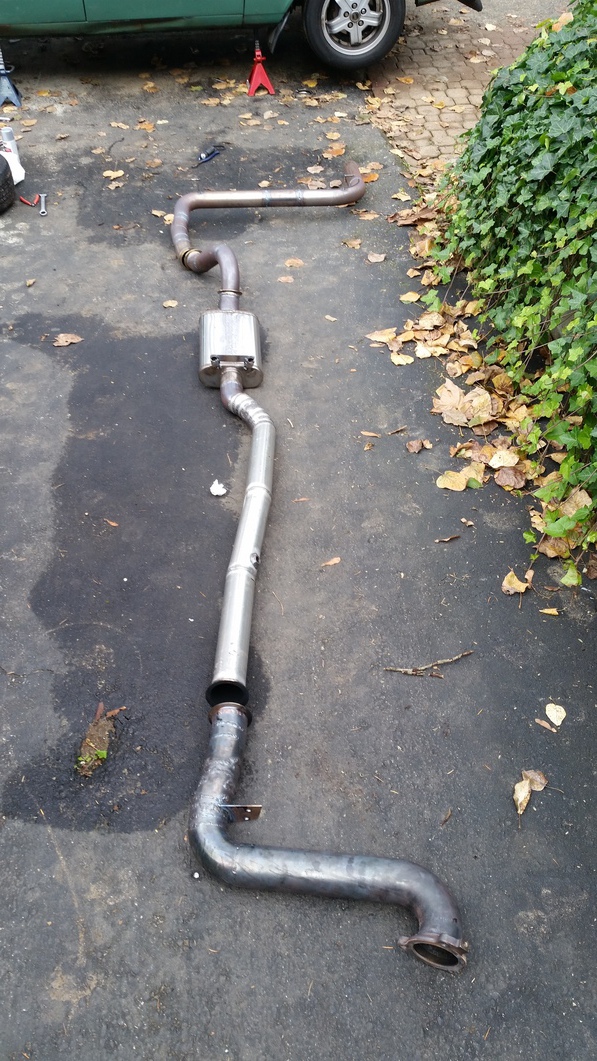
I used a 14" Magnaflow ahead of the axle, and a 24"x7" round
Magnaflow in the rear position (backordered at the time of the
picture).

It no longer scrapes on speedbumps which I am very happy about.
Also, V-bands are way better than the three bolt flanges I used
on the last exhaust. Well worth the extortionate price.

With both mufflers in place, the exhaust is quite quiet, despite
being able to see right through the mufflers. Once I sort out the
airbox, the car shouldn't make more noise than a stock 240.

I did take it out for a short rip with just the downpipe. That
was pretty hillarious. Unfortunately, I forgot about the wideband
O2 sensor that I had left hanging under the car, and the heater
plus rain killed the sensor. That was stupid.

I've got the VE table dialed in fairly well at this point. The
volumetric efficiency took a shocking dive as compared to the
stock 4-2-1 into 2.5" pipe that I had been running. I feel it is
worth it though.

I need to do some work on my ignition timing table, I know there
is more power lurking in there.

I'm running a 0.5 bar spring in a Kinugawa wastegate actuator. I
haven't seen more than about 5psi of boost in the logs. Once I
replace the NA Honda MAP sensor with a GM 3bar, and work on the
tune a bit more, I'll install a MBC. Eventually, I'll put in a
boost control solenoid and set up the EMS to control it.

I think it is fair to say that the Snot Rocket is no longer slow.
It isn't fast either, but 5 psi is pretty fun. At this point, I
should only need to turn up the boost to make 200hp. Or a hole in
the block, one or the other.

The old B21A is holding up okay so far. She is pretty worn out,
and blows hard into the catch can when rev'ed right up. The smell
of burning Mobil 1 is strong on a long hill descent with the
throttle closed. The 80,000km squirter motor should make a pretty
good difference. I'll probably get that installed in the spring,
provided I don't ventilate the B21A in the meantime.

That was my 2014, pretty much. It wasn't looking like I'd get
much done, but it came together in the end. A proper LSD is now
pretty high on the list for next year.
 
Last edited:
I finally managed to swap in the 80,000km B230F that has been in my garage since 2011:
Leaning_on_crane.jpg


No more blue clouds of smoke behind the car.
No more chuffing from the poor exhaust manifold seal.
No more filling up catch bottles with mayonaise.

It's easier to start and just purrs when it runs.

Aside from the longblock, everything else remains the same - with
the exception of the coolant temperature sensor. I'm using the
stock Bosch sensor instead of a GM sensor.

I installed a K grind cam in the new engine.

I put a crank scraper in before installing the motor:
IJ_Crank_Scraper.jpg


Plugged the pulse air holes with thermocouples:
Thermocouples.jpg

I don't have a means to log EGT at the moment. I do have a cheapo
digital thermometer that can read one thermocouple at a time.
The thermocouples should come in handy to tune advance and
individual cylinder trim later.

That is a 0.036" Cometic MLS gasket, with the pistons out about
0.006" it should be nicely in tight quench territory.

I swapped over the flywheel and clutch, and left the M46 in the
car.

The new motor makes quite a noticeable amount more power. I've
had to gap down my plugs and dial up the dwell a little to
counter spark blow-out. I'm running a pretty conservative
ignition map so I know there is a fair bit left on the table yet.

The clutch is already slipping.

I have a T5 from an '88 Mustang to rebuild and then it will be
clutch and tranny time. I'm looking into getting a set of gears
with the z-spec ratios for it.

Once the slipping clutch is taken care of, I have a little intake
manifold project I've been working on over the winter to install.
 
Last edited:
Back
Top