
davashcow
Got V8?
- Joined
- Dec 7, 2006
- Location
- Mom?s basement
Hello Guest, welcome to the initial stages of our new platform!
You can find some additional information about where we are in the process of migrating the board and setting up our new software here
Thank you for being a part of our community!
Oh I am buying a 940, it has ecodes (with fogs) but 1 of the corners is broken so I am trying to figure out what the difference is. Also I found they do offer both corners so I guess it's not an issue but I am still kinda curious
Also, the e-code turn has two sockets, one clear and one amber. No one has come up with a good way to make them both work correctly AFAIK, only to put the one, two filament bulb in one of the sockets and leave the other blank. I have not put mine in yet because I want to do it that way, and make the bulb out light not come on.
I'm going to be installing a set soon, converting my 94 non-fog 940 to e-codes with fogs. My understanding about the corner lights is that a single filament bulb goes into the top and bottom holes. The clear takes a 5w bulb that comes on with the signal from the parking lights (city lights in Europe), and the amber section takes a 21w bulb that is only activated as a turn signal.
 and and ounce of prevention is.........you get it.
I trimmed some bits on the socket and spliced 2 sockets into the single feed and am running an 1156 and an 1157 bulb. Obviously the 1157 is the turn signal/marker light. The 1156 is simply a marker light...
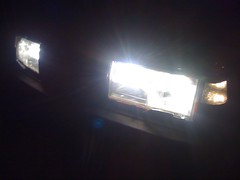
I used this wiring setup just yesterday, each light works like it should the first time. I did take some pictures of my modded US spec corners that I fitted into the ecode.....Mind if I post them here?


Go for it! More information is always better, especially as the Ecode corners are apparently becoming more difficult to find in good shape.


I'm going to toss something in here that is somewhat related...
Since I spent a wad of dough on my ecodes I decided I wanted to protect my lenses with the best possible protectant film so I wasn't buying replacement lenses in 6 months. I got some X-Pel film in what they call 40 mil thickness (it's actually 0.040"). It's thick and would keep anything but the big rocks from harming the lens. To my dismay, about 3 days after I installed it, I found cracks in both lenses. The cracks ran top to bottom pretty much in front of the H4 bulb. I suspect the thick film retained too much heat and the glass couldn't handle it and cracked. Needless to say, my lenses aren't so pretty anymore. I've glued them back together with Crazy Glue which has pretty good optical properties and the cracks have mostly disappeared but we'll see how they work with a little heat. This time around I'm going with some 12 mil film...
I've got a set of the FCP Scan Tech replacement lenses which are actually DJ Auto lenses. Honestly, I'd rather run the cracked OEM lenses than put the FCP lenses in...just an FYI to anyone out there contemplating buying a set from FCP.

Wow, I was about to buy that exact same film... gues I'll go with the 12 mil too
The 20 mil might work fine. I figured since my lenses are defiled already, I'll go with the thin stuff and see how it works. The 12 mil is really quite thin...a lot like the 3M paint protectant film...