• Hello Guest, welcome to the initial stages of our new platform!
    You can find some additional information about where we are in the process of migrating the board and setting up our new software here

    Thank you for being a part of our community!

122s B18 Judson Positive Displacement Supercharger


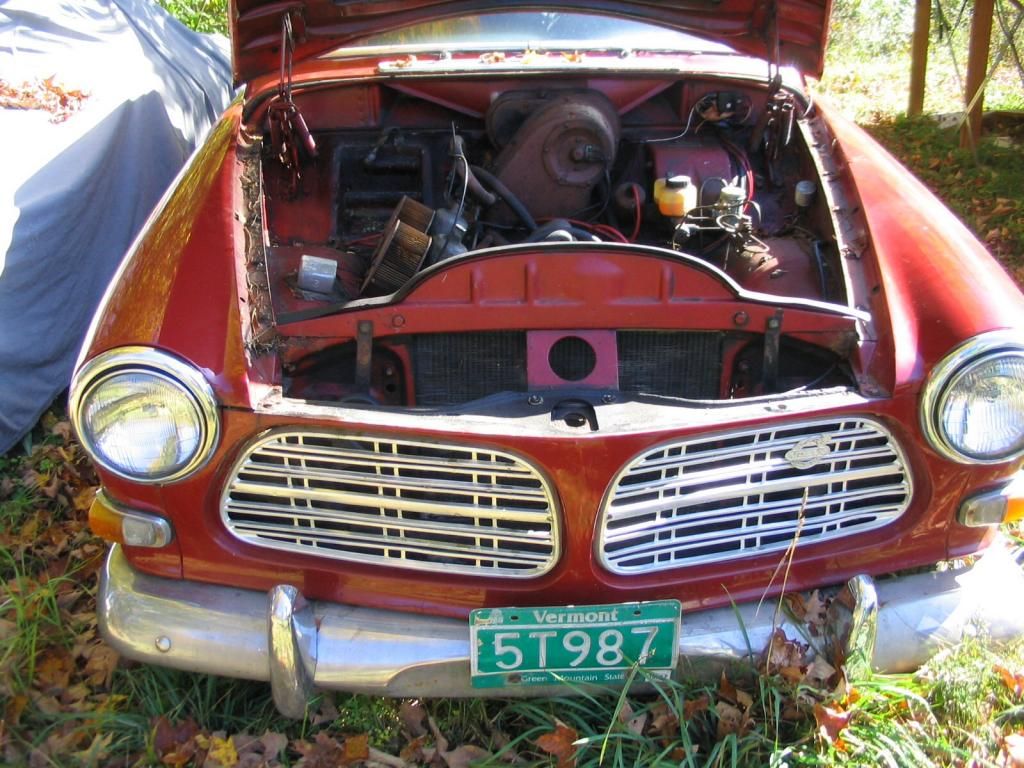
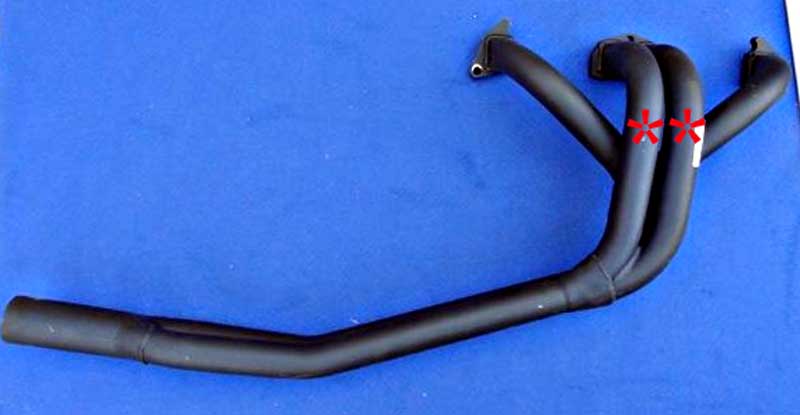
Ah - Let the games begin. The original 1968 B18 115 hp engine w/a B20 FI F head and a later M41 trans and J-Type OD comes out for a rebuild of all three.

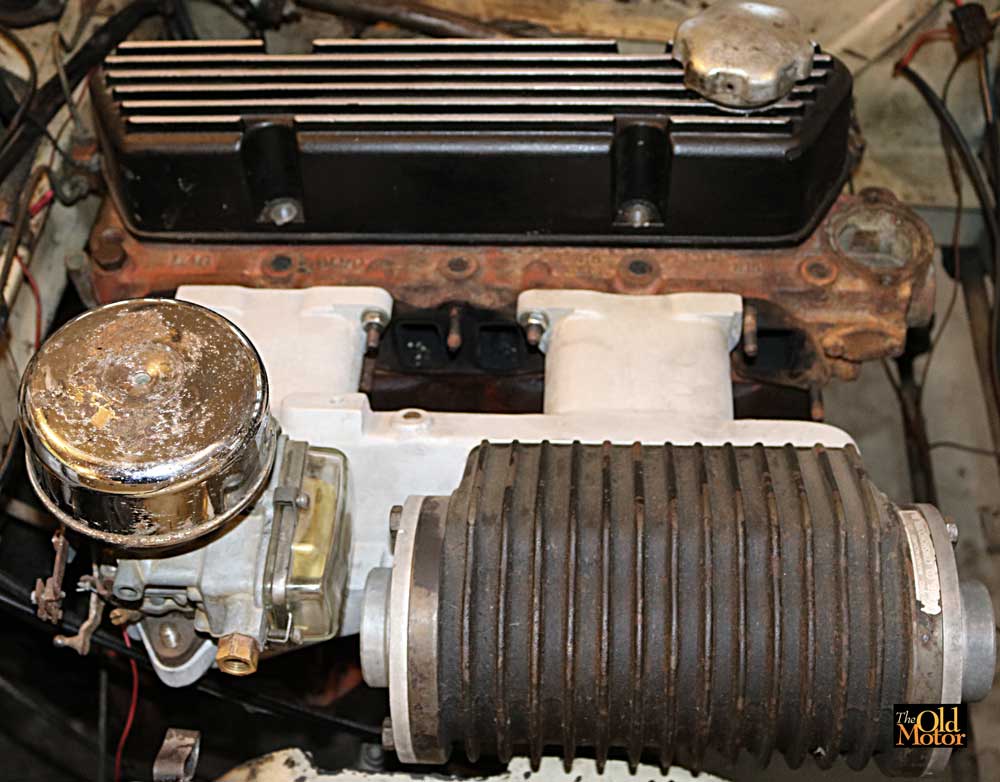
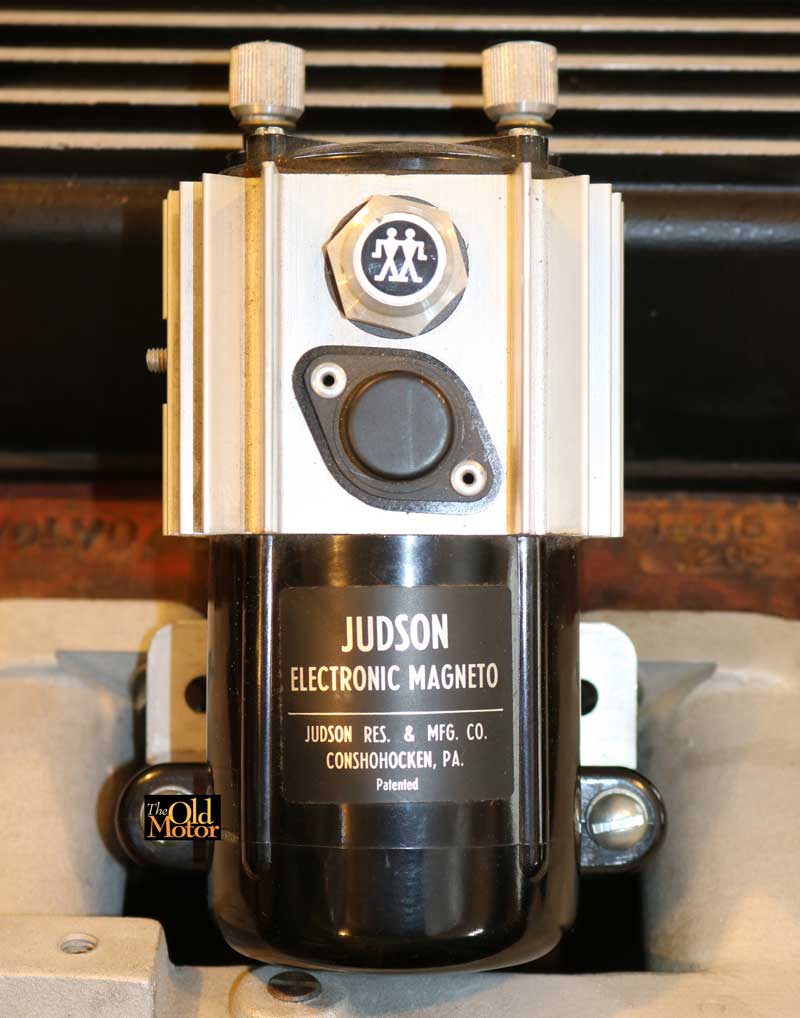
Oh - and the problems begin as soon as the cylinder head was removed!! The engine had been rebuilt about 20K miles ago (190K total on the engine) and was over bored to the B20 standard size and everything it looks near new inside. I was hoping it had close to the original bore size because the Judson supercharger which will go on it later is sized for 1800cc engines, and the cylinder wall thickness at this size is border line for a blower installation.

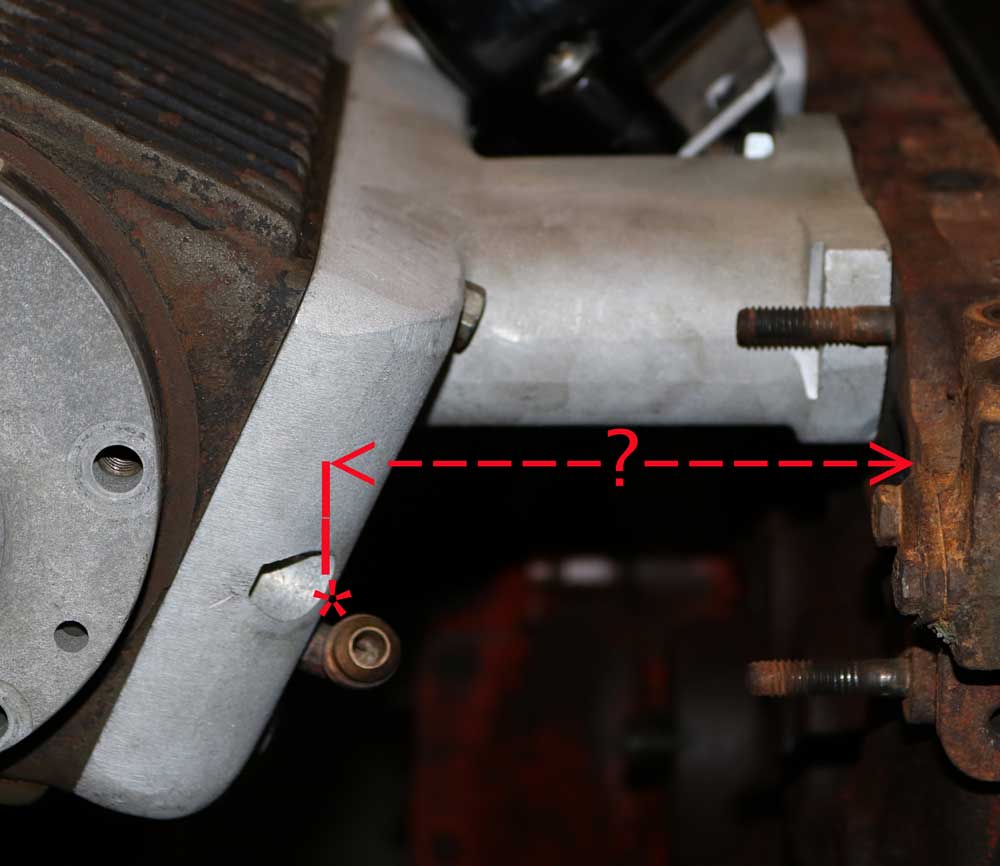
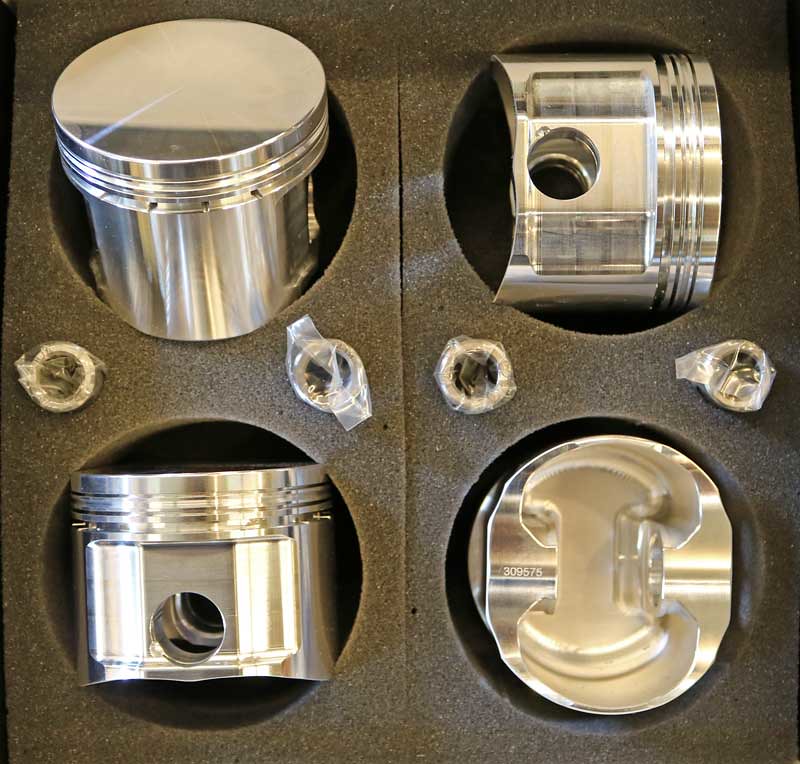
That leaves me with two choices: do a small clean up bore on the B18-B block and then sleeve it and bore it to a B18 standard bore size, or seeing as I am trying to keep this car as original as possible w/the exception of bolt on vintage speed and racing equipment, is too find another 1968 manual transmission block. This block is stamped 68 on the first of the two pads on the middle of the left hand side of the engine block, the second pad is the serial number. The first part of the number is 4968 which is cast on the block in front of both, the second number is the serial number.


Anyone out there that has such a bare block w/its original main caps in good condition that could save me from spending a lot of time w/my boring machine?
 
Last edited:
FWIW: '68 parts car...

Drivetrain intact...
imagejpg1_zps51a4a1e1.jpg


Still complete and in situ:
image_zpsxkviagkb.jpeg
 
Thanks, I was thinking about this car and you last week.

Do you have a source to double check Scandcar's engine prefix numbers of 68 for 1967 and 71 for 1968.

I will try to call you early this evening, or try me when if works for you today, I'll be in the shop working on the car.
 
For 220 estate wagons only, all B18Bs (3rd digit #3):

P 22334=M40=496871
P 22336=BW35=72
P 22344=M40=71 UAR ... (UAR=without Emmission Control)
P 22344=M40=68 MAR ... (MAR=with EC)
P 22346=BW35=72 UAR
P 22346=BW35=69 MAR
P 22394=M40=61 UAR
P 22394=M40=69 MAR

Brrrrr, no?
 
33529565282_012ea86c15_o.jpg


Decided to go with a B18 block bored out to a std. bore B20. A mock up engine and transmission went in the car yesterday to check the fit of the Judson Supercharger in the engine compartment, and the exhaust manifold, and for the installation of a 1800s trans tunnel and shifter.

The intake manifold will clear a single early single down tube pipe manifold, but not the later double pipe unit known for good bottom end torque. This car will be used daily on the street and also for a lot hill climbing. Later on it will be used for towing a lightweight vintage racing car to the track so I am looking for all the low end power I can get. An Isky Street Performance cam will be used.

32872760383_8b63e2eb8c_o.jpg


Since headers are the only viable option available, the exact measurements of how far the center two pipes come out from the head to a 4-2 into 1 KR Trimmings type of header where marked under the intake manifold are needed.

33685941705_129f649240_o.jpg


Would also like to know if a header with the shorter primary pipes that merge together in a shorter Y-shape both on the inside and out like the Volvo Competition Services unit is available?

33529600632_7a2625bd11_o.jpg


Also found a very rare never used circa 1962 Judson high-intensity coil with the instructions and decal.

And finally, I wish the 1800s transmission tunnel was as easy to install as the carpet for it but this gives you and idea of what it will look like and where the shifter will be.

33302013850_69c495c6b0_o.jpg
 
Last edited:
And watch the flange to head point on those ipd/patriot units. They run the pipes through the flange, then weld on the side to be mated to the head, and mill the welds.
 
Yeah, I had one for a few years. Not bought from IPD, but I saw one for $75 on Amazon once and got it (my original header was falling apart).

It was a cheap nasty little thing. Those milled welds that needed to seal were problematic for me (R-Sport head with larger ports). There was a bit of restriction at the flange as well, given the way they attached the pipes, they just sort of bulged inward a little.

I messed with the flange a bit too much trying to get it to work with my head, eventually a couple of the pipes cracked loose and I pitched it and got the KGTrimning header. Which is very nice, very stout, no issues with a flaky flange area construction. Worth the money, IMO.
 
I have a KGTrimning 4:2:1 header on my PV, I'll try to get you a measurement on that tonight.

IPD has a header that has the shorter curves on the center cylinders: https://www.ipdusa.com/products/7014/108023-exhaust-header-ceramic-coated-carb-head

It's probably a jazzed up (ceramiced/painted) Patriot header with a nasty looking 4:1 collector.

$90 cheaper in black paint: https://www.ipdusa.com/products/7013/108952-exhaust-header-fi-weber

Thanks John, I'd really appreciate that - the problem area is 2" down from any of the lower manifold studs or 4" down from any of the upper manifold studs.

Yes, Most of the four-into-one headers will fit in behind the Judson intake and the IPD units look better than the crappy Patriot units.

Rather have the KGTrimming unit as I expect they provide more low-end torque which is what is needed for this car. I hope to use it for towing a lightweight vintage racing car to tracks in the northeast.

Are there any dealers in the US that stock them?
 
Last edited:
https://flic.kr/p/V7BTf8

The engine rebuild on the "Georgia Peach" 1968 122s B18 w/a Judson supercharger is starting to come together. Specially designed and machined CP-Carrillo forged pistons arrived last week that have: a zero deck height, an offset pin, and machined sides and interior for lightness. With a Cometic gasket, the combustion chamber will have a .032-inch squish band which should be optimal.

After I ridgid hone the block to finish bore size, clean it, and install new cam bearings, core plugs, and wrist pin bushings in the rods, the bottom end can go back together.

Also been busy working on the head, valves, and machining new conversion guides for B20 valves which have smaller stems. Have lightened the valve heads and swirl polished them and stems, and cut the B20 intake valve heads down to 41MM with is larger than the 40MM B18 intake valve heads. Still need to relieve the head, machine and install valve seats and do some very minor porting. The head is actually taking more time to do than the complete bottom end.


Have finished machining the B18 cast iron conversion guides (bronze is not needed in this application, and really is only necessary for racing applications) to be used with B20 valves which have .312-inch (5/16″) diameter stems that are hard chromed and smaller than the original .343-inch (11/32″) stems for improved air flow. The end of the intake guides have also been tapered for better airflow through the port. The top end of the guides were machined for modern valve seals. Valves with chrome-plate stems and finely machined guide id's with a honed finish will last a very long time in street and highway use.

The new B20 exhaust and intake valves are in the center of the photo above shown in comparison to the B18 guides and valves on the left and the right. The dark spots near the valve head will disappear after a second blending angle is cut on the back side of the head for improved flow, after the new valve seats have been established in the head.

Both sides of the valve heads and the end of the stem where it meets the head have been lightened somewhat (compare them to an untouched valve below) by machining the two sides in the lathe and then swirl polishing the backside of the head. The 42MM B20 intake valve heads have been turned down to 41MM which is larger than the original 40MM B18 intake valve heads. B18 and B20 exhaust valve heads are both the same size.

Next up, install the guides in the head and machine for and press in exhaust valve seats, and cut larger intake valve seats. And finally, relieve the combustion chambers, and do some very minor porting behind the valve seats.

Delete the DOT in the following link and replace it with a period to learn more about what was involved and view pictures of how the guides were machined @ http://theoldmotorDOTcom/?p=165294
 
Last edited:
Back
Top