
Took it all apart. Never could figure out how to remove the seat tilt knob so that side panel got re-dyed in place with clean up. Removed the map pocket on the back of the seat. The driver side map pocket elastic is broken so it will get fixed.
-
Hello Guest, welcome to the initial stages of our new platform!
You can find some additional information about where we are in the process of migrating the board and setting up our new software hereThank you for being a part of our community!
You are using an out of date browser. It may not display this or other websites correctly.
You should upgrade or use an alternative browser.
You should upgrade or use an alternative browser.
Brand new '81 262C Bertone Coupe . . .
- Thread starter TestPoint
- Start date
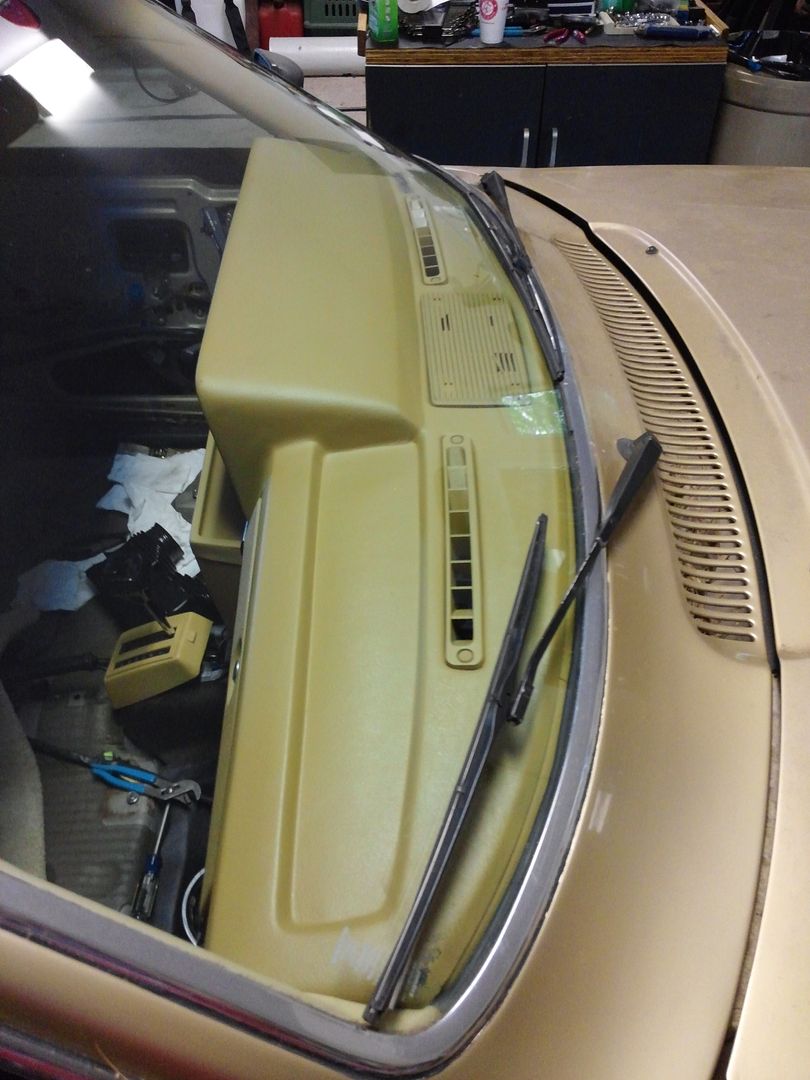
Got most of the interior out and am working on the package or hat shelf. It was very faded but restorable. The shelf itself as well as the rear trim with the plastic vent was all vinyl although Volvo advertised that the Bertone interior was all leather. Disassembled and cleaned with alcohol and a paint scuff pad and applied an initial thin coat of Leatherique's leather dye. It works very well on vinyl also as it is a flexible vinyl paint.

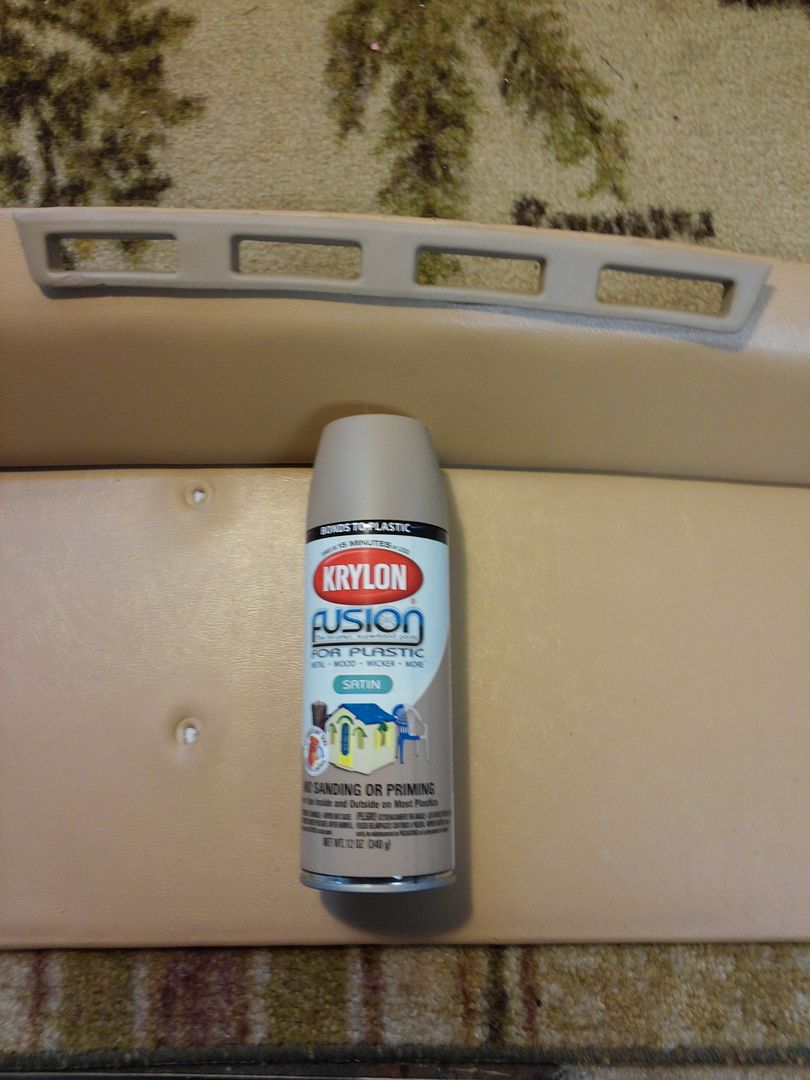
The plastic vents were not salvageable and I bought a pair of black vents. The dark colors, black, blue seem to survive much better than the tan.
Using the old board as a pattern a new one was cut from the tempered hardboard. Where cut and drilled the hardboard 'feathers' and needs sealed with an exterior enamel for moisture protection.

The black vents were painted with the closest plastic paint color and left to harden for several days before application of the dye. Reattached the dyed vinyl to the new hardboard with contact adhesive and 1/4" staples. Used cotton quilt batten to substitute for the original foam padding between the backing board and the the vinyl.
I used aluminum pop rivets with securing washers to secure the shelf to the vent trim.
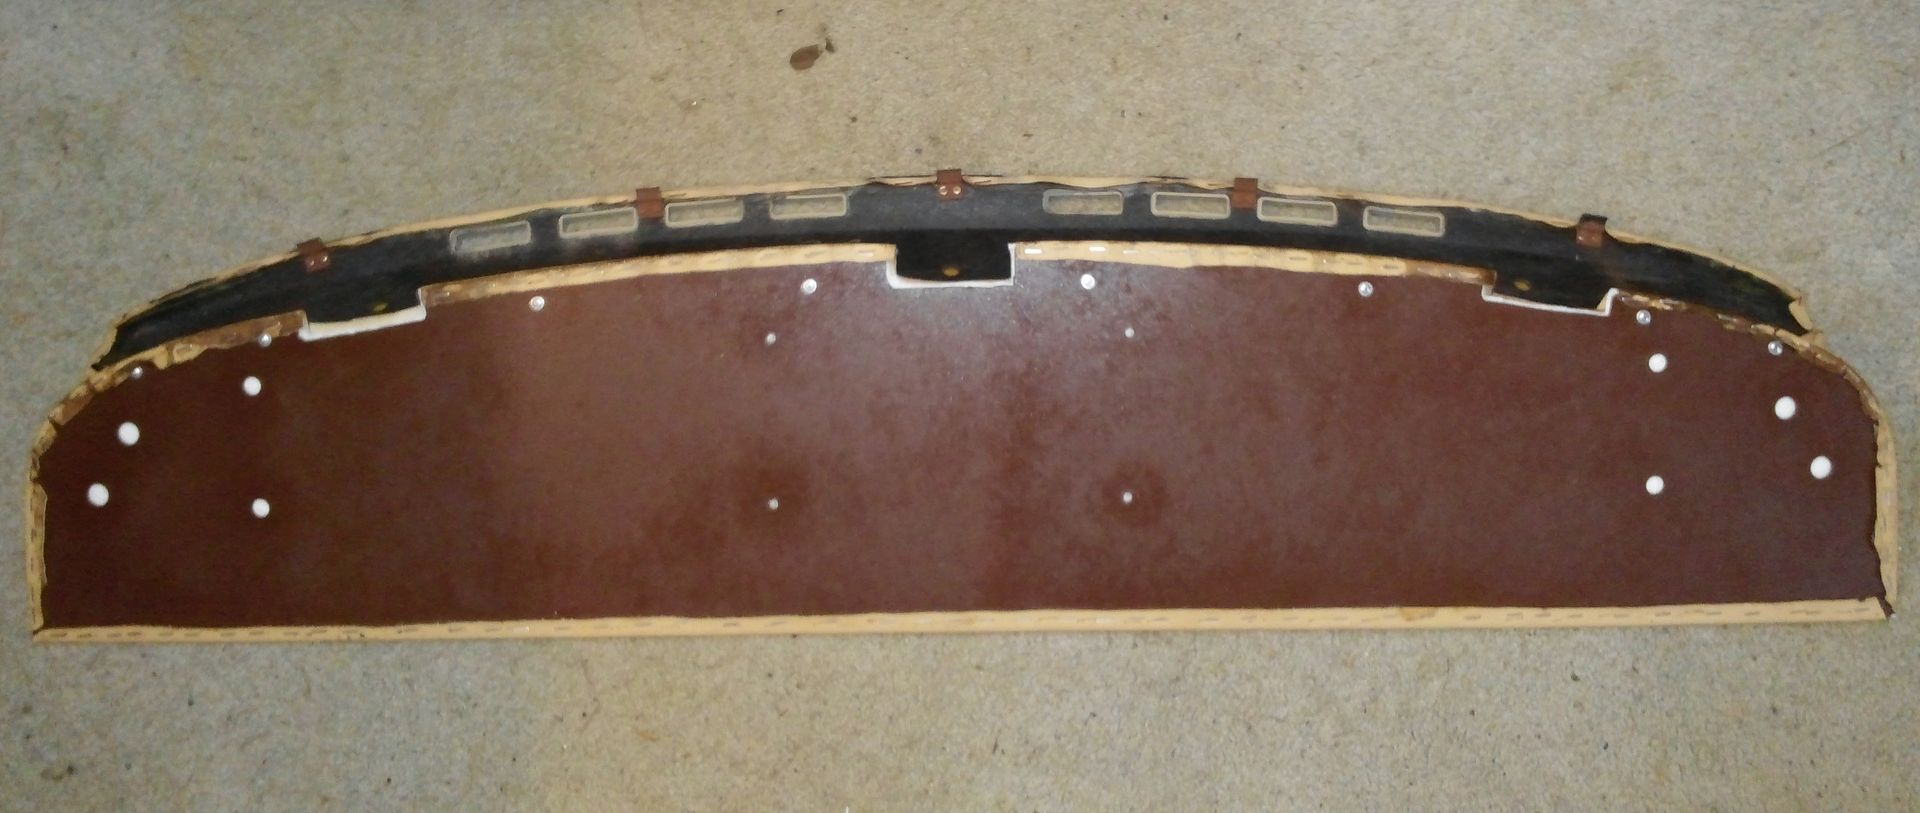
After all that I applied a second coat of the Leatherique dye to the assembled shelf.
The plastic vents were not salvageable and I bought a pair of black vents. The dark colors, black, blue seem to survive much better than the tan.
Using the old board as a pattern a new one was cut from the tempered hardboard. Where cut and drilled the hardboard 'feathers' and needs sealed with an exterior enamel for moisture protection.
The black vents were painted with the closest plastic paint color and left to harden for several days before application of the dye. Reattached the dyed vinyl to the new hardboard with contact adhesive and 1/4" staples. Used cotton quilt batten to substitute for the original foam padding between the backing board and the the vinyl.
I used aluminum pop rivets with securing washers to secure the shelf to the vent trim.
After all that I applied a second coat of the Leatherique dye to the assembled shelf.
Last edited:
Lowes.
With the dash completely apart it was time to address the little leak in the heater core from sitting in a barn for 19 years.
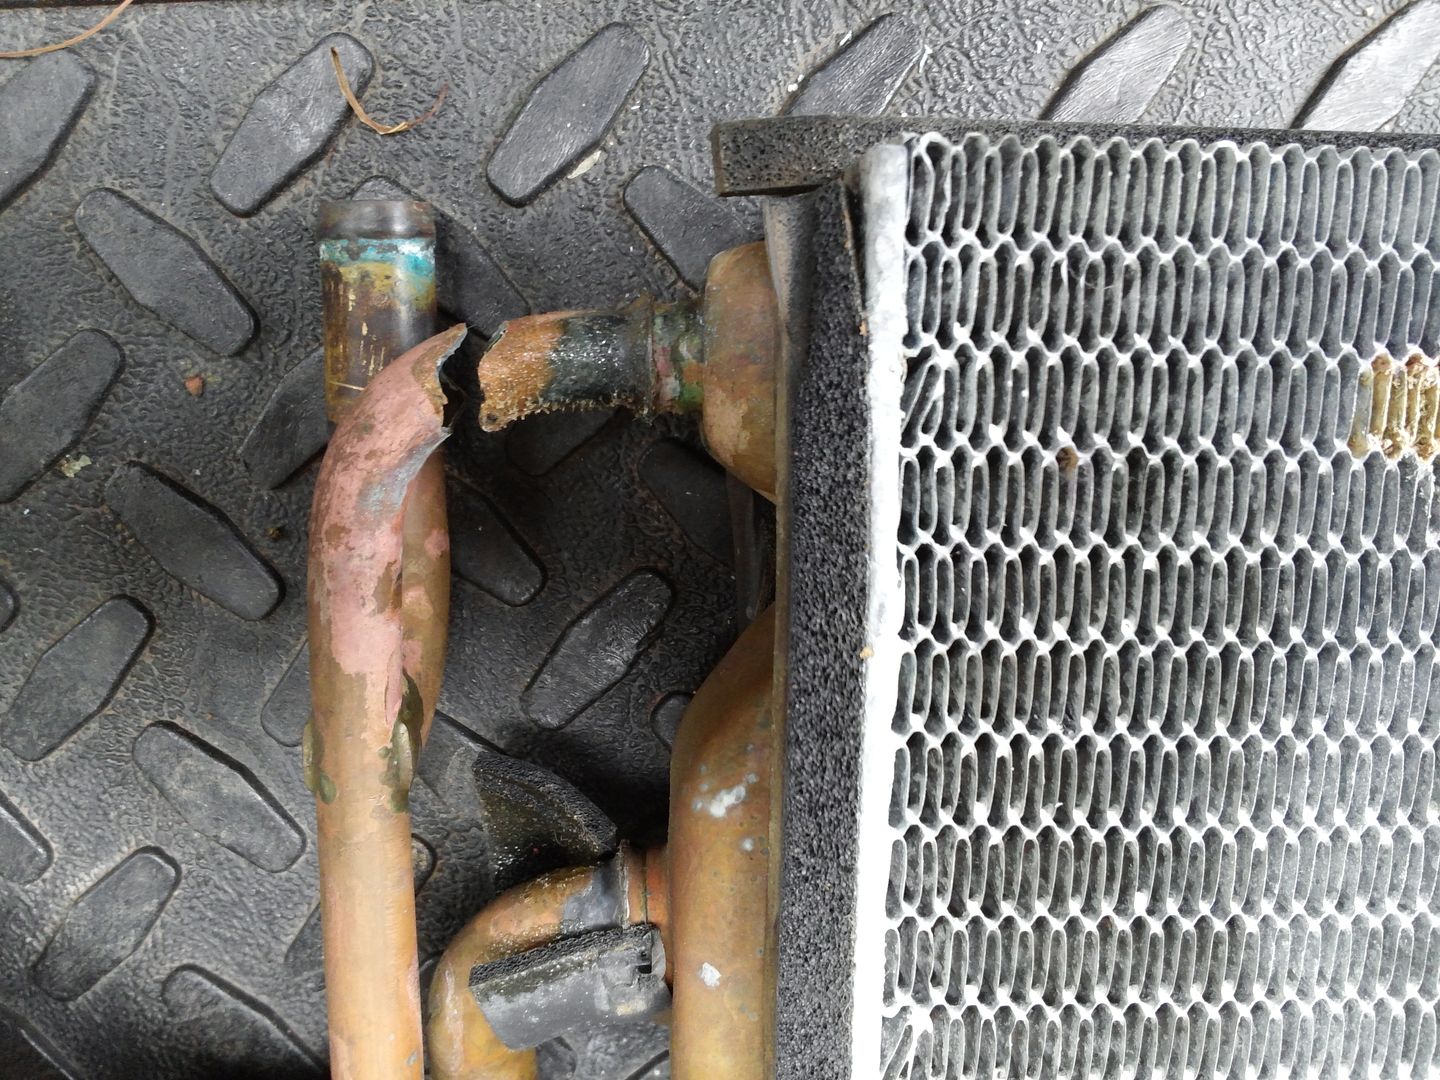
Never seen copper pipe break like that. It also had a leak in the core itself.
Core back in the box ready to go back in. I just used some hardware store adhesive backed foam insulation to seal the sides and bottom of the core to the box.

With the dash completely apart it was time to address the little leak in the heater core from sitting in a barn for 19 years.
Never seen copper pipe break like that. It also had a leak in the core itself.
Core back in the box ready to go back in. I just used some hardware store adhesive backed foam insulation to seal the sides and bottom of the core to the box.
Last edited:

Finished all the leather interior.
Next on the agenda is the interior and trunk carpet. The interior is faded and generally overall dirty but not any baked on milkshakes or other stubborn stains. Took it all out and spent more than an hour vacuuming, air hose blowing the deep down grit and then vacuuming it again.
The carpet is in good physical shape but certainly not acceptable due to fading.
Then spot cleaning of the extra soiled places with Clorox Cleaner and a good scrub. Then I mixed a pint of laundry Clorox in two gallons of hot water with a cup of Tide liquid laundry detergent and sprayed the mixture on all the carpet with a 2 gal pump up sprayer and let it soak for a half hour while I got my pressure washer set up. Big pressure washer so I turned the volume down to about what you would find in a spray car wash. In fact, using a spray car wash with soap then rinse would be pretty much what I did . . . except for the Clorox. It was amazing the dirty water that was produced by the rinse. Dirty car wash bucket nasty and this car only has 25k miles on it. Bet it will even smell better.
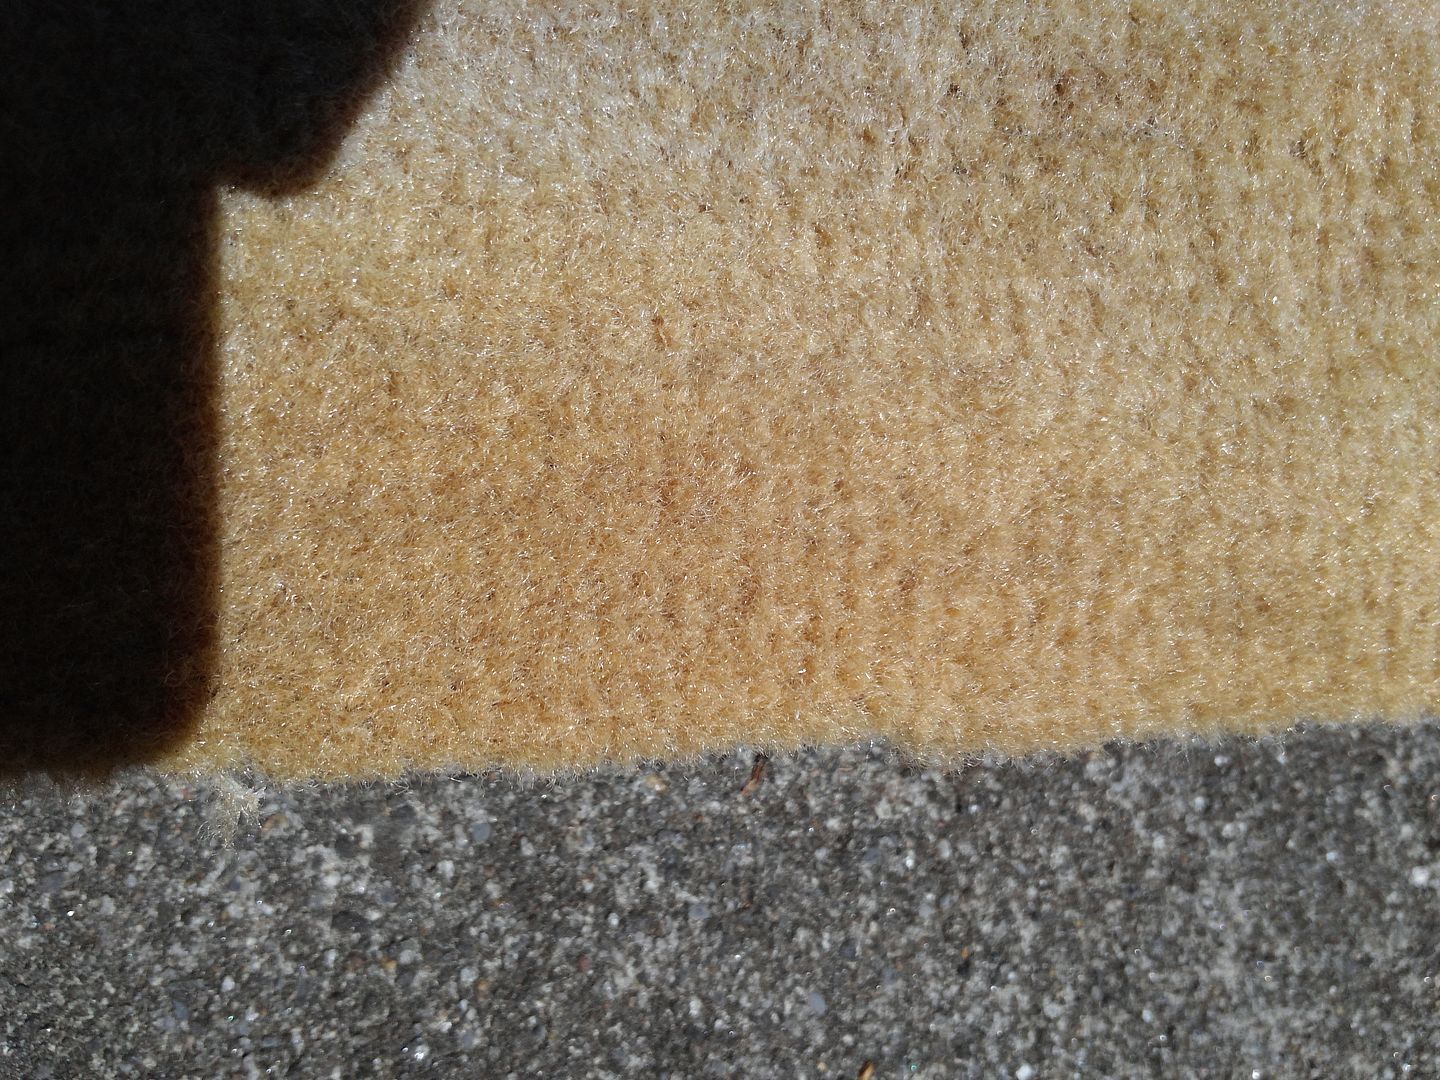
After 6 hours in the pleasant 90* Georgia sun it was dry and after a vacuum the carpet looked as new physically but it was a few shades short of original.
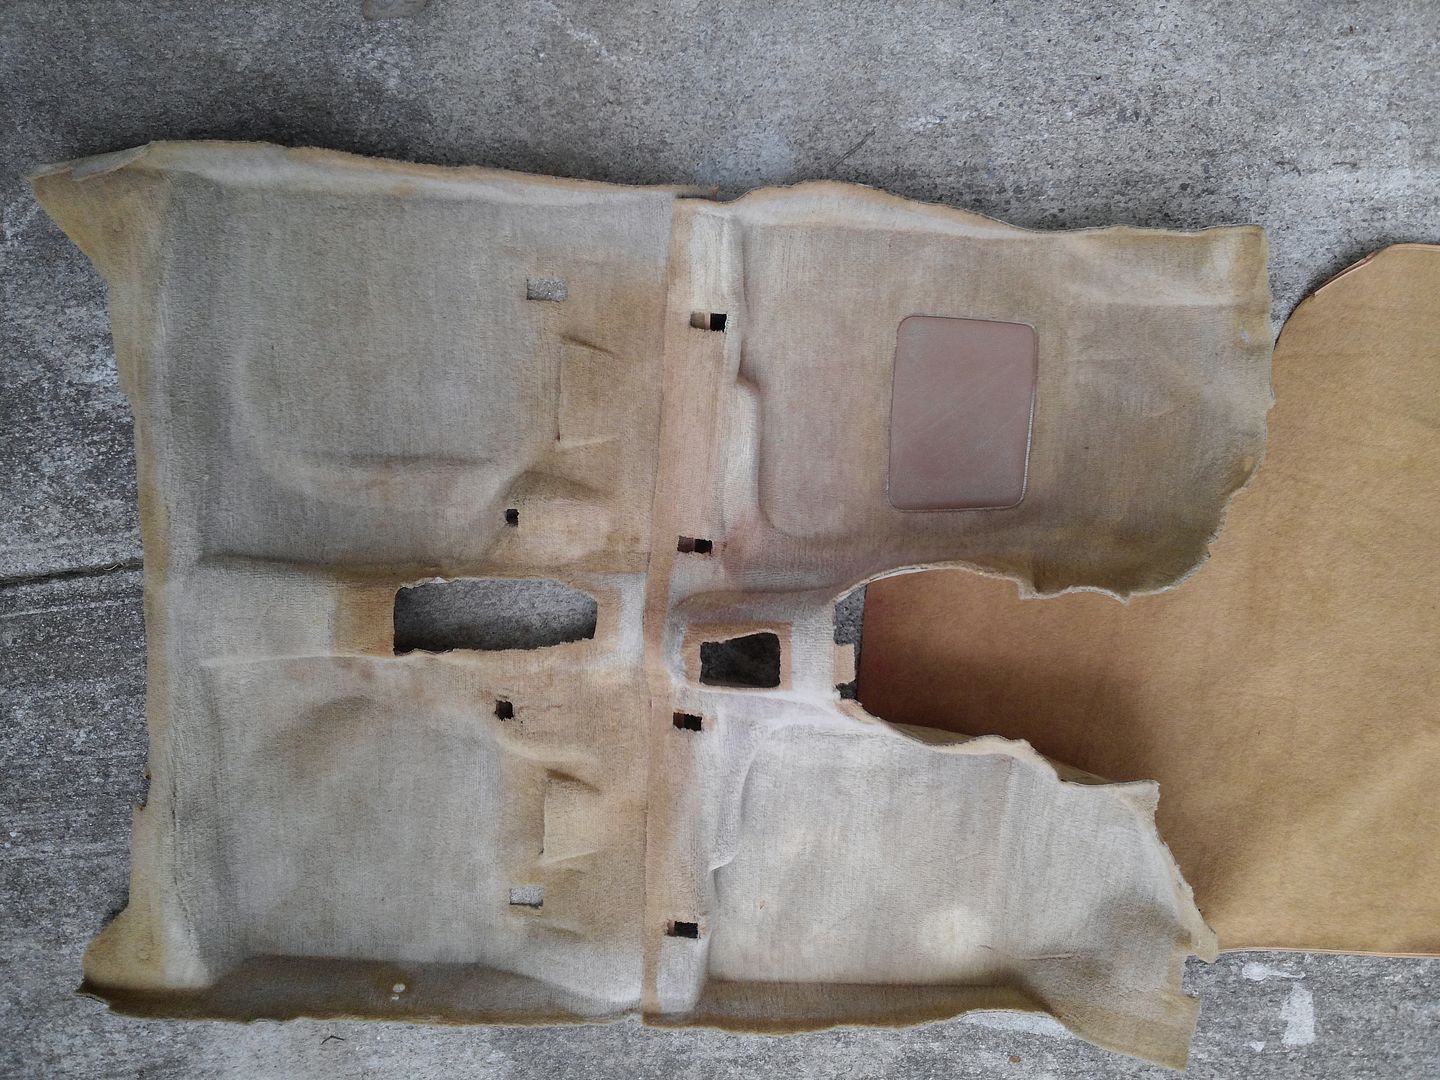
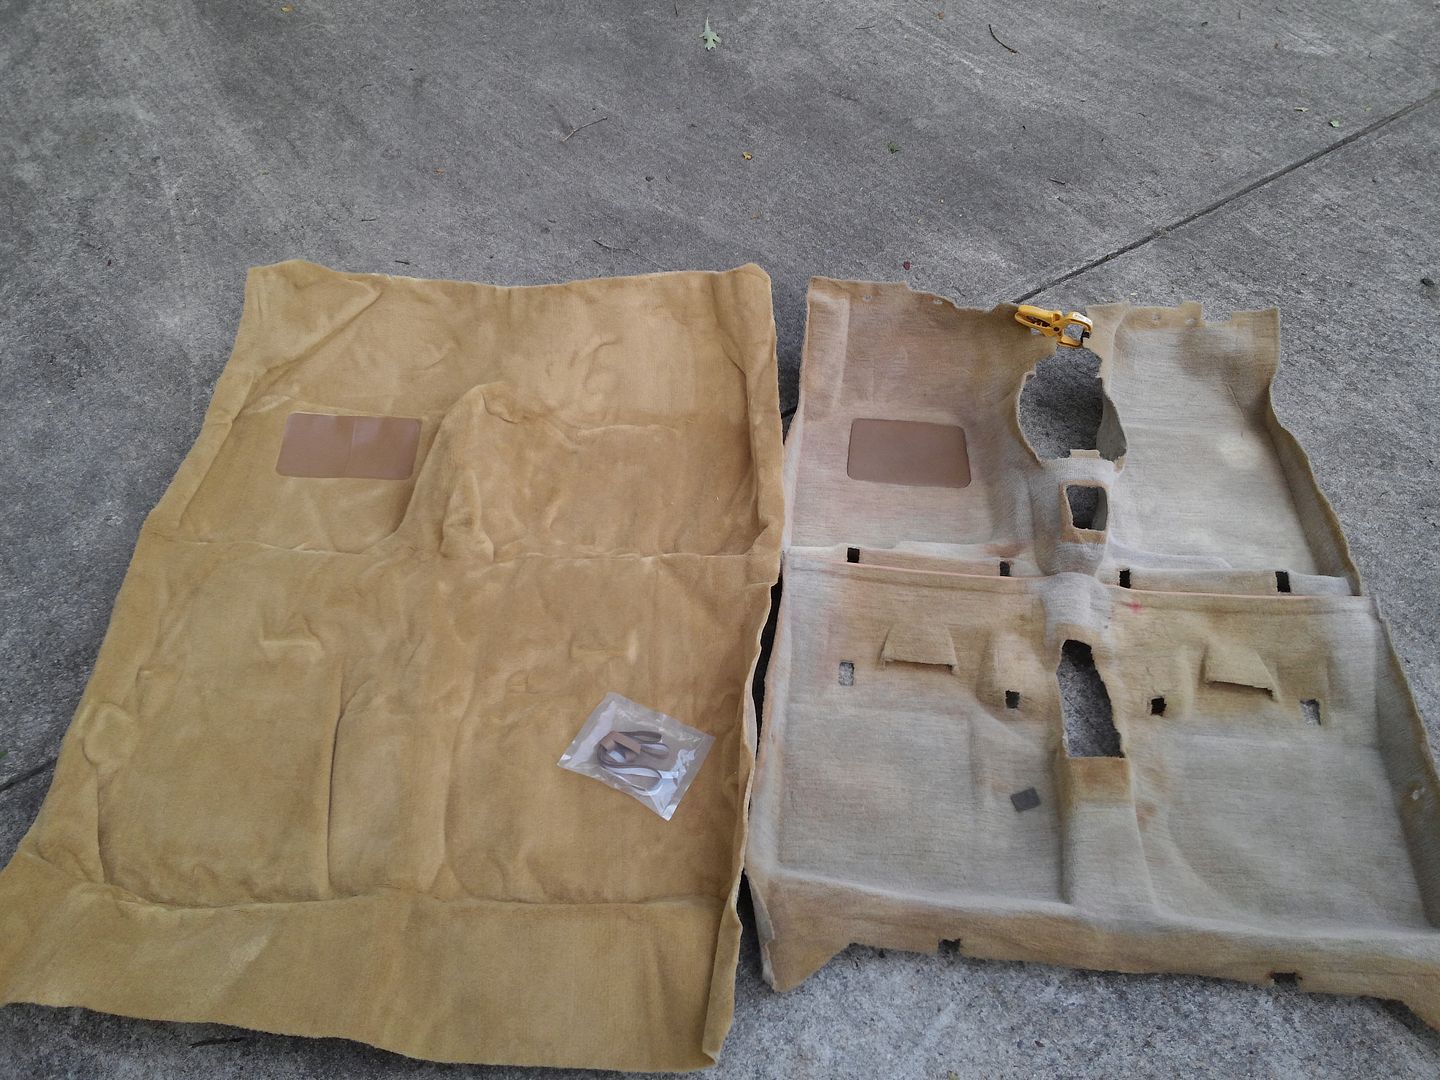
The 'gold' carpet showing in the middle of the front piece is the trunk carpet. It cleaned up after the same treatment as new having been out of the sun lo these many years. It is also a different color than the interior based on the unfaded under seat areas.
NOW . . . after long research I need to find the formula for the RIT Dye mixture that will approximate the original color. I stole a large plastic storage bin from the wife that is big enough for complete immersion of the carpet pieces.
Anyone have any experience doing this? Oh! By the way . . . I am color blind in the green/gold area of the spectrum. It is not that I don't see those colors, it is just that I do not see them as everyone else does.
After a week exploring carpet dye I have come to the conclusion that dying carpet is not a viable solution. The RIT Dye tech support center says they do not support use on auto carpet as it will come off on shoes, etc. The SEM folks say their carpet color product must be carefully brushed in or the carpet fiber will be hard as if it had been painted . . . which it would have been. Even Leatherique says that their dye should be brushed in with a toothbrush.
On to OEM replacement carpet.
Next on the agenda is the interior and trunk carpet. The interior is faded and generally overall dirty but not any baked on milkshakes or other stubborn stains. Took it all out and spent more than an hour vacuuming, air hose blowing the deep down grit and then vacuuming it again.
The carpet is in good physical shape but certainly not acceptable due to fading.
Then spot cleaning of the extra soiled places with Clorox Cleaner and a good scrub. Then I mixed a pint of laundry Clorox in two gallons of hot water with a cup of Tide liquid laundry detergent and sprayed the mixture on all the carpet with a 2 gal pump up sprayer and let it soak for a half hour while I got my pressure washer set up. Big pressure washer so I turned the volume down to about what you would find in a spray car wash. In fact, using a spray car wash with soap then rinse would be pretty much what I did . . . except for the Clorox. It was amazing the dirty water that was produced by the rinse. Dirty car wash bucket nasty and this car only has 25k miles on it. Bet it will even smell better.
After 6 hours in the pleasant 90* Georgia sun it was dry and after a vacuum the carpet looked as new physically but it was a few shades short of original.
The 'gold' carpet showing in the middle of the front piece is the trunk carpet. It cleaned up after the same treatment as new having been out of the sun lo these many years. It is also a different color than the interior based on the unfaded under seat areas.
NOW . . . after long research I need to find the formula for the RIT Dye mixture that will approximate the original color. I stole a large plastic storage bin from the wife that is big enough for complete immersion of the carpet pieces.
Anyone have any experience doing this? Oh! By the way . . . I am color blind in the green/gold area of the spectrum. It is not that I don't see those colors, it is just that I do not see them as everyone else does.
After a week exploring carpet dye I have come to the conclusion that dying carpet is not a viable solution. The RIT Dye tech support center says they do not support use on auto carpet as it will come off on shoes, etc. The SEM folks say their carpet color product must be carefully brushed in or the carpet fiber will be hard as if it had been painted . . . which it would have been. Even Leatherique says that their dye should be brushed in with a toothbrush.
On to OEM replacement carpet.
Last edited:
Coverelay dash cover installation
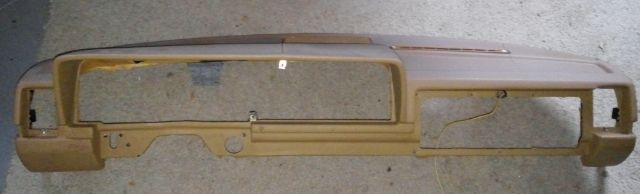
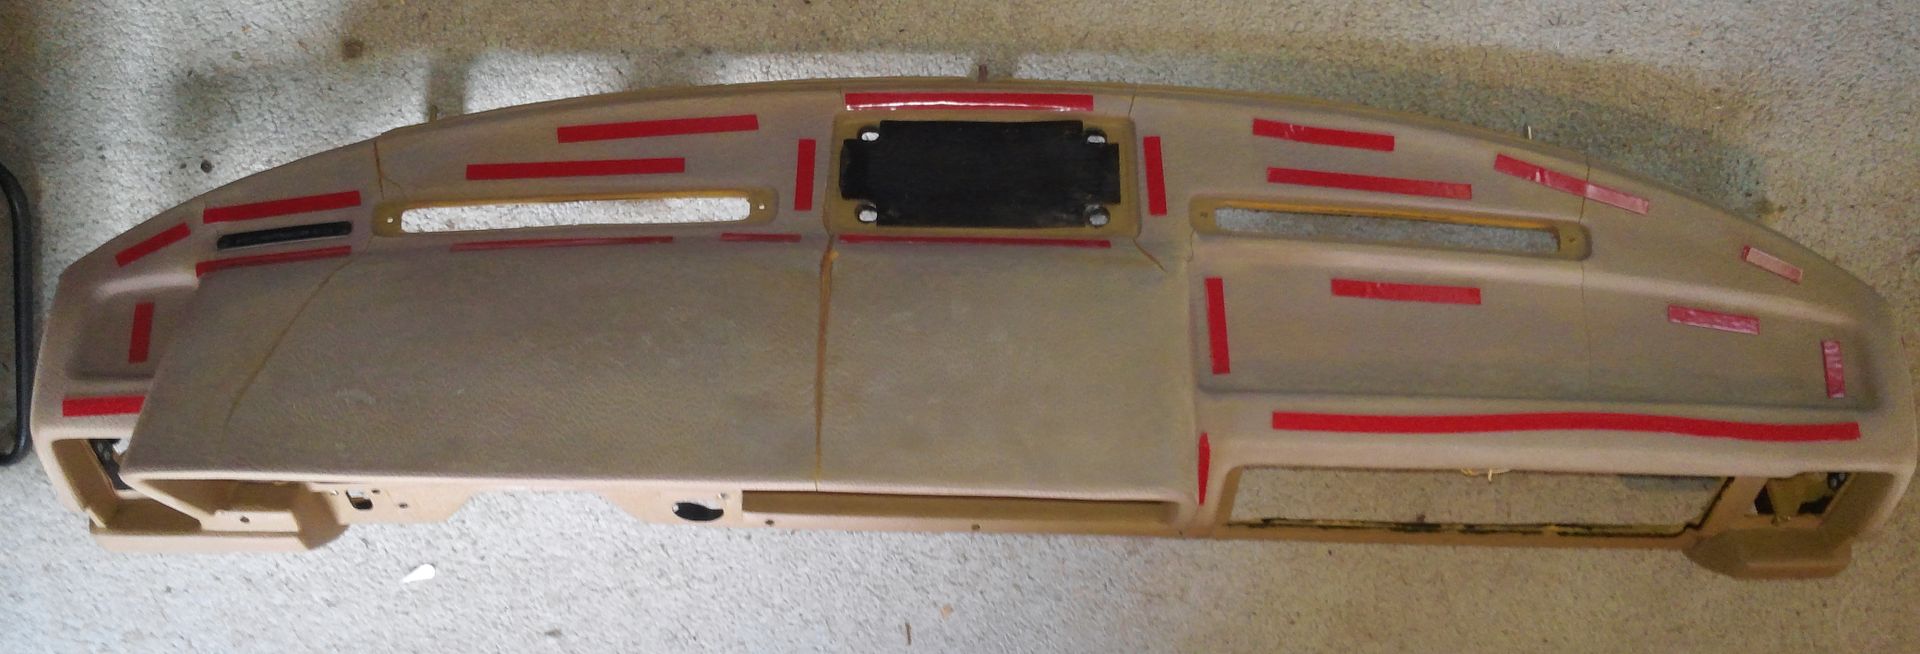
Since I have to take the dash out to replace the leaking heater core I thought it was the appropriate time to cover the dash. Coverlay makes a cover that is difficult to notice without close inspection. Ordered one from the limited color selection and it going to need to be painted to get closer to the original.
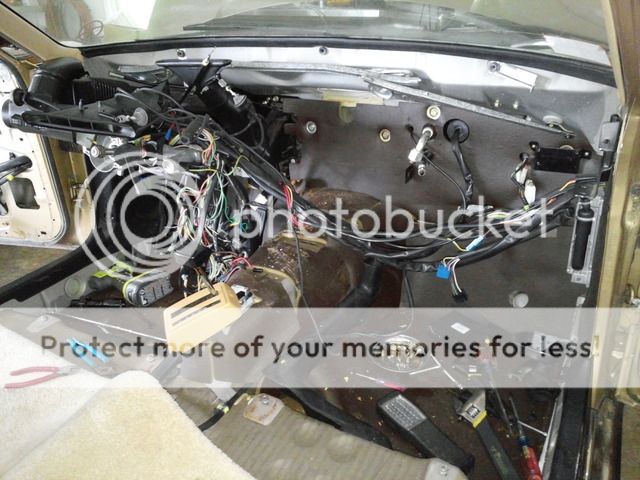
I got the instrument panel out but not without breaking the speedometer tamper device off. First I had to remove the speedometer cable from the transmission in order to get enough slack to move the panel out enough to get to the tamper device.
CAUTION: Don't pull the panel out by force. The first thing that will break is the plastic locking nut on the speedometer cable. Then you will have nothing holding the cable in.
Once the tamper device was off a simple twist of the locking nut and the entire panel came out. I did remove the steering wheel because it is easy and in the way.
Most of the connectors are unique and do not require much documentation. There are three single connector wires. The red/white goes to the tach. I sorta lost track of the other two but noted the wire colors on the other hobby car panel with a Sharpie. If I can't figure it out I know how to and will come back and document the connections.
Following CleanFlametraps guidance on the mystery connectors removal I got the dash out without breaking anything else.
The 3M tape solution is attractive but the temperature specs on the tape is 200*F. While the interior may not get beyond 140* or so the dash itself will certainly hit 200*. The Coverlay Sil-Bond RTV 4500 is rated to 400*F.
Done . . . for better or worst.
I used an electric sander to sand the raised cracks and to rough up the surface for the adhesive.
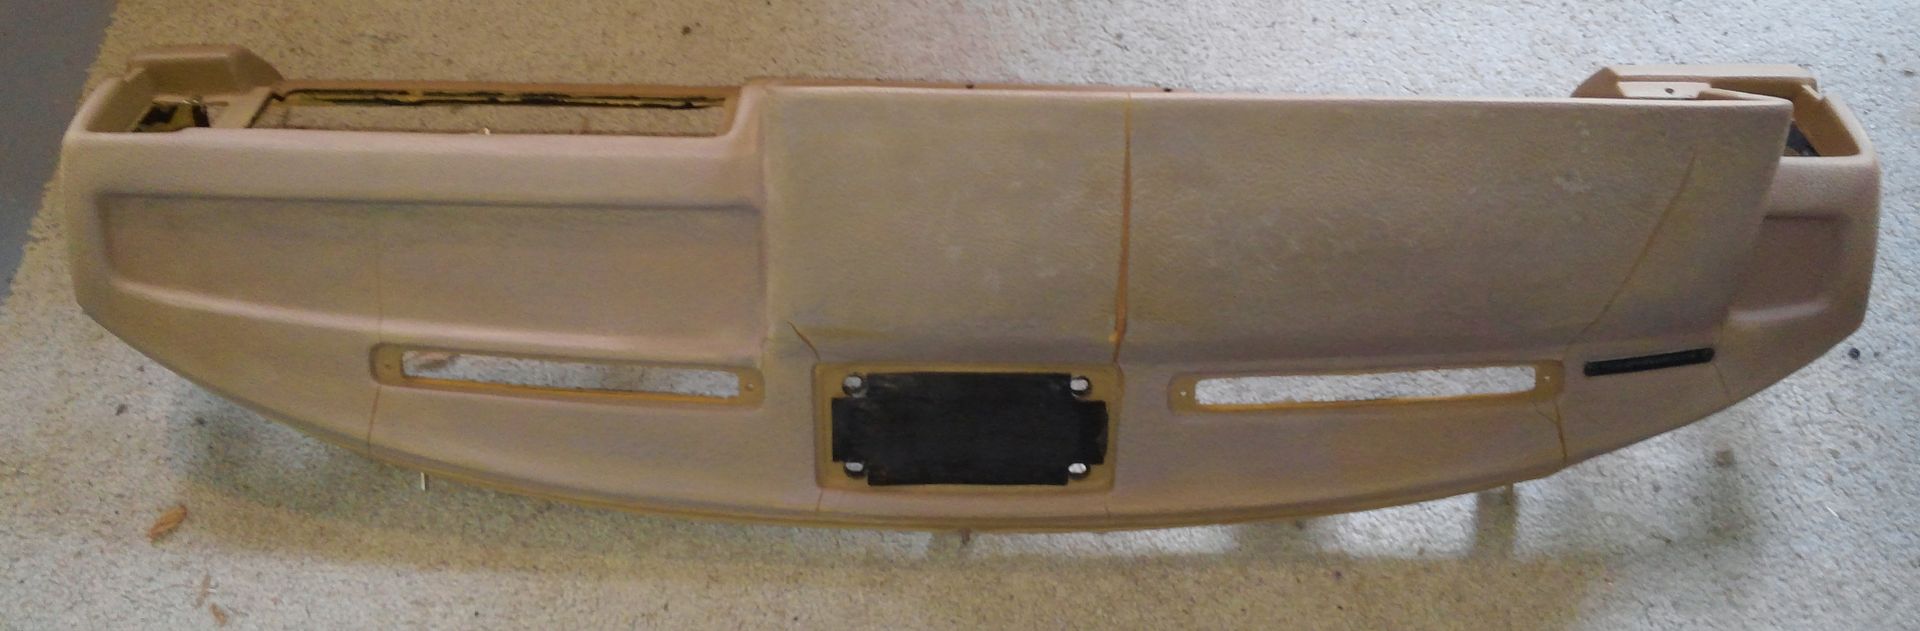
I followed through on my flash of adequacy regarding using 3M Super Strong Attachment Tape. Ran strips all around the edges that the cap instructions say requires a silicone adhesive seal which I applied. The instructions are to attach at the edges leaving the open areas free to move. Hope that doesn't mean bubble/warp up. The intent is that the double backed attachment tape would hold the cap tightly to the dash until the high strength adhesive had time to set.
Note on the tape: the backing of the double backed tape is a little difficult to get off. It would be a good idea to peal them off before applying the silicone as it took me 15 minutes to get all that off and the work time of the silicone is supposed to be 10 minutes.
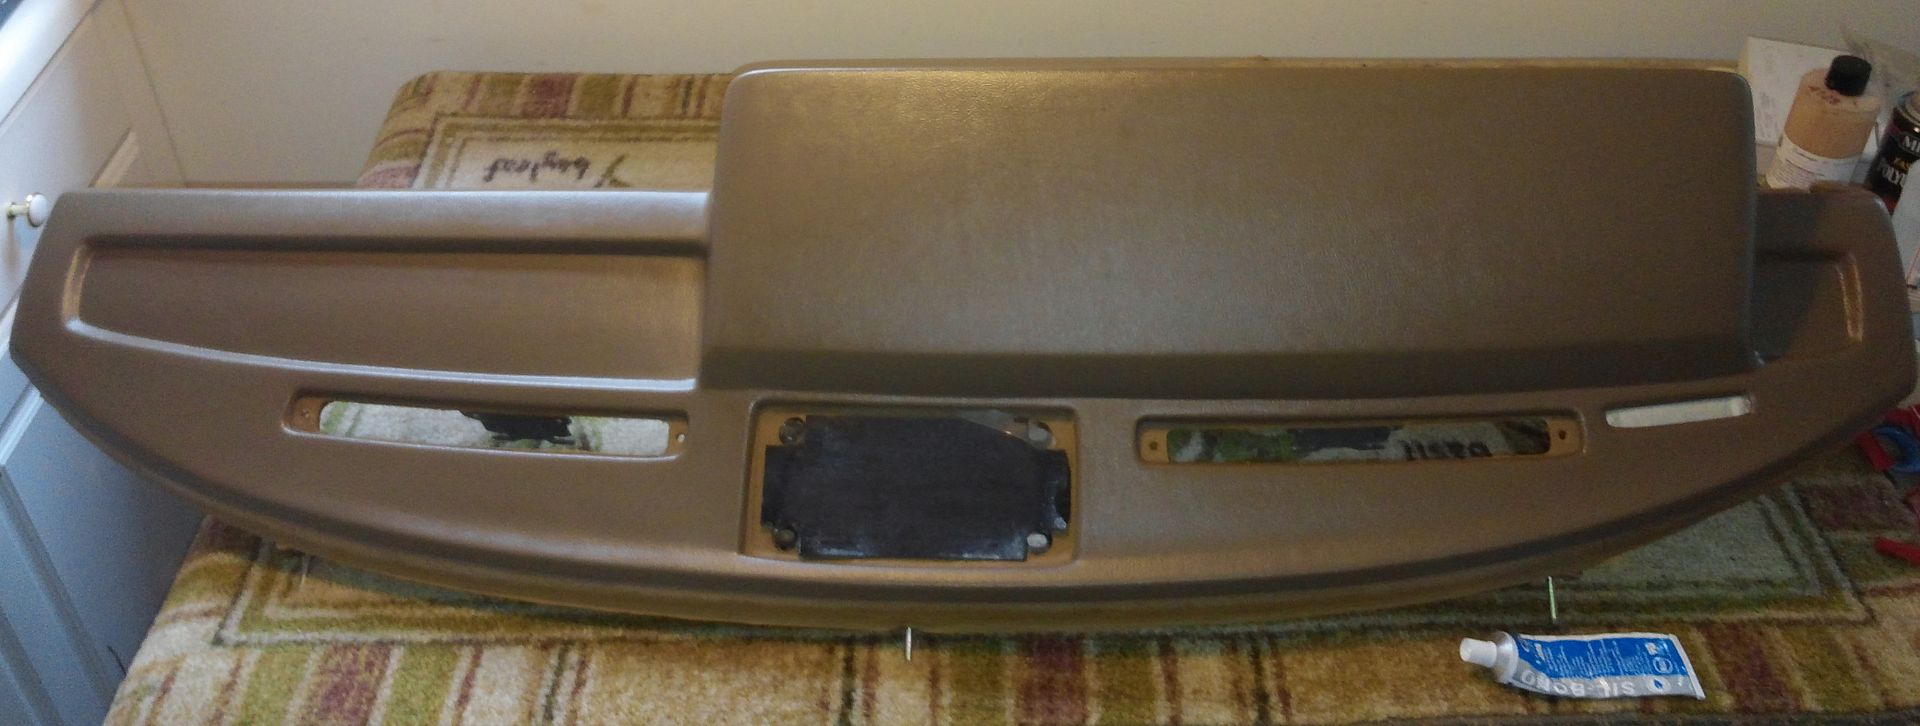
Seemed to have worked. The cap is held down pretty tight to the dash. Now, if it just won't release before the silicone sets.
Plastic bags of water was plan B.
Now, to address the part about the Coverlay brown, which was the closest selection to the dark palomino of the original color. It has got to be refinished and I have yet to find a close match. The local auto color shop is ordering in a can of SEM Palomino but I suspect that it is going to be too light. Next closest if the SEM Camel.

The Bertone dash does not seem to be a 'normal' color for Volvo's of the period. The local paint shop says that they can mix a match for only a few dollars more but I would have to provide the spray equipment. I have that. Leatherique could do that also with their vinyl paint that they claim is suitable for dashes. Cost $50 vs. $20 for a can of SEM vinyl paint.
Decision for another day.
Now I have to figure out how to get the heater core out.
If I wasn't having so much fun I might get frustrated about now.
Since I have to take the dash out to replace the leaking heater core I thought it was the appropriate time to cover the dash. Coverlay makes a cover that is difficult to notice without close inspection. Ordered one from the limited color selection and it going to need to be painted to get closer to the original.
I got the instrument panel out but not without breaking the speedometer tamper device off. First I had to remove the speedometer cable from the transmission in order to get enough slack to move the panel out enough to get to the tamper device.
CAUTION: Don't pull the panel out by force. The first thing that will break is the plastic locking nut on the speedometer cable. Then you will have nothing holding the cable in.
Once the tamper device was off a simple twist of the locking nut and the entire panel came out. I did remove the steering wheel because it is easy and in the way.
Most of the connectors are unique and do not require much documentation. There are three single connector wires. The red/white goes to the tach. I sorta lost track of the other two but noted the wire colors on the other hobby car panel with a Sharpie. If I can't figure it out I know how to and will come back and document the connections.
Following CleanFlametraps guidance on the mystery connectors removal I got the dash out without breaking anything else.
The 3M tape solution is attractive but the temperature specs on the tape is 200*F. While the interior may not get beyond 140* or so the dash itself will certainly hit 200*. The Coverlay Sil-Bond RTV 4500 is rated to 400*F.
Done . . . for better or worst.
I used an electric sander to sand the raised cracks and to rough up the surface for the adhesive.
I followed through on my flash of adequacy regarding using 3M Super Strong Attachment Tape. Ran strips all around the edges that the cap instructions say requires a silicone adhesive seal which I applied. The instructions are to attach at the edges leaving the open areas free to move. Hope that doesn't mean bubble/warp up. The intent is that the double backed attachment tape would hold the cap tightly to the dash until the high strength adhesive had time to set.
Note on the tape: the backing of the double backed tape is a little difficult to get off. It would be a good idea to peal them off before applying the silicone as it took me 15 minutes to get all that off and the work time of the silicone is supposed to be 10 minutes.
Seemed to have worked. The cap is held down pretty tight to the dash. Now, if it just won't release before the silicone sets.
Plastic bags of water was plan B.
Now, to address the part about the Coverlay brown, which was the closest selection to the dark palomino of the original color. It has got to be refinished and I have yet to find a close match. The local auto color shop is ordering in a can of SEM Palomino but I suspect that it is going to be too light. Next closest if the SEM Camel.
The Bertone dash does not seem to be a 'normal' color for Volvo's of the period. The local paint shop says that they can mix a match for only a few dollars more but I would have to provide the spray equipment. I have that. Leatherique could do that also with their vinyl paint that they claim is suitable for dashes. Cost $50 vs. $20 for a can of SEM vinyl paint.
Decision for another day.
Now I have to figure out how to get the heater core out.
If I wasn't having so much fun I might get frustrated about now.
- Joined
- Jul 30, 2002
- Location
- Rockville, MD
wow, you're going nuts with this thing!!! keep up the good work.
This is the most baller factory paint job offered on the 200 series.
This is the most baller factory paint job offered on the 200 series.
Ash tray
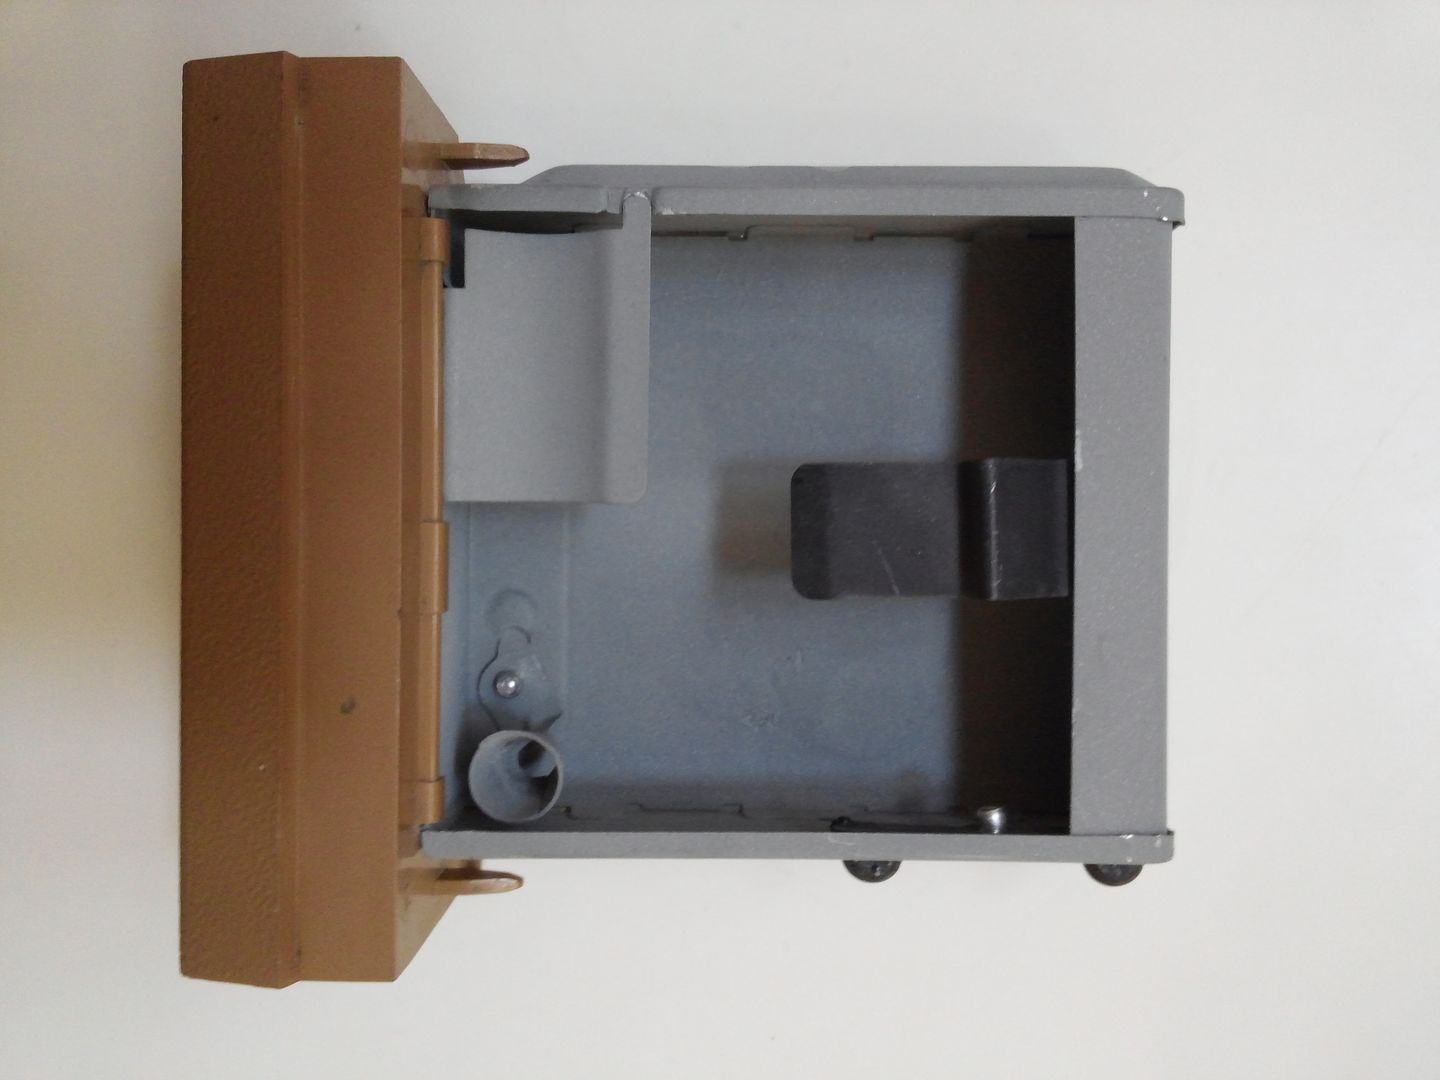
Didn't feel like a big project this morning so thought it was time to restore the ash tray.
Took it all apart and did a little media blasting.

A shot of galvanizing primer and some pop rivets and it is all pretty again.
The new carpet has arrived and is going through its 'relaxing' exercises in the sun before any installation efforts are made.
Didn't feel like a big project this morning so thought it was time to restore the ash tray.
Took it all apart and did a little media blasting.
A shot of galvanizing primer and some pop rivets and it is all pretty again.
The new carpet has arrived and is going through its 'relaxing' exercises in the sun before any installation efforts are made.
- Joined
- Oct 10, 2003
- Location
- Acworth, GA 30102
The new carpet has arrived and is going through its 'relaxing' exercises in the sun before any installation efforts are made.
That looks like the same aftermarket carpet I bought for my 240. They do not fit at all even after all the trimming you have to do. You should really consider sending it back. It's much, much better to clean & re-dye what you have.
I did a re-dye using these instructions and it turned out better than new
http://www.supraforums.com/forum/sh...nally-Black-Carpet-Dyed-my-Tan-Carpets-Black-
Last edited:
Stiggy Pop
In the cool kids club
- Joined
- Feb 27, 2011
- Location
- Granville, MA
Yeah I got that new carpet too. I wouldn't say it doesn't fit at all, but I wouldn't say it fits well either. After I put mine in I pulled my brown carpets off the trash pile and think I'll probably end up doing dye and swapping them back in.
Really it fits OK it's the center console area that was the big let down (baggy on the sides)
Really it fits OK it's the center console area that was the big let down (baggy on the sides)
M.H. Yount
Active member
- Joined
- Nov 1, 2008
- Location
- Charlotte, NC
Since I've a mix of black and brown interior trim pieces to tie together the black/brown tweed cloth I used on the seats, I think I'll just clean up my old brown carpet and dye it ---- black. Hard to screw up that color.
NONHOG
equal opportunity car guy
- Joined
- Oct 3, 2008
- Location
- Tucson ish
TP here is that link I was telling you about. You may have already seen it, but thought it fitting to add to your thread.
http://www.jefflilly.com/fabrication/carpet-install-2/
http://www.jefflilly.com/fabrication/carpet-install-2/
M.H. Yount
Active member
- Joined
- Nov 1, 2008
- Location
- Charlotte, NC
If only it went in as easy as it looks in the jefflilly pics....
quillc
yv1a.com
- Joined
- Aug 19, 2008
- Location
- Kitsap, Wa
Can you post another picture of your updated dash with the cover installed? I'm curious how it turned out. Looks great from the top, how does it look from the front?
After my nap this afternoon . . .
I got busy on installing the dash. Pulling it out was easier then putting it back . . . never mind the several wires involved.
Couple suggestions:
the dash itself needs to go in first with all the mounting brackets and duct work loose.
Tie a string on the little pigtail of wire to the glove box power lead. It is short and will get lost easily.
Make sure that the center speaker grill and defrost pieces fit inside the new dash cap. I thought I had done that but will now have to trim more to get everything to fit well now that it is in place. The speaker grill may have to be replaced due to age and UV deterioration.
It looks great . . . in my opinion . . . especially when you consider where it came from.

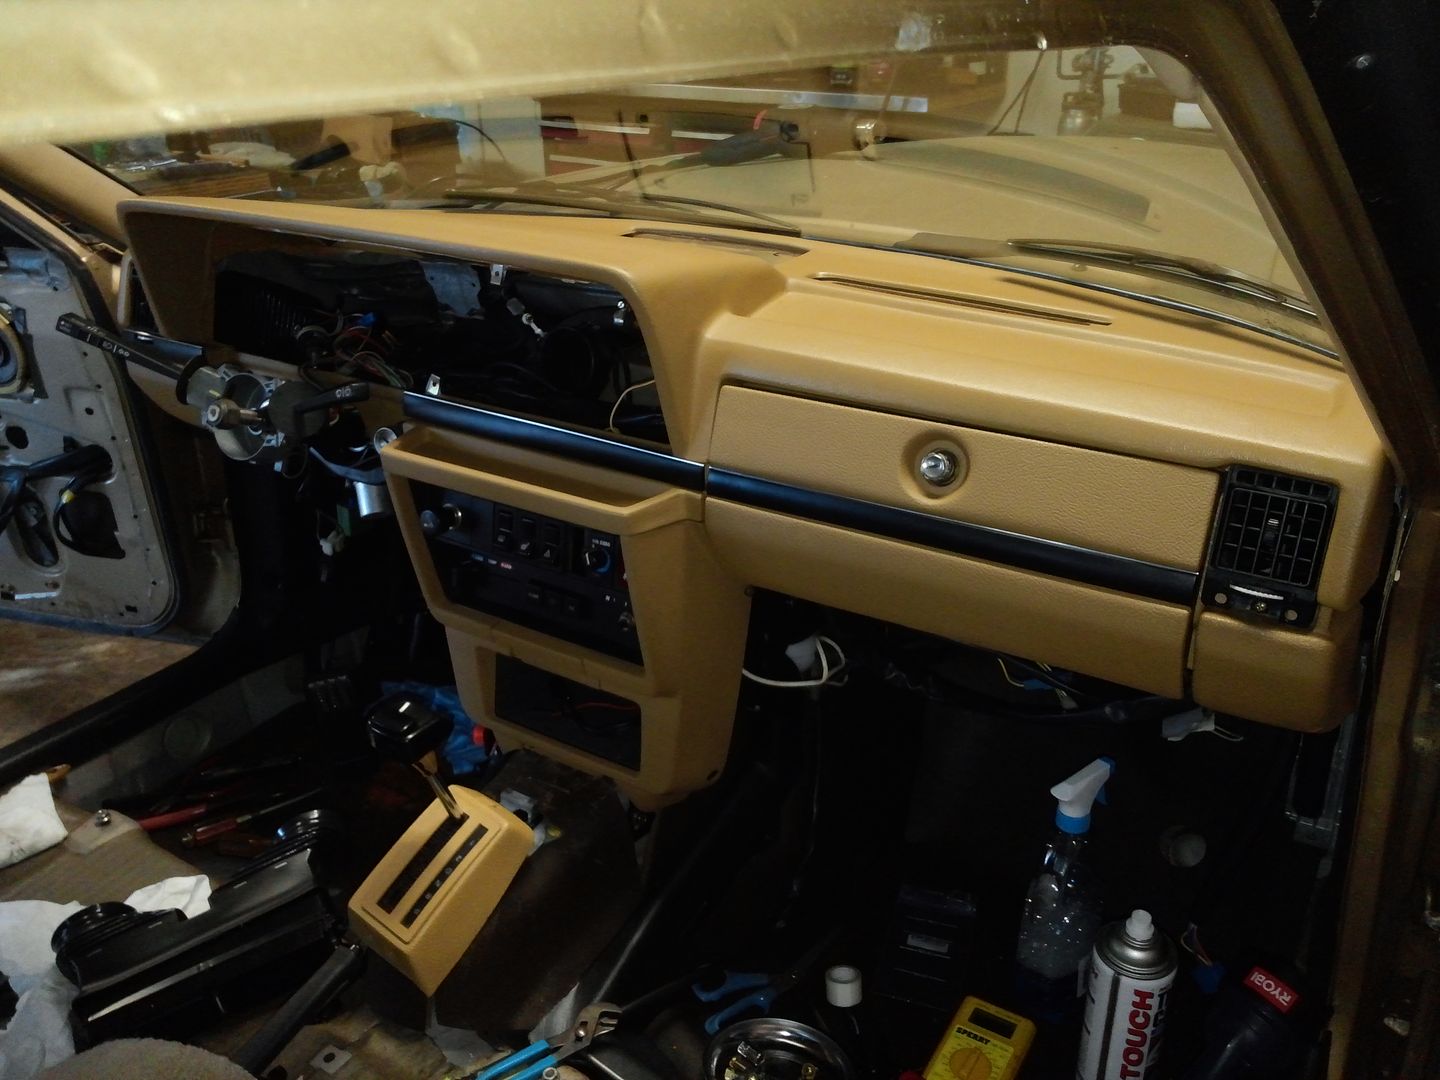
The Coverlay vinyl cap does not have the same surface detail as the original. It can be seen best at the glove box as much of the rest of the old/new surface is separated by trim.
Don't know if I would have done the dash cap this way except that dash had to come out anyway for heater core replacement. The vinyl paint color match is near perfect but the sheen is just a little flatter than original after 3 tries to get it right. For a dash that is OK, certainly better than shinier.
I have another cap on the V8 wagon that is just sitting there. Unfortunately/fortunately it needs a heater core also so it will get the same treatment.
I got busy on installing the dash. Pulling it out was easier then putting it back . . . never mind the several wires involved.
Couple suggestions:
the dash itself needs to go in first with all the mounting brackets and duct work loose.
Tie a string on the little pigtail of wire to the glove box power lead. It is short and will get lost easily.
Make sure that the center speaker grill and defrost pieces fit inside the new dash cap. I thought I had done that but will now have to trim more to get everything to fit well now that it is in place. The speaker grill may have to be replaced due to age and UV deterioration.
It looks great . . . in my opinion . . . especially when you consider where it came from.
The Coverlay vinyl cap does not have the same surface detail as the original. It can be seen best at the glove box as much of the rest of the old/new surface is separated by trim.
Don't know if I would have done the dash cap this way except that dash had to come out anyway for heater core replacement. The vinyl paint color match is near perfect but the sheen is just a little flatter than original after 3 tries to get it right. For a dash that is OK, certainly better than shinier.
I have another cap on the V8 wagon that is just sitting there. Unfortunately/fortunately it needs a heater core also so it will get the same treatment.
Last edited:
You're going to need one of these but $10 shipping is crazy.
http://www.ebay.com/itm/NEW-Swedish...279-/121675440335?hash=item1c546be0cf&vxp=mtr
http://www.ebay.com/itm/NEW-Swedish...279-/121675440335?hash=item1c546be0cf&vxp=mtr