• Hello Guest, welcome to the initial stages of our new platform!
    You can find some additional information about where we are in the process of migrating the board and setting up our new software here

    Thank you for being a part of our community!

1984 245T mLPT B274FT Project

Yes, which is why I always switch off the battery when I park this car. I haven't driven it enough for things like that to become ingrained as a habit yet.
 
255-17 on front, 315-17 on rear.


170556975.jpg


170556972.jpg


These guys are now unemployed:


170556974.jpg
 
Shocking, that turned out really, really nice!

What's the three digit date code on those out of work P-Zeros? Starts with '6'? :lol:
 
Yeah, that'll do. 
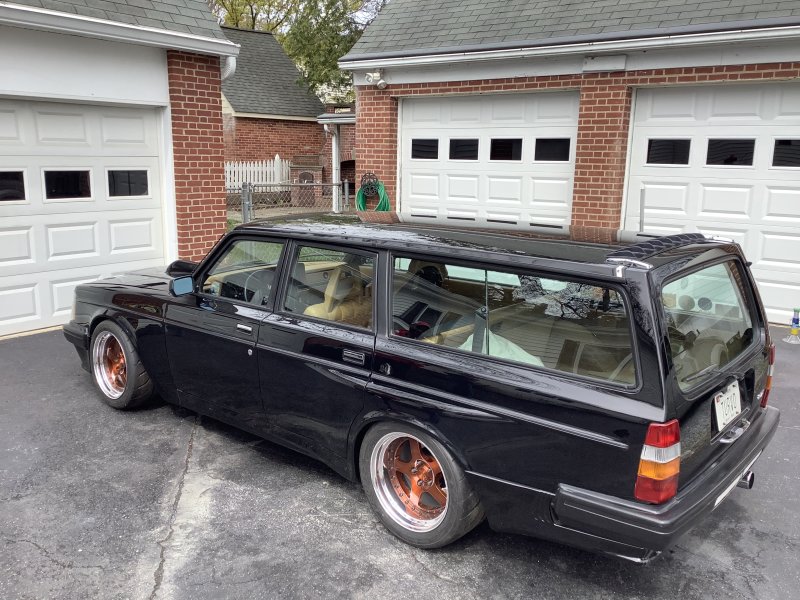
This thread needs some good shots of the car and vids of this thing ripping to redline.
 
"504"

This is a pre-2000 date code, which I believe breaks down to the 50th week of 1994. Seems about right.
Ah, that's it. I was thinking it was year, then 2-digit week. I was thinking 1996.

I haven't driven on '90s tires since 2006. :lol:
 
dat body work makes me go.

<iframe width="560" height="315" src="https://www.youtube.com/embed/_4-MmsLKRDw" frameborder="0" allow="accelerometer; autoplay; encrypted-media; gyroscope; picture-in-picture" allowfullscreen></iframe>
 
Took only a little longer than expected but I am very happy with the work. Cody is an amazing artist and I am grateful that he agreed to take on this project. It's outside the parameters of his normal portfolio (traditional hot rods and customs) but like all cool guys, he digs longroofs.

Got the car loaded up and delivered to the body shop yesterday.


https://www.youtube.com/watch?v=TdRfvJP4kWs
Yep, excellent work.

awesome build, has to be one of if not the nicest custom 245 in the US, can't wait to see it finished. Widebody work looks well thought out and executed
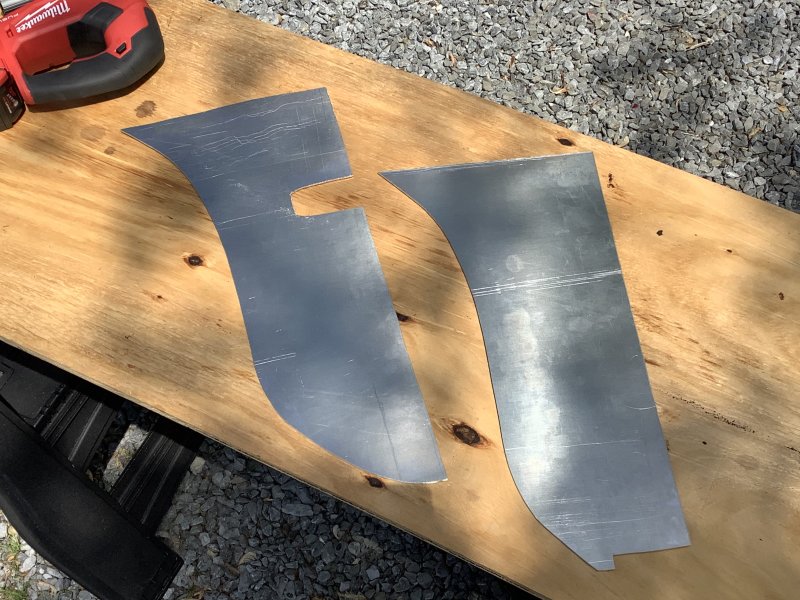
I think it's the nicest. I've worked on a few showcars, and it's my favorite.

Edit: International Travelall for the tow vehicle! That is an old favorite truck. Great stuff!
Funny story, Dave: Paul, Steve Noe and I were meeting at College Park Ikea so they could write in Matt's journal. Paul was running late, and it turns out he broke down at the worst place for that particular moment. So I broke in my new WRX clutch by pulling him (backwards) up a steep hill behind the Lowes or something, where he diagnosed the bad fuel pump. Good times.

Such a great accomplishment to get where you are now. Enjoyed the video and the sound this beast makes. I can not wait to see the wheels and tire mounted, hopefully soon? What transmission do you have in it? Straight cut gears?
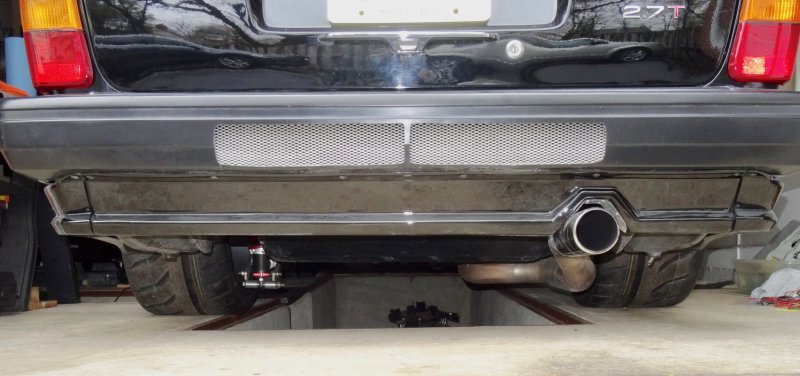
Dude. I stood under it in his pit, with it running in gear to make sure there was not an abnormal noise. (It was just the carbon fiber driveshaft amplifying the gear noises) Chills.
 
The Beginning of the Next Thing

TURVO is a true 'project car' in the sense that it's probably not something that will ever be finished. I am still trying to get the parking brake situation under control and need to rough-in the alignment so that it can be driven safely in public.


Meanwhile, here's the beginning of the next project. It's 3.5mm aluminum plate, more details when it's closer to fruition:


170742899.jpg
 
Last edited:
Wish I had made this mod years ago. Reduces the installation time of the intake plenum from 2 hours to about 30 mins. No more fiddling with getting tiny nuts started on studs that I can't see and can barely reach.


170908491.jpg
 
What do you have going on there Paul ^?

Hi JB,

If you look at the sketch on the left, that was the stock mounting base of my intake trumpets: a hole in each corner to slide over the four mounting studs on the throttle body. But this meant inserting the trumpet and then trying to maneuver the 16 tiny nuts to get them started onto studs I can barely see and barely reach with my fingertips.


170912799.jpg


The sketch on the right was basically how I modified my trumpet bases, using band saw, belt sander, Dremel tool, and hand files. Completely removing two of the corners means that eight of the nuts can now be installed to secure plenum to tops of the TBs before the trumpets are even inserted into plenum. But because the remaining mounting points are now slotted, I can also pre-install the other 8 nuts 3 or 4 full turns on the studs before I insert the trumpets. The trumpets slide past the pre-installed nuts and then a few degree twist seats the stud into the mounting location of the trumpet and I can finish tightening the remaining 8 nuts. Bottom line: after the trumpets are in, I only have to tighten 8 nuts and they are already threaded on.

The semi-circle shaped cut-outs are to clearance the pre-installed flange nuts that the trumpet has to clear while be inserted.

Because these trumpets are just air guides, there is no real reason that they need to be secured with four nuts. The two remaining nuts on each trumpet are flanged, nylock units that should hold them just fine.

Hope that all makes sense.

.
 
Back
Top