• Hello Guest, welcome to the initial stages of our new platform!
    You can find some additional information about where we are in the process of migrating the board and setting up our new software here

    Thank you for being a part of our community!

1980 242DL engine swap

made progress.
I now have fuel.
The injectors were no good, luckily I had another set layin around, hooked one up and felt a nice buzzzing, that of which I never had with the old injectors :roll:
So now, spark, fuel, air, compression... she cranks A LOT better with a new battery

however...
still not starting.. it feels as if the timing is STILL off... intake is pulling and pushing air, not just sucking..

I am checking on the valves.. make sure none are sticking, and am going to do another compression test.
didnt think one valve sticking would do this..
 
When the timing was 180 degrees off, does the marking on the flywheel for top dead center sits on the right position now? 86degrees before top dead center.

Greetings
 
Welp, might have found my problem.

Went through the timing YET again, realized the intermediate shaft was pointing the rotor to number 4 on the cap when everything was TDC.. fixed that right up.

Still do not have compression.... Took valve cover off to check for valve clearance.. Bentley reads .30mm-.40mm for checking, .35mm-.40mm for adjusting. I could not even get my smallest feeler gauge in there..
my guess, when the "shop did the valve job" he had no clue what he was doing..This was "done" before I picked up the motor..
I still need to check the shim thickness and go from there..
What size adjusting disk usually come in these motors?

This would somewhat explain why I have weak/no compression.. valves staying open too long as the lobe comes around...
 
Replaced the shims under the B cam with 3.30 and 3.35mm shims.
Valve clearance is now opened to ~.25mm.
Cold tolerances are .3-.4 (checking)
Seeing as these were the smallest shims I had, I threw em in and buttoned it up.
WHAT A DIFFERENCE.
She's cranking harder and buckin harder. like a car should!
I'll grab some 3.25mm shims and see if that makes er even better

New fuel tank is going in tomorrow, and fresh,CLEAN fuel.

wonder why stock shims, 4.00mm, would not be correct after a valve job.. longer valves maybe?
 
welp, she's running.
valve shims were the ticket.
fixed a valve cover and cam seal leak today and finishing up front brakes.

now to get her dialed in and have some fun:)
 
I'm interested..do u have any more detailed info on ur wiring setup??im starting the same winter project and the wiring seems like the only real chore. And what's up wit the flywheel y did u have to drill it?
 
I'm interested..do u have any more detailed info on ur wiring setup??im starting the same winter project and the wiring seems like the only real chore. And what's up wit the flywheel y did u have to drill it?

I used the harness out of the 940. pulled everything out of the 240 that had to do with the old ecu setup. left wiring for the headlights.
You can use the 940 harness if you like, if you have time, and can understand whats going on.
Or you can grab a 2.4 harness out of a 240, easy as cheese.
 
Took er for the first drive... much more power than my old 740ti.. ;-)

my temp gauge, however, is of concern.
Its pegged hot. The wiring I found is a single yellow from the gauge. The sensor in the motor(940) is a 2 prong sensor..
Does anyone have two spares(one from a 240 and one from a 940) in which they could measure the threading.
The easy solution would be to take the 240 single prong sensor, thread in, rewire and go..

Anyone know the threading?


Once I get that working properly and the brakes, then I can really let er go:cool:
 
temp sender(front of head) is wired, in the stock 940 application, y/w and y/bl. I took the yellow wire from the back of my cluster, single yellow wire, to the y/w. the y/bl then runs to a ground.
the gauge then goes straight up and stays there...
the 240 was wired cluster->yellow->sender->sender grounded out on head.

the sender in the head is producing ~340ohms.
any idea on wiring? i've tried several ways of wiring it up, looking for advice.

You are referring to the coolant temp sensor used by LH. The temp sender for the gauge has a single spade and is located in the head between the dizzy and the knock sensor. Connect yellow wire from gauge to this single spade and report back...
 
You are referring to the coolant temp sensor used by LH. The temp sender for the gauge has a single spade and is located in the head between the dizzy and the knock sensor. Connect yellow wire from gauge to this single spade and report back...

you're right, on the 240 2.4 application.

I have a b230ft from a 940 2.4 application. The sender on the 940 version is a double male barrel connector, reference here

Thus is why I was wondering the threading sizes on the two sending units, hoping they were the same, so that I could grab a unit off a 240 and plug the one wire up, instead of the two...
 
update

The sending units are the same thread.. obviously...
screwed it in, hooked up my yellow from the dash and straight to sender.. voila.
Also ect was replaced.. she fires up like a dream now.sweet.
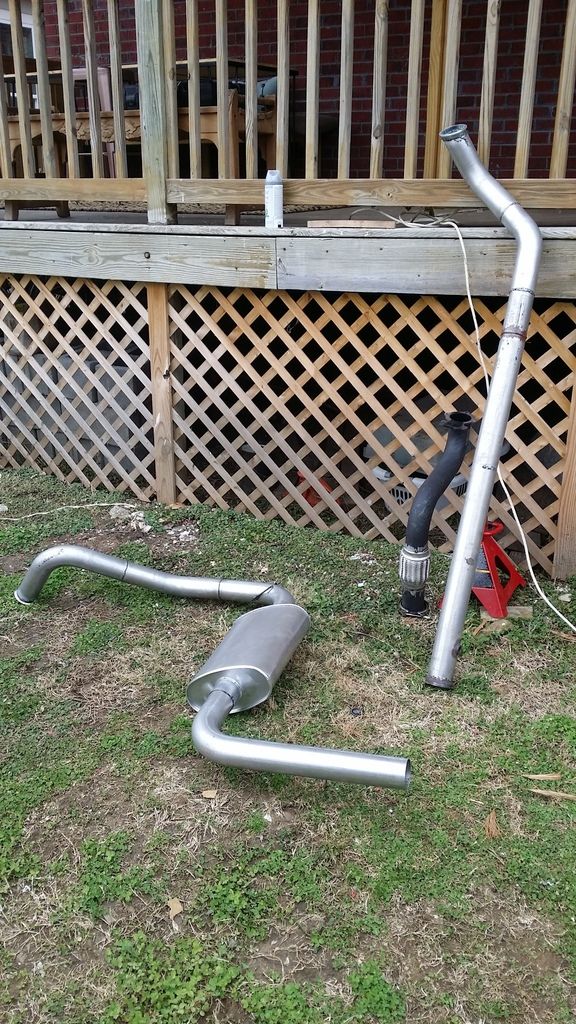
Exhaust is built and on the car too. much better than just a down pipe.

Now I am looking at injectors..
Holset, 3"exhaust 3" maf, stock fpr. Wideband will be installed this week so I can tune it properly.
after a lot of reading, 50's should be sufficient, ya? and if I get high impedence, then i'd need to bypass the pack?
Will someone please enlighten me on this/size/style(ev1?).. i've read and read and its starting to mush...
 
4 years into this thing and its still fun! :lol:

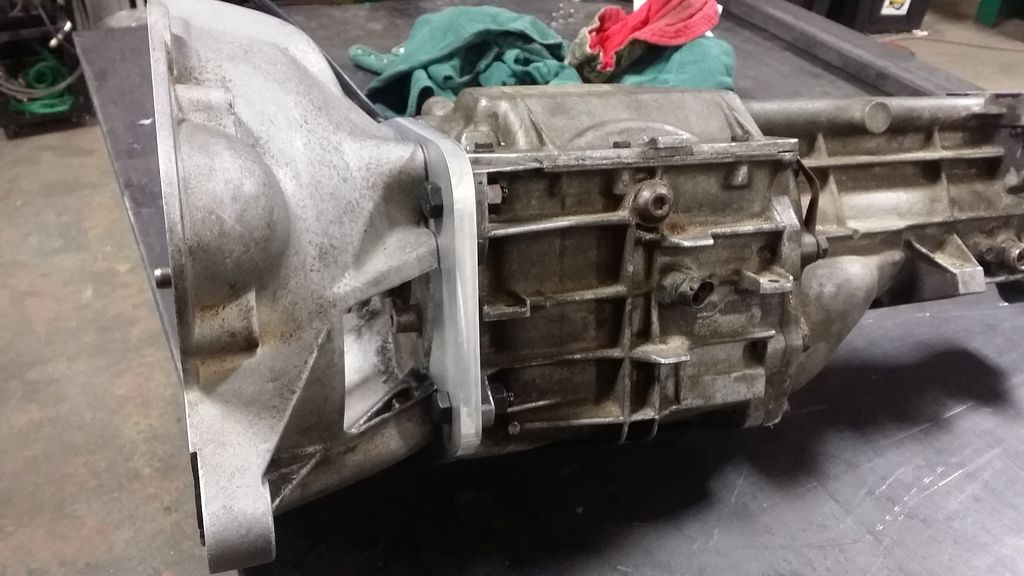
Thought I would add some pics of the GM t5 swap going in.

Got a killer deal on this one, so I had to use it.
Plus a shop helps too:cool:

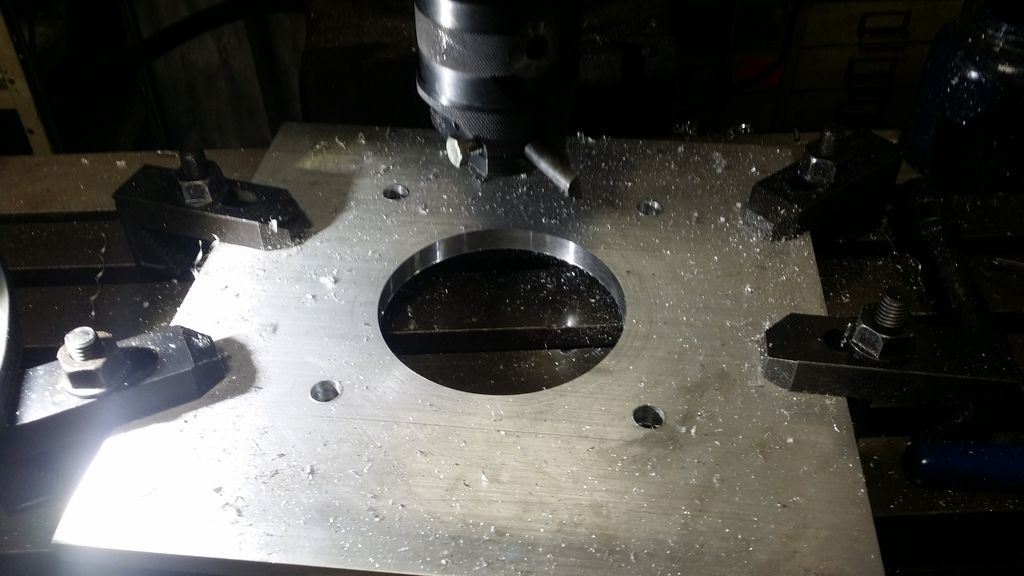
Started by clamping the alu plate to the bell, transfer punching the holes, then drilling those out.
Indicated the center of the bell housing, then left the plate and bored out the plate to fit over the gm bearing cover.
20161103_162751_zps6nyyemqq.jpg


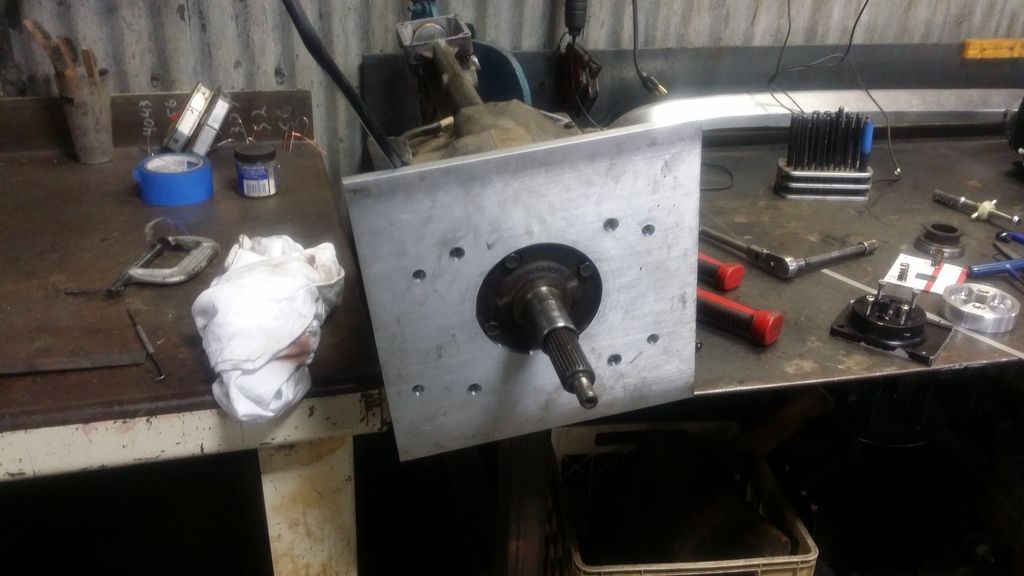
Transfer punched the t5 to the plate and drilled those holes.
20161103_171708_zpsbocjh0rn.jpg


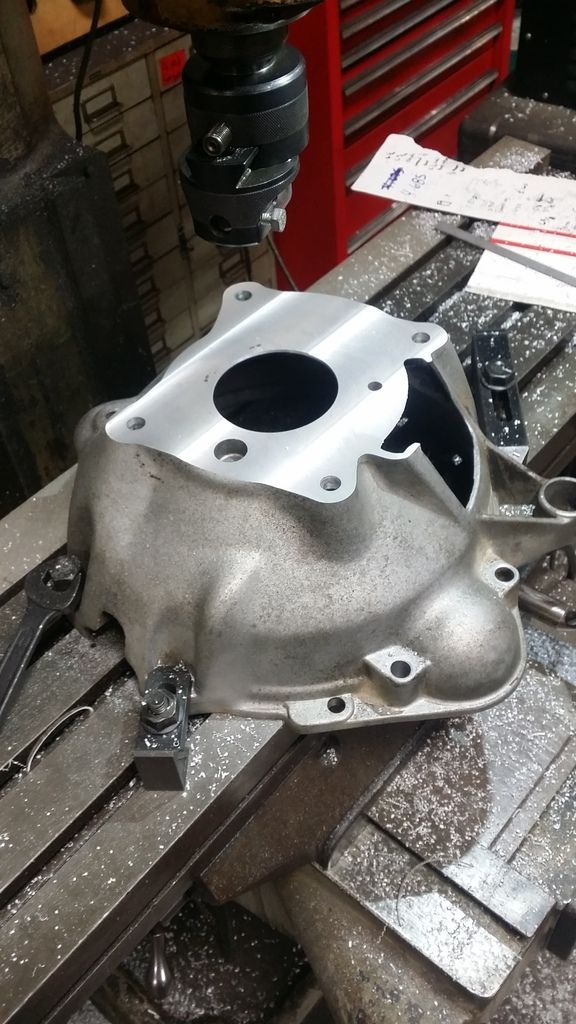
Clamped up the bell on the mill and took off enough to compensate for the plate, then bored out the center to fit over the bearing cover as well.
20161110_140006_zpshakgznjp.jpg


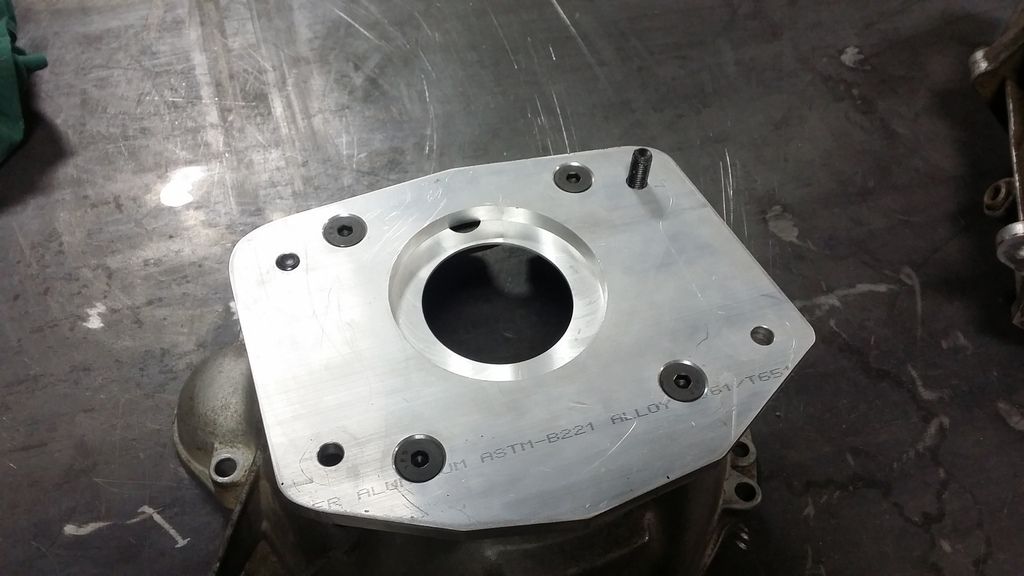
Buzzed er down and countersunk the bellhousing bolts, and bolted it up
20161115_120106_zps2wrjfg4v.jpg


20161115_120801_zps2cnwq65e.jpg


Still need to adapt a drive shaft and cross member, but its getting there.
 
You can use a LH NA harness out of a 240 it's about 100X easier, but there is no splicing wires. Less chances of making a mistake. The harness is a bolt in application takes 30 mins to install.
 
Wiring has been done for years, lol.

It worked out just fine ��

But that's a nice note to add
 
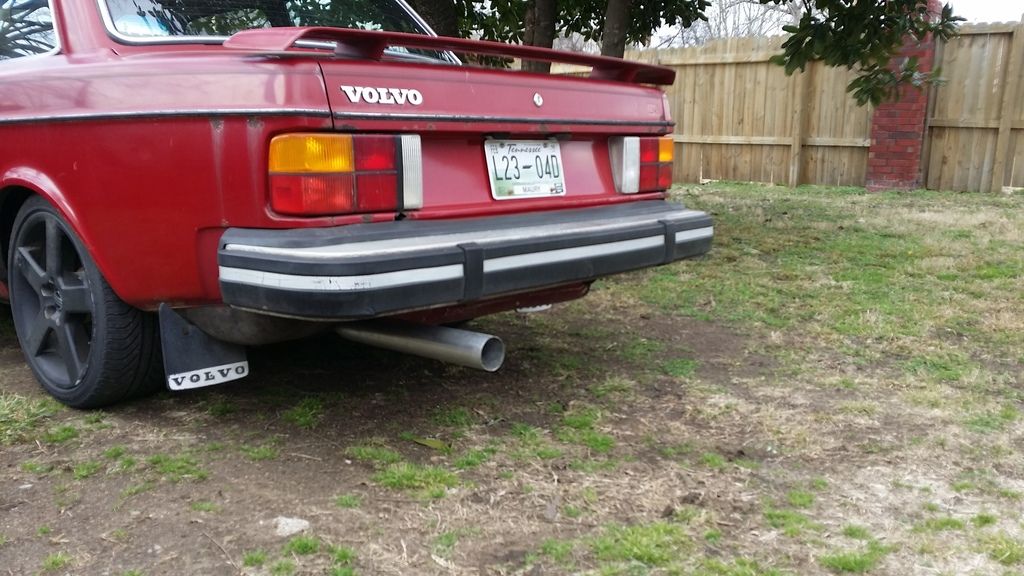
Also, installed that 3 in mandrel bend, turbo back.
So much better rolling around my neighborhood with a muffler:)

20160220_105921_zpsmozztiwd.jpg


20160220_133617_zps3ushg4fb.jpg
 
Back
Top