• Hello Guest, welcome to the initial stages of our new platform!
    You can find some additional information about where we are in the process of migrating the board and setting up our new software here

    Thank you for being a part of our community!

Starting on my 79 262c

Sheet%20metal%20repair%20sections%20016_zpslhitrtnn.jpg
Small up date. No work on the car. But my structure didn't fair well in last nights' rain storm. Note this tent was originally an outdoor gazebo for the backyard, a place to get some shade and no bugs. We used it a few times and then never put it up again. I decided to use it to shelter the coupe from the sun while I worked on it. Anywhere there was a slip joint I used a Tex screw to secure it. The rear center support came loose, the only place that wasn't held by a screw. No biggie, but that allowed the water to puddle on the tarp and the weight caused the left support to bend. I have another failure closer closer to the front of the car. The saving grace is that none of the metal hit the car.:-D The tubing is light weight and narrow. I'll try to slip some 1/2 in conduit over any place that got bent, extended maybe 2 feet on each side of the bend and once again secure the conduit to the thin pipe with TEK screws. This thing needs to stay up a few more weeks.
 
Last edited:
The weekend weather has not been favorable to painting outside. It either rains or is way too hot to get anything done. I did manage to have a few parts painted. also toying with the idea of bring the bolt on parts to my friends' shop and painting them inside. I can't bring my car there because there is no room. Slow and steady. The upper support got the most detail. the headlight buckets, not so much. They are smooth and shiny but a small run here and there that will be hidden by the radiator and condender.


The black tool chest was free!:)
 
Also if any of you have a 79 coupe with the OE door jam labels still on there can you post a pic of how and where this label is applied. I took a close up of the label but did not take a pic of how it was on the car. My 81 coupe does not have this. I think passenger door.
 
Also measurement on that label ^ would be very helpful.
This is taken care of. thank you.
 
Last edited:
One step forward two steps back. There was finally some room at my friends' shop to have the doors painted. Sorry, no pics. But I should have them home tonight. Not sure where I'll put them. If it isn't raining then I'll just mount them. I do have a pic of what the rain storm did last night. All the metal poles that were damaged from the previous storm and sleeved with 3/4 conduit survived. Well that left everything else to fail. :-(:grrr::wtf:
 
Here in NYC it's been raining everyday for about a week now and more rain coming for next 3 days. Today I got lucky and was able to get some work done before the rain. The fenders are back on the car and the passenger door too! Some observations. The back two bolts on the fender, closest to firewall are a PIA. Especially the one behind the hood spring. This would not be a problem if you REMOVE the hood and hinges but I was was working alone. Also helps to have a very flat 10 mm wrench. I was able to wedge the spring away from the fender with a piece of wood, this helped. I'm using a plastic socket insert call NOMAR to reinstall the bolts. Basically a plastic socket that fits over the painted bolt and then you use a larger socket over it to tighten the bolts. Helps protect the painted bolts, maybe. You can only snug the bolt so much before the plastic insert gives up. Directions say good to 99ft lbs. I don't think so. I got them as tight as I could then had to cover the nuts with tape and go at them with 10mm ratchet wrench from Gearwrench. Needless to say there will be some touch ups.
Next was installing the door without any help. I had to build a small platform using scraps of the 2 x 4 and 2 x 6 to get a height of 14 inches to get the bolt holes to line up. I must have picked up that door a dozen times. Did I mention it is heavy? I was able to get the alignment and gap correctly the first time, :). The door will be "in" just a little too much if you don't have the weather seal installed.
Speaking of the weather seal. If you remove it from the door like I did, make sure you put it back BEFORE you install the door. I didn't do that. So I had to crawl under the door pushing the rubber into the channel with a small scraper. I started the install at the upper corner, there are 2 clips that hold it in that area, then worked my way down under the door. Then I went from the top working towards the front of the car. Don't stretch the rubber otherwise it will be too long when they meet. If that happens don't cut it. Go back and slide the rubber in the opposite directions, making it shorter so you don't have to cut it.
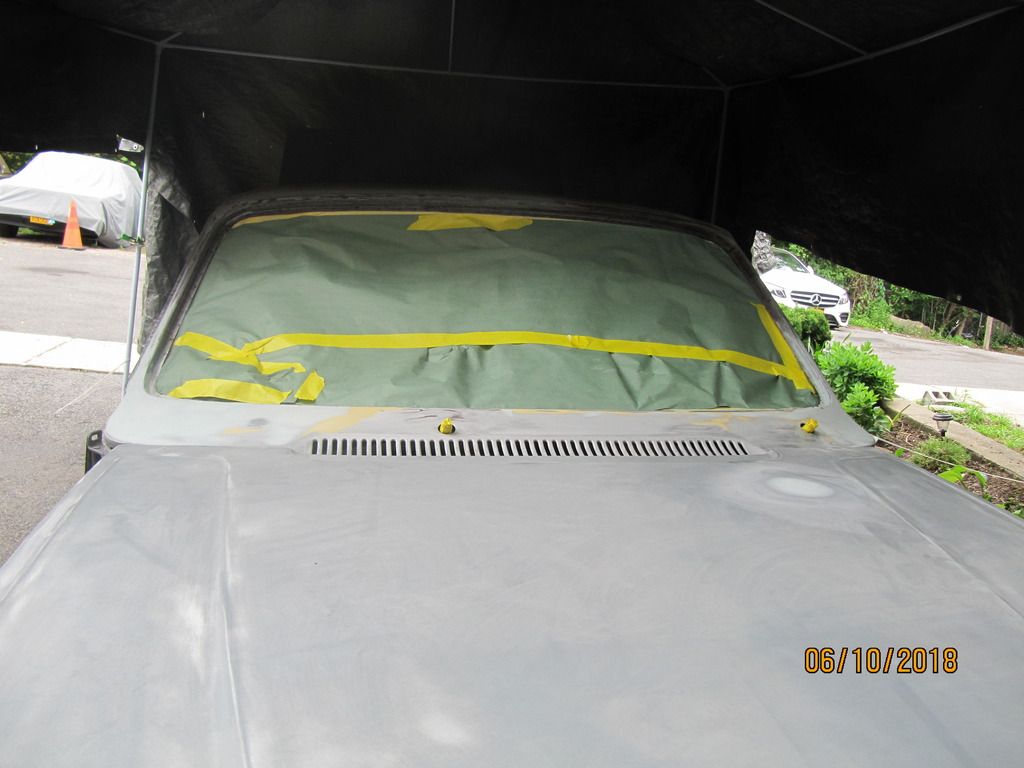
Also put some of your yellow tape on the fender edge and door edge where they meet. Just in case you get some rub on install.
Back to fenders. Before I installed them I put a small piece of cardboard from a shipping box on the edge of the fenders where they meet the cowl. It creates the perfect size gap for that panel area.
The drivers door didn't go back on because there is some bodywork being done to the door sill. I may just reinstall it anyway tomorrow just to get the door off of a work bench that I had made to hold it.
I didn't take any pics but will tomorrow, if it doesn't rain, and post them here. Thanks for following along.
 
Didn't get anything done today, weather not helping. I did clean up the weather stripping for the driver door. Also found some Forever Black that I had laying around. So I applied that to the rubber to see if it would improve the looks. So far looks OK. Not sure if the black permanent. It does get your hands black. :-P
This is how I was able to hold the door up to mount it.


And I was able to score some new labels to replace the ones that were removed. Thank you Mr. D
 
Small progress today. Got the drivers door on. First I reinstalled the weather strip rubber. I thought it would be easier installing the rubber first. I was wrong. As the door lay flat on my work surface I found my self crawling under the door more often. Also with rubber installed it made it more difficult for me to install the door. I used my wood setup to hold the door but still had trouble lining everything up. My wife was home today so I enlisted her help to help me hold the door in right the orientation to get the bolts to thread in finger tight. For some reason the driver side door does not meet the latch side as smoothly as the passenger side. My gaps are even front to back. And the panel is flush with body. My driveway has a very slight right to left slope and then slopes back towards the street to help rain runoff away from the house. I don't think this is the issue. But when I go to close the door it feels as if there is an obstruction. I do not have any of the locking mechanisms installed, driver or passenger. I'm tempted to remove the rubber strip and see if the door closes better. Tomorrow.:)
 
I spent hours (days) getting the doors and rear hatch aligned after paint and I didn't even take the doors and fenders off. I did remove the rear hatch. Alignment was never a noticeable issue until I spent about a thousand hours trying to do this in fine detail. Every logical adjustment made things worst.

I am sure the factory has a precise jig for door alignment but at home alignment with the wife is really difficult and very stressful. But my long time assistant, Bat Girl, is always there to help (at some social and financial cost). She never would get in a trunk to help align one of those.
 
Not sure why this door is giving trouble. The radiator is out of the car for painting so can't start it. I may just slap in on and turn the car around ( more level on the other side, but not by much) and see if it make a difference. The passenger door was easy and I was able to do it alone.:e-shrug:
 
I did lift that side of the car with my jack. I just don't like the way the door is closing. Kinda hard to describe but is isn't gliding as freely as the passenger side. Will take a closer look with new eyes in the am.
 
While I'm waiting to get the paint job finished on the coupe I figured I start on the interior. I took the seats out of storage and started to clean them up. I applied some Rejuvenator Oil from Leatherique to get them even softer. Gave them two good coats and let them sit in the sun for awhile. Next will be the Pre-clean product. Not sure if I'll order the dye and redo the seats at this time. The black is very forgiving although they would benefit from recoloring. I'm at the point where I just want the car back together so this dye job may have to wait. Still need to to take a heat gun to a couple areas where I have "dents" in the leather. I tried to take good care to pad the seats so I wouldn't have any impressions on them from storing them. Not too bad, maybe 2 small sections.

you can see the dent here

 
Great place to start!

I treated and treated and treated and treated the V8 Volvo seats and while they got a great deal better they never got back to new. Same with the Bertone. No wear on them but without a Restorer treatment from the back surface they are never going to be the 'glove soft' as they were 35 years ago.

Leatherique's finish is really only a vinyl 'paint' which is different than the original dye that was used when the car was produced.
 
I'm lucky that the leather is still soft. Now it's a little softer. I get that the Leatherique is just a paint. I can see that in tan panels I treated with the stuff. On a spare black seat cover I tried using some shoe dye product. It does get an any scratches black but when it dries the section I treated will look a bit blotchy. Don't really want to spread the product over a large area fearing it may get worse before it gets better. SOOOO , leave good enough alone.
 
I need to get a bunch of old butyl off of the stainless windshield trim. Any suggestions on something that will "melt" the stuff away without harming the metal?
 
Good day bad today. The good was the car started fine and drove well. First time actually driving in 2 years. Got my inspection sticker too so all legit for another year. Only added 40 miles in 2 years since last inspection ( 2017 ) didn't get one for 2018. Went to my friends' garage to hang for bit and one of the mechanics had decorated his tool chest with pics of Bertones from a 2017 VCOA magazine. Nice surprise. Then I show up with the real thing. Everyone had a laugh. The car turns many heads and gets lots of attention from other drivers. On the way to the inspection station I had to stay behind a few police cars as the car doesn't have seat belts or front turn signals. And the doors are held closed with bungee cords.:) Got home and decided to start to put some interior parts on. I just got the trim piece that fits between the dash and windshield from Tasca Volvo. Took a few weeks to get from Sweden. Thank you Hiperfauto for the part numbers. Before I can install the dash I need to install the A pillars.
Now the bad. I turned my garage upside down and still can't find the 2 A pillars. I need to recover them due to a previous botch job removing a windshield. Whomever did the job wound up cutting the leather on the pillars. I have some leather to recover them but can't find them anywhere. I did find another perfect tan dash for one of my other coupes. I thought I only had one, now 2, on for each car, yea! I'll be going through all the boxes and stuff again tomorrow, bummer.
Also when I removed the vinyl top I was careful to remove it in one piece so as to have a template. Upon further inspection I find just 2 small sections that I think can be mended. When the time comes I'll ask the shop if it can be saved. So just for giggles I placed the top on the car and the 95 + heat today got the folds out . Looking forward to getting this thing done. Where the f*ck are the a pillar trim?
 
Back
Top