
the poi
Has been
- Joined
- Jan 5, 2003
- Location
- Pasadena, CA
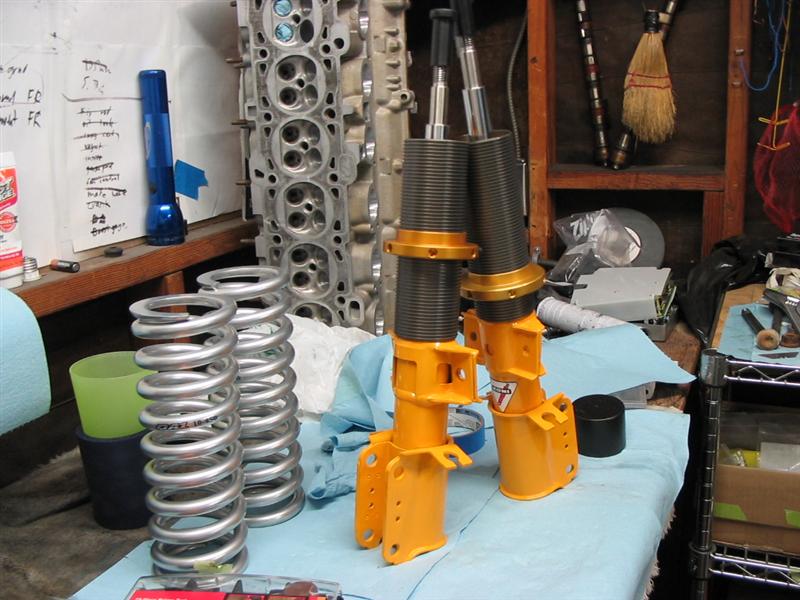
Alrighty, the following is a very delicate operation, and should be done in a cleanroom, if at all possible. First, obtain some brand-spankin new Koni Sport shocks for an 850. Also, two 2.04" coilover sleeves from Coleman racing, and some springs. I'm starting out with 10" 450 pounders. Now, the delicate operation begins:

OH GOD WHYYYYY?! YOU'RE A MONSTER!!
THE HUMANITY
NOOOOO!
DEAR GOD
DON'T DO IT. OH GOD DON'T DO IT.
WHY ARE YOU DOING THESE THINGS?
Ohhhhh. Pretty!
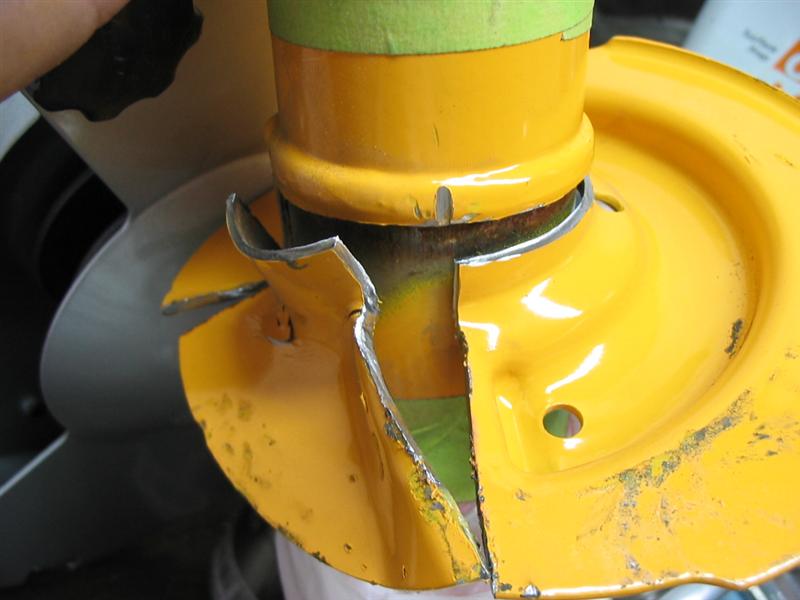
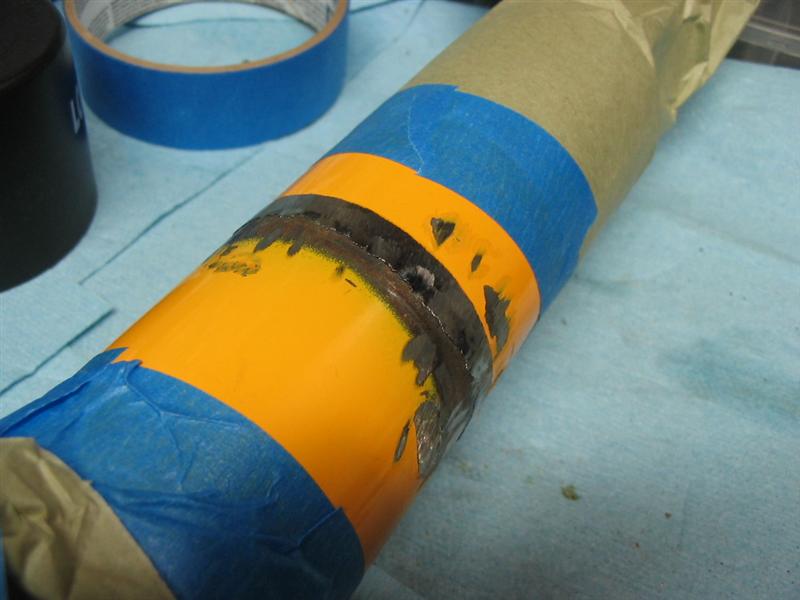
For the initial cut, I used a Dremel, with a thin cut off wheel, and cut most of the way through the lower perch immediately under the weld. Cutting in through the perch as shown to get started. Shoving a chisel in between the angle-grinder cut and hammering down will eventually get a crack going. Once the crack has started around the circumference (where you weakened the metal with the dremel), hammer down (in line with the strut) on the perch, and propagate to crack around the strut.
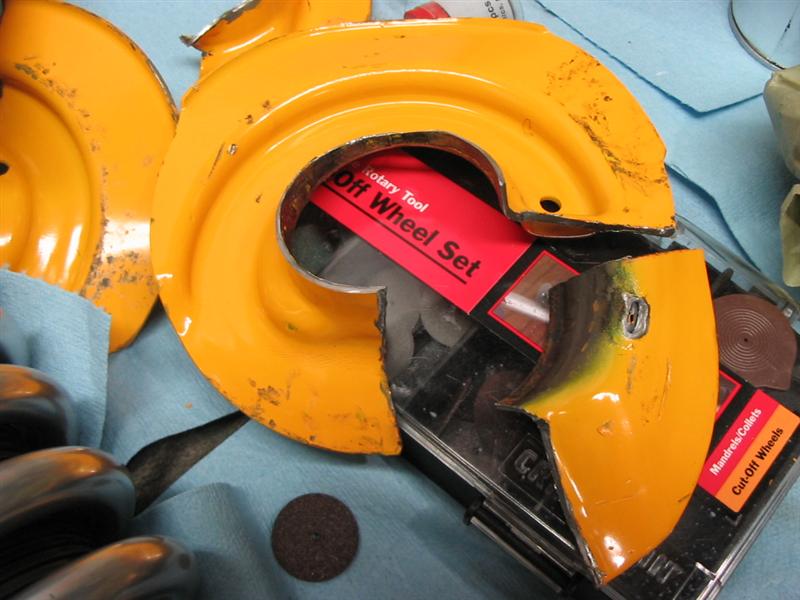
There are two annoying welds under the strut perch. You can see how I dealt with them above--cut a pie shaped section out to disconnect the two parts--you can "wiggle" the smaller piece up and down until you break the welded. Repeat for the larger section. Then, remove the remaining 75% strut perch.
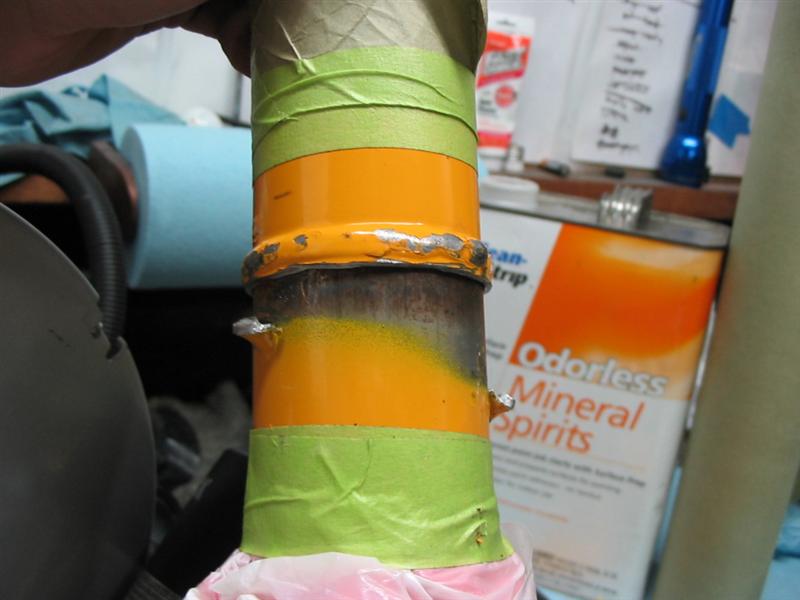
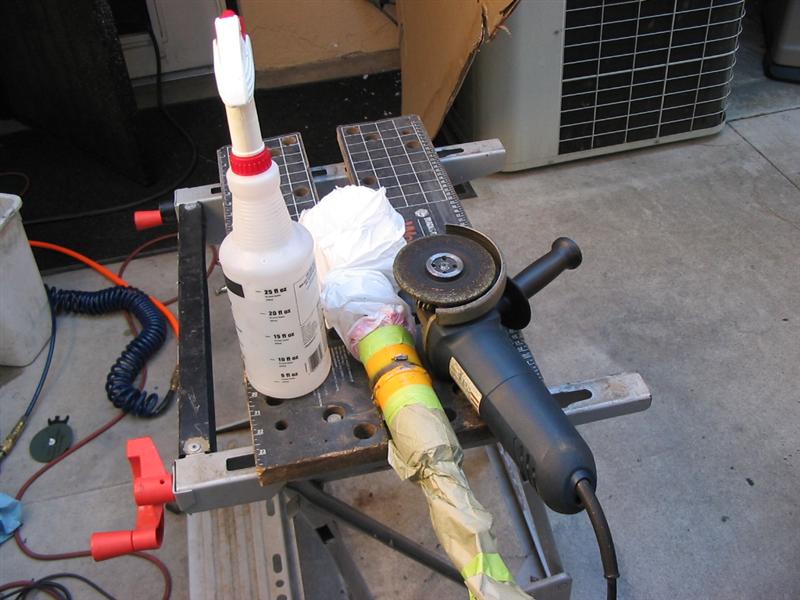
Get out the grinder, and grind down the remaining weld--I went really slow and quenched it with water, so it never got to a too-hot-to-touch temperature. May not even be that necessary, but better to be on the safe side. At least with Konis and coleman sleeves, the welded doesn't have to be flush with the body, just close to flush, so you don't have to get into the body much (although that didn't stop me from knicking it a couple times )
)
I gooed up the top (3m window weld!) to keep it from rattling and keep rainwater from getting in there (also painted the ground section, of course)
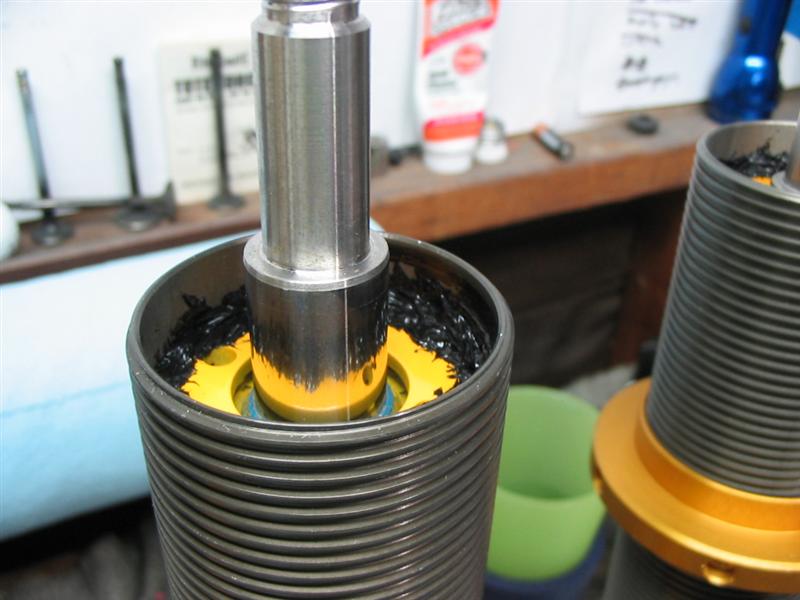
Spring stuff! Hog out the upper perch like so:
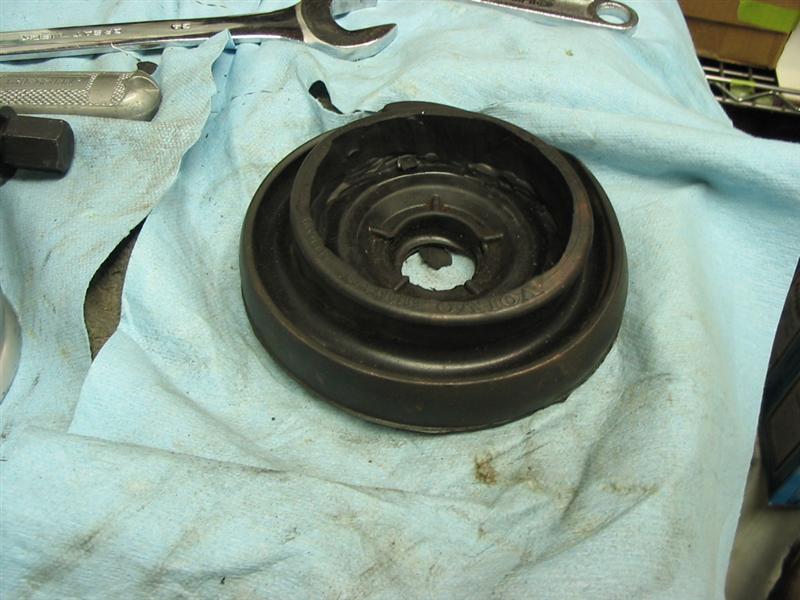
The spring will pop right into the recess, and rest directly under the bearing (rad!)
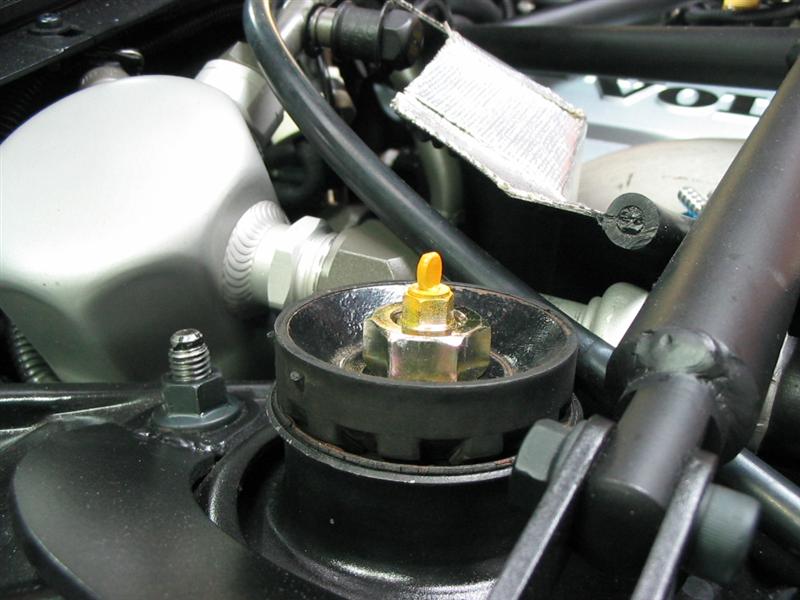
My camera ate the next few pictures, but basically, I used a spacer at the top about an inch and a half, as the 850 struts are a bit shorter than 960 struts. The spacer keeps the thread from sticking through the hood. (mines actually a little too long, as I couldn't fit the lockwasher in. I'll fix that...)
Anyway, here's what it looks liek from the bottom:
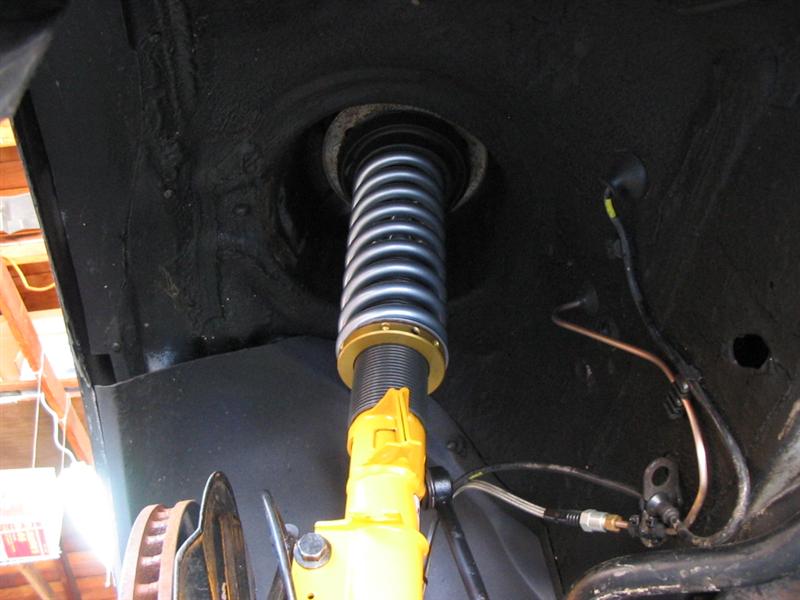

hawt!
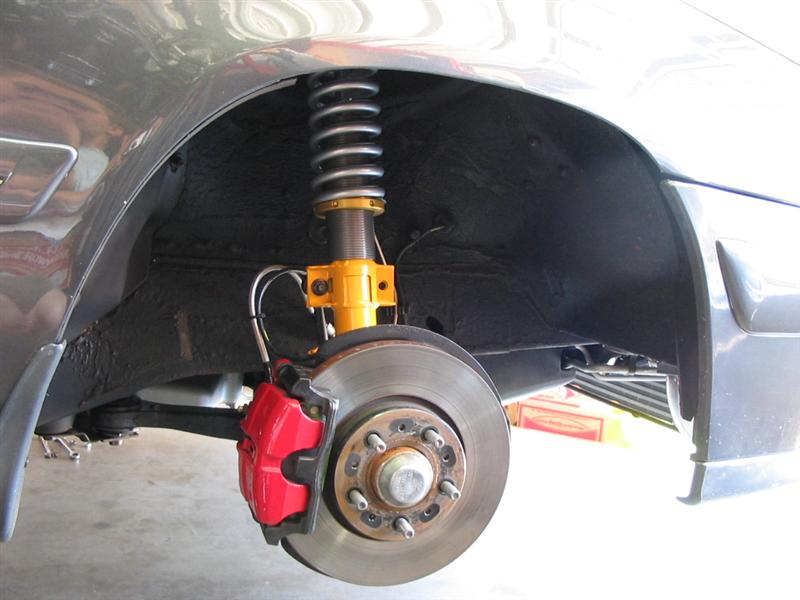
It's practically adjustable!
So ya, the lower spring perch is currently at it's lowest position-any lower and the tire would contact it. There's about 3/16" of clearance between the threaded collar and the wheel rim (on ronal 18x8 RTs). If it needs to be lower, I'll space it out, but it'll probably be fine. Got to get it on the ground before I can figure that all out.
The only bitch is the swaybar endlinks. I modified my stockers, because this nerd I know insisted if I built new endlinks with 8$ heim joints they'd start clunking in a couple hundred miles. Here's what I did:
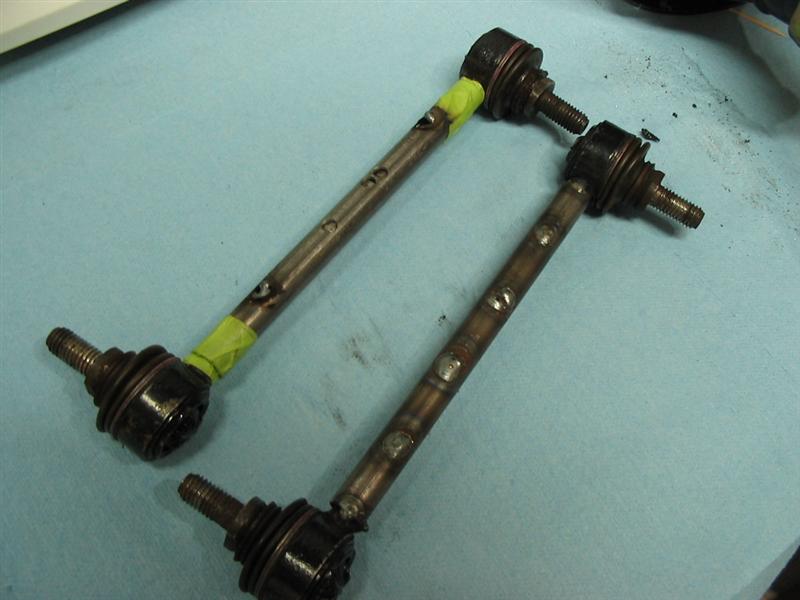
The two pieces are welded together through the large "window", and the outer cylinder provides a little more strength. I tested these by jacking up the front of the car from one side, so they appear to work right")
edit:// hee, my binder clip is showing!
Have to put the back end of my car back on before I can go test it... I'll let you know if I've built a deathtrap.
FAQ:
Q: It's really that easy?
A: Yes.
Q: Seriously?
A: Ya I know, right?
OH GOD WHYYYYY?! YOU'RE A MONSTER!!
THE HUMANITY
NOOOOO!
DEAR GOD
DON'T DO IT. OH GOD DON'T DO IT.
WHY ARE YOU DOING THESE THINGS?
Ohhhhh. Pretty!
For the initial cut, I used a Dremel, with a thin cut off wheel, and cut most of the way through the lower perch immediately under the weld. Cutting in through the perch as shown to get started. Shoving a chisel in between the angle-grinder cut and hammering down will eventually get a crack going. Once the crack has started around the circumference (where you weakened the metal with the dremel), hammer down (in line with the strut) on the perch, and propagate to crack around the strut.
There are two annoying welds under the strut perch. You can see how I dealt with them above--cut a pie shaped section out to disconnect the two parts--you can "wiggle" the smaller piece up and down until you break the welded. Repeat for the larger section. Then, remove the remaining 75% strut perch.
Get out the grinder, and grind down the remaining weld--I went really slow and quenched it with water, so it never got to a too-hot-to-touch temperature. May not even be that necessary, but better to be on the safe side. At least with Konis and coleman sleeves, the welded doesn't have to be flush with the body, just close to flush, so you don't have to get into the body much (although that didn't stop me from knicking it a couple times
I gooed up the top (3m window weld!) to keep it from rattling and keep rainwater from getting in there (also painted the ground section, of course)
Spring stuff! Hog out the upper perch like so:
The spring will pop right into the recess, and rest directly under the bearing (rad!)
My camera ate the next few pictures, but basically, I used a spacer at the top about an inch and a half, as the 850 struts are a bit shorter than 960 struts. The spacer keeps the thread from sticking through the hood. (mines actually a little too long, as I couldn't fit the lockwasher in. I'll fix that...)
Anyway, here's what it looks liek from the bottom:
hawt!
It's practically adjustable!
So ya, the lower spring perch is currently at it's lowest position-any lower and the tire would contact it. There's about 3/16" of clearance between the threaded collar and the wheel rim (on ronal 18x8 RTs). If it needs to be lower, I'll space it out, but it'll probably be fine. Got to get it on the ground before I can figure that all out.
The only bitch is the swaybar endlinks. I modified my stockers, because this nerd I know insisted if I built new endlinks with 8$ heim joints they'd start clunking in a couple hundred miles. Here's what I did:
The two pieces are welded together through the large "window", and the outer cylinder provides a little more strength. I tested these by jacking up the front of the car from one side, so they appear to work right
edit:// hee, my binder clip is showing!
Have to put the back end of my car back on before I can go test it... I'll let you know if I've built a deathtrap.
FAQ:
Q: It's really that easy?
A: Yes.
Q: Seriously?
A: Ya I know, right?


