• Hello Guest, welcome to the initial stages of our new platform!
    You can find some additional information about where we are in the process of migrating the board and setting up our new software here

    Thank you for being a part of our community!

Canyoneagle's 1979 245

Nothing exciting to report. 29 degree temps kept my work on the car to a minimum.
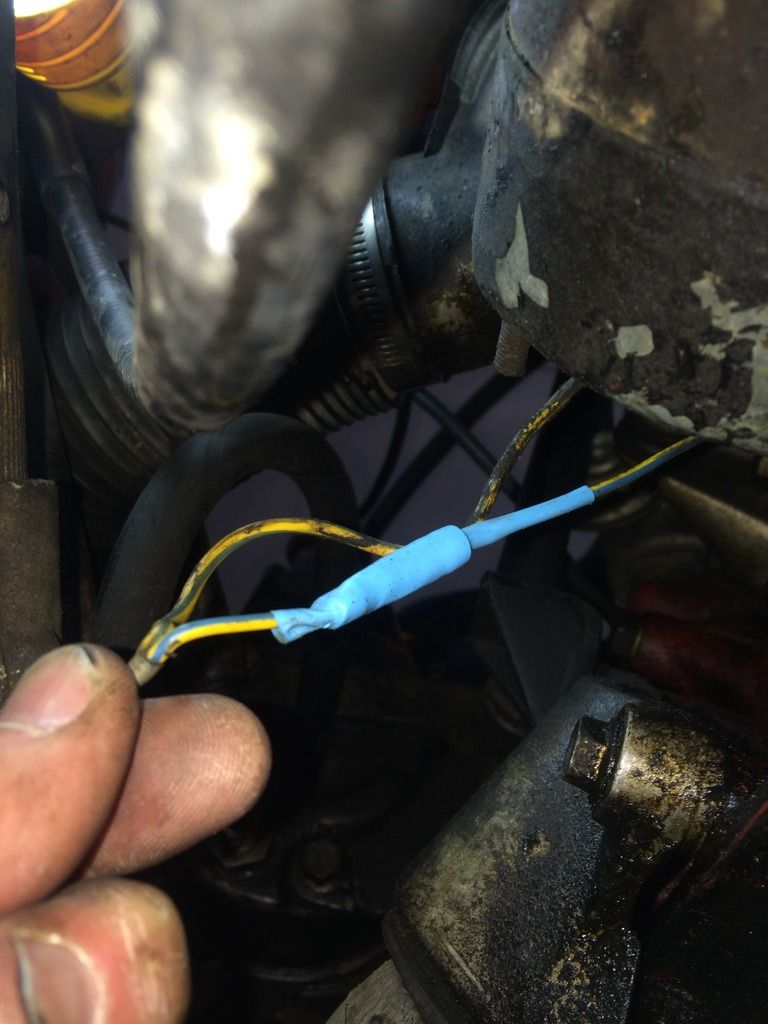
Fixed the wire near the starter - it was a b%$#tch to get in there to strip/splice the wires, but I got it done.

I also replaced several vacuum lines while I was at it today.

Turned the car over, still no sign of fuel. Too chilly to chase it down today.

 
Neat project! ;-)

I was a bit unmotivated at painting the valve cover on mine, but heck, that one looks awesome, I HAVE to do mine also, of course in brown. :-P

Onto the no-fuel issue, have you tried to move the "flapper" several times up and down 'till you hear ALL the injectors buzzing? (while the pumps are working)
On my brother's '86 Audi Coupe we always had to move it when it stood for a few months, it just wouldn't start without it. But once it started after this it worked good.
 
Ahh the start of k-jet problems. Yep, way too cold to get any work done without a heated garage, should be back to the 50s/60s this week so we can all get some work done.
 
Ahh the start of k-jet problems. Yep, way too cold to get any work done without a heated garage, should be back to the 50s/60s this week so we can all get some work done.

;-)
Yup, I'm sure it will be a long love-hate relationship.
I'm watching your carb project with keen interest...... :cool:
 
Took advantage of some nice weather to do some prep for this weekend's fuel system-o-rama (replacing both fuel pumps and the filter, plus at least one line)

The tank pump/level assembly area looked cleaner than I had expected (after having seen some really nasty images and videos).

I removed the supply line all the way to the main pump and plan to replace it (assuming I can find the right size).
I separated the return line at the over-axle union to avoid dealing with the barbed fitting at the tank. I will look into replacing this one, too. I'll be exploring possible options for the right type of line. I like the writeups on cleanflametrap.com

 
Last edited:
Last edited:
Dave Barton has a good discussion on the fuel lines here (scroll down 2/3 of the page): http://www.davebarton.com/volvo240mods.html

I bought 12mm ID hose online for the feed and used 5/16" hose for the return, it works but in my opinion 7.5mm would be a more snug fit over the nylon line.
http://www.mk1autohaus.com/Fuel-Hose-by-the-Foot-75mm-ID-x-135mm-OD_p_6941.html
*Edit: I see you separated the return line at the union...might have to get creative in your case.

Good stuff.
On the return line, I'll initially just keep it attached to the sender/pump holder unit, and will retain it if it looks good. I think if I need to replace it, I'll cut the old line to retain the inner line over the barbed fitting(s) and put new line (7.5mm if I can find it) with clamps.

If time allows this weekend, I'd also like to do the headlight relay mod in preparation for installing the new H4's.

I've seen some cases where people cap off the vent line. Is this generally recommended? I can see the possible benefit of doing this (avoiding an open line into the tank) but am not sure if this will create tank pressure issues.
 
Last edited:
I've seen some cases where people cap off the vent line. Is this generally recommended? I can see the possible benefit of doing this (avoiding an open line into the tank) but am not sure if this will create tank pressure issues.
For a while I had a stuck rollover valve (connected to the vent line) in my car and every time I would get gas the tank would "excessively vent" when I opened the gas cap. I wouldn't recommend plugging the vent line for that reason.
 
More fuel system progress today.
In-tank pump upgrade kit is still on backorder at IPD due to the filter sock. Ugh. not likely to have it for the weekend. Good thing I haven't pulled the bung yet.

This evening I got the old filter out and removed the main pump/accumulator assembly. They are both pretty crispy.

New pump arrives tomorrow.
I plan to look into how to test the accumulator. I'm inclined to just replace it, but my budget is already long since gone for this initial work :-P
When I removed the filter (prior to the accumulator/pump) there was no spurt of pressurized fuel..... none. just a little drip. Same at the accumulator end - no sign of any held pressure in the system. So, I'm guessing it is a goner.


Last edited:
IIRC the accumulator only holds fuel pressure for a few hrs...I'd just keep the one you have for now. When you test your fuel pressure you will be able to see if there's a lot of fluctuation in the line pressure which would indicate the accumulator is not damping the pulses as it should.
 
IIRC the accumulator only holds fuel pressure for a few hrs...I'd just keep the one you have for now. When you test your fuel pressure you will be able to see if there's a lot of fluctuation in the line pressure which would indicate the accumulator is not damping the pulses as it should.

Good to know. I'm a total newbie to K-Jet, so I appreciate the info.
 
If you haven't found them already, there is a wealth of information on K-Jet here (specifically the "CI Fuel Injection Construction" manuals): http://www.k-jet.org/documents/greenbooks/200-series/?browse=Section+2+-+Engine

I have been looking at the K-Jet site quite a bit in the past few weeks, and have printed out numerous green books. Excellent resource there. I've also come across a great video from the early 80's that introduces the K-Jet system components and functions. Poor quality video, but really informative introduction. https://www.youtube.com/watch?v=a4fJAfXYxWk
 
This is the fuel pump that will arrive today. Looks like I will need to re-do the wiring due to the fact that the original pump is no longer made, and the new pump has a different configuration for the electrical connections.

It isn't apparent (to me) in the picture, but this pump does not appear to have a check valve, unless it is the fitting between the electrical posts. Should a check valve be installed on the pump outlet prior to the accumulator, or perhaps on the accumulator outlet?

EDIT - looking at the green books, the only mention of a check valve that I see is for the fuel tank pump. For some reason I had it in my head that there was a check valve in the main pump assembly.

 
Last edited:
So..... new fuel pump is in da house....
I've had the IPD in-tank upgrade kit on order (the fuel strainer sock is backordered) for 2 weeks now, but I have found a kit locally and will cancel the IPD order.

So, I will be able to get the fuel system back together tomorrow and hopefully fire the old girl up.
-fingers crossed-
 
Productive day today. Got both new fuel pumps and the new filter in without too much fanfare - had to cut some length from the tank hard line, re-wire the main pump, and modify the main pump/accumulator bracket, but I got everything back in and working.

Still no start.

Light was fading so I got a brief start on troubleshooting. I cleaned the aux air valve, verified that the cold start injector was spraying, and replaced some vacuum and other hoses in the intake area.

Battery is trickle charging and I'll get a fresh start with the K-jet manuals in hand tomorrow.


Have you tried to move the K-Jet flapper 'till you hear the injectors working as I suggested before?
 
Back
Top