
-
Hello Guest, welcome to the initial stages of our new platform!
You can find some additional information about where we are in the process of migrating the board and setting up our new software hereThank you for being a part of our community!
You are using an out of date browser. It may not display this or other websites correctly.
You should upgrade or use an alternative browser.
You should upgrade or use an alternative browser.
Kyle242GT's 1959 5.044
- Thread starter kyle242gt
- Start date
cwdodson88
Well-known member
- Joined
- Oct 27, 2011
- Location
- The Dalles, Oregon
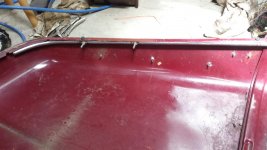
spray them in a different color of primer, then block them out with a 12-18" block, it'll show you all your lows and highs, then hammer away, then do it again until all your stuff is one color after a round of blocking. When your happy with your hammering, I feel that its easiest to "skim" the entire panel with filler, just a thin layer, then another round or two of blocking.
Looks really good from here though!
Looks really good from here though!
kyle242gt
Still has a Volvo
- Joined
- Sep 16, 2003
- Location
- Santa Rosa, CA
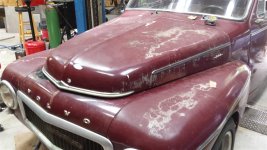
Put the fenders on, took it for a few short drives. Almost a civilized vehicle if I keep my foot out of it.
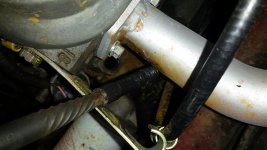
Found it leaking water... lo and behold, broken head bolt. Amazement of amazements, the easy out worked! Thank god, did not want to pull the top end apart.
Idle hangs a lot, I think it's the TPS, since thumping it makes the idle drop back down. Going to see about getting the hood on next.
Found it leaking water... lo and behold, broken head bolt. Amazement of amazements, the easy out worked! Thank god, did not want to pull the top end apart.
Idle hangs a lot, I think it's the TPS, since thumping it makes the idle drop back down. Going to see about getting the hood on next.
Attachments

NO_SPRK
ihazkoolaid
- Joined
- Feb 8, 2012
- Location
- Santa Rosa, Ca
baby got back! nice! ")
kyle242gt
Still has a Volvo
- Joined
- Sep 16, 2003
- Location
- Santa Rosa, CA
kyle242gt
Still has a Volvo
- Joined
- Sep 16, 2003
- Location
- Santa Rosa, CA
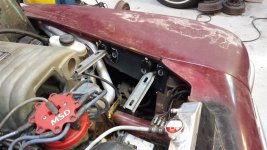
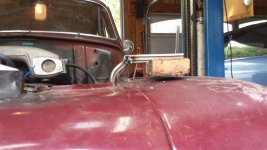
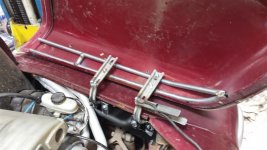
Have been pondering the hood for a long time. Original thought was the Mustang hinges through the firewall, but that was complicated by the shape of the sheetmetal and the presence of various EFI bits on the inside.
Then I thought about making my own hinges, but have learned enough to know my fab work would not be something I wanted to see front and center every time I open the hood.
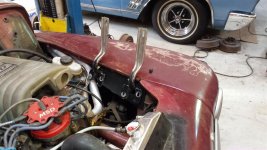
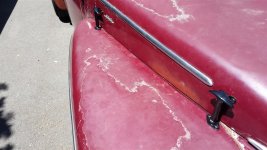
So, back the the Mustang hinges. And I think this is going to work! 1/8" steel plate, bolted to the fender flange (three layers thick at the top) and the inner fender. No springs in the hinges, so no load to speak of.
Have to find some hardware, then modify the arms (need to point up vs to the side) then make an attachment inside the hood.
Then I thought about making my own hinges, but have learned enough to know my fab work would not be something I wanted to see front and center every time I open the hood.
So, back the the Mustang hinges. And I think this is going to work! 1/8" steel plate, bolted to the fender flange (three layers thick at the top) and the inner fender. No springs in the hinges, so no load to speak of.
Have to find some hardware, then modify the arms (need to point up vs to the side) then make an attachment inside the hood.
Attachments
Benjam83
Moar Volvos than Queen B
- Joined
- May 23, 2003
- Location
- Peoria Illinois
YEEEESSSSS, I didn't read the whole post, but before I scrolled down to the pics, I was like, "have it open like a grand piano" (couldn't remember the actual terminology).
Love this build.
Love this build.
- Joined
- Nov 12, 2002
- Location
- Santa Rosa Ca
I can affirm that the PV5.044 runs and drives and is a beast!
Kyle took me for a joy ride yesterday, it put a smile on my face.
Kyle took me for a joy ride yesterday, it put a smile on my face.
kyle242gt
Still has a Volvo
- Joined
- Sep 16, 2003
- Location
- Santa Rosa, CA
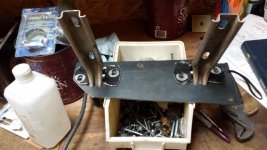
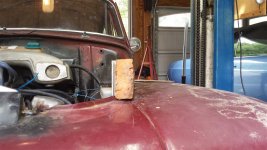
Cut the hinges, angled up 90*, used a 2x4 to be sure they were aligned okay, and wouldn't hit the fender when open.
I then made an inner frame out of my ever-favorite EMT.
Screwed the lower piece of the frame to the hood long enough to see how it fit together - kind of a puzzle doing it with the front end installed, but it's a big enough pain to remove that I just worked around it. The mufflers have to be removed in order to get to the inner fender bolts, and the radiator has to be disconnected. Not really a big deal, but kind of a pain.
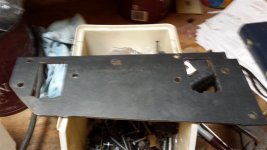
Once I had it eyeballed and tacked, I pulled the frame back out to finish welding (about 3/4 done) before welding it to the hood.
I'm still vaguely planning on some old-school Jeep latches to hold the hood closed, but my bro (a jeep guy) cautioned me that I need a safety latch as well. So I may go to PnP and just get a real double-action latch.
I then made an inner frame out of my ever-favorite EMT.
Screwed the lower piece of the frame to the hood long enough to see how it fit together - kind of a puzzle doing it with the front end installed, but it's a big enough pain to remove that I just worked around it. The mufflers have to be removed in order to get to the inner fender bolts, and the radiator has to be disconnected. Not really a big deal, but kind of a pain.
Once I had it eyeballed and tacked, I pulled the frame back out to finish welding (about 3/4 done) before welding it to the hood.
I'm still vaguely planning on some old-school Jeep latches to hold the hood closed, but my bro (a jeep guy) cautioned me that I need a safety latch as well. So I may go to PnP and just get a real double-action latch.
Attachments
kyle242gt
Still has a Volvo
- Joined
- Sep 16, 2003
- Location
- Santa Rosa, CA
- Joined
- Nov 12, 2002
- Location
- Santa Rosa Ca
nice work buddy
kyle242gt
Still has a Volvo
- Joined
- Sep 16, 2003
- Location
- Santa Rosa, CA
Thanks homie!
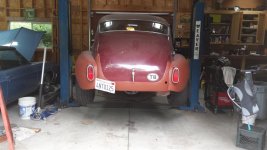
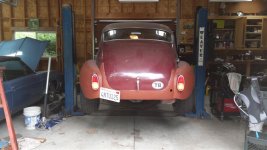
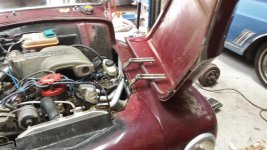
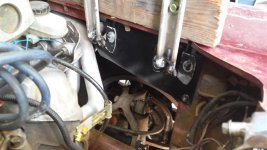
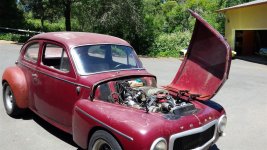
Took it on a ~10mi drive, got up north of 70mph a few times, hood stayed shut, so I think we're good to go.
Clearance when open is very tight, so I'll probably limit the hinges or figure out a way to use some old hood shocks as openers and limiters.
Pretty cool driving it around all in one piece again!!
Attachments


pat244ti
Moderator
- Joined
- Dec 23, 2002
- Location
- Santa Cruz CA
It lives! I remember test driving it for you out in Cool or wherever the hell it was.


NO_SPRK
ihazkoolaid
- Joined
- Feb 8, 2012
- Location
- Santa Rosa, Ca
dat ass 

Coupid
Active member
- Joined
- Sep 24, 2003
- Location
- Santa Barbara, CA
I love this thing. Nice work!
Råda
Volvoretard/Partshoarder
- Joined
- Jan 6, 2010
- Location
- Örebro, Sweden
This thing is mean! Love that side open hood
kyle242gt
Still has a Volvo
- Joined
- Sep 16, 2003
- Location
- Santa Rosa, CA
Thanks gang. Drove it to work today. Funny showing up in shirt and slacks abuzz with adrenaline. Nutso car for sure.
Not sure what I'm going to do next. Might get the lights/blinkers/horn/wipers sorted.... and the steering needs some investigation. I think the steering arms are too long, makes for very very slow on-center steering, and a lot of feed- (aka kick-) back to the wheel. At a pretty decent stopping point for now though.
Not sure what I'm going to do next. Might get the lights/blinkers/horn/wipers sorted.... and the steering needs some investigation. I think the steering arms are too long, makes for very very slow on-center steering, and a lot of feed- (aka kick-) back to the wheel. At a pretty decent stopping point for now though.
NO_SPRK
ihazkoolaid
- Joined
- Feb 8, 2012
- Location
- Santa Rosa, Ca
thats just the car showing it wants to go sideways
I think the steering arms are too long, makes for very very slow on-center steering, and a lot of feed- (aka kick-) back to the wheel. At a pretty decent stopping point for now though.
didenpx
Active member
- Joined
- Feb 26, 2012
- Location
- Live Free or Die
This thread is insane! Major fabrication envy here.