• Hello Guest, welcome to the initial stages of our new platform!
    You can find some additional information about where we are in the process of migrating the board and setting up our new software here

    Thank you for being a part of our community!

24D's 242 "build"...yea...I know it's late

A little more Stage 0 work.
IM and TB bolted back in (both with fresh gaskets) and looking good.
Throttle spool back in place...as well as new dizzy cap and rotor.


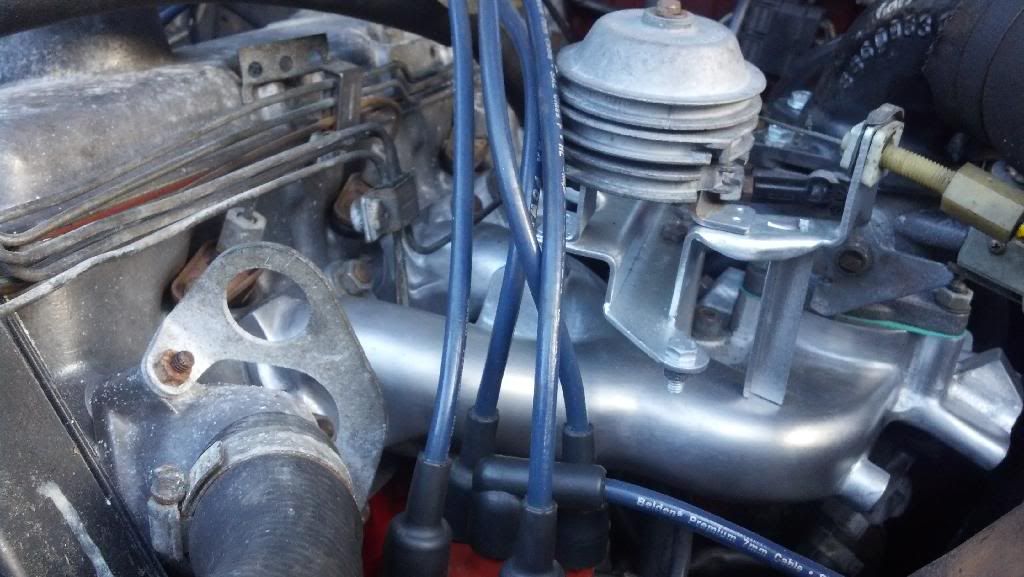
One thing I noticed during disassembly of the IM/TB...was that there was no big o-ring on the inside of the 90? elbow that bolts to the TB...and the TB gasket was all but dust. Yay for contributing to vacuum leaks!

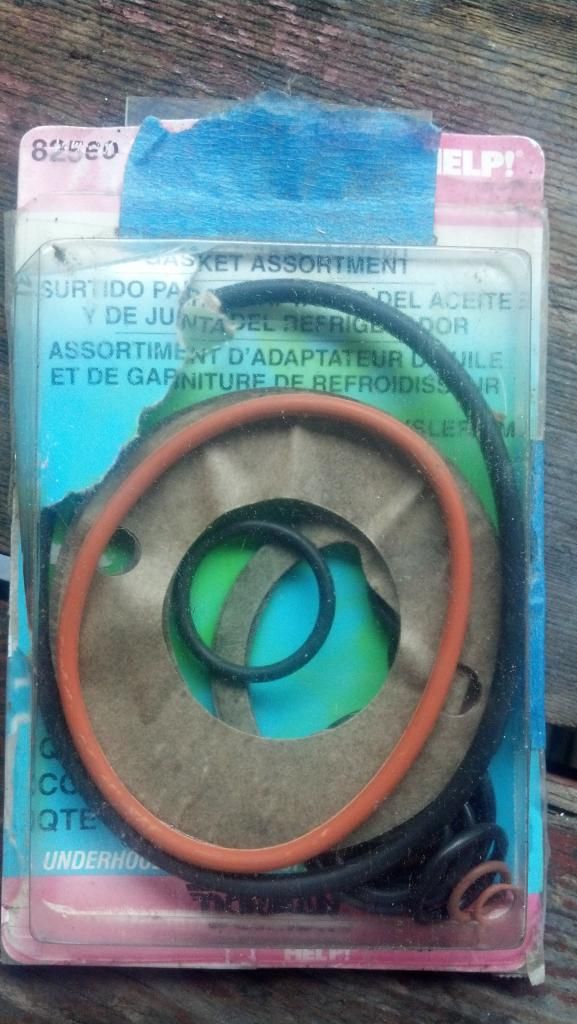
In looking for the 90? elbow o-ring, I came up with nothing (perhaps didn't look hard enough) I took a trip to AZ and found this in the "Help" corner and came home with this blister pack full of o-rings hoping 1 of them might fit. As it turns out...there is only 1 in this pack that fit the elbow and it was a tight fit at that to get the elbow into place with the o-ring inside. Help #82560 Maybe if someone else is in a pinch for an o-ring for the 90?…this can help.


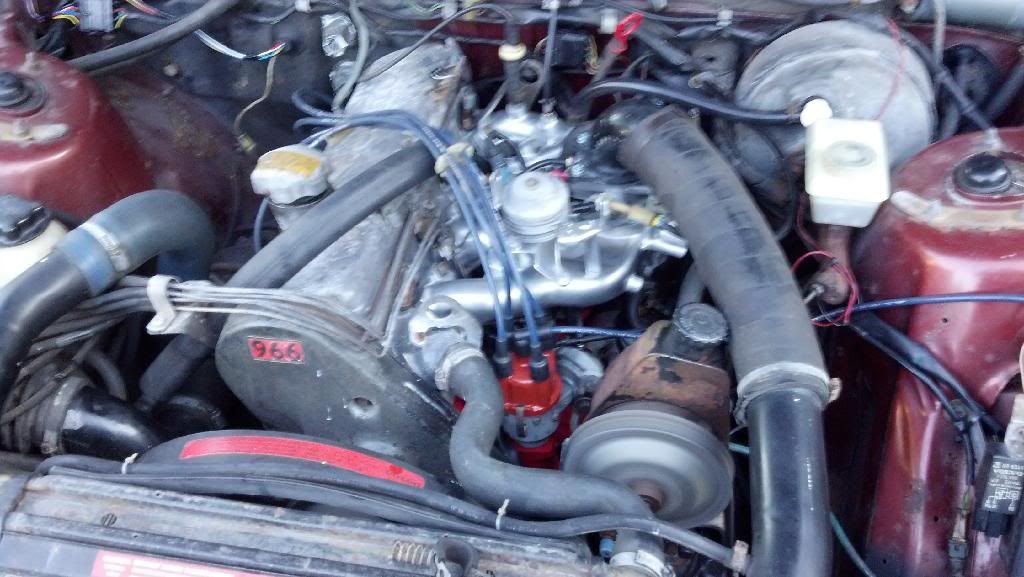
A bit fuzzy...but everything bolted, wired, and plumbed back in. Fresh check valve on the brake booster with silicone hose as well. Started right up on the first shot...a bit high but smooth. Idle screw was adjusted to a more reasonable level.

 
Last edited:
Nice work. Keep that k-jet happy!

You are like an old Volvo's best freind!!!

Thanks! Lol...I'm tryin
I don't have any room in my garage so I have to always work outside (weather permitting of course)...and no large formal workshop with mills and lathes and such. I wish I did. The only "workshop" I have right now is my picnic table outside...but I get **** done...most of the time. Lol

I just try to do 1 thing at a time...or else my ADD will kick in and the whole car will be in pieces with NOTHING done.

http://youtu.be/bBWrMQVsuak
 
Last edited:
2014 work...almost caught up!

Anyone want Swiss Cheese???


I left this rustiness in place to have my battery someplace to sit whilst doing other underhood work. It's time to go so I grabbed my body saw and cut this area out...I'm relocating the battery to the trunk to simplify things under the hood.

Next...those pesky welds on the drivers door...which had more cracks than Tyrone Biggums...

Cracked

Cracked

Cracked

Cracked


Last edited:
Ya, wtf..... more like hibernating!

Ya I know right...lol. Life's been busy with 6 other vehicles to maintain & repair, 3 houses (possibly soon to be 4) to maintain & repair, family, work, etc.

Keep it going! That IM looks great—just a wire wheel on that thing?

Thanks...as you can see in the first couple pics of the IM...I just used a wire brush/wheel and it cleans it up well but it also keeps the casting texture from the factory when it was made. Things sometime snowball...so that turned into me using a sander with 80/120/220 grit to get rid of the texture and make the IM smooth. I then used my die grinder with a carbide burr to take down most of the webbing that was also present in the factory casting. Doing things like a flametrap replacement no longer is as "difficult" or should I say "uncomfortable" as it once was because the IM is no longer rough...and the openings between the runners are now larger. For somebody as hamfisted as myself...this is a small improvement.

If you look at post #13 on the 1st page...in pix 4 & 5 you can see a large bit of the webbing that I removed between runners 2 & 3 towards the firewall side of the IM.
 
Last edited:
I miss this thread. You were really doing that poor car a favor!

I've been trying....progress has been slow...but it's progress nonetheless.

Since my 244 had started smoking on me (see Spy Hunter status smoke screens) I decided to daily my 242. IDK if it was a valve seal or the more likely piston ring on only the #4 cylinder.


So...next step to daily this pig...was to ditch the 90- turbo manifold with leaking head-to-manifold gaskets and replace it with a 90+ unit. I reused the stock Garrett T3 as she seems fine for now.

Teardown and prep for paint...


Light scuff with a Scotch-Brite pad


Then some color...


Taped off areas removed...lookin pretty good!
 
Last edited:
Stainless Steel exhaust studs scavenged from my 244. I made sure to chase the threads with the appropriate tap prior to installation which was an absolute breeze. No need to "double-nut" because the exposed ends accept a hex key.


The venerable 90+ (lightly ported) mounted with fresh gaskets and more SS hardware...covering up all my nice paintwork... lol.


In the pic the stock 82 hard oil feed line is still present. I WAS going to reuse it...but it had slight fitment issues. When exiting from below the turbo manifold...it gets "pinched" between the manifold itself and the coolant line off the back of the water pump. I wasn't pleased with this result so I ordered a couple fittings off the bay and a -10 press-fit oil drain kit from Josh at Yoshifab (pictured on the right)...nice product by the way Josh! Nice solid pieces, great fit, clear instructions, with good packaging and quick shipping!


Cleaned the bunghole...


Fitted the Yoshifab drain fitting...waited for the green goo to cure and fitted my 45? -10 AN barbed fitting to it. This is WAY easier IMO than dicking around with the stock hard line and lower gasket/o-ring and worrying if it's actually seated and sealing properly.


Scavenged the oil feed line off my 244 and fit the banjo fitting to it.


Fitted the oil feed with banjo fitting to the block and routed it away from the toasty bits

 
Last edited:
My mistake...stupid autocorrect. I distinctly remember saying something about this hood to you a while back........you seemed clueless as to what I was talking about...lol.

Probably lack of context on my part.

It's in this semi-defunct website.

http://ursan.com/242gt.html

*THE* first welding I've ever done. If you're still using it, I'm surprised it's held up.

I think I did it in 1996 or 1997.
 
Probably lack of context on my part.

It's in this semi-defunct website.

http://ursan.com/242gt.html

*THE* first welding I've ever done. If you're still using it, I'm surprised it's held up.

I think I did it in 1996 or 1997.

Perhaps...I'm still using it for now. It's held up decently...even after its stint in a damp storage area for an unknown number of years. The paint is pretty scratched and faded...and the area around the welding has been rusting...but I don't care at this point. Function over form. A pretty car isn't worth crap if it never gets completed or can't move under its own power.
 
Last edited:
She SAID she was going to "help"...little did I know it was to keep my mat occupied. I should've known due to her lack of thumbs that she wasn't going to be doing too much helping.


Cleaned up the snail and started to deal with the oil return line


Pretty close! Nothing a short length of hose won't fix


Crappy pic of said drain hose. Fresh oil filter and filter magnet are also present.


Snail mounted and feed line hooked up.
Used new SS hex head bolts to use a P-clip to hold the feed line off of the hot manifold. This is a temporary solution. Also replaced the K-Jet fuel line bracket bolts with SS hex heads as well. Future servicing should be a breeze if necessary.

BTW...I get most, if not all, of my SS hardware from a local company called "The Nutty Company". They have just about ANY hardware style, size, thread you may need. I believe the only hardware they don't carry is studs. Great guys, great prices, and very knowledgeable.

Contact them at www.nutty.com


Onto downpipey stuff


I chose to grind the welds off of the above factory CO bung and weld on an O2 bung in its place. The hole easily accepts an O2 sensor without enlarging the hole.


Factory CO bung versus O2 equivalent nut


Had a friend TIG weld on an O2 bung in its place


DP reinstalled and O2 threaded in. Almost ready to rock...just need fluids.

 
Last edited:
Back
Top