• Hello Guest, welcome to the initial stages of our new platform!
    You can find some additional information about where we are in the process of migrating the board and setting up our new software here

    Thank you for being a part of our community!

"Brick in a box" - (1991) 245 "stealth" project car

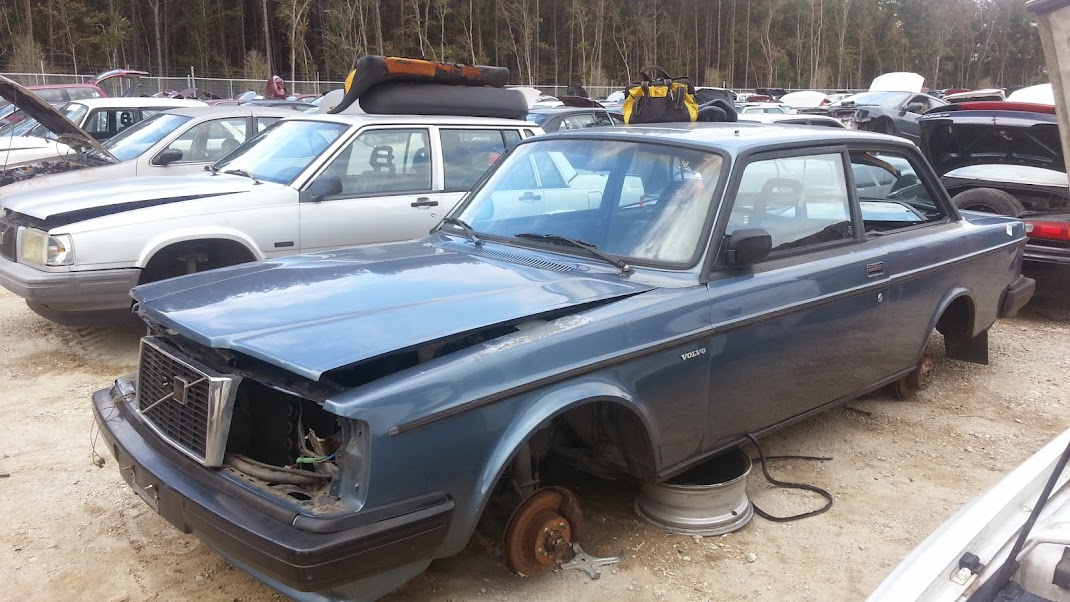
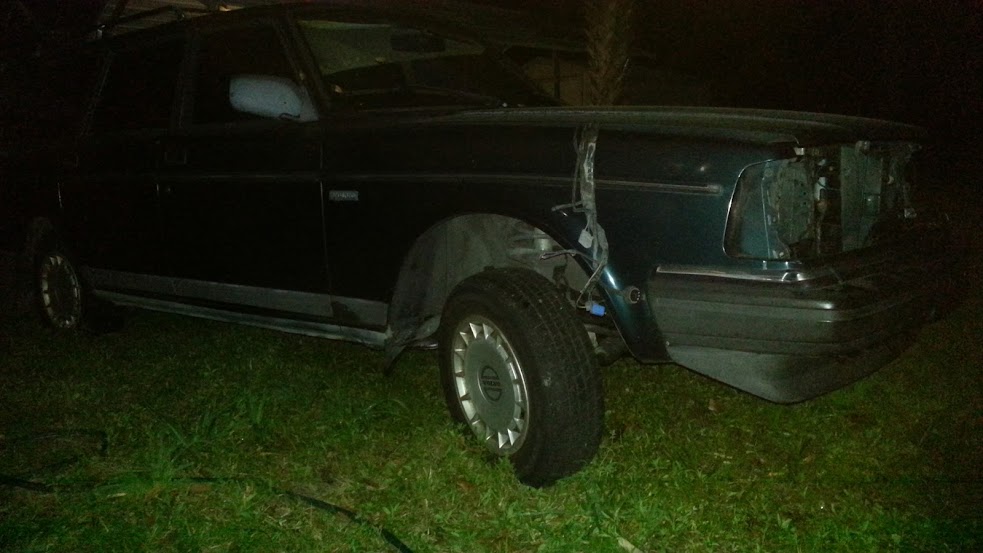
93' 244 hit the yard today, figured I'd check it out. Gold mine! Well, worth the trip at least. In addition to a nice black interior, it had heated power mirrors and a set of red/white tail lights the trunk. Only had 138k on it.
20140201_145815.jpg

20140201_145855.jpg


The old seats were WELL PAST their prime with 250k +, ripped vinyl, broken supports, and non-heated (or so I thought)

20140201_162012.jpg


Come to find out the old ones were heated (although with taxi beads and exposed wires, I'm not sure how effective they would have been) but the center console had no switches and the seats weren't hooked up.So i picked the console to, they guy even forgot charge me for it. Plus, not core charge on the seats, since I swapped them in the parking lot.

Problem solved!
 
Last edited:
Last junkyard snag post before things get fun...promise.

Went to the yard to grab some goodies and found a fresh 91 740 turbo. had lots of usable parts: Lift pump, main pump, power stage, but it also had a nifty license plate frame as well as some free maintenance items in the trunk!
20140302_142516.jpg


Being that my other car is an RX-7 this thing is pretty much perfect, well built too, and best of all......free!
20140302_142709.jpg
 
Now to catch up with the past few days... Yesterday she drove into the "workshop" under her own (non-boosted) power for the last time.
20140306_162410.jpg


Got started with the teardown, not a pretty sight.
20140306_174404.jpg


Had to make an unexpected trip out to the store courtesy of the stupid spot welds (86+ apparently) on the rad core support. These 2 drill bits made life a lot easier
20140307_153230.jpg


Victory!
(certainly would have been easier helping my brother install his RB25 if nissan's came apart like this!)
20140307_160658.jpg


Ran into a snag with the bolts on the cat, so while I was letting the PB Blaster soak in on the drive shaft bolts, I spent a little quality time with the hack saw...
20140309_124858.jpg


While I was down there (it took a while) I noticed two pleasant surprises, 1) Some Gas Adjust shocks in the rear 2) No real rust to speak of
20140309_124910.jpg


And that pretty much wraps up day one. Still need to unplug the ecu/ezk so I can get the harness through the firewall, but other than that I think the engine and trans (for good) are ready to come out.
 
Went to the junk yard, and much to my surprise they had a decent selection (90' 245 --92' 244-- 84 242 turbo -- and a couple turbo 740's)
20131116_133029.jpg

Do you know if that 242 is still in the JY?
I need the body side moldings.
which yard is it, I'm going to be in the area next week and might be able to stop by.

thanks, and nice project!
 
Oh no, long gone, sadly, I wish I had seen it a month later, or got on my volvo game a month sooner. I really didn't know what I was looking at when I found it, and the blistering paint on the fender was the only (visable) defect.
 
So I pulled the ecu/ezk and freed the harness from its remaining encumbrances, and in the process discovered this little note:
20140309_125530.jpg

I never had any problems with it, so I guess the fire didn't hurt the ecu :shrug:

The beast is free
20140309_141349.jpg

20140309_141324.jpg


It's amazing how long the seemingly simple tasks take. Lost probably 30 minutes searching for the right combination of hardware to get this engine mounted to the stand.
20140309_162644.jpg


And what a dirty engine it is...
20140309_162656.jpg


And that pretty much wrapped up the day's productivity
20140309_195710.jpg
 
Man, too bad a about that gorgeous 242, this project is shaping up nicely!

I want that Volvo license frame bracket! Sell it to me!
 
Man, too bad a about that gorgeous 242, this project is shaping up nicely!

I want that Volvo license frame bracket! Sell it to me!

Lol, That frame will be refinished and proudly displayed. I am curious as to where it came from though, its got some weight to it, and appears to perhaps be made of brass.
 
Is there a redblock under that grime? + Die! rust die!

When we last left out intrepid hero...
20140309_195844.jpg


After a vigorous round of scraping (at least 2 lbs of dirt and grime) I hit it with an entire can of degreaser. Up until this point I was doubting that this was even a readblock, :rofl:
20140310_192317.jpg

20140310_192329.jpg


After a round of scrubbing, degreaser, scraping and sanding, some surface rust reared it's ugly head. Fortunately its just the driver side frame rail (I'm guessing a combination of leaking brake master and P/S pump). If this were a "real" build I'd get a wire wheel and take it to bare metal, but "ain't nobody got time for dat". Permatex rust killer seemed like a much better alternative for the more time sensitive nature of this project. Only problem is that it takes 24 hrs to cure before its ready for paint.
20140310_132628.jpg

20140310_132636.jpg

20140310_192653.jpg
 
The under dash area of a 240 is an unmitigated engineering failure!!!

It was such an immense pain in the ass getting the firewall panel out, I can understand why people chose to avoid it when swapping cable clutches. Why on earth would anyone put a nut back here?
20140311_132429.jpg

I mean 1" in any direction (except right obviously) and it's not a problem, but I guess that's the theme for the 240 pedal area. . Like the stupid bolt for that giant bracket (which nothing is attached to) that threads in from the top, where you have zero access. Or perhaps that stupid plastic box around the gas pedal whose only purpose is to make you curse. I contemplated buying a set of bent-neck wrenches, but this was a much cheaper solution...
20140311_143707.jpg

Keep in mind of course that it doesn't just slide on in there, Ohhhh Noooo. I had to "persuade the A/C unit with a pry bar with one hand while I snuck the socket on with the other.

Volvo obviously had some great engineers working on the 240, unfortunately none of them were allowed anywhere near the pedal box area.

After slaying the dragon of short sighted engineering I was finally able to remove the auto panel and take a much needed break.
20140311_155416.jpg


Out with the old and in with the hydro!
20140311_161308.jpg

20140311_171832.jpg
 
Last edited:
Looking good! I have had my dash apart for about 6 months, I am not looking forward to trying to put all that crap back together.

Jeff
I pulled a (miraculously, crack free) dash in the junk yard in about 30 min, wasn't so bad, but anything more than that and it gets ugly fast! Hope you did the heater core while it was all apart :cool:
 
Paint and stuff

Woke up this morning and went to check on the handy work
20140312_121700.jpg

Then, because Florida is Florida...
20140312_123126.jpg

Rain lasted all of 7 minutes and it was back to business
 
Last edited:
So it's a redblock after all...

Big thanks to 240inJax for the use of his pressure washer, don't know how many hours it saved on the cleanup process, but I'm sure its a lot! Sadly, this is AFTER a round a de-greaser and a brush (prior to the arrival of my 1400 psi assistant)
20140312_124742.jpg

20140312_124758.jpg

And after...
20140312_140628.jpg

20140312_140649.jpg


once everything was clean I separated the items that were ready for re-install from those requiring further attention, such as:
20140312_152752.jpg

20140312_154122.jpg

20140312_155343.jpg

Wherever rust is found , rust killer will soon follow!

While all of the accessories, brackets, mounts etc. were drying attention returned to the block. I was never able to read the timing belt sticker until I hit it with some cleaning solution that seemed to react to the ink ( or vice versa)...I think it's a little overdue (odo stopped at 226k...which was prior to my ownership) :roll:
20140312_190549.jpg
 
Engine Break down

So, about that overdue timing belt, I just got my OE volvo belt from IPD, however, apparently Conti Tech belts are pretty tuff
20140313_171018.jpg


I decided to devote today to the engine, first on the the to do list was removing the old, and crusti-fied gasket material. This stuff by 3M is amazing on old decals, and helps remove stubborn gaskets too.
20140313_183348.jpg


Water pump area didn't look so bad considering it's been playing with coolant for the bast 24 years...
20140313_181738.jpg


Got the head off, and this is what I was greeted with. Keep in mind this is the first piston engine I've ever disassembled (rotary guy here). Doesn't look so bad from what I can tell
20140314_150728.jpg


One thing that holds true rotary or piston, is that carbon build up is bad, and helps create the kind of hot spots that turbo engines don't like. So I figured a few hours in a bath of Sea Foam might help loosen the deposits
20140314_151857.jpg


Not sure if its the "recommended combo" but this is what worked for me (aka what I had around). 2 hrs soaking in sea foam + SOS + elbow grease
20140314_162547.jpg

Good enough for gov't work I think
20140314_162623.jpg


Now, time to resurface the deck. After a bit of research this is the procedure I decided on:
20 passes (10 left to right 10 top to bottom) with 220 grit sanding block.
40 passes (20 left to right 20 top to bottom) with 400 grit sanding block.
60 passes (30 left to right 30 top to bottom) with 800 grit sanding block.
WD40 applied liberally*
20140314_171017.jpg

Finished product
20140314_175444.jpg


Now that the hard work is over with, time for the "fun" part
20140314_182156.jpg
 
Last edited:
Red Block !!!

Hopefully I didn't forget to mask any areas that should remain unpainted, lol
20140315_145043.jpg


Then it was time for the not-so-fun task of putting the under dash area back together.
20140315_154715.jpg


I strongly considered leaving out that PITA nut behind the hvac box that helps secure the firewall panel. However, after looking at it for a while, I realized that the nut wasn't really the problem, rather the stupid insulation and the stupid sunken mounting cup used to hold it on. So after a little trimming I have retained the nut and it can be accessed with a regular wrench now.
20140315_165655.jpg


Also, if anyone has some insight as to how a TON of leaves ended up UNDER my carpet and behind the dash, I'm all ears...
20140315_165232.jpg


Eventually I go tired of laying upside down and decided to work on the bay. The manual firewall panel got a fresh coat of paint, but the passenger side (thanks to a degreaser bath I' m guessing) was not looking so hot.
20140315_174259.jpg

I was NOT about to remove it purely for aesthetics, so I decided to see if I could rehab it with some products I had laying around, I think it came out pretty decent
20140315_180923.jpg
 
Turning the corner, limited reassembly

So it's time to drill the block for the oil return, so I can start putting things back together.
20140316_124527.jpg

Unfortunatley at some point the oil pump bolts were overtightened at some point in time. Trimming the oil separator tube helped get a wrench on it, but there wasn't enough space for the box end, and the open end was flexing too much. so eventually I had to resort of slipping on a socket (part way) and hammering an extension on at an angle("massaging" the pump casing in the process) but eventually it broke free.
20140316_132618.jpg


To keep shavings out of the engine a came up with this, which was stuffed well above the drain location and draped down around it.
20140316_134434.jpg

20140316_134741.jpg


Hole drilled, not the prettiest , but I suppose that's what harbor freight drill bits will get you :grrr:
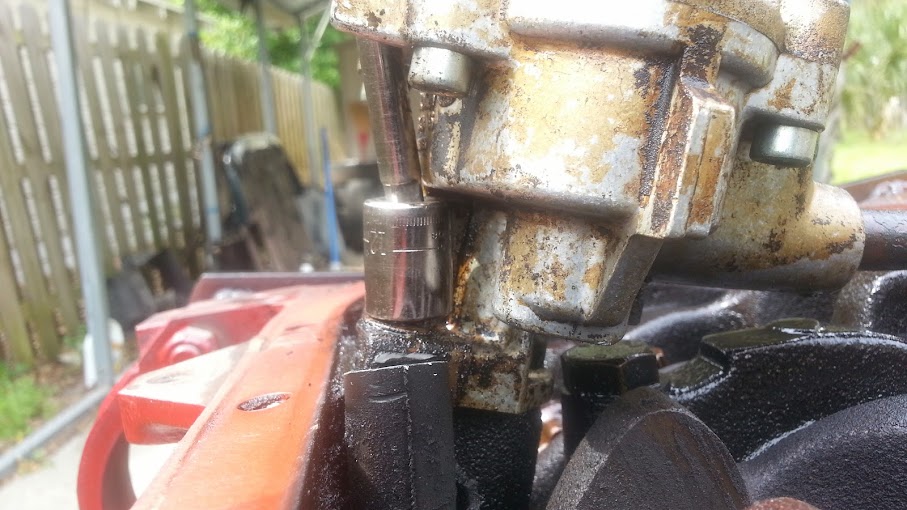
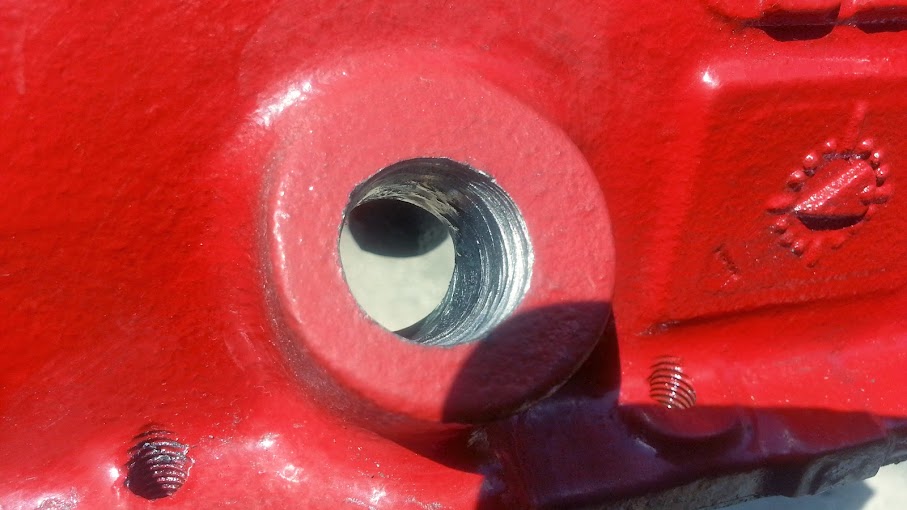
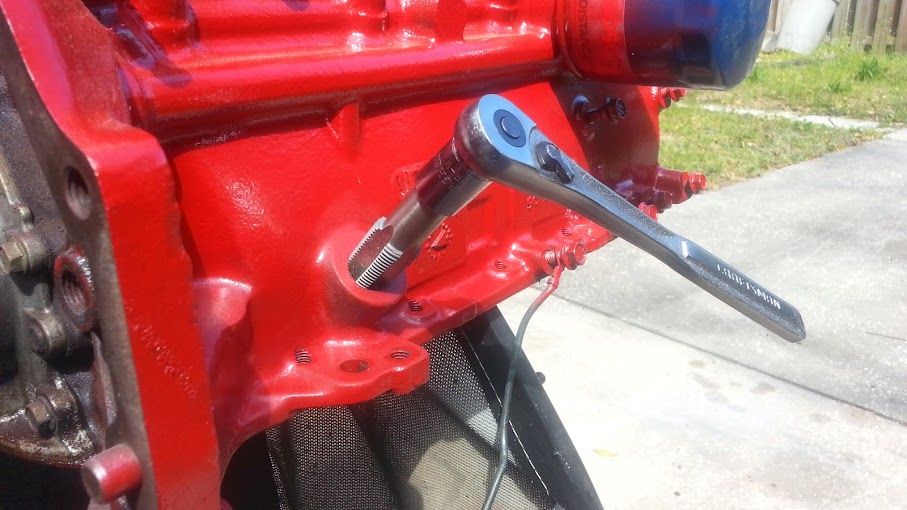
. Then again it was the ONLY place open on a Saturday that carried an 11/16" drill bit (the correct size for a 1/2" NPT tap is apparently 23/32 or some such foolishness that no one will have in stock)
20140316_150136.jpg


There were no "T" handle wrenches for taps this large so a 16mm socket had to make due. This arrangement only worked for about the first 2 threads, then I had to find a breaker bar
20140316_151327.jpg


Done. And shaving free.
20140316_154558.jpg

20140316_155605.jpg


With the pump removed it was an opportune time to swap out the oil pump seals, the old ones were not quite as hard as I would have expected, perhaps there were replaced when the pump was bolted on by the Hulk?
20140316_165330.jpg

Be sure to check the filter screen/cap. Wonder what seal this used to be?
20140316_171150.jpg
 
Back
Top