• Hello Guest, welcome to the initial stages of our new platform!
    You can find some additional information about where we are in the process of migrating the board and setting up our new software here

    Thank you for being a part of our community!

Brown 244 GL

Oh my!! That is SOME restoration!! Good job!! :)

Thanks! :)

Seen your thread&car also, nice work! And those wonderful places in Lithuania! :drool:


Already liked that on fb! :)

Btw don't you think your car needs a chin spoiler soo bad? :-P
V.jpg
 
Ok, so my father got a job, I hope he'll handle it well. It means that the main place in the garage released where he used to work on the cars.
I'm pretty happy about this, it was a joy to uncover the 244 and push it inside to a safe place.
I hope some steadier progress will follow this post. :-D

 
In a few days i removed the whole front-end and the complete wiring harness. Damn, what a pain in the ass!
The whole wiring harness will be reconditioned, and I'll probably add two firewall connectors to sort out this mess and to be able to easily add/remove anything wiring related that goes thru the firewall.

Also considering to buy a spare parts car... (pic removed)
 
Last edited:
Awesome metal skills!

Thanks!

Dude... you don't mess around, do you?? :D

Unfortunately I lost some motivation in the past 2-3 months and did not do anything serious on the car.
But the project ain't stopping, I have to finish the bodywork in the summer, as I have to go to work in September to earn some money to put it back on the road. And also I don't want to mess with its chassis in school time.

At least I worked a lot on my brother's Coupe, we'll only have to weld the corners of the roof panel together, and it'll be ready for the paintjob. What a relief it will be. :nod:
The front end turned out really great and straight taking into account that it had a little fenderbender and parts came from 4-5 different cars.


Replaced a messed up section in the rocker panel:

Repaired the floor:


Some other little patches here and there but I won't bore you. :-P

And onto the volvo, I decided to finish the left side completely and move on to the right side after that.
Cut away the sill, and the bottom of the pillars, and thought that I won't put on that weak 0,75mm klokkerholm sill all alone. Even a full original 240 is weak by nowadays standards. :roll:
So I'll put in a reinforcement 1mm sheet between the inner and the outer sills to make the brownie stronger:

I know it won't make a drastic difference, but I don't want to roll around with a thin and weak structural item. It means a lot in a wreck, and you know that there are too much stupid drivers around everywhere. :-(
 
Last edited:
Wow, 1 month and the sill is still not welded on...

However the left front lifting point thingy was taken apart, sandblasted, welded together and finally welded on:


Susp check, not perfect, but with stock rubber bushings it'll be fine:


And the finished product:


Sill is almost ready to be welded on, with a reinforcement middle sill :-P :

Photo is older, now it is welded together, and will have some bigger holes but right now I don't have a core drill for that.

With doors :cool:

Outer sill was trimmed, looks nice but the gap is not perfect as the lower part of the inner sill wasn't entirely made in right position. And with the floorpans welded on the inner sill, it is too much work to make it perfect. But who cares if even I don't care about this. :lol:
 
Last edited:
Middle sill was welded on :-D


And finally made the decision how to make the cowl drain better. As you may know, 240 has an utterly stupid cowl drain system, which drains the water completely to the sill, and the water leaves the sill through 4 holes per side.
Yeah, it works well until the firewall&sill fills up with leaves and gunk, and until the factory sealing cracks up and no longer seals.
On my car, the firewall is rusted through... And I know that I can do anything there, it wont last too long if rain always makes that place wet. I need to avoid water there as much as possible. Hence this hole here, which will get a 40mm PVC pipe connected to the cowl trough:

And the sight through the 40mm hole.

It will get an elbow, and a 60cm pipe facing down:


This is the most annoying chassis related thing on the 240s in my opinion. Even the beige donor car I bought has rusty firewall there. :grrr:
What makes it ridiculous that the previous chassis workers on that car completely shut those drain holes... :uh:
 
Last edited:
Progress isn't going as fast as planned, but its definitely going forward.
This place came apart to make room for repairs:


At first I made it sure to guide the water out from the top gutter with a welded on tiny piece of metal, and also hammered the joint under it towards the engine. It helps to keep the joint "dry"


And opened up a little the hood holder piece, to let the water actually flow down, not only seep down trough.


Sorted the firewall rust, oh man... Decided that I don't want to dig myself into the car too much, so I won't drill the firewall to pieces. It is easier to just cut away a sheet at a joint, and T seamweld it together. It keeps the water out so it does the job pretty well, and also removes a rust source.


So made this whole place to be screwable with 6mm backplating and M6 screws, only because if any problem occurs in the future (paint, rust, etc) I'll have easy access.


Back rear inside arch was continued, the frame rail needed some replacement metal, as the outer layer of 2mm sheet became a bit wavy because of rust. :wtf:


Ha, 6mm sheet welded in and looking nice. :-D


And the arch, took a while to fab and trim them well to their place. Welding was the easy part. :cool:


Attention to detail, to keep the joint dry from the splashed up water in the wheelarch:


Also I'll make some custom rear mudflap consoles, to match how they look like at the front wheels. They'll be bolted onto those two unused nuts in the frame rail. :-D
 
Last edited:
Thanks guys! I'll definitely finish it. :)

Anyway, big update time:
Sill is finally welded on, but it required a lot of prep work.

At first I had to make sure to lead the water from the cowl to the ground with a 40mm PVC pipe. This required a nice opening from the cabin side:


And had to make it strong enough because the brake pedal console is bolted there:


This looks pretty nice in my opinion, and works well :cool:


Windshield corner was also repaired while I was there:


And the sill, I made 2 little braces to support the outer rocker:


One drain hole was punched into the front of the sill:


And one to the back of it:


The gap is a little big, but I can live with it... :lol: Also planning on doing lower door seals which covers that big gap, and reduces wind noise.


And also welded on the bottom of the B pillar. Fortunately I got pretty good at welding 2-3mm gaps, so this wasn't a problem. :-P

 
Last edited:
Nice to see some progress! :)

Definitely! :-D

Also went to the paint shop, and asked about color code #138. Aaaand they know that exact color and they can mix some for me, so the left side will be painted within a few weeks to be able to cavity wax the hell out of the rocker as soon as possible.

Progress will slow down a bit as school starts, but I have 4 free days a week overall so I ain't going to stop working on it.
 
Last edited:
New year, goals have changed a bit.
The last semester went pretty well, so good I'll get a nice amount of scholarship which can be dumped into the brown to pass MOT.
Also worked on a few cars for buddy's buddies and earned a bit money. I did a V6 Ford Mondeo alternator "swap" and I achieved a new level - calmness when there is sooo little place for my hands to work. I was so proud of myself when I finally turned the key, it worked flawlessly.
Next one was a Nissan Vanette rust job, was quite ****ty but did it in 5 days and those new pieces will surely outlive the van. And by outlive, I mean the owner already did second fenderbender with it today... :lol:
Also helped the company my brother works for with my Inventor knowledge. It is not funny to repair a loosely 3D scanned plastic box, but it came out great. :)

Onto the 244: new goal is to finish the main bodywork before or in summer. As you may seen it has 022 on its plates, and somehow I'm also 22. It HAS to run this year. :cool:

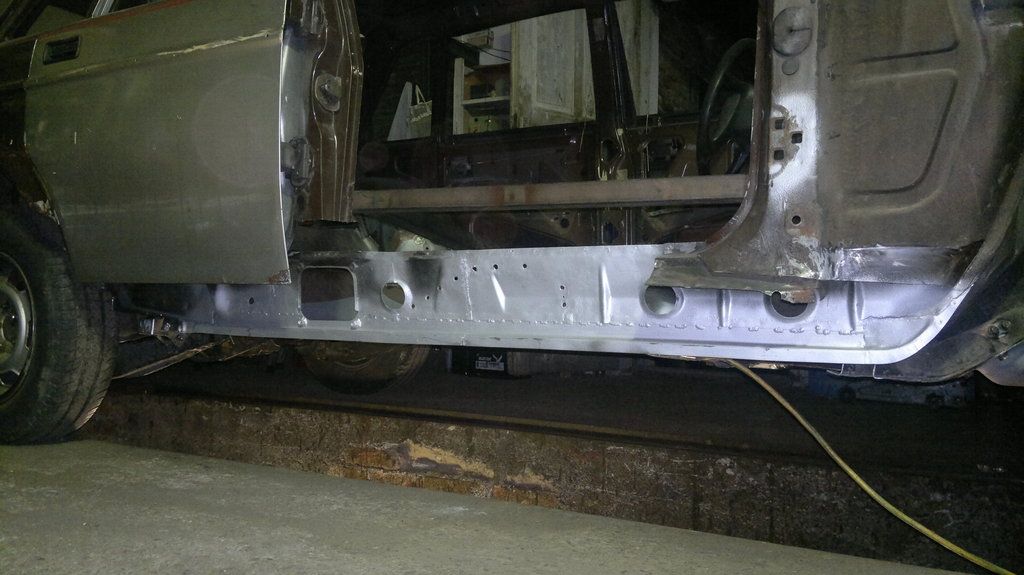
The left side is 90% done, only the wheelarch needs to get welded on. That only happens a few days before I seal and paint the floor.
Shimmed the commando, and threw on the "new" rubber sealing thingy on top of it. It looooks sooo nice already :oogle:

Notice the repaired quarter-spare wheel well joint. There is NO overlap.

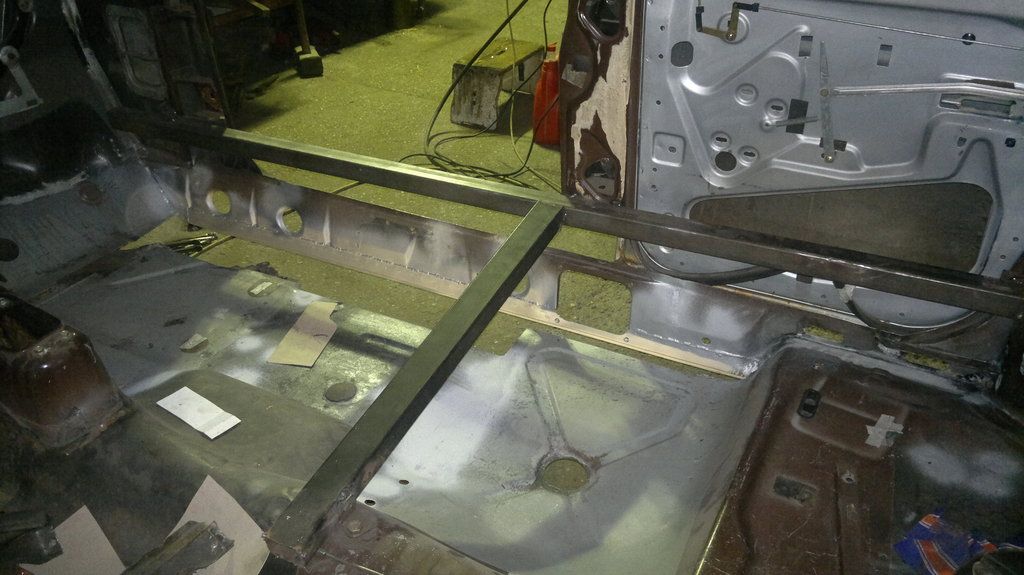
Right side came (january 28) and by a weird idea I chained the front strut to the ground and jacked the A pillar.
Sadly I've had no routine in crash jobs, so I did so much unneeded and harmful pushing-pulling on this chassy before and I'm glad I sorted it all out with this last step.
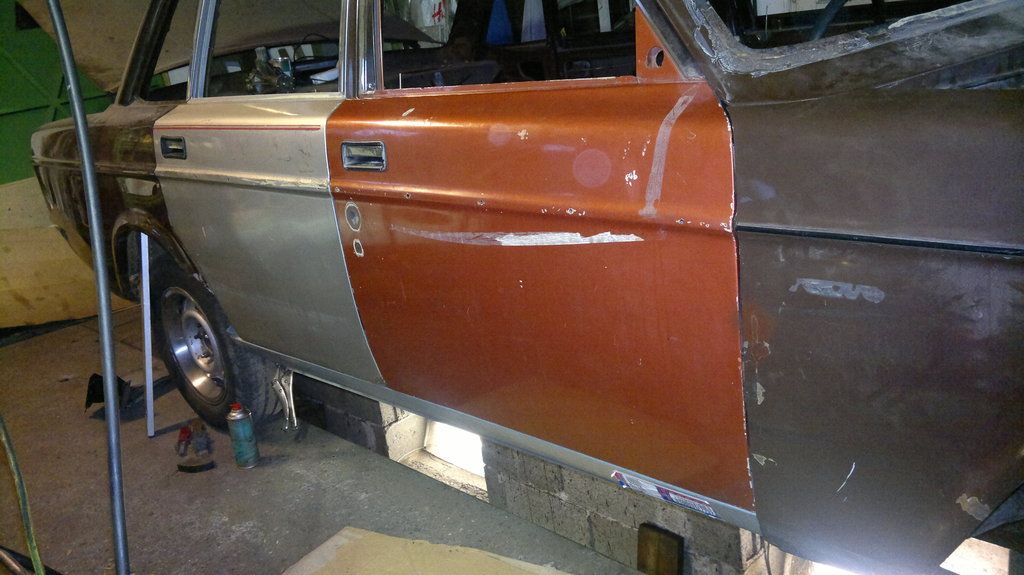
Gaps came out pretty nice, not perfect by any means but I can live with it. Doors mostly seal, and overall it looks nice. Only the front door needs four 2mm thick shims, and thats it.
This pumped me to cut away all the not needed rusty pieces down there. I already fabbed the lower inner sill and welded it on. I hope I can get the floorboards connected to it this weekend.


Also snow fell and I did a quick tuneup on the beige donor car. Funny thing I put the brown's SU carb on it, and it ran quite ****ty. No wonders, SU carbs need dampening oil in them. The brown's carb did not have ANY atf oil in it. I have no idea how I was able to cruise with it on petrol. It even felt stronger than LPG. :rofl:
So right now it starts on first try: https://www.dropbox.com/s/vaof8txbubn2ojq/2016-01-06-1467.mp4?dl=0
 
Last edited:
Back
Top