• Hello Guest, welcome to the initial stages of our new platform!
    You can find some additional information about where we are in the process of migrating the board and setting up our new software here

    Thank you for being a part of our community!

Chuck's '75 245 - "The Red One"

Chuck W

Active member
Joined
Apr 29, 2008
Location
Indpls, IN
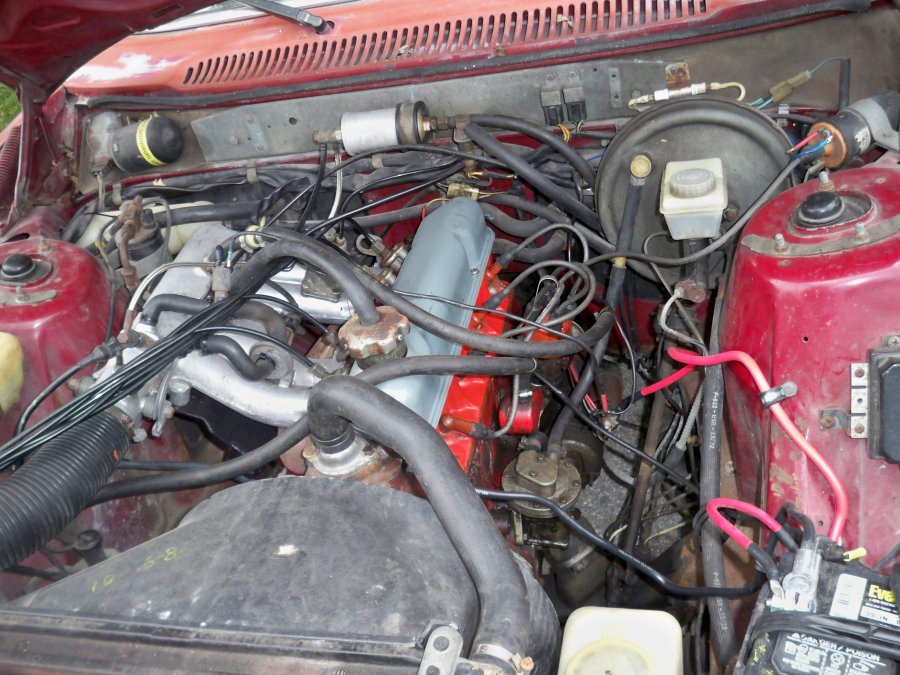
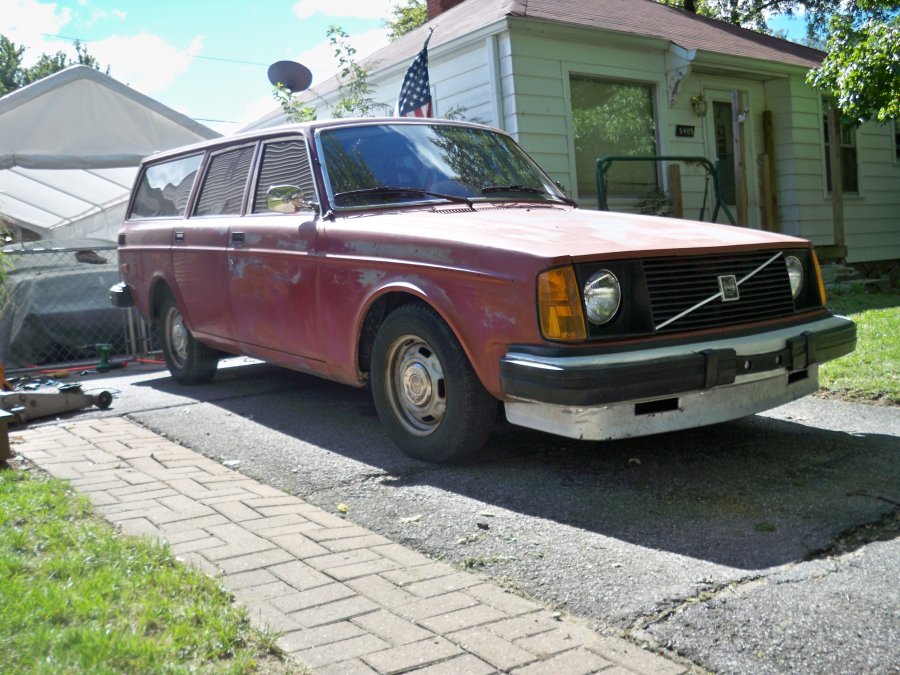
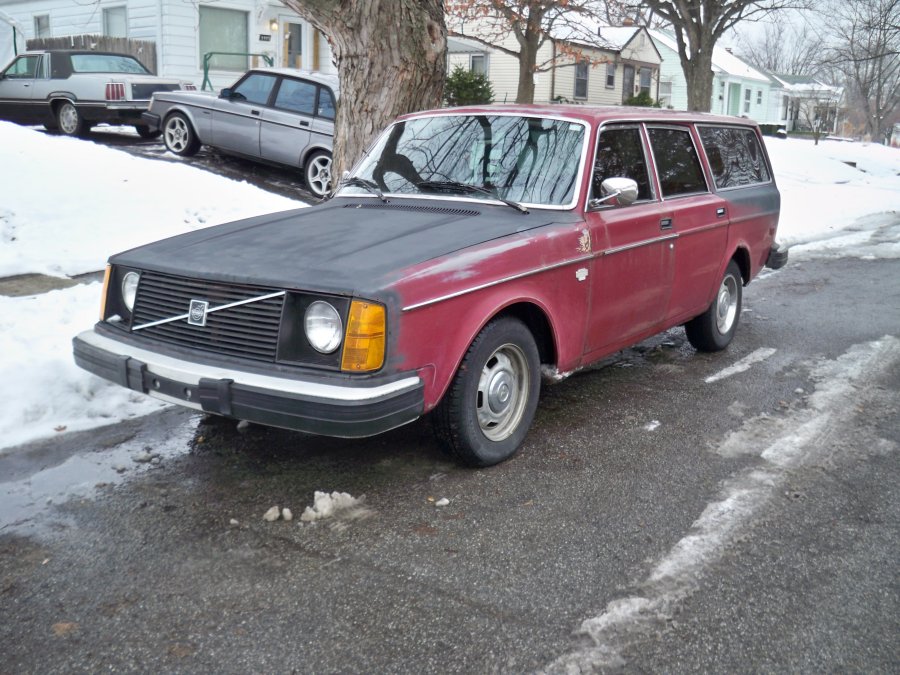
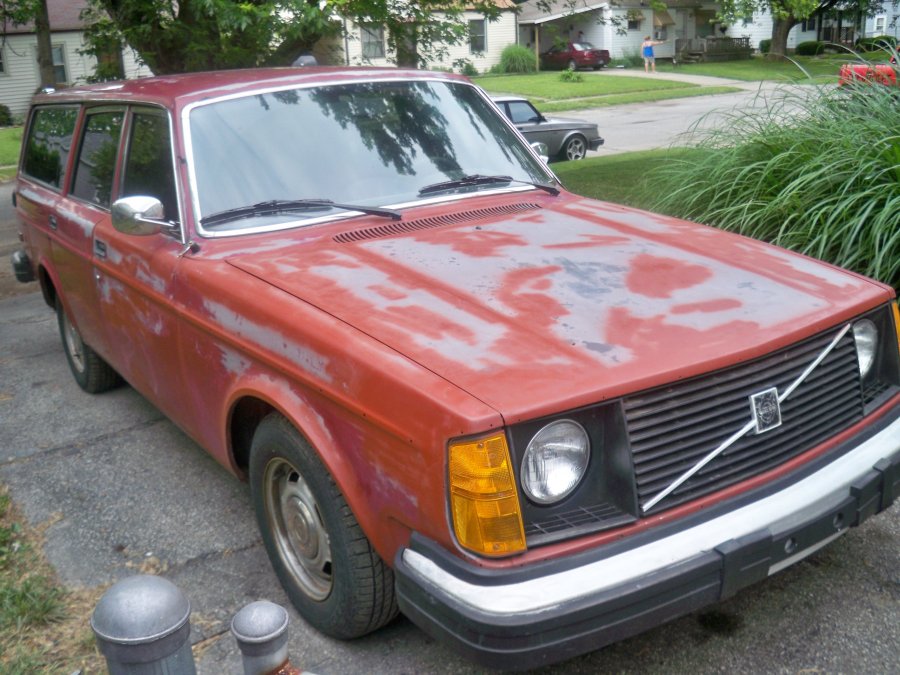
So, I picked this thing up at the beginning of the year as a back-up driver/utility car, to save my 244TIC from disaster. It's motivated by a B20/M40 combo. Other than really wanting an OD (or 5th gear), it does OK.

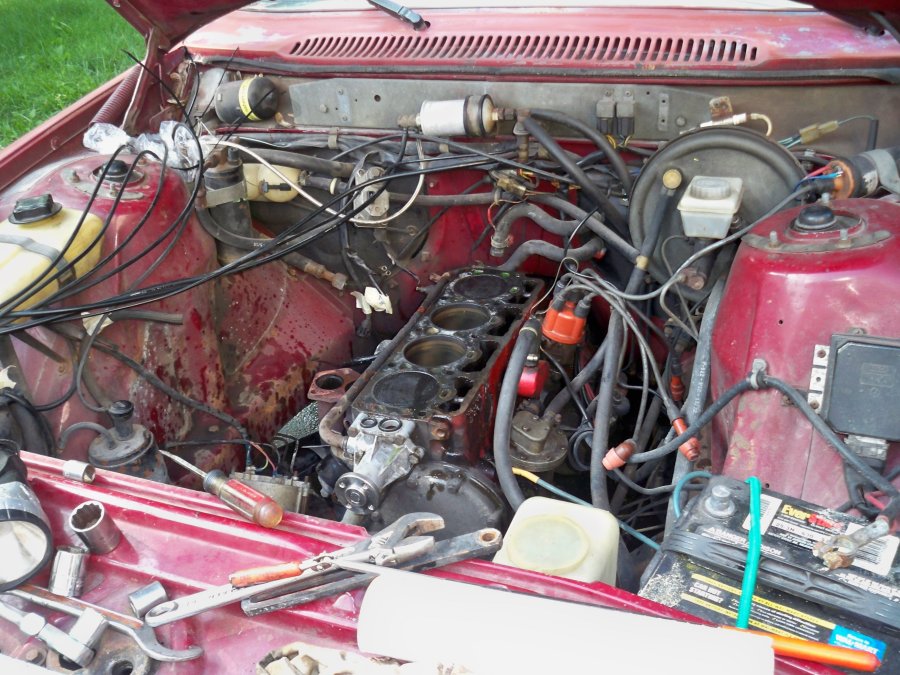
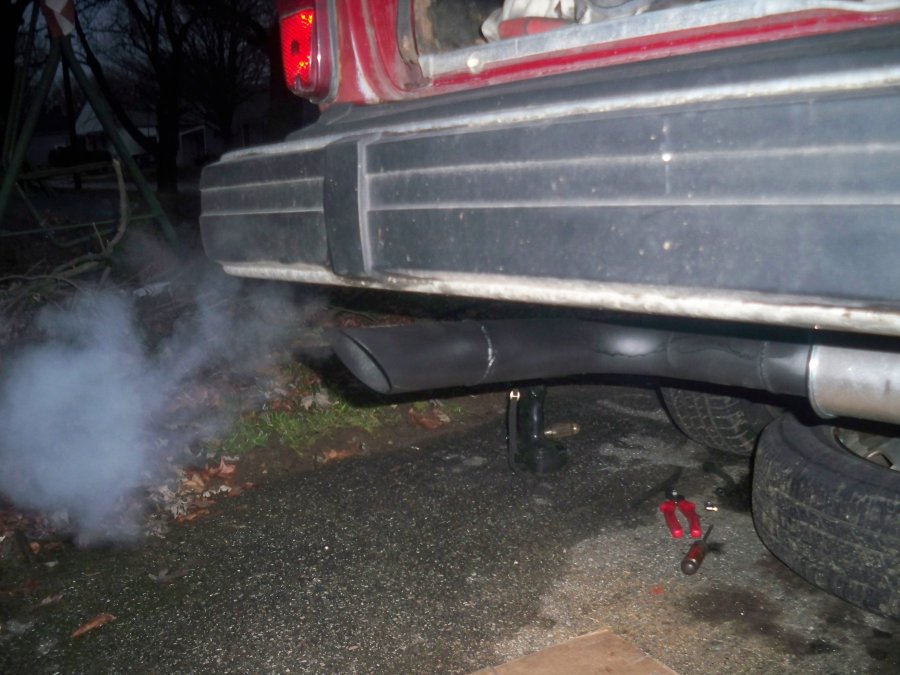
Here's a pic from when I sorted out a couple things, and put it on the road for the end of the winter.
The%20wag.jpg


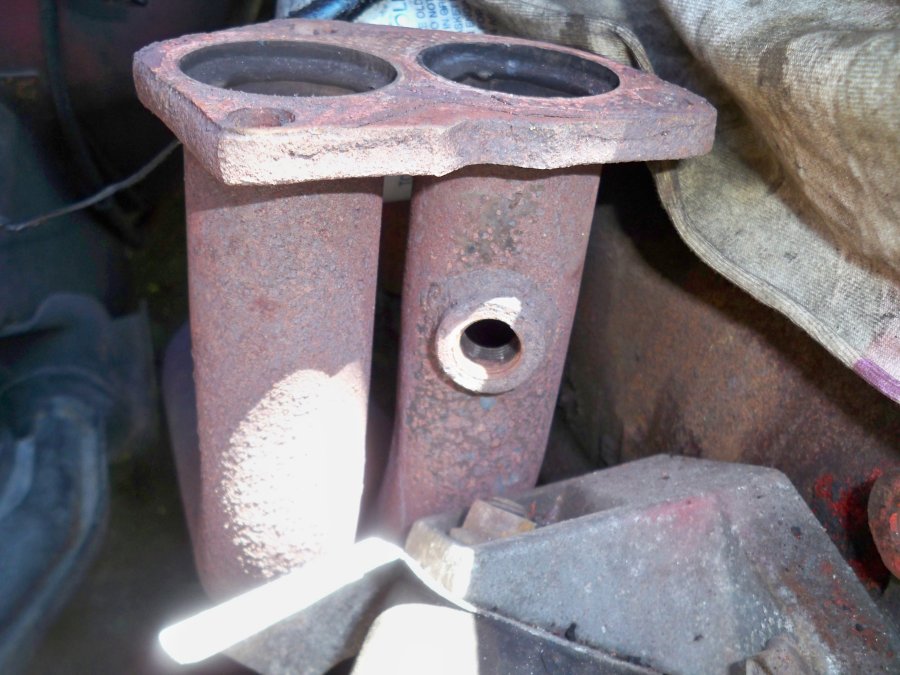
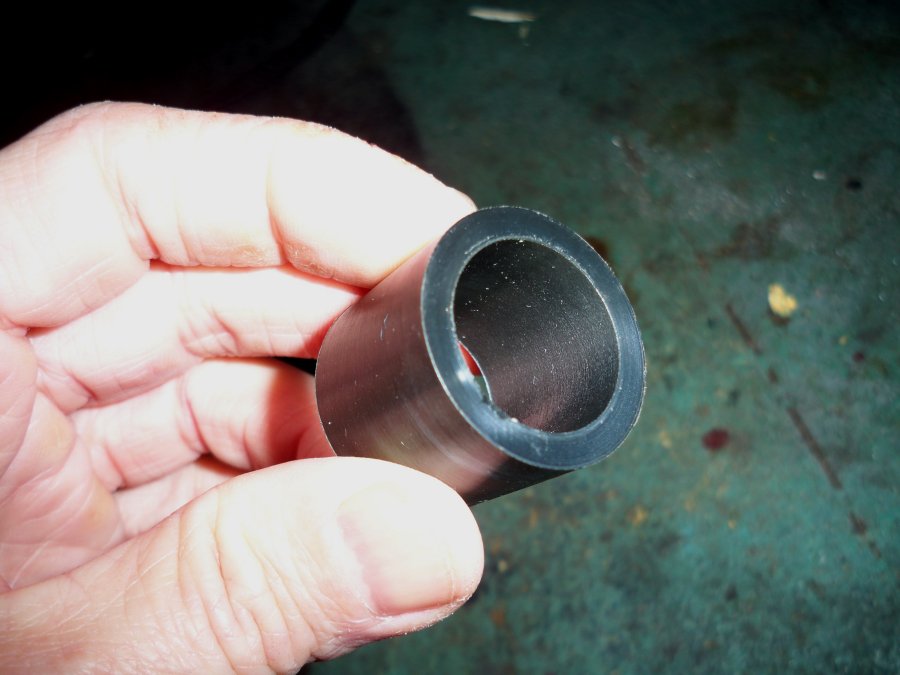
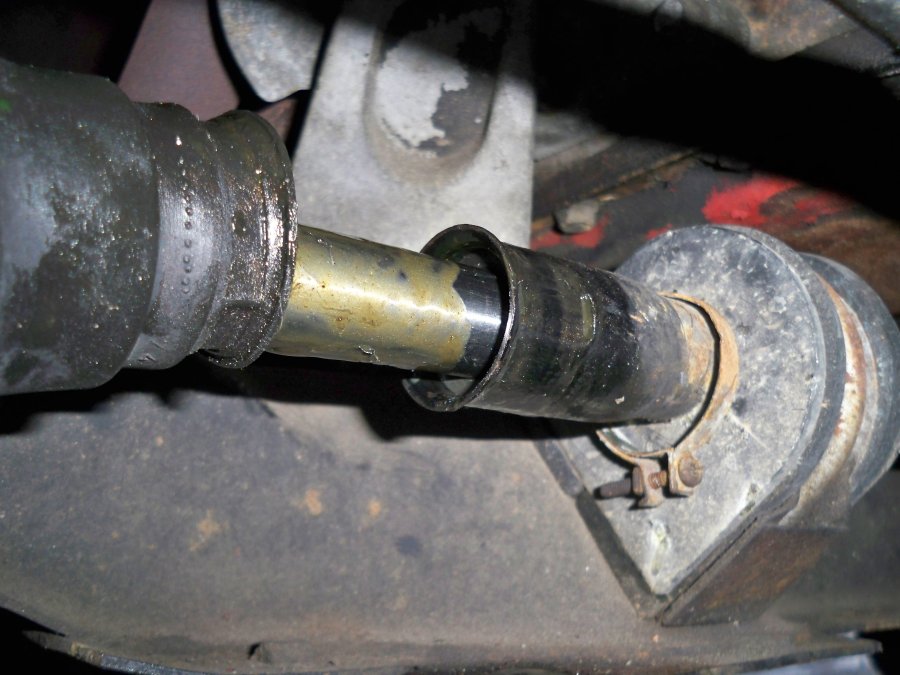
One of the things I fixed was made a bushing/support for the manual steering rack out of Nylotron, to solve the issue of the original one being non-existent.

Rack%20Spacer.jpg

Spacer%20installed.jpg


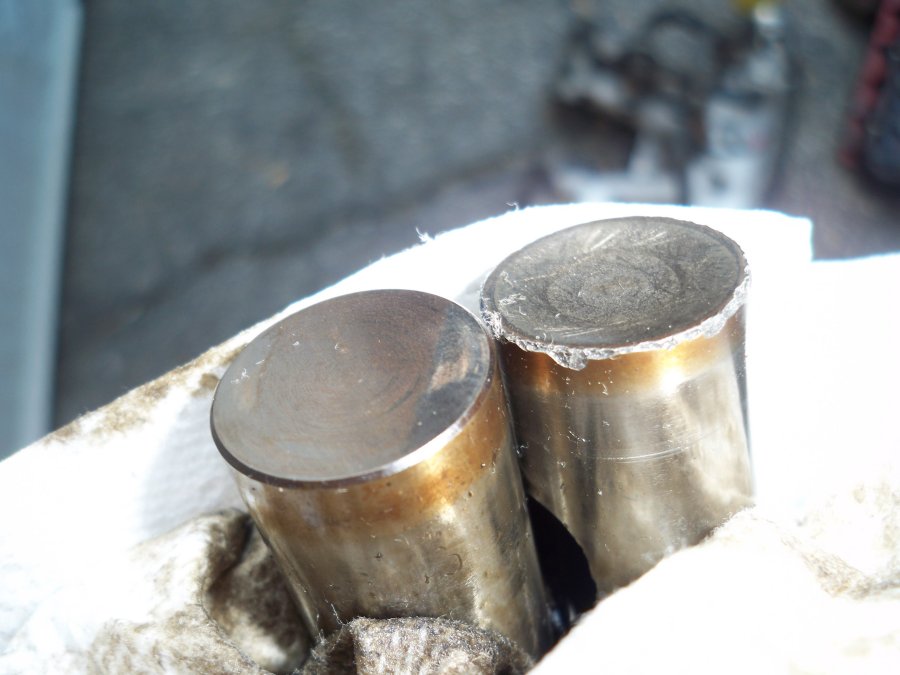
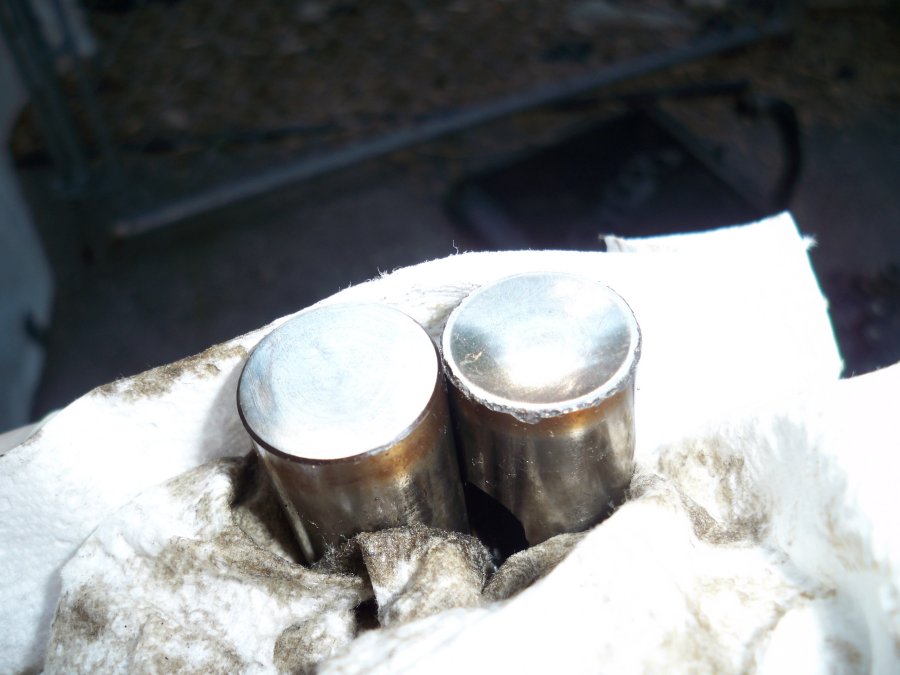
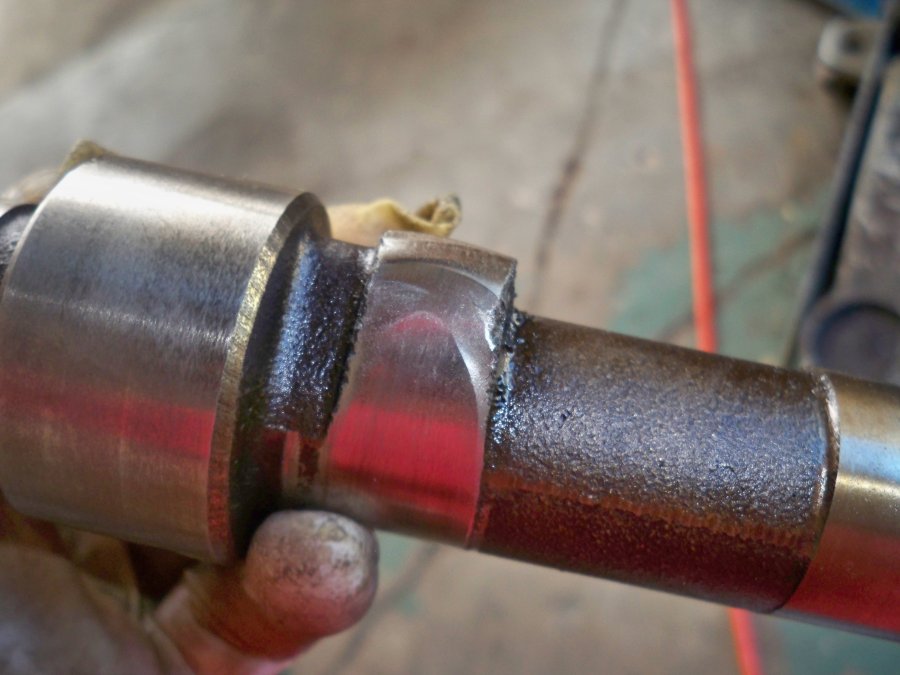
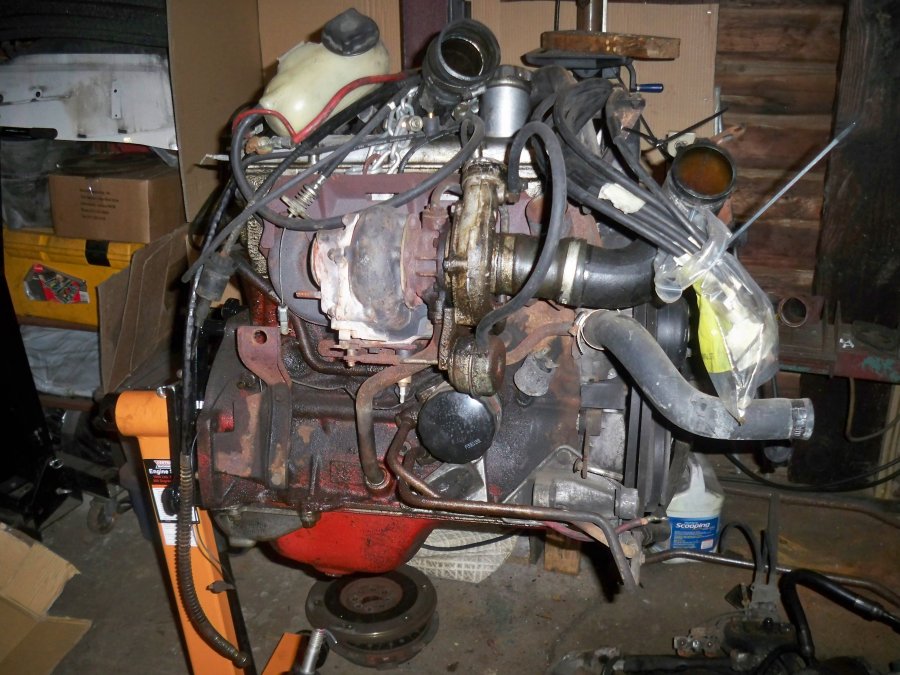
In doing some tune-up work in Jan, and replacing a manifold gasket, it became apparent that the #2 EH lobe on the cam is on its way out. So, I acquired another cam/lifters/gaskets, etc to swap the cam. I'd adjusted the rocker arms at the time, and things were quiet, so I just decided to drive it for a bit. I've put about 500-600 miles on it, and the noise is coming back, so I'll need to pull things apart.

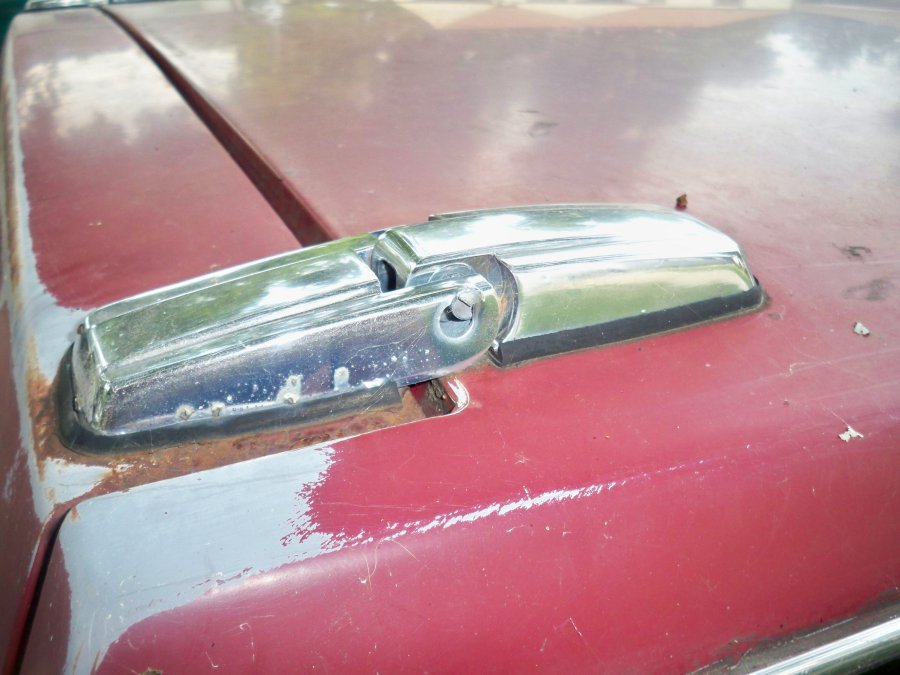
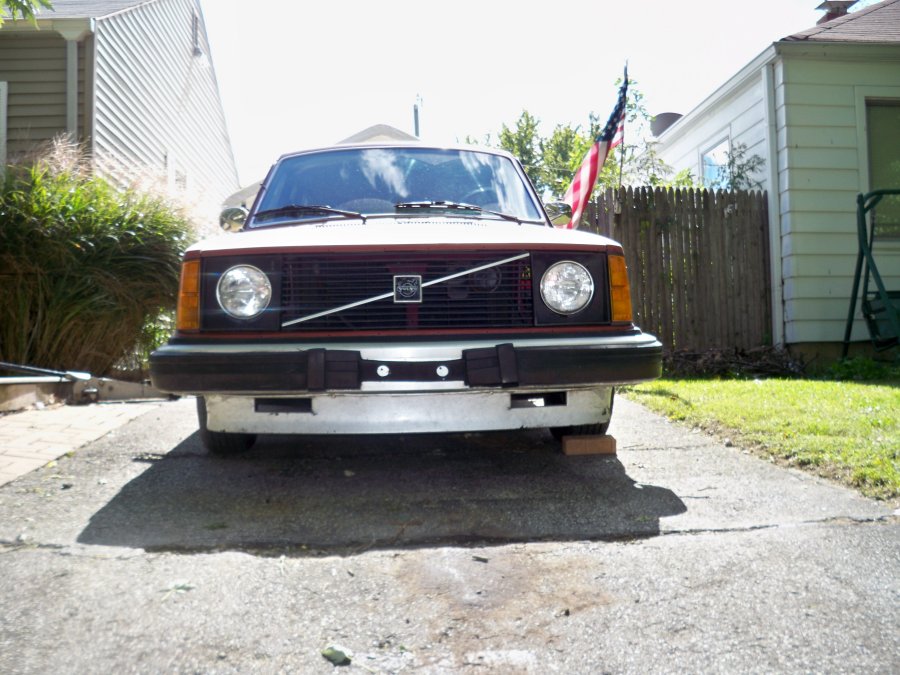
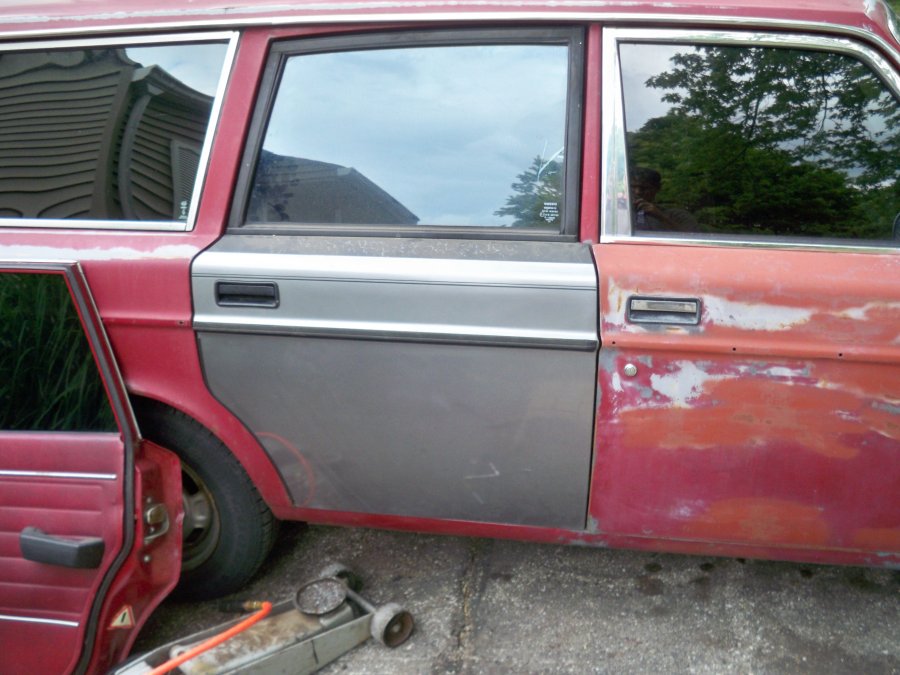
One of the things the PO had done when he was "fixing" things, was start to go over the panels, and start to paint the car flat black, and rip all the trim off the car.
uglyprimer.jpg


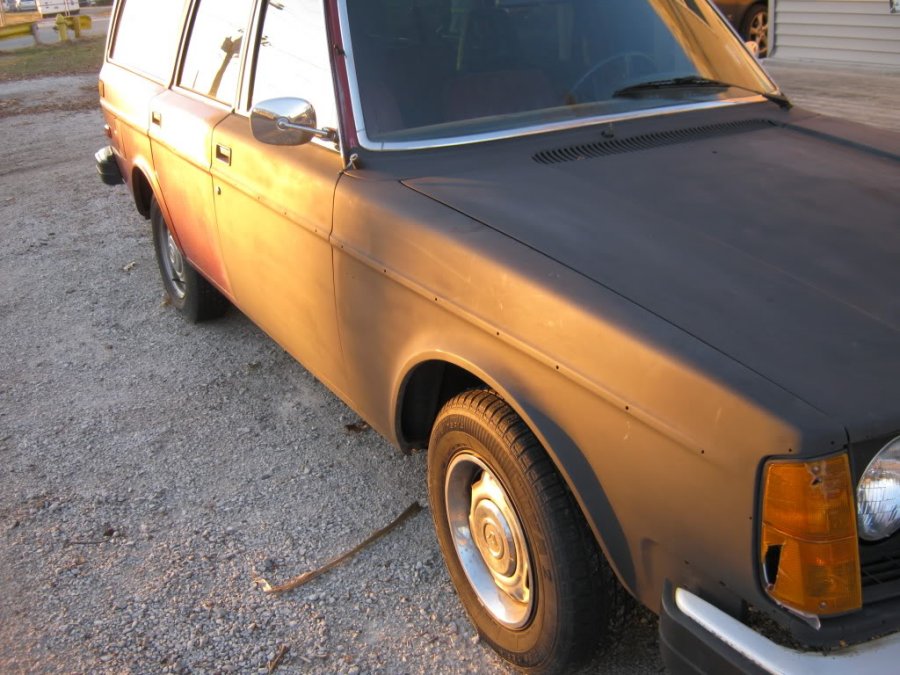
About 1/4 of the car had been done, and I really despise the flat black look.

So, one 94*F day, some oven cleaner, and a sheet of plastic later...
nomoreblack.jpg


Yes, it's still ugly, but at least the flat black is gone. I have most of the trim pieces, so that will be going back on the car as well.

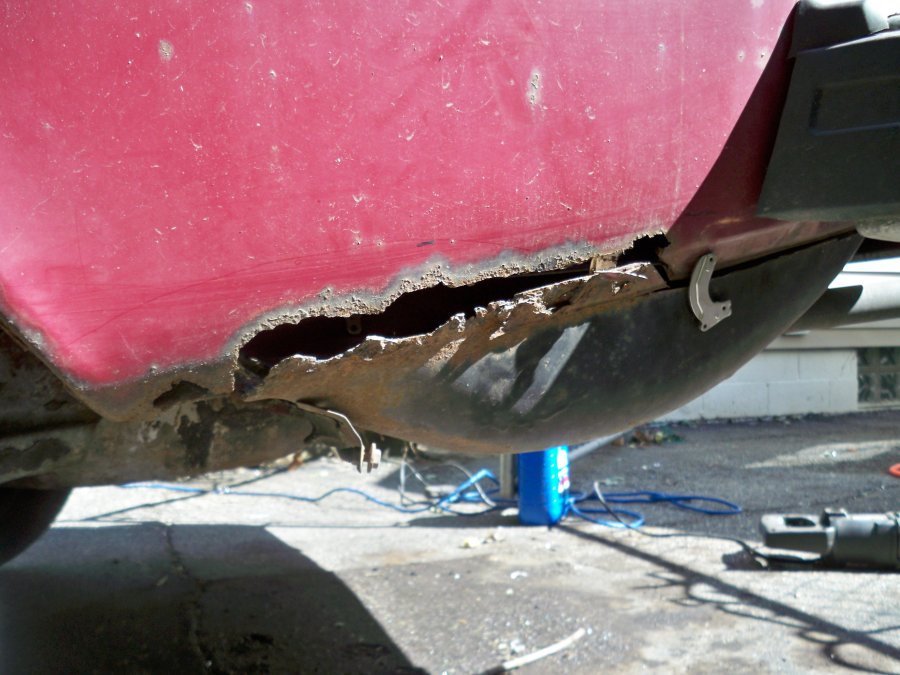
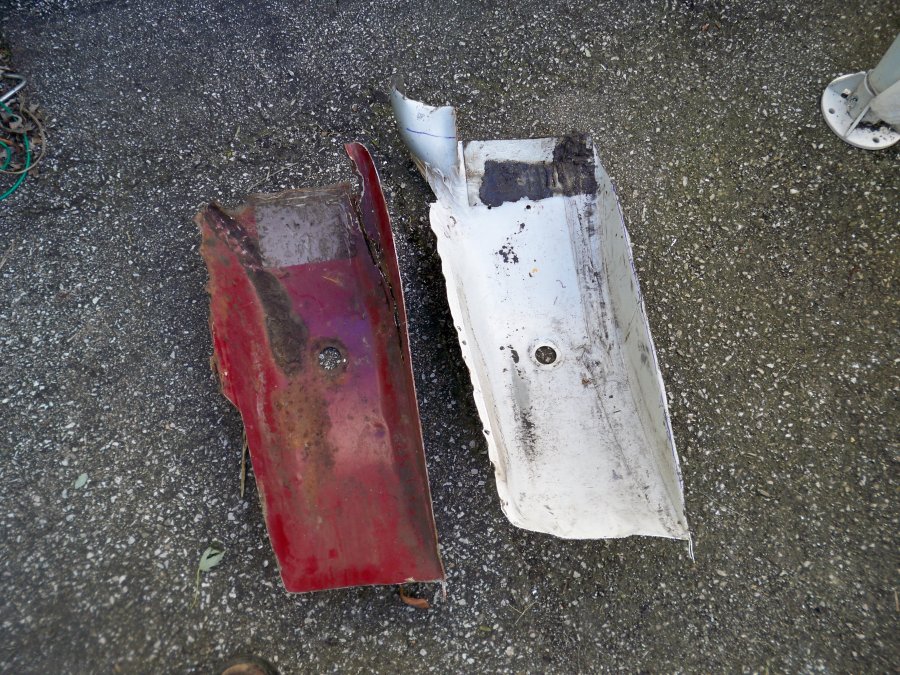
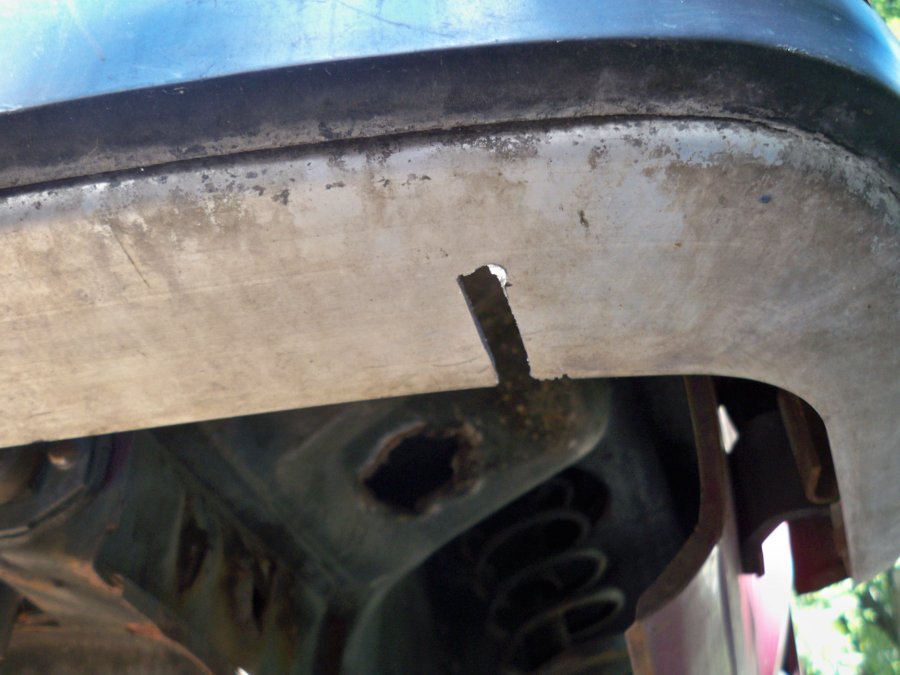
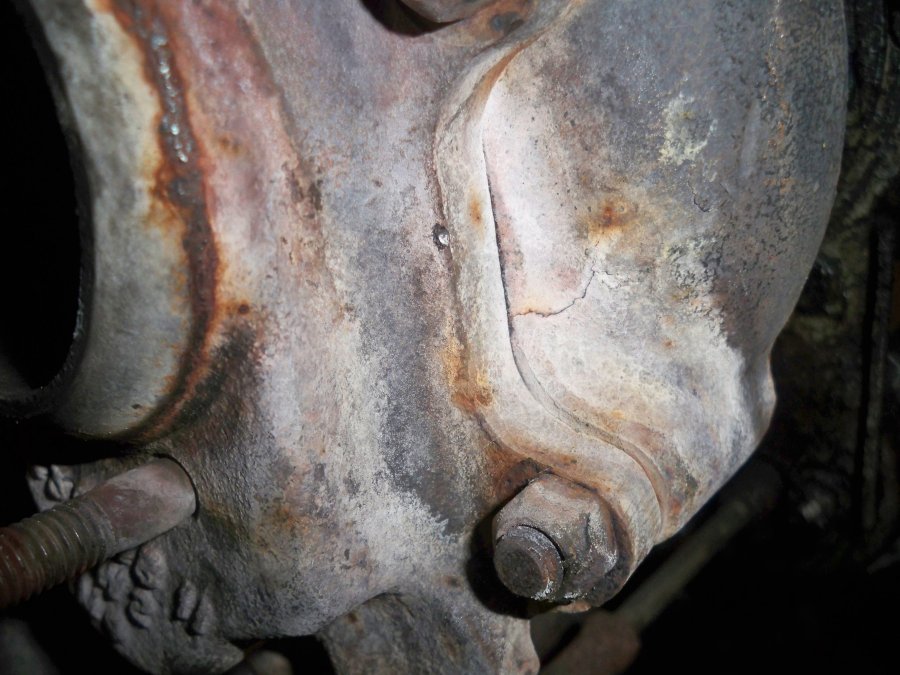
One more thing he "fixed" was chopping out the rusted driver buttcheek, but left the gaping hole.
buttcheekhole.jpg

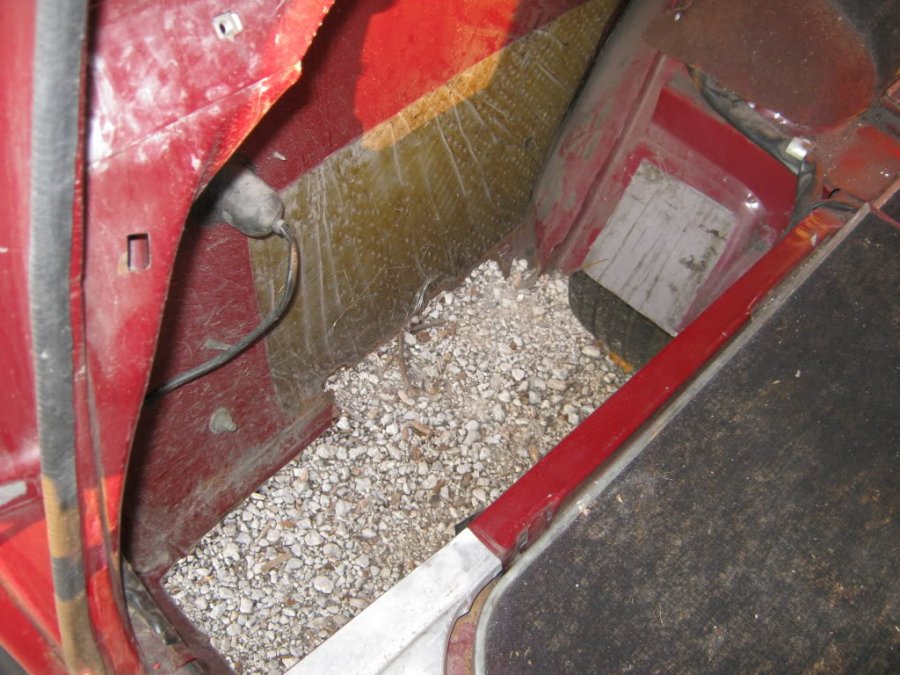
I'm trying to get my hands on some good cheeks to fix this.

After chasing around a thermostat issue over the winter, once things got warm, it was apparent that the fan clutch is not working properly. The car cools off while in motion, but starts to get warm when idling. I *could* hunt down and replace the fan clutch, however I kind of wanted an e-fan, but the tiny stock alt wasn't going to cut it. In the garage I have a 90A Ford 3G alternator, and an extra e-fan and a thermoswitch. So, a couple weekends ago I grabbed some parts, and worked on the alternator mounting. The car used to have AC on it, and the old support brace was still there, and seemed like it might be handy.
After a little work with the bandsaw and the welder, I got to this point.
3G%20Mock-up.jpg


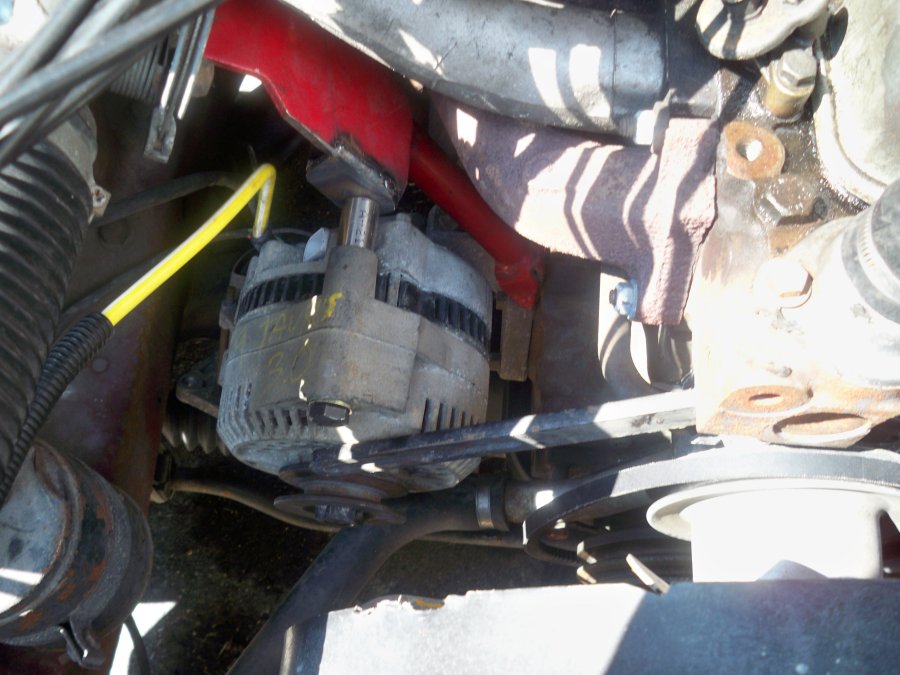
The original adjuster mount will become a support brace, and I have an adjuster bracket from another application I'm going to use underneath for adjustment. I will need a longer belt, though. I'm going to finalize this when I pull things apart to replace the cam.

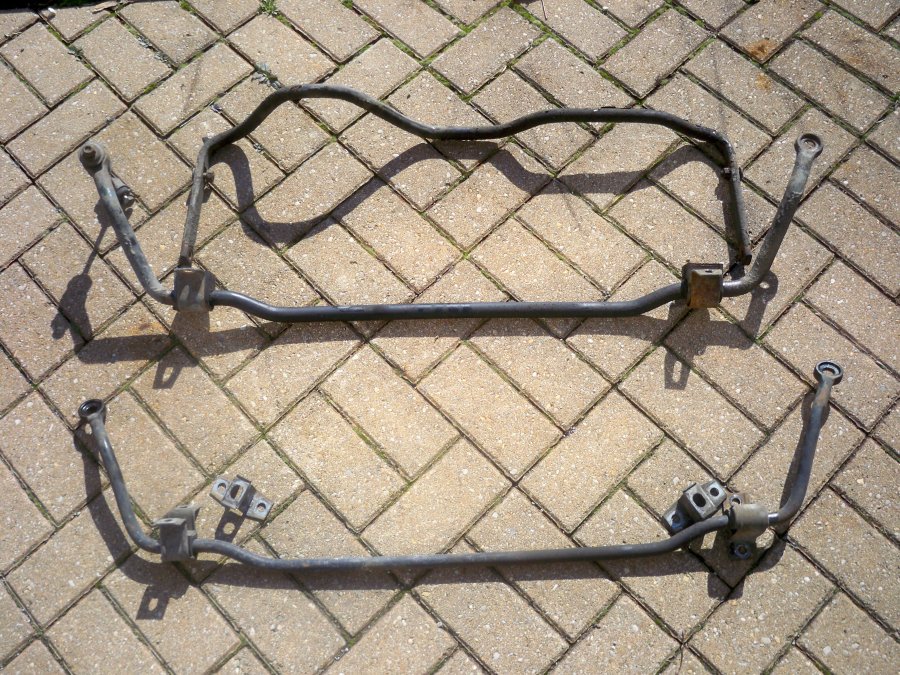
That's about where things stand at the moment. Compared to the 244, this thing kind of wallows around, but it is lacking any kind of suspension upgrades. The plan is to get a 25/22 sway bar combo for the 244 and transfer the turbo bars to this car. Also, I'm trying to see about some way to get a "5th" gear in this thing. I probably could live without it, but damn it's tedious. I've also got a set of D-Jet injectors in the garage, so I may ditch the K-Jet and MS this thing with a basic set-up. :roll: It just never ends.

Anyway, more pics and such as I progress on the cam replacement, and alternator/e-fan install.
 
Last edited:
Finally got into the cam swap on the B20 this weekend. It's all torn down and ready for clean-up and reassembly.

Inprogress.jpg


As I was pulling things apart, I got the lifter out of the offending spot (#2 intake, I think) and this is how it looked.

Lifter_1.jpg

Lifter_2.jpg


When I got the cam out, this is what the lobe looked like.

Bad%20lobe.jpg


Now it's just a matter of cleaning things up and putting it back together.

The cam that was in it is the same as the one I picked up a few months back. It's one of the "D" cams, but I don't think it's the earlier "good" one. Regardless, if it has 8 good lobes, it's a good cam for this engine.

Now that I'm looking at it, and have the bolt out of it (that didn't fit), what size is this hole? It's an EGR hole, not an O2 sensor hole.

DP.jpg
 
Last edited:
OK, I finally got the webhost sorted, so I can get back to putting up pics as I get through this.

I finished up the cam swap over the weekend, and the car is running well now. I still have a cold start issue that I need to sort out, but haven't dug into whether it's the thermo-time switch, or the CS Inj itself.

I shelved the e-fan (and alternator upgrade) for the moment. While I had things apart, I let the radiator sit full of vinegar for about a week. After flushing out some crud, the car seems to run at more reasonable temps, even with 95+*F temps we've been having. I still plan on the e-fan conversion, but I can wait for a bit.

I plugged that hole in the DP with a pipe fitting I had sitting around. No more annoying exhaust tick now.

I also got the fuel gauge working again. It was pretty much reading the same level all the time. I pulled the sender out of the tank, and everything looked good with it. Just to do a quick test, I grounded it and worked the float through it's range while watching the gas gauge (Key in "RUN"), and it worked as intended. In the end, I just needed to clean up the mating surface/connection between the tank and sender to make things work.

OK, now that things are working again, I can get back to the pictorial documentation.
 
I found this the other day while I was putting gas in the car.

Gate%20hinge.jpg


Looks like I need to address the hinge...
 
Last edited:
OK, well I haven't followed up since I got the cam/etc swapped out.
After%20Cam%20001.jpg


It's been rolling along very well, and running great. No odd noises, no missing. The lack of OD is not helping gas mileage, so it's getting about 18mpg. It's mostly in town with short runs on the interstate (70 mph @ about 4000-4500rpm).

The only thing I should've done while I had things apart was replace the valve seals. It'll puff at me on start-up if it's sat for a little bit. No biggie as I have a tool to allow me to do it while the head is on the car.

Next thing I NEED to address is fixing the missing driver buttcheek. Have the parts, now just need the time.
 
You dont need a tool to do valve stem seals in car, screw a compressed air fitting into your spark plug hole (make an adapter at your local hardware store), pressurize the cylinder to hold the valves up, compress valve springs, remove locks, pull seals, replace with new, reverse to reassemble. [Probably missed a few steps but thats the jist of it.] [(O use a deep socket to seat the seals)]
 
You dont need a tool to do valve stem seals in car, screw a compressed air fitting into your spark plug hole (make an adapter at your local hardware store), pressurize the cylinder to hold the valves up, compress valve springs, remove locks, pull seals, replace with new, reverse to reassemble. [Probably missed a few steps but thats the jist of it.] [(O use a deep socket to seat the seals)]

By "tool", I meant one to compress the springs to remove the locks. I know what I need to do to change them. Been there, done that. :nod:
 
Got a little more time in on the car today.

Since I want to have the big hole in the back patched up before winter, I spent some time today messing with that.

I stuck the piece the PO cut out back in place, just to see what was done.
buttrust.jpg


I then spent some time messing with the patch panel I got.I went ahead and removed the outer quarter panel skin, so I could better mess with the buttcheek and inner fender area.
patch%20panel.jpg


I didn't get much farther today on that. Still need to mess with trimming down the patch panel and finalize what I'm going to still need to remove from the body.

I also got to do a little bit of "fun" instead of just repair stuff today. This past week I received the front spoiler I'd picked up. I was looking for (and thought I was getting) one of the turbo ones, but instead I wound up with a GT one. So, I got to installing that today.

There are some supports on the top of the air dam that I needed to account for, so I put a couple slots in the bottom of the bumper.
bumperslot.jpg


After that, I put it in place, marked and drilled the holes, and mounted it up.

spoiler_1.jpg


spolier_2.jpg


Back to reality, I think the starter is going out on me. It seems like it wants to hang a little bit after the engine fires, and sometimes the solenoid won't kick at all, and I have to mess with the wires a little, and then it will fire up. Probably just going to need to replace it.
 
OK, so at the end of the last update, I mentioned that the starter was acting up on me. I got myself another starter and set to replacing it. In the process, I found that the starter had been replaced previously, and that they didn't do a good job with the fasteners. One of the nuts had come off the mounting bolts, and this was causing the odd-ball hang-up issues. The starter was trashed, so I swapped it anyway.

It helped the cranking, but the car was still slow to fire. In the process of messing with the starter, I knocked the one of the plug wires apart. They looked kind of bad, so I remembered I had some pieces left from a Taylor universal kit. Using the stock plug ends, and new dist ends, I made up a new set of plug wires and a new coil wire. This pretty much solved the starting problem. Even when cold, the engine fires now. Last winter it was VERY tedious to get this thing started when cold.

Now onto this weekend's work. I've been messing with finicky lights on the back of the car for a while, and a newer set of tail lights fixed most of the issues, but I still could not get the license plate lights, or the right rear side marker to work. I fixed the tailgate wiring when I was fixing hinges, so that was good for the license lights, but they still wouldn't work.

Digging into wiring diagrams, it appeared that the license plate lights and that right rear side marker were on the same wiring circuit. I was checking wiring with the multi-meter and was getting odd results. So I dug into the back of the car and found this.

wire%20mess_1.jpg


Digging deeper, I found that the two wires for the lights that run back and forth across the car had done this...

wire%20mess_3.jpg
.

They were fused about 75% of their length, and had attached themselves to the insulation of the other wires.

Digging deeper, I found this on the driver side of the car.

wire%20mess_2.jpg

wire%20mess_4.jpg


I'm guessing that at some point, the license plate light wiring had come loose and went to a hard short and loaded up and melted these wires. When it was all said and done, only those two wires, and one more that ran to the right tail light were damaged badly. I simplified the wiring slightly, repaired the damaged other wire, and put it all back together. Now I have fully functioning lights. :)
 
OK, finally something "fun".

Earlier last month I had been getting all the bits together to redo the exhaust on the turbo car. Pretty much to the day that I get those parts all in, the exhaust on the wagon comes apart. I had originally thought it was going to at least make it through the winter, but I guess it thought otherwise. I patched it together to keep it quiet just to get me past the holidays.
This wasn't going to be a fancy exhaust, as I wasn't planning on spending what I'd spent on the 3" stuff for the turbo car. I had some 2-1/2" stuff sitting around, so that's what I was going to use. I looked things over, and bought a few more parts.

So, I had a few hours to kill NYE, so I went at it.

Pile of old parts.
new%20ex_9.jpg


There was a 2-1/4" pipe run from the DP to the first muffler, but it was choked down to this.
new%20ex_10.jpg


Pile of new parts.
new%20ex_8.jpg


First I modded the DP to add the flange (there wasn't one there to begin with).
new%20ex_3.jpg


Then I began the slow process of fit-check-fit-weld-fit-check-etc back and forth between the car and the garage. I probably could've welded things up in the driveway with my little welder, but I didn't want to hassle with screwing with it under the car, and I wanted to use the big welder in the garage.

First I did the front section.
new%20ex_1.jpg


I also kept it over the axle (Pay no mind to the crappy shocks).
new%20ex_4.jpg


Then I put the rear muffler section together
new%20ex%20_2.jpg


new%20ex_6.jpg


Keeping with the "not fancy" theme, I made my own slash tip, and pieced it together as the sun was going down on NYE.
new%20ex_7.jpg


new%20ex_5.jpg


I wasn't able to get the hangers on it Sat, but I wanted to start it at least to hear it. It was chilly, thus the "smoke".

I welded the hangers on this afternoon and the car is ready to roll again. The exhaust is louder than it was, and it's definitely raspy when you are angry with the throttle. I figured it would be louder, and I may need to add a second resonator to it, but we'll see.

Drive test tomorrow on the way to work.
 
Well, drove it into work this morning. Other than a bit of "rasp" during aggressive throttle application, it sounds decent. No rattles or thumps, either.
 
Well, while I'm waiting for the insurance stuff to get sorted on the '85, I went ahead and pulled the sway bars off it to put on the wagon.

sway%20bars.jpg


I think the 23/21 combo will do better at keeping the body roll down than the 18/0 combo that was on there. :nod:

Depending on what I wind up replacing the '85 with, the wagon could get a nice influx of parts.
 
OK, well I haven't had much time to do anything to the wagon, but it's been performing well while I sorted out the details with the dead 244 and fiddling with the 242 to get it on the road.

Going through the stuff on the 244 and my plans for the 242, this is the list of stuff from the 244 that will be making its way onto the wagon.

- B21FT/M46 combo (Going to +T the B21F in the 242 instead of swap)
- PS rack
- Doors (with power windows, mirrors, and locks) I could just swap all the internals, but the driver door on the wagon is kinda crusty anyway.

I'm probably going to use the side molding from the 244 as well. The stuff from the fenders was salvageable and I could probably modify the rear pieces without issue to work on the wagon. It's not perfect stuff, but will work to fill the holes left by the previous owner pulling the trim all off. I'm probably just going to weld up the holes left from the trim around the headlights/grille, since that wasn't with the car when I bought it.

I'll also have the sheetmetal I need to fix the rust on the driver rear quarter.

A little more power, some longer legs, and some creature comforts/cosmetic upgrades. :)
 
Been busy pulling the 244 apart and driving the 242, so this has been sitting, save for a couple trips to the hardware store. Quite a few parts to be had for this car when I get things pulled apart.

One thing I decided after messing with fishing the damned engine harness out of the 244, is that there is no way in hell I'm screwing with reinstalling that mess (and K-Jet) into the 245 when I get things swapped. I'll throw together a basic MS unit before I waste time with that.

One thing I noticed when disconnecting the steering shaft while dropping the engine/trans/susp out of the front, was that I'm not sure what'll need to be done to swap the PS stuff into the 245. Being that it's a '75, that's probably one issue, but when swapping from manual to power steering, how much of the steering shaft needs to be swapped?
 
The steering shaft from the firewall forward needs to be swapped - that is it. I've done this swap before on a couple of '75's.

So the rag joint that's on the '75 steering shaft will come off and leave a splined stub to accept the rest of the PS steering shaft?
 
So, I took a little time and hung one of the doors from the '85 244 today.

Door%20installed.jpg


It's not a *direct* swap (as detailed HERE), but it is workable.

Going to get the wiring harness(es) pulled out and sorted before I set to installing the other doors.
 
Working on sorting out more of the 244 parts.

I got the engine and trans apart, and the engine on the stand.

B21FT.jpg


M46.jpg


The rumor is that these were from an '83 and swapped into my '85 at some point. Doesn't matter I suppose. Flat flywheel and 215mm clutch are what came out of it.

Looks like I'm going to need to hunt down a new turbine housing.

Hotside%20Crack.jpg


I'm not really planning on changing too much with the basics of this set-up. I *could* swap out to a 90+ manifold and a bigger turbo, but only if something fall into my lap VERY cheaply. Mainly I'll just be cleaning this up and replacing gaskets and seals.

The biggest deviation on the engine swap will be using MS instead of K-Jet. Going to be very basic. I have a LH2.2 dist, and will probably grab up an EFI manifold on the cheap. I have one that I might use on the 242, but I might also add injectors bosses to that B21F intake instead. I'll probably pick up a basic V3.0 board kit, so I can easily add the flyback circuitry and use the old brown-tops off my TBird.

The next thing I'm probably going to do while I get the engine stuff together is get some new ball joints and swap the front control arms and steering rack out. I'll have to run the power rack un-powered until I get the engine swapped (currently car is manual steering, and I don't have a bracket to mount the pump on the B20). Reading up on here, that should work OK for the short term. The manual rack is OK, but the U-joints on the steering shaft have some play in them.
 
Back
Top