
-
Hello Guest, welcome to the initial stages of our new platform!
You can find some additional information about where we are in the process of migrating the board and setting up our new software hereThank you for being a part of our community!
You are using an out of date browser. It may not display this or other websites correctly.
You should upgrade or use an alternative browser.
You should upgrade or use an alternative browser.
Brand new '81 262C Bertone Coupe . . .
- Thread starter TestPoint
- Start date
Doing over the do over
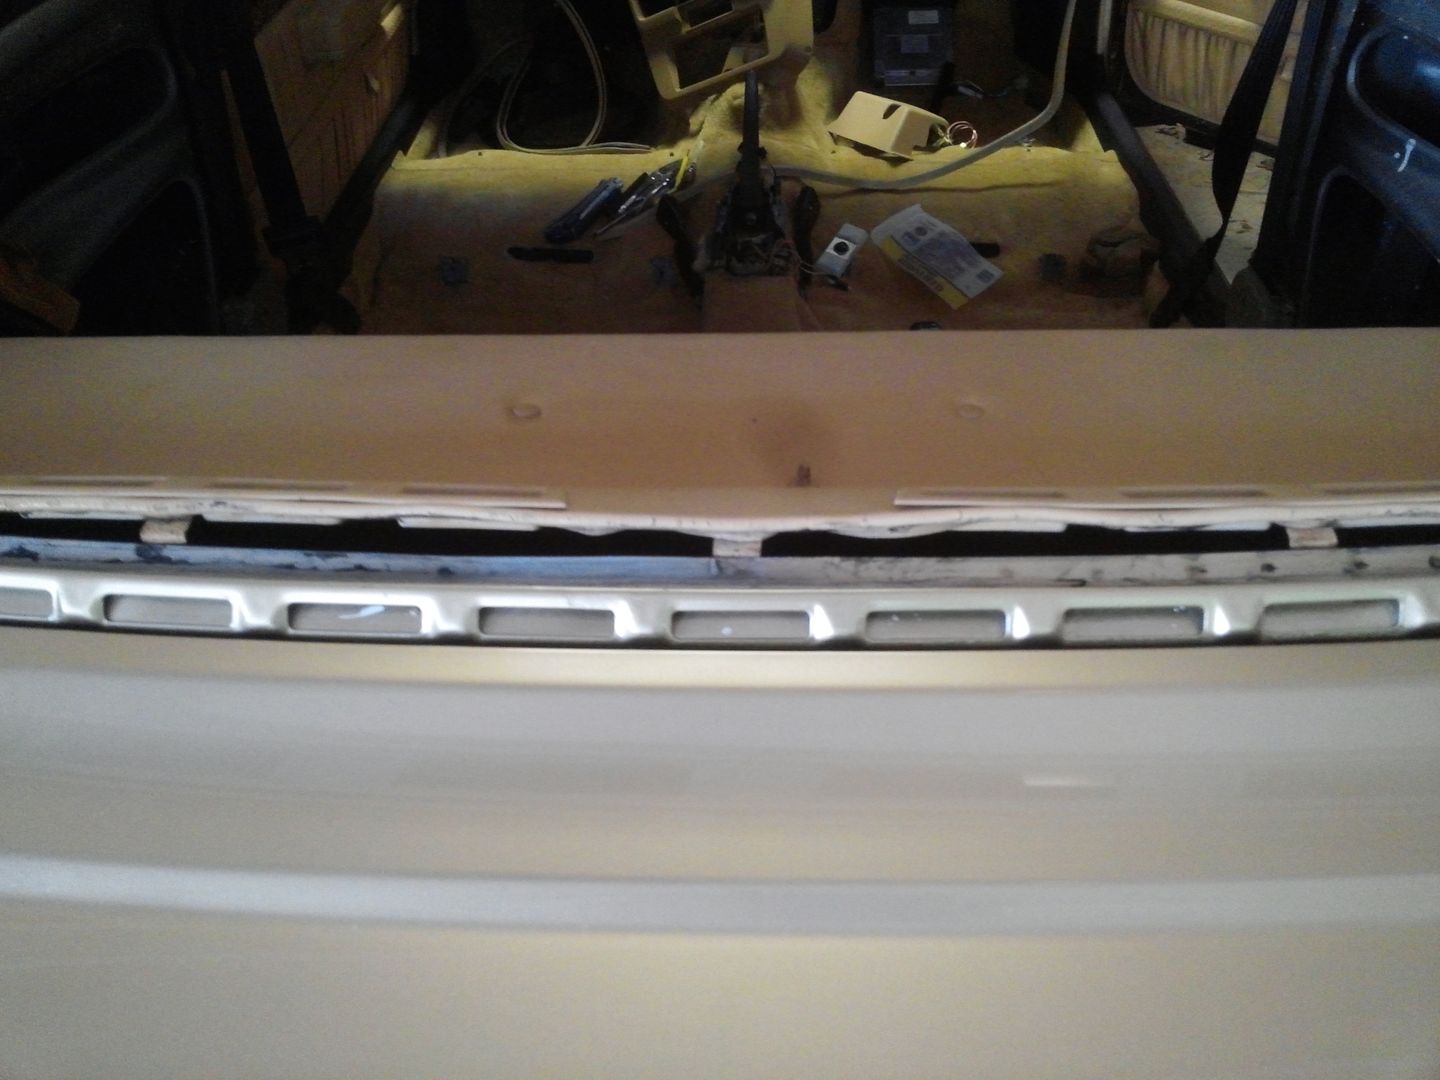
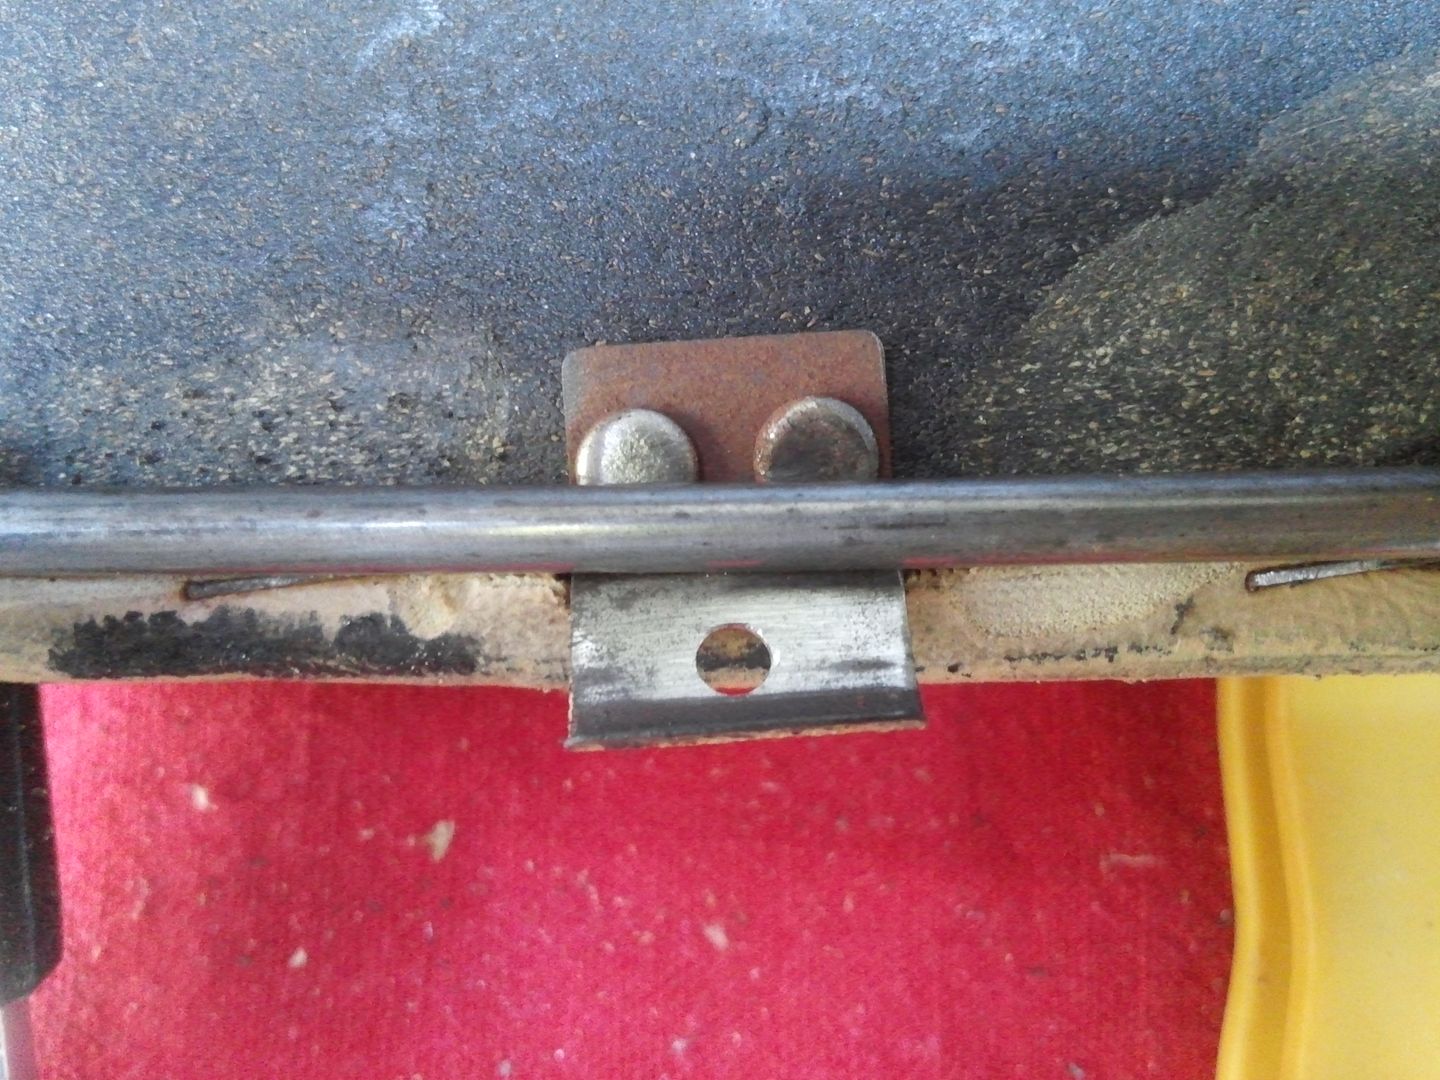
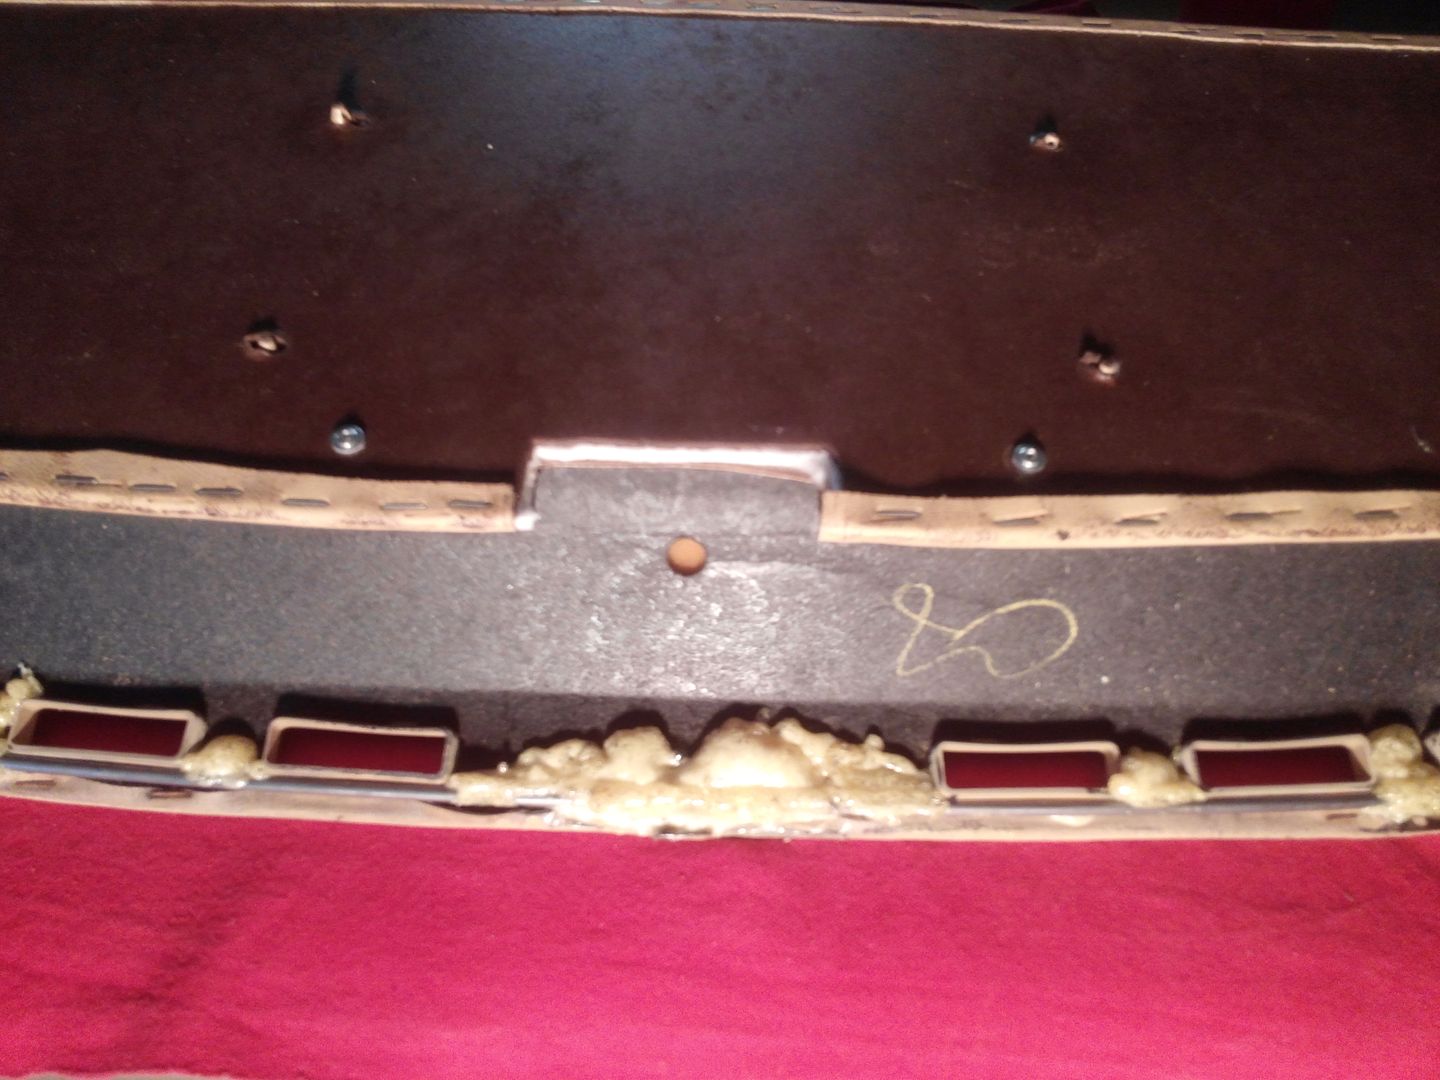
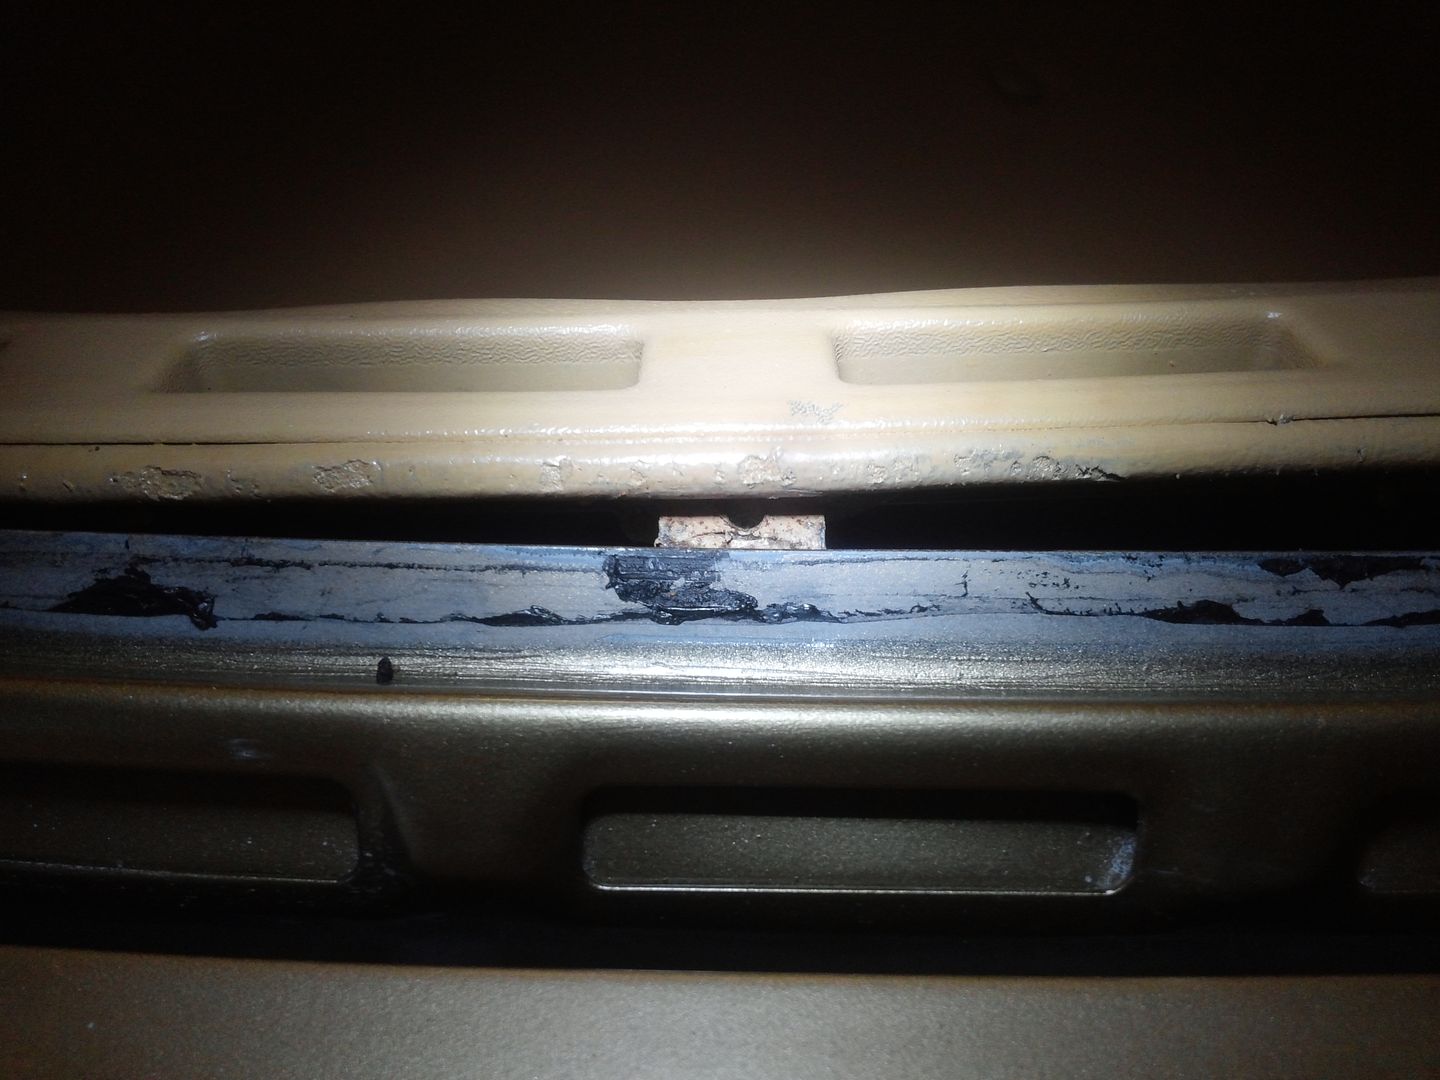
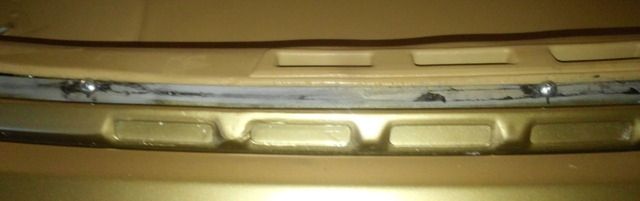
The screw in bolt didn't work because in order to use one large enough prevented the clip from entering the sheet metal hole. While you could pull the bolt up tight the stainless trim was still loose against the plastic trim.
That required the already modified clip to be modified again. First, the 1/4" Philips bolt was replaced with a #8 counter sunk machine screw. I did not counter sink the little plastic clip because of a concern about the amount of material that would have to be removed. The screw stood 'proud' of the plastic but had plenty of room within the stainless trim.
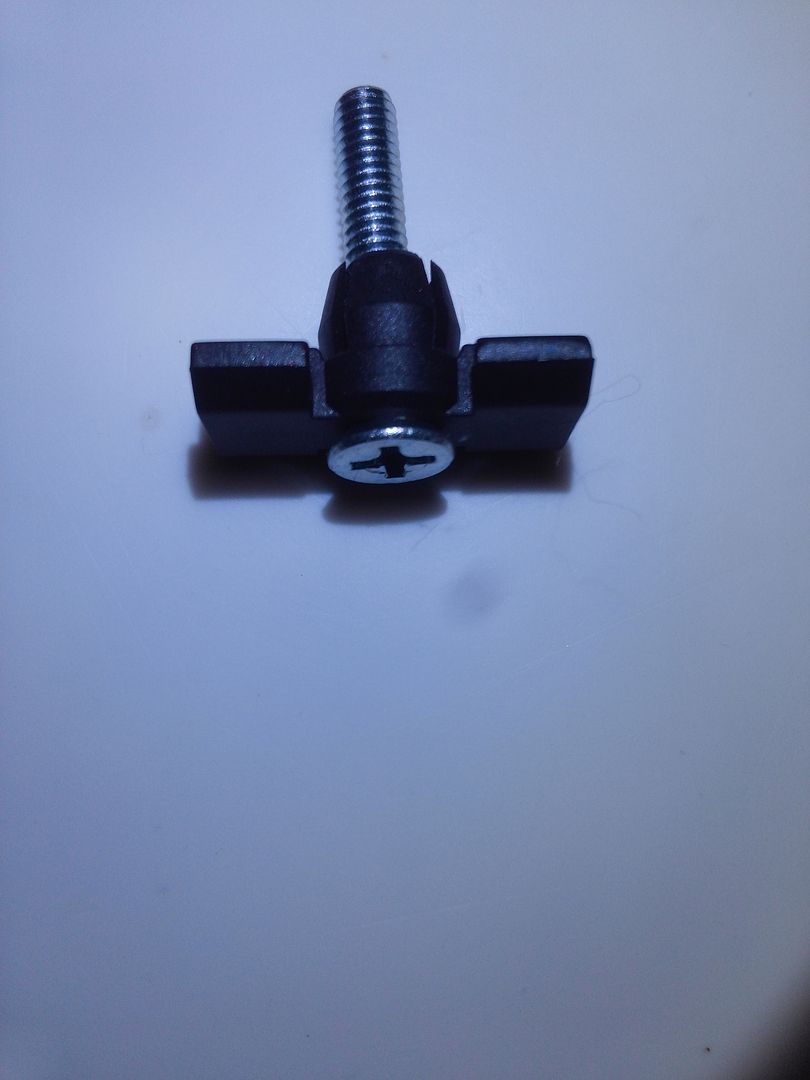
The little 'tit' was cut off with a Dremel cut-off wheel which allowed it to be now pulled up tight against the plastic trim and the sheet metal.
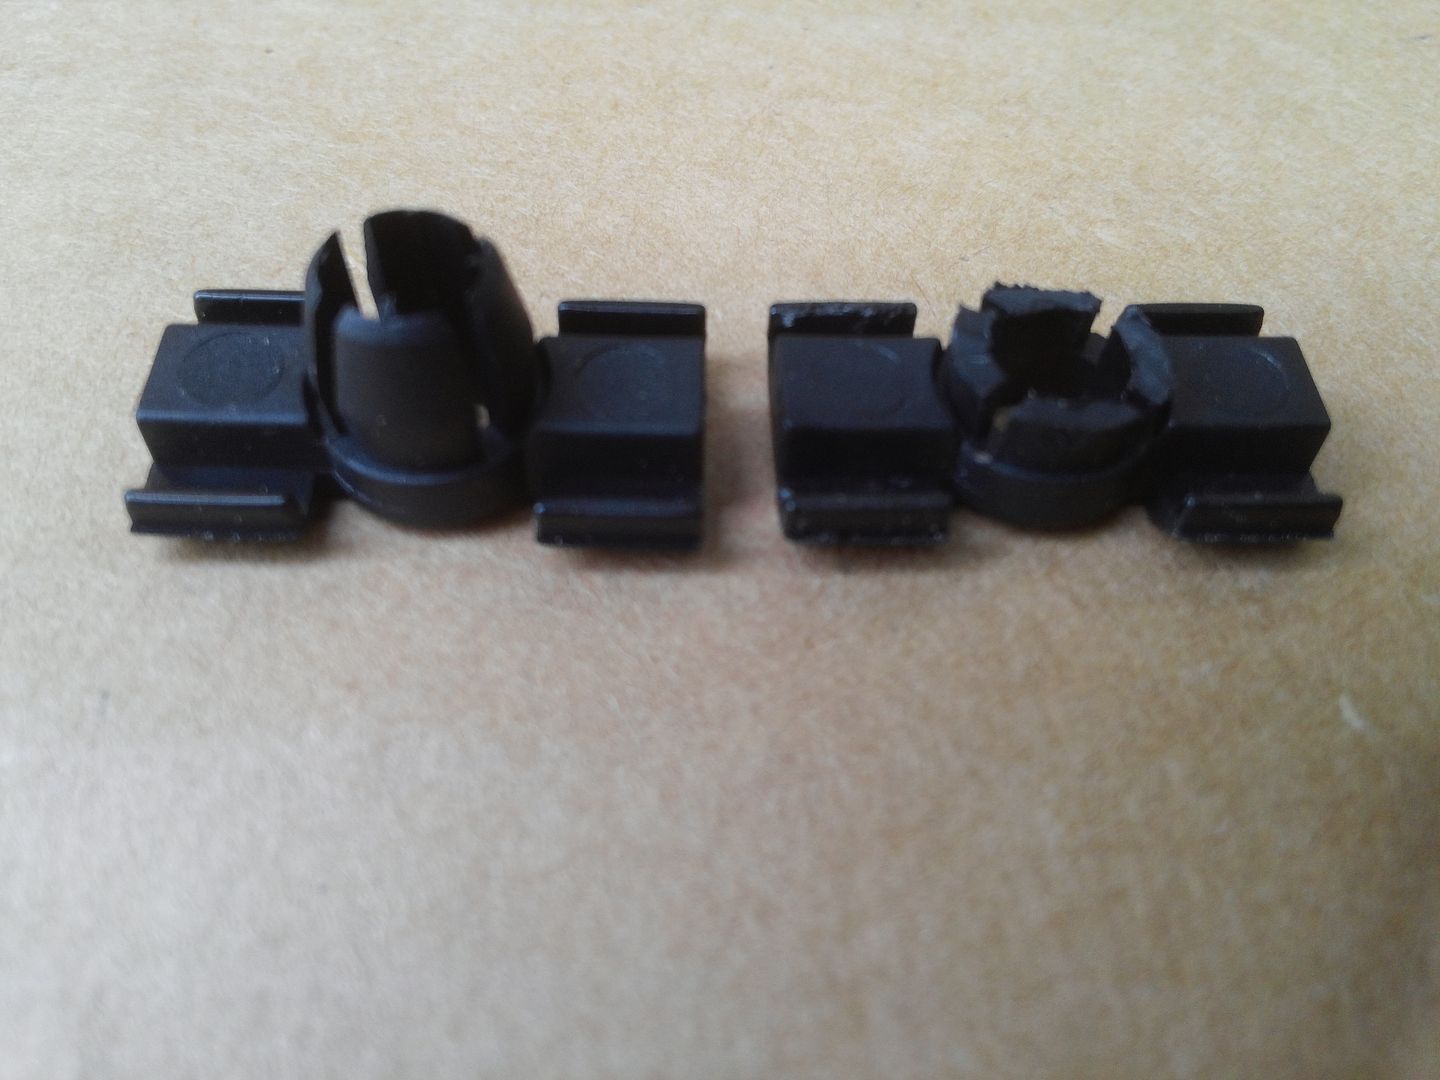
. . . and . . . the stainless trim can be removed just like the original clips.
Between the attachment tape and the bolts through the clips it is tight as a drum head! There will not be any water or trash behind that strip again!


Probably only have about 10 hours in those little trim pieces.
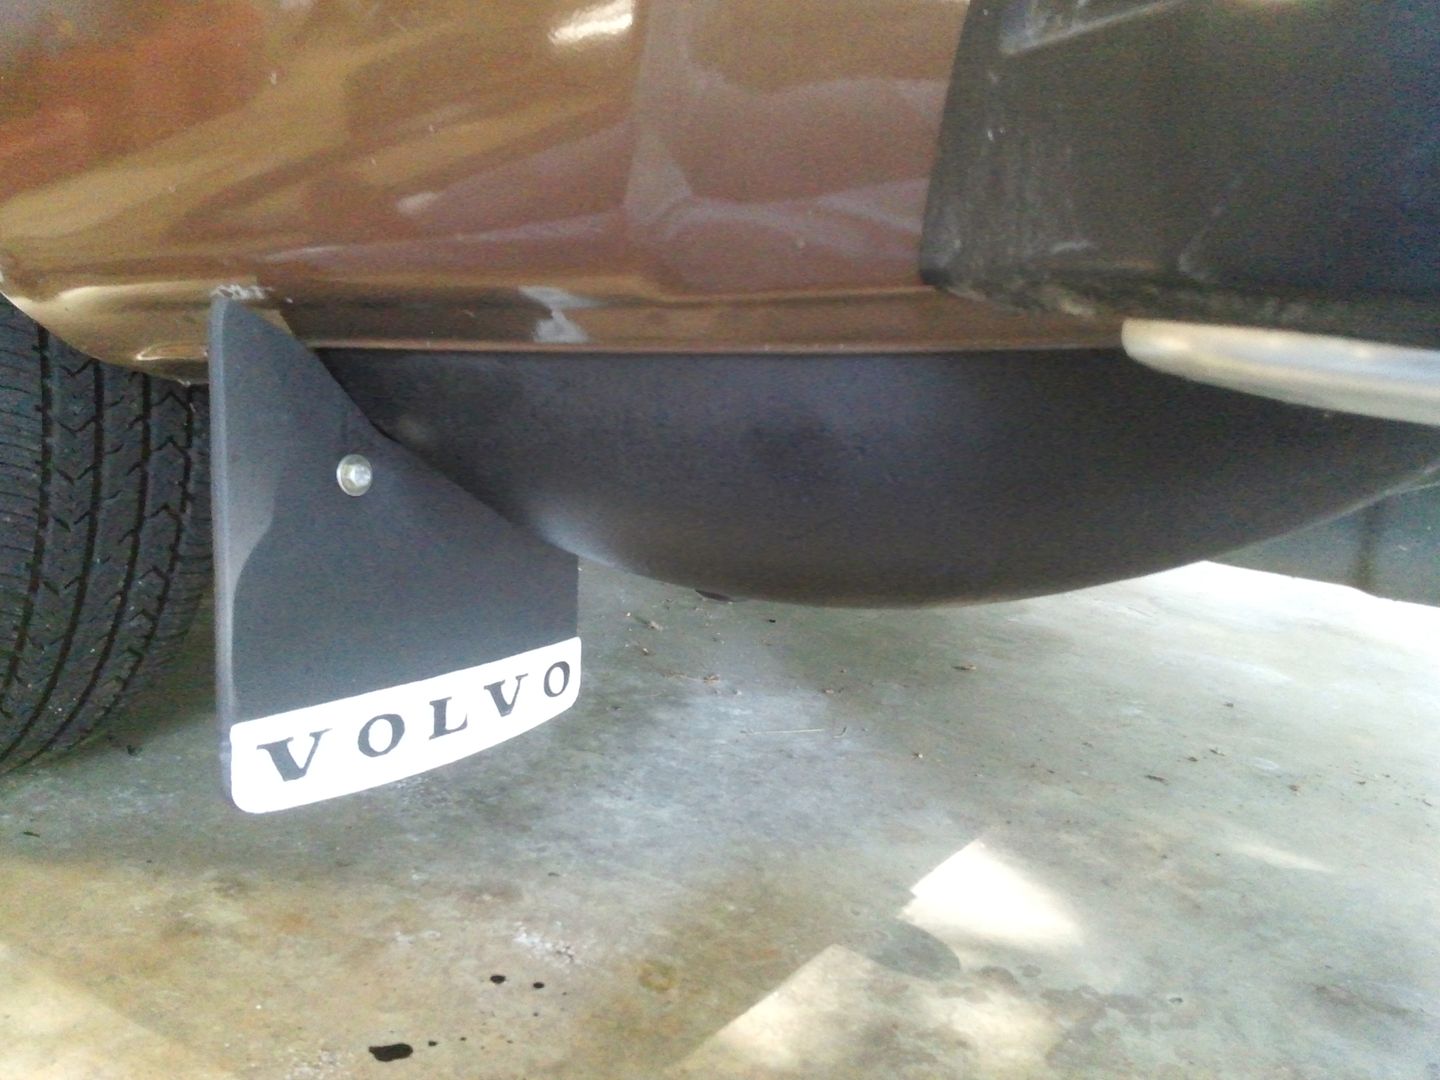
Also got the butt cheeks cleaned and painted and the mud flaps reinstalled. Yes, this car has the same hangy down spare tire storage area as the sedans. It came from Bertone like that. Cars before and after this serial number had the flat area and small spare. I have no idea how this occurred.
The screw in bolt didn't work because in order to use one large enough prevented the clip from entering the sheet metal hole. While you could pull the bolt up tight the stainless trim was still loose against the plastic trim.
That required the already modified clip to be modified again. First, the 1/4" Philips bolt was replaced with a #8 counter sunk machine screw. I did not counter sink the little plastic clip because of a concern about the amount of material that would have to be removed. The screw stood 'proud' of the plastic but had plenty of room within the stainless trim.
The little 'tit' was cut off with a Dremel cut-off wheel which allowed it to be now pulled up tight against the plastic trim and the sheet metal.
. . . and . . . the stainless trim can be removed just like the original clips.
Between the attachment tape and the bolts through the clips it is tight as a drum head! There will not be any water or trash behind that strip again!
Probably only have about 10 hours in those little trim pieces.
Also got the butt cheeks cleaned and painted and the mud flaps reinstalled. Yes, this car has the same hangy down spare tire storage area as the sedans. It came from Bertone like that. Cars before and after this serial number had the flat area and small spare. I have no idea how this occurred.
Last edited:
The interior of the sheet metal seems well treated. I keep an eye out for such things and have some latex based phosphoric acid rust treatment. The acid changes the iron oxide to ferric phosphate which does not further corrode.
Last edited:

NONHOG
equal opportunity car guy
- Joined
- Oct 3, 2008
- Location
- Tucson ish
I wish ours had full size spare (and butt cheek) ah well.
As usual very nice work Tom.
Nels you ever figure out the patch panel on the A pillar?
As usual very nice work Tom.
Nels you ever figure out the patch panel on the A pillar?
- Joined
- Nov 19, 2002
- Location
- Northern Washington
Looking good Tom....
Let me know when you wish for it to have an even-firing 3.4 liter six that will look as what the car came with...
Let me know when you wish for it to have an even-firing 3.4 liter six that will look as what the car came with...
Which car is that?
That is my 79 with the rusty A pillars.
I wish ours had full size spare (and butt cheek) ah well.
As usual very nice work Tom.
Nels you ever figure out the patch panel on the A pillar?
I spoke to a body guy who says he can fab something to do the repair. he is old school so no mig welding. He is more comfortable using a torch. Still need to get the glass out first, maybe next week.
Looking good Tom....
Let me know when you wish for it to have an even-firing 3.4 liter six that will look as what the car came with...
How does that work????
Which car is that?
Bought this one with 44k original miles. Runs great and looked good from 10 feet away. The more I looked at it the more I found that needed attention. Looks like the car a windshield leak at some point in its life and although the glass was resealed the damage was done. Had to put a new floor pan in the drivers side. Then it really got crazy. This is what it looked like when I bought it. Should look like that again soon ( I hope).

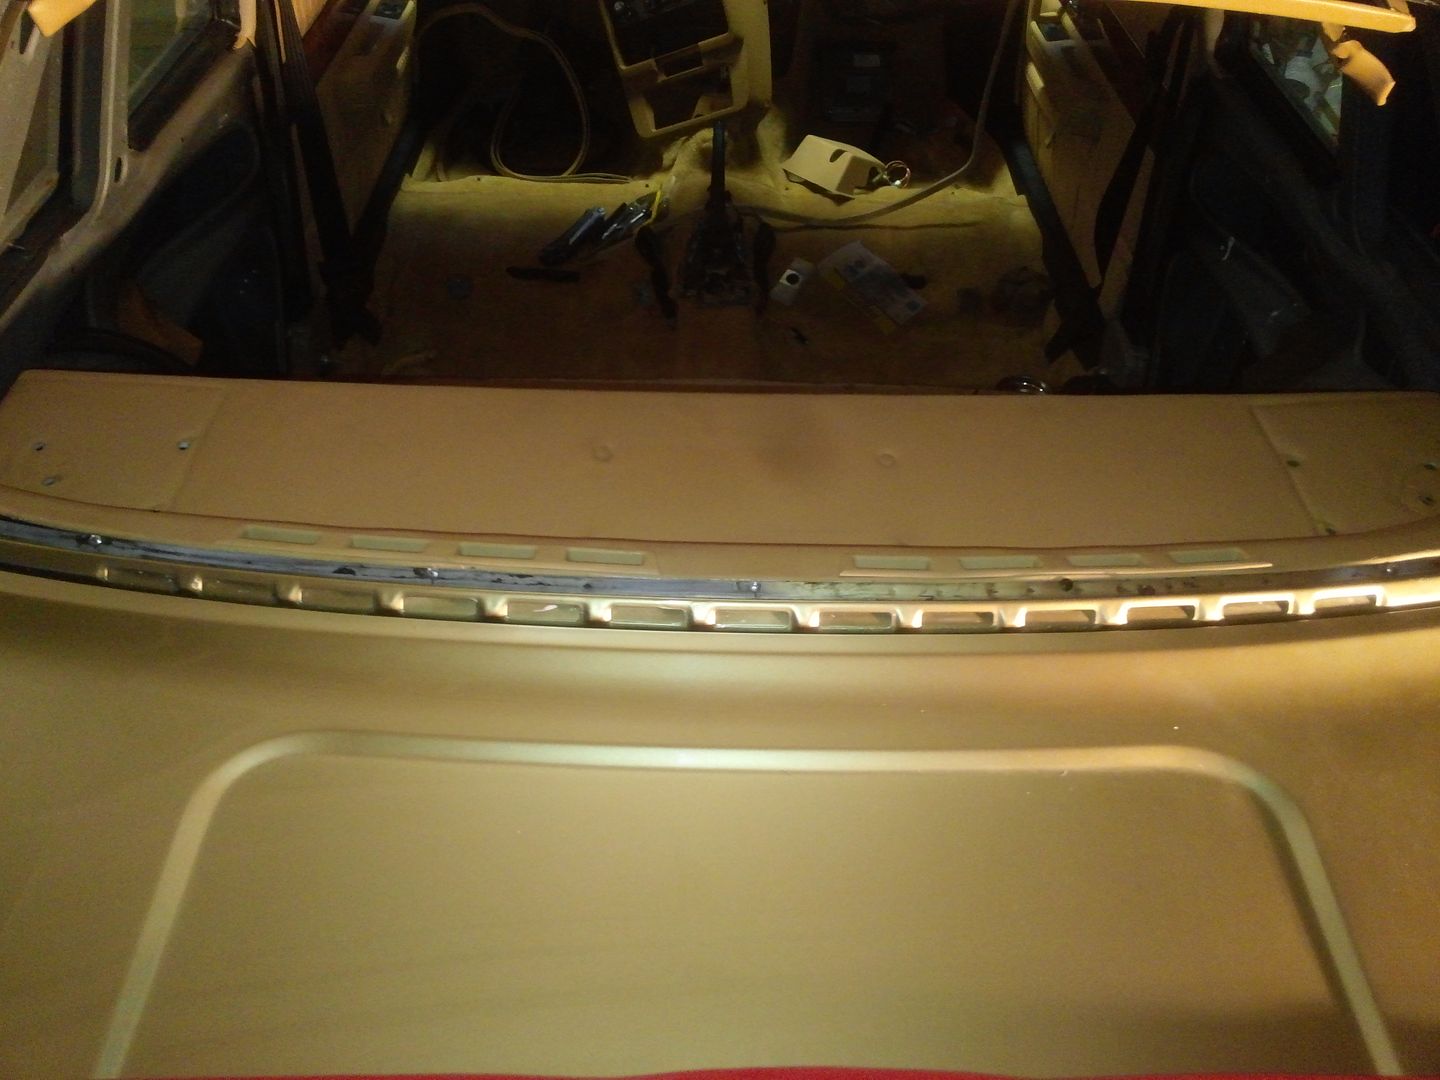
The reason the hat shelf will not clip under the sheet metal is that the fiber board that the spring clips are attached to is coming apart. I replaced the main board but between cut outs and pop rivets did not replace the sloped area in which the vents are mounted.
Now I have to figure out to get it back together without a big gap at the bottom of the glass.
My first thought is to drill a hole in each of the spring clips, install the panel and locate where a hole in the glass channel that would pull the clip up tight against the glass and then install with small screws.
The existing clips seem securely fastened to adequate fiberboard. Between the vents and the shape of the vent mounting board there is little room for further creativity.
Other solutions appreciated.
Last edited:
What I need to do is stiffen the glass edge of the panel with some spring steel to straighten it out. Notice in the photo that the glass edge is not very straight. There is only a quarter inch between the plastic vents and the glass edge but there is plenty of space below. I could even use a 90 degree angle if I could find a quarter inch version at least on one side. Something to do tomorrow.
My solution:
Drill holes in the spring clips that were intended to hold the hat shelf under the rear lite pinch weld. I replaced the flat panel of the hat shelf with tempered hardboard but the sloped and curved portion up to the glass was too complicated to replace.
Then, when the panel is installed with the clips under the pinch weld screw screws through the pinch weld to locate and hold tight the entire panel against where the glass will go.
Then, because the glass edge of the panel was distorted attach a 3/16" steel rod appropriately bent to both the spring clips and the curved panel. I may reinforce that with some thin metal strips also glued in.

Between JB Weld and Gorilla Glue I think I will go with the Gorilla Glue to attach everything to the fiber panel. The concern is that the surface of the fiber panel may separate and release the steel rod but it would with JB Weld also.
Are we having fun yet. Got to get this done by mid next week when the glass man comes back . . . fourth trip.
Drill holes in the spring clips that were intended to hold the hat shelf under the rear lite pinch weld. I replaced the flat panel of the hat shelf with tempered hardboard but the sloped and curved portion up to the glass was too complicated to replace.
Then, when the panel is installed with the clips under the pinch weld screw screws through the pinch weld to locate and hold tight the entire panel against where the glass will go.
Then, because the glass edge of the panel was distorted attach a 3/16" steel rod appropriately bent to both the spring clips and the curved panel. I may reinforce that with some thin metal strips also glued in.
Between JB Weld and Gorilla Glue I think I will go with the Gorilla Glue to attach everything to the fiber panel. The concern is that the surface of the fiber panel may separate and release the steel rod but it would with JB Weld also.
Are we having fun yet. Got to get this done by mid next week when the glass man comes back . . . fourth trip.
Last edited:
Gorilla Glue seems to be the ideal product for this application. Between clamps and a first shot of glue the clamps could be removed and another couple applications of the stuff applied. The GG is workable and cut able for about 24 hours then gets as hard as JB Weld.
The 5/16" rod seems very firmly attached to the fiberboard and the entire piece is now straight across where it meets the glass.
Now to carefully drill holes in the pinch weld to align with the previously drilled holes in the spring clips.
Then to screw the hat shelf clips to the pinch weld.
All better. By the time all five screws were in the panel was pretty straight across the entire width of the opening.
Last edited: