• Hello Guest, welcome to the initial stages of our new platform!
    You can find some additional information about where we are in the process of migrating the board and setting up our new software here

    Thank you for being a part of our community!

White 83 242 Commuter

Just went through this entire thread today.

Fantastic work!

If I was to get into the Volvo game, which would be the best year model that's "easy" to work on?

I'm trying to avoid complicated electrical systems.

If you want to get into 240s, 83-93. The later ones are nicer, the earlier ones have more style.
 
If I was to get into the Volvo game, which would be the best year model that's "easy" to work on?

I'm trying to avoid complicated electrical systems.

240 Volvos are very simple with regards to electronics. I found them to be a very easy and interesting transition from VWs. They even used the same ceramic fuses, from the late 60s all the way into 1993! LOL

Turbo cars have CIS injection, like 80s VWs. I would avoid that because when it goes wrong, it sucks.
Early 80s volvos have issues with the engine wiring harness, because the insulation tends to crumble and cause shorts. But it's not so difficult to swap a harness. About like doing a new wire loom in an aircooled VW.

I picked specifically the 1983 242 for a variety of aesthetic reasons:
-1983 was the first year for black plastic bumpers, rather than the earlier aluminum commando bumpers
-1983 is the last year for 5 panel tail lights, and I like those better than the later 6 panel units
-earlier 240s had 7" round headlights and flathoods, but they are interchangable onto all 240s up to 1986.
-in 1986, they went to the huge rectangular headlights, and a bulbous hood and cowl, and trunklid.
-I swapped the headlights and flat hood onto my car, because I don't really like the chrome mirrors on the earlier 240s
-the solid colors are single stage volvo paint which is extraordinary. metallic paints have a clearcoat layer, and tend to peel.

As far as choosing a first Volvo, the electronics shouldn't be an issue on any of them really, aside from the engine harness issue. Even things like power windows and locks are easy to fix. In general, later cars had better parts, like Athlon said. But all in all, if you like the look of an early car and you're coming from the world of VWs, you'll be totally happy. There's not too much of a learning curve, and every little weird detail (like heater control failures) are easy to find answers to on turbobricks.
+1 to a well-written, well-thought-out write-up.

#240masterrace
 
Nice work. Why didn't you just swap the foam from the good 244 seats onto the frames of the 242 seats? Seems like you gave yourself extra work. That was also the time to put all of the fabric in the washing machine for a like new seat. Nice work on the headlight frames.
 
Using the 242 as a truck:

IMG_7127.jpg

Dayum, round lights offset all the boxy boxiness perfectly...(he said wistfully while looking at the giant yellow portable TVs on his 745)

And like that refrigerator white...

Just a cage and some suspension and find some nice twisty gravel roads...:oogle:
 
Nice work. Why didn't you just swap the foam from the good 244 seats onto the frames of the 242 seats? Seems like you gave yourself extra work. That was also the time to put all of the fabric in the washing machine for a like new seat. Nice work on the headlight frames.

Thanks! You're right, I should have thrown them in the washing machine. I was just impatient.

I couldn't just swap the foam though. The driver's side seat back was bent, and it turns out it had a broken spot weld. When I swapped the driver's side seat back, I noticed that the recline knob mechanism was different from early to late. I wasn't sure if there were any other differences, so so I did the passenger side too to assure they'd match.


Dayum, round lights offset all the boxy boxiness perfectly...(he said wistfully while looking at the giant yellow portable TVs on his 745)

And like that refrigerator white...

Just a cage and some suspension and find some nice twisty gravel roads...:oogle:

Thanks man!
Not this car. I'm just tinkering with this one for fun to clean it up and drive it to work. Sort of OEM-ish with a few cosmetic clean ups. My other orange car will be more performance oriented, but even that one won't be a race car. I'm sort of done with that kind of thing, after a vertebrae fusion surgery at the base of my neck, and the suggestion from a doctor that I not bobble my head around with a helmet strapped on top. No off-road, performance, or bouncy bounce driving for me. But I'm perfectly OK with that. It means less broken car parts.
 
Got a few little things done to the car this weekend. First, I received my LED headlight bulbs from VintageCarLEDs, and I was pleasantly surprised how nice they are!! Both in terms of quality and light output. Very nice upgrade!


More information about their lights on this thread:
http://forums.turbobricks.com/showthread.php?t=323403&page=2
Their site:
http://www.vintagecarleds.com/


Not that I guess it matters that much, but I was impressed by the packaging:


VintageCarLEDs offers a kit with the H4 7" round headlight lens included (Autopal brand), but I already had some brand new Hella H4 lenses. So I bought just a pair of their VC4000 bulbs. They don't have a mechanical fan to cool them off, just a really nice aluminum heat sink. The only unfortunate thing I ran into, is that the dust boot did not fit on the back. I haven't decided if I am going to cut a slice in the side of it to make it fit or what.


IF I could stretch the boot over the heat sink, it would fit perfectly on that thin section. But it won't stretch, so I'd have to slice it to make it fit. I am also not sure if the heat from the bulb will be a problem. I'll contact VintageCarLEDs tomorrow and find out.
 
Installation was super easy. Just plug them into the socket and it's done. They use the same pin configuration as our stock sealed beams, so repinning was not even necessary.

Hella H4 versus sealed beam. I love the flat profile of the Hella lenses:


I took a round of pictures with the LED on the passenger side, and the stock sealed beam on the driver's side.

LOW beam:


HIGH beam:


Note, my fog lights have amber HID H3 bulbs in them, (wired to what used to be the stock inner high beams). So you can get a slight idea of the amount of brightness between the LEDs and HIDs.

I am very happy with how they turned out. At night, they have a very crisp light cutoff. MUCH better than the HIDs by a long shot. These lights in my Volvo look almost as good as the factory HIDs in my wife's E39 BMW. It's so much nicer than I thought it would be. In fact, I'm going to drive at night a bit first, but I think I might ditch the HID fog lights now!


Also took my passenger door panel off, to try and track down a rattle and also replace the floppy door handle. Found one of my favorite things in any old used car... repurposed aircooled VW parts!
Someone used half of an old VW exhaust clamp to help keep the door release rod from bowing outwards when you pull the inner door handle:


That's definitely going to stay!

I discovered the source of my rattle. Some spot welds have broken on the frame that sits at the bottom of the window. I don't have a welder here, so I mixed up some heavy duty epoxy, clamped it for 12 hours, and it seems to be doing OK. IF it doesn't hold, I'll replace the frame with one from a donor car. Has anyone ever removed that frame from a piece of glass, and gotten it to fit tight on the new piece of glass? I've tried it a few times on Karmann Ghia windows, and haven't ever fully succeeded at getting the frame to grip the glass tight enough to prevent it from falling off eventually.


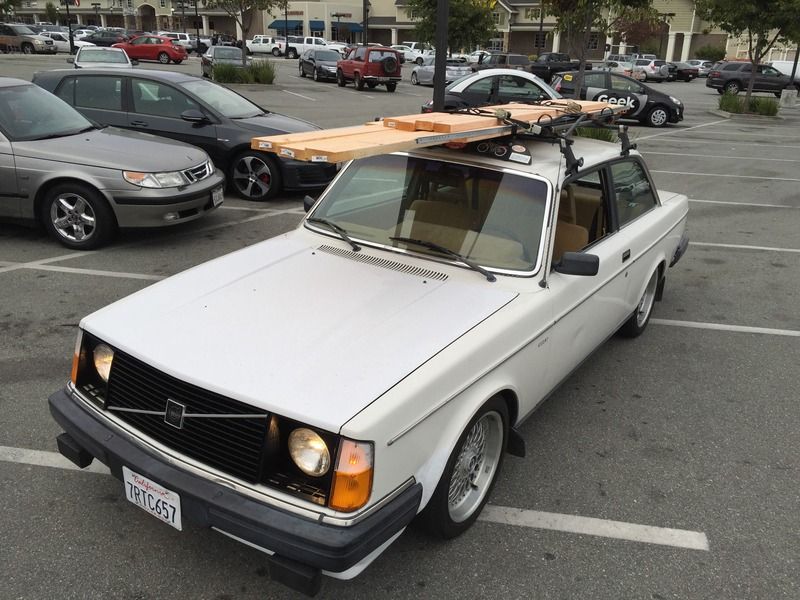
Finally, I am trying an experiment...
I think that my rear speaker shelf would look better if it was all tan. Right now, it's got some 6x9s in the shelf, it's got some nearly white carpet that used to be tan once, some black rear window defrosters, and it's got those black seat belt covers. I am going to try and paint it all tan with SEM interior paint, and see how it looks.


All scuffed up and then washed with dish soap and left to dry. Tomorrow I'll paint.


This is the paint that IPD sells for tan 240 interiors. SEM 15173 Camel. I hope it matches pretty well!


I knew that the door panels were faded and would need some of that SEM paint too. But I had no idea they were so rotton!


These are both totally gone at the bottom. So I am going to keep an eye out for some workable door panels for sale. In the meantime, I am going to run these as-is. I'm not even sure if I want to bother trying to seal up the backside, because they're so gross and floppy. What have people used to seal the backsides of door panels like this?


One last thing, In my effort to lube and free the passenger side rear popout window, I discovered how the popout window hinge works. If you're curious, it's pretty damn basic:


It just fits into two slots and pivots there. And here's the backside of the mechanism:


I'd love to try and modify these someday, to get twice the amount of opening out of them or something. Similar to Spoon latches in an old VW bus:
rockdel105.jpg


I checked it out, and there's enough give in the hinge up front to make it possible. I'm just not sure how far is too far, before the window falls out of its front hinge when you go over a big bump! I'll find out someday.
 
Is the heat sink removable? If so you might be able to get those sealers on. Top notch stuff as always.


Yes, you can unscrew the heatsink (large black part) -anti-clockwise to install the dust boots.

The White thermal paste on the threads should not be removed (helps heat transfer)
 
Last edited:
Yes, you can unscrew the heatsink (large black part) -anti-clockwise to install the dust boots.

The White thermal paste on the threads should not be removed (helps heat transfer)

Nice! Thanks! I looked for a little set screw but didn't try unscrewing the sink. I'll try that tonight and post pics.

So the dust boot won't cause any thermal issues?
 
Thomas, the reason that door latch release bar bends and bows is because the door latch is not lubed up properly and it's harder to make work. Use some white lithium type spray and lube everything up. Wurth's HHS2000 is what I use. Great stuff!

wurthhhs2000_zpsbzx4gujo.jpg


Regarding setting a window back in the channel, it's pretty difficult to get right. It's crimped from the factory to smash the glass in the rubber. Getting the right tension with out breaking the glass is almost an art. It will at least work for a while, but I've just went to replacing the entire thing if I don't want to deal with it ever again.

A tan "restored" interior that pictures don't do justice for ideas/reference: http://forums.turbobricks.com/showpost.php?p=4762860&postcount=20


These are both totally gone at the bottom. So I am going to keep an eye out for some workable door panels for sale. In the meantime, I am going to run these as-is. I'm not even sure if I want to bother trying to seal up the backside, because they're so gross and floppy. What have people used to seal the backsides of door panels like this?

My '79 GT had similar issues.

What I did was leave the loose bits in place and the reinforce with fiberglass. It worked quite well and stiffened up the panel quite nicely.

If you're clever, you can also re-incorporate the tab holes so you can continue to use those. But honesly, I've gone and used TB3560 from itapestore.com. It's strong stuff, but flexible and easily separable.
 
Last edited:
What I did was leave the loose bits in place and the reinforce with fiberglass. It worked quite well and stiffened up the panel quite nicely.

That's what I did for mine as well. I had one that was pretty good but I used just resin to stiffen it back up. The other I basically remade the bottom section with glass cloth. They gained a little weight but it worked.
 
I did not know that, but that must be how people get polished center nuts on their Style 5s.
Thanks for the info!

Yep! Lincoln town car chrome hex nuts. I gorilla glued some onto a set of E30 bmw mesh waffled center caps. It's not an exact fit, but it livens up the wheels a bit. Paired with some fake BBS center cap poly domed centers, it doesn't look too shabby!
 
Thomas, the reason that door latch release bar bends and bows is because the door latch is not lubed up properly and it's harder to make work. Use some white lithium type spray and lube everything up. Wurth's HHS2000 is what I use. Great stuff!

wurthhhs2000_zpsbzx4gujo.jpg


Regarding setting a window back in the channel, it's pretty difficult to get right. It's crimped from the factory to smash the glass in the rubber. Getting the right tension with out breaking the glass is almost an art. It will at least work for a while, but I've just went to replacing the entire thing if I don't want to deal with it ever again.

A tan "restored" interior that pictures don't do justice for ideas/reference: http://forums.turbobricks.com/showpost.php?p=4762860&postcount=20

Pat,
That's what I was afraid of, and exactly what I experienced with Ghia windows in the past. It's best to just leave them as an assembly, and replace the whole thing. If my epoxy doesn't hold up, then I'll search for a new 242 window..
And yeah, I have lubed up all my door mechanisms inside and out. I didn't use white lithium grease though, I just sprayed Tri-Flow on everything. And it's working great right now, with much less effort needed to open doors and roll windows up. I'll add Wurth white lithium grease to my arsenal, and re-do it with that when it needs it again.
That tan interior in your link is incredible. Those door panels!! Holy crap. I like how you used carpet in the back parcel tray, but it looks almost a little too fuzzy or something. But it might have looked perfect in person? I'd love to find something like speaker box carpet in the right color.

My '80 GT had similar issues.

What I did was leave the loose bits in place and the reinforce with fiberglass. It worked quite well and stiffened up the panel quite nicely.

If you're clever, you can also re-incorporate the tab holes so you can continue to use those. But honesly, I've gone and used TB3560 from itapestore.com. It's strong stuff, but flexible and easily separable.

That's what I did for mine as well. I had one that was pretty good but I used just resin to stiffen it back up. The other I basically remade the bottom section with glass cloth. They gained a little weight but it worked.

Thanks for the great ideas! I love the velcro idea, and the resin onto the existing cardboard panel. I might cut out the cardboard below the door pull, overlap some new particle board panel with the old cardboard, and glue it all up. For now, I'm just putting them back in place as-is. I'll gear up for a door panel overhaul sometime later.
 
Last edited:
Back
Top