• Hello Guest, welcome to the initial stages of our new platform!
    You can find some additional information about where we are in the process of migrating the board and setting up our new software here

    Thank you for being a part of our community!

1975 242DL Project: B230/M46/Lh2.4 Upgrade <!!! Image Heavy!!!>

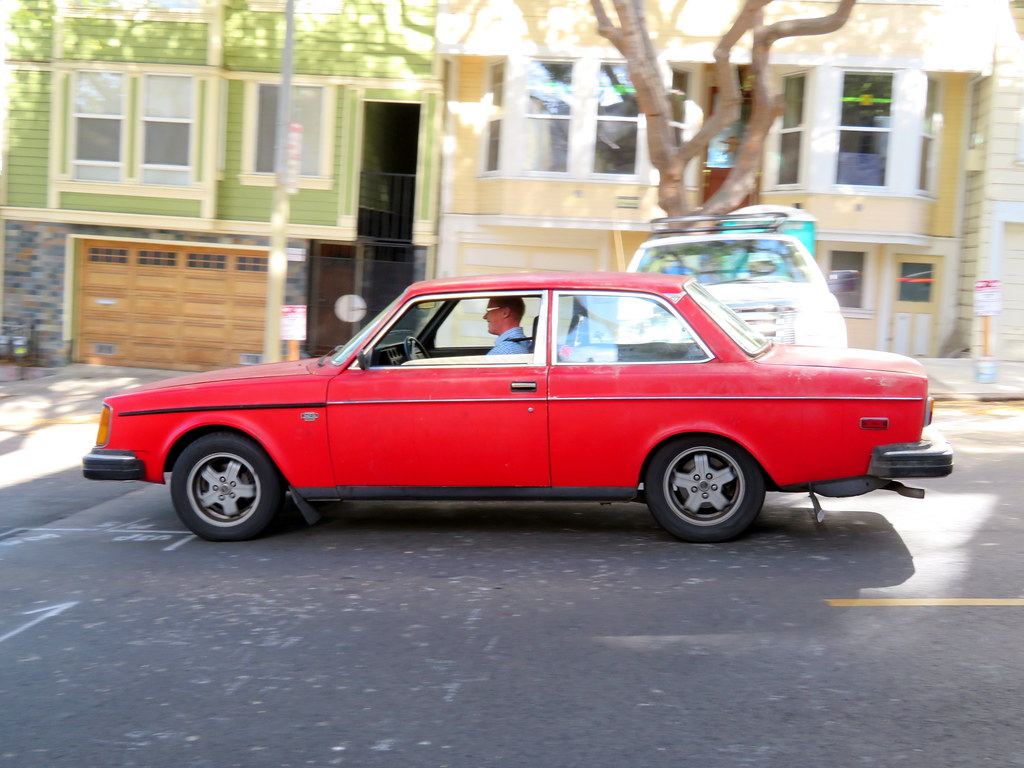
Summer and Fall 2016

Since making the 242 operational, overall work and progress slowed down comparatively in the subsequent months. Since the CEL light still mocked me from the instrument cluster, I unplugged the ECU to clear the codes and see how long it took to return. Driving the car for a couple minutes it came back on with the familiar codes of 2-2-1 and 2-3-1. For the next couple of weeks the car did not like starting cold as it would stumble and hesitate especially when going up hills or hard acceleration. Searching and consulting the internet did not turn up anything conclusive. One morning decided to remove the spark plugs to inspect them and see if they show evidence of running lean or rich. Looking at them they were definitely not fouled, but more on the lean-ish side of the spectrum.

29106679086_b3e38ce6e1_b.jpg


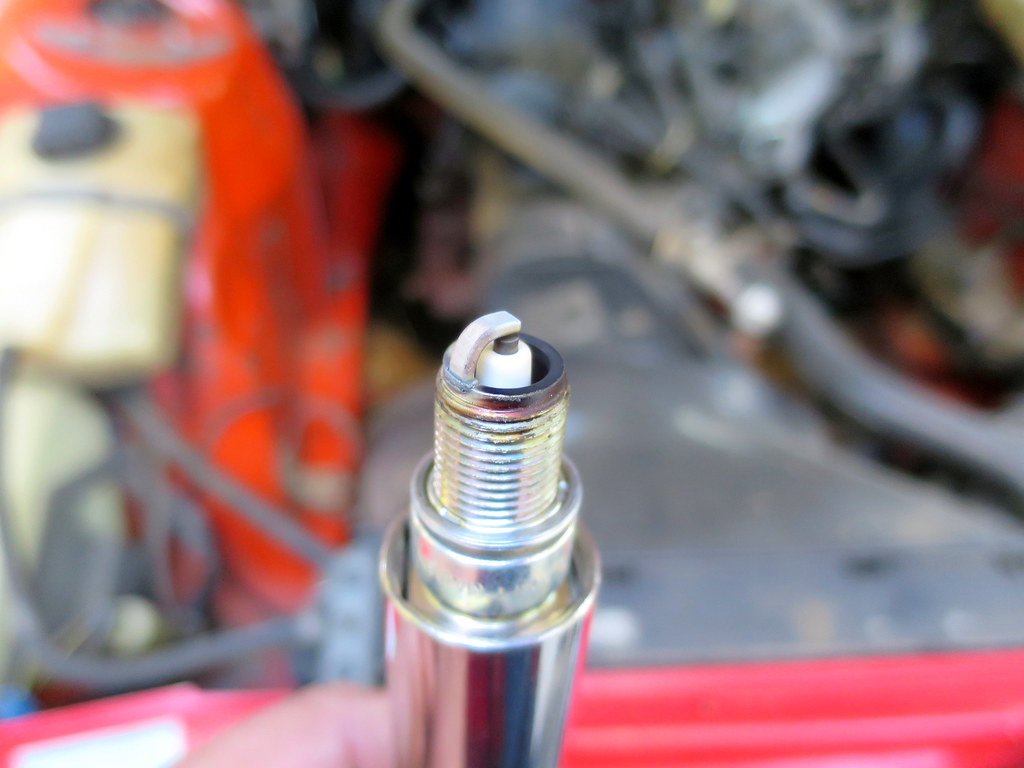
Reinstalling the plugs back in I restarted the car and suddenly it idled smoother than it had in a while. After pondering what had just happened, the proverbial lightbulb went off. I realized one of the components I had not changed out this whole time were the ignition wires. Being a set of Bougicords wires, had not thought they would be suspect or needed to be replaced out. Later that afternoon ordered a new set of Bougicords along with a few other parts. Arriving just before July 4th, installed the new wires which resolved the running issue and the CEL light illuminating.

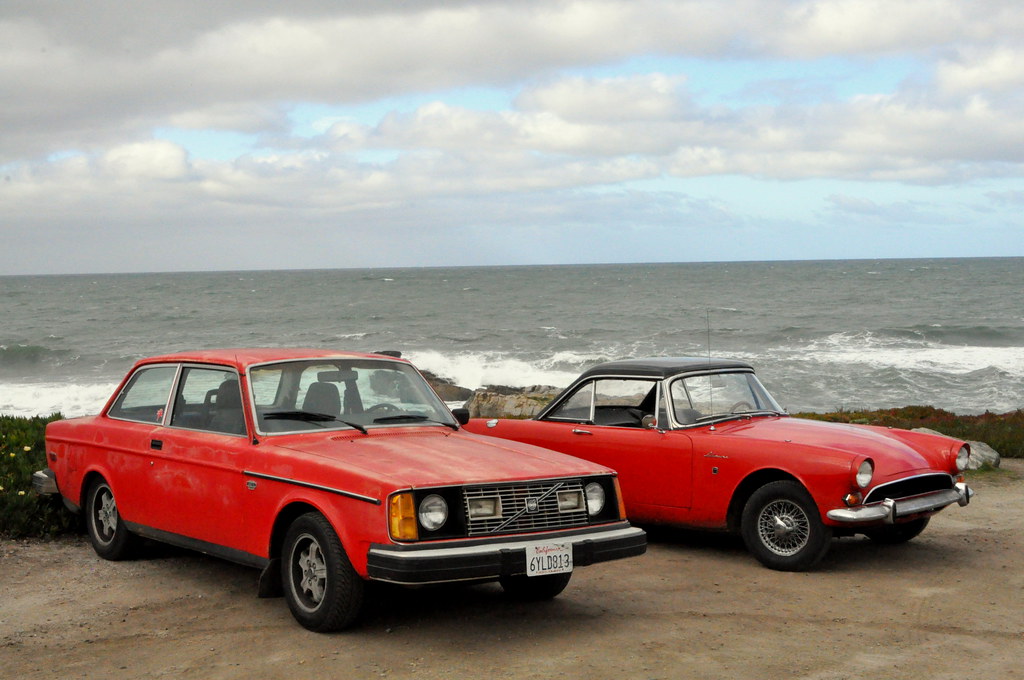
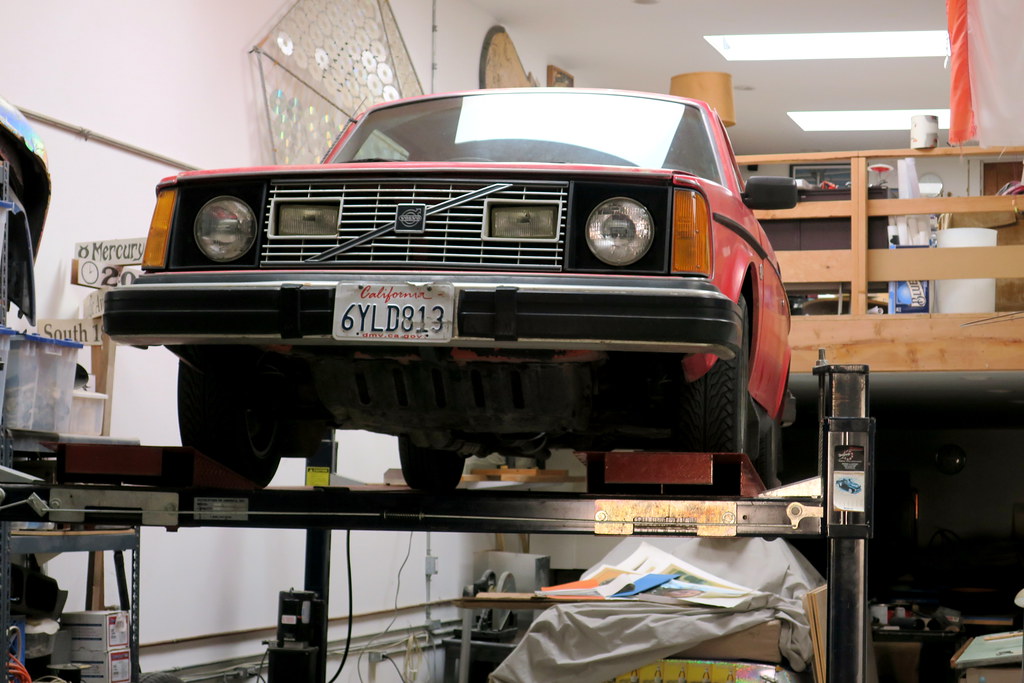
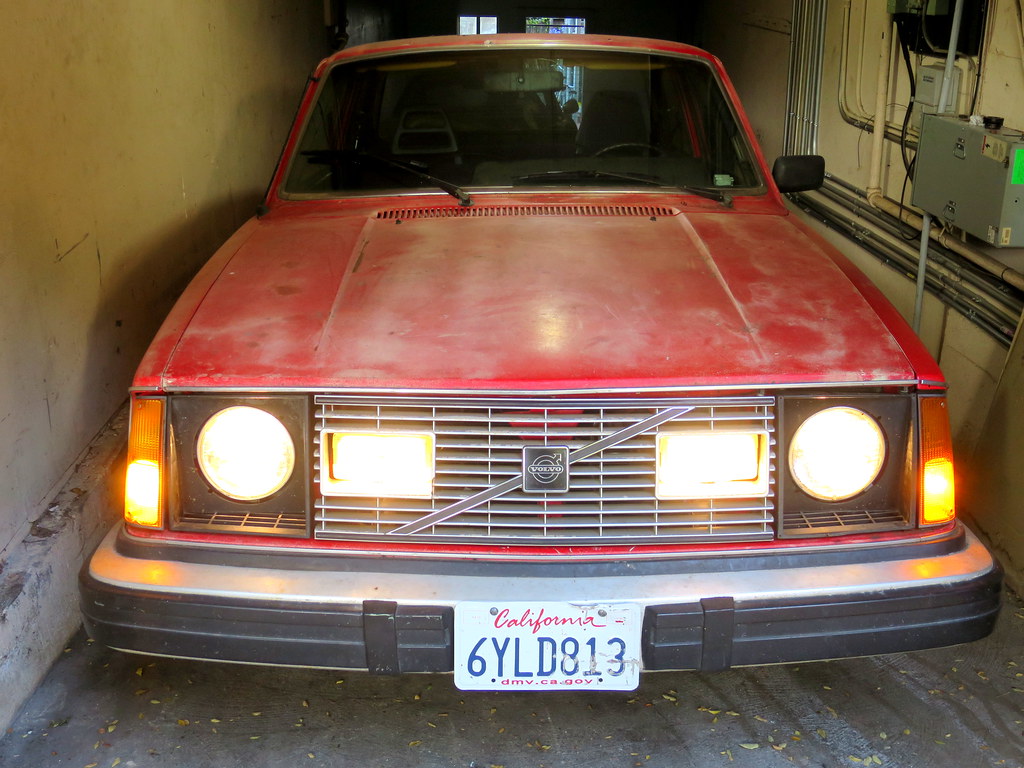
One of the other plans for the 242 involved installing a set of 242GT driving lights and grill. I had all the parts to make the conversion, but I did not know the exact location of where to drill holes for the mounts into the valence. After posing a question on Turbobricks, Highperauto posted with a link to the installation instructions online and two days later the driving lights had been installed and wired up.
http://www.turbobricks.com/forums/showthread.php?p=5431175

28517733004_cd26393a8e_b.jpg


28852328440_5703747b8b_b.jpg


31010535704_468bfc0f88_b.jpg


In August dug into the front suspension noise. Talking the front wheels off and looking around I checked out the various components. On the passengers’s side while looking at the front strut, noticed the several threads were visible on the strut retaining collar. Using a pair of large channel locks, grabbed the sides and tightened down the collar into the strut tube and the noise disappeared.

During the same period the overdrive started to be contemptuous. It began not able to engage and every so often would work, but most of the time would not. Started by checking the wiring going through the shifter to the push button in the knob, but that looked to be not the issue. After thinking back to the other electronics which failed (ECU and Fuel Injection relay) when trying to initially start the car, dug through the spares to locate another relay. Swapped in a new replacement and the OD now worked on demand. The wet spring and garage environment really did a number on the car.

31041638983_ff54995297_b.jpg


31010537254_446948b008_b.jpg


31010538594_09d8d1fecd_b.jpg


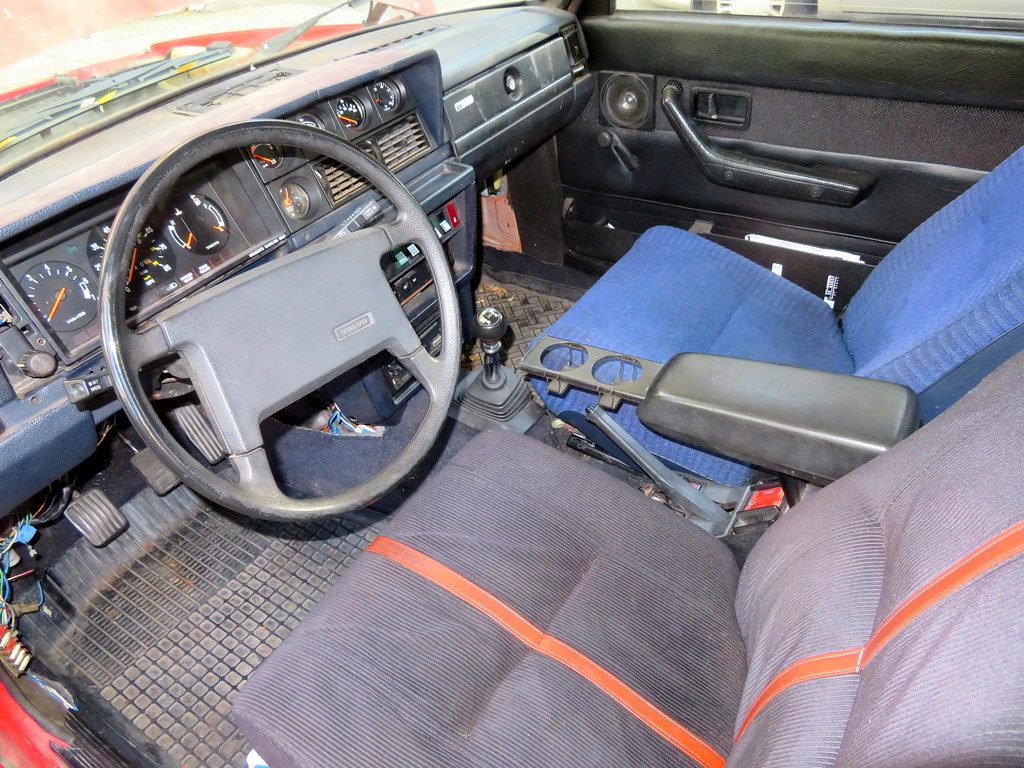
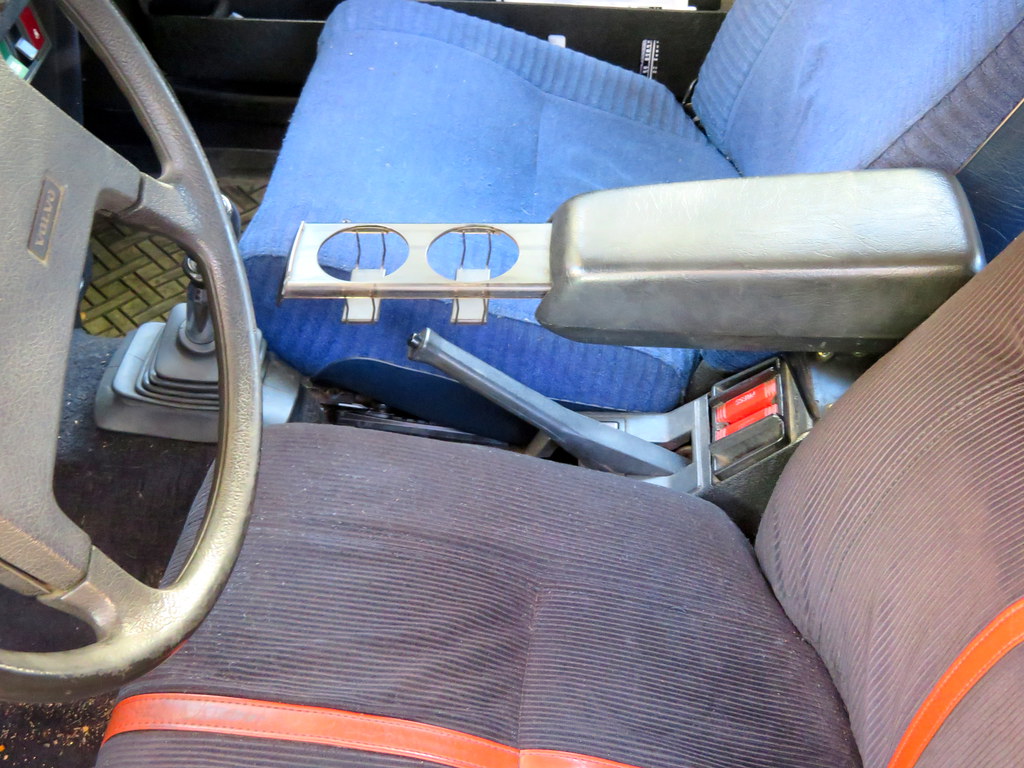
Added a creature comfort in the form of an armrest between the front seats, the type with the integrated cup holders found in the later 240s. Found one in the junkyard several years back and finally installed it into the car. Since the 1975 does not have the pre-drilled holes in the transmission tunnel, had to use that type instead of the more common rectangular armrest.

31729570141_34293bf06b_b.jpg


31729566111_65ab9e1678_b.jpg


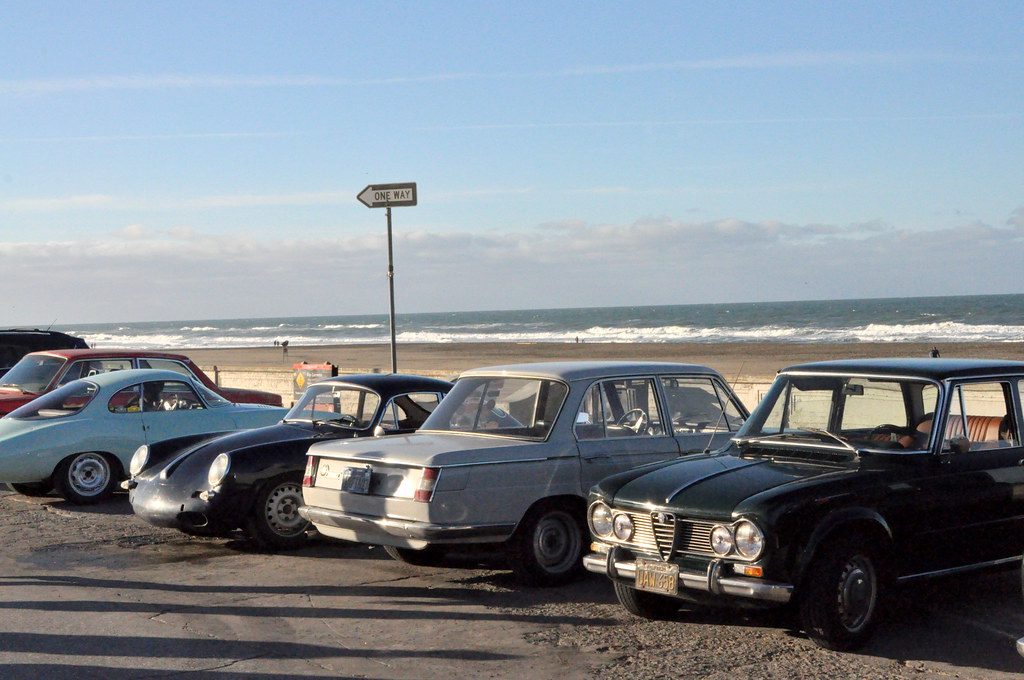
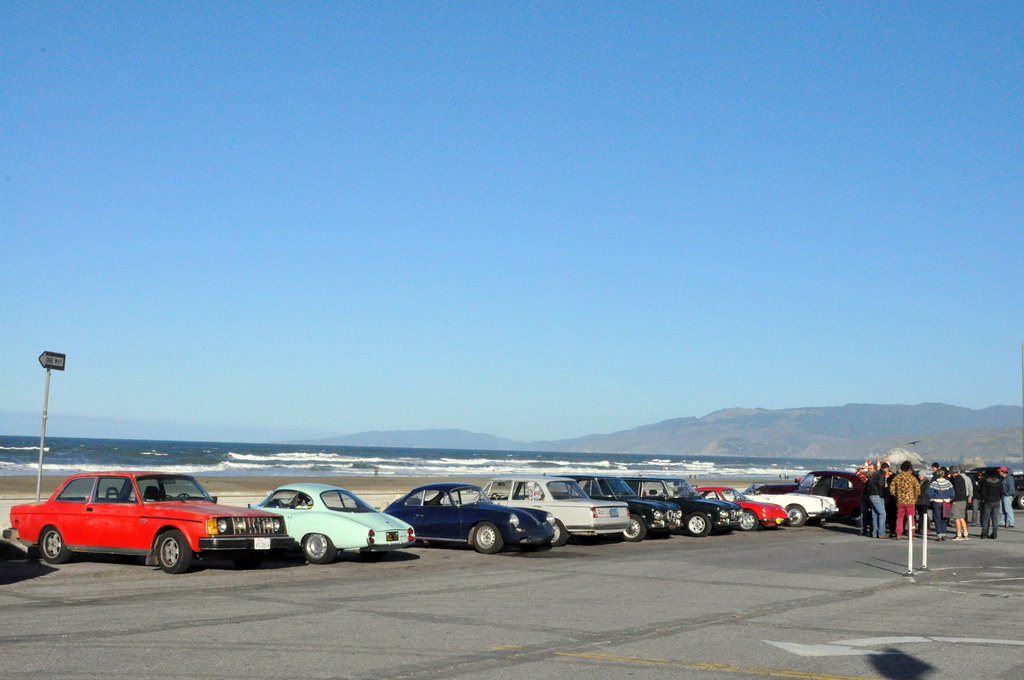
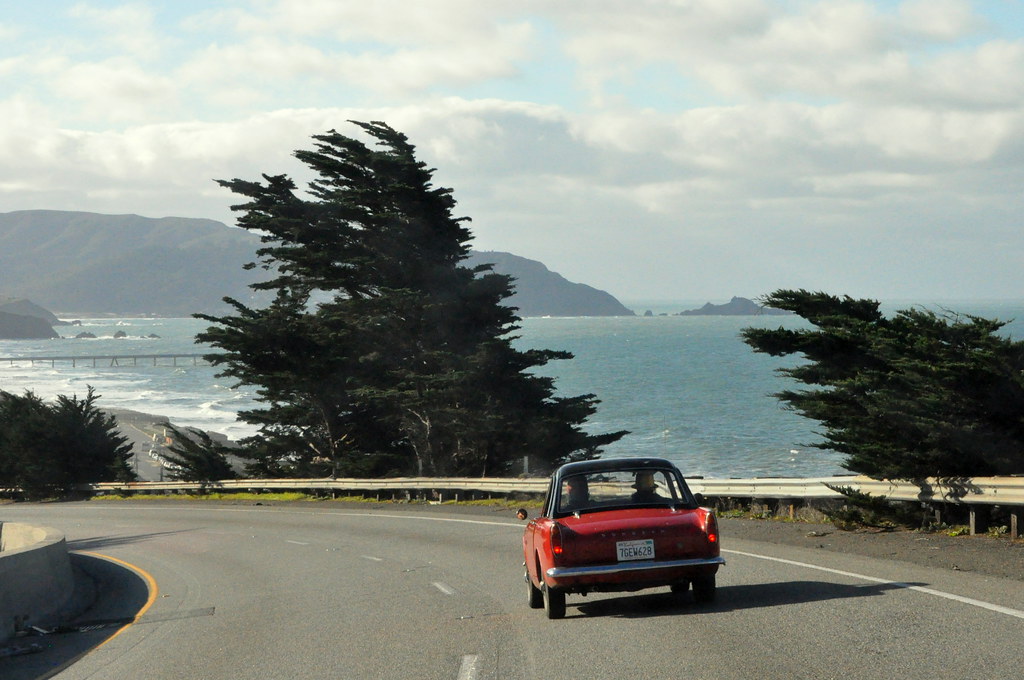
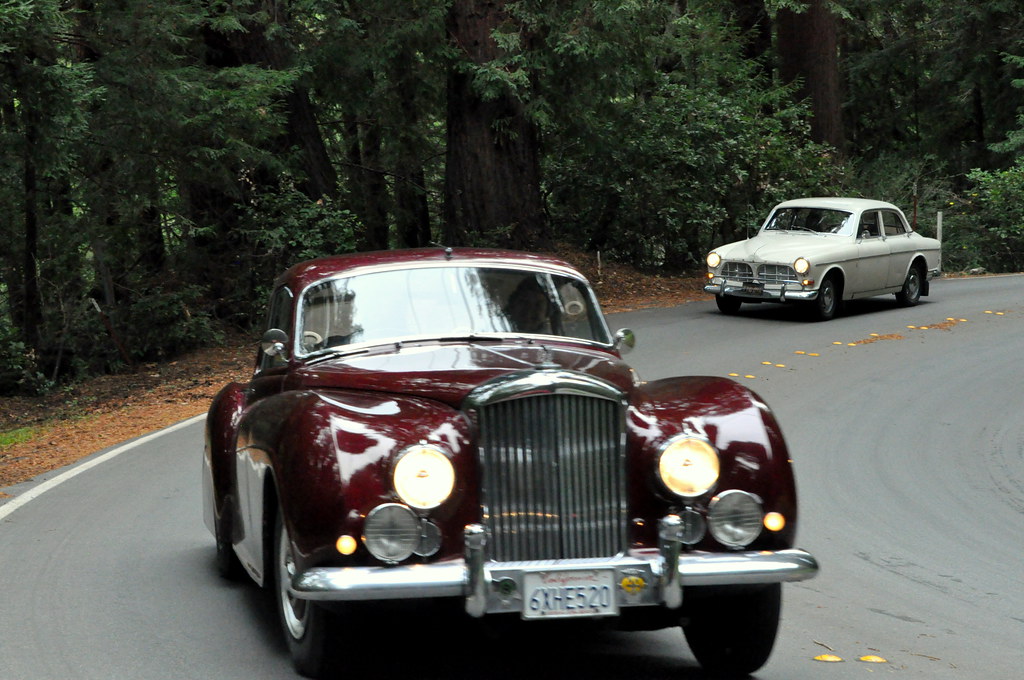
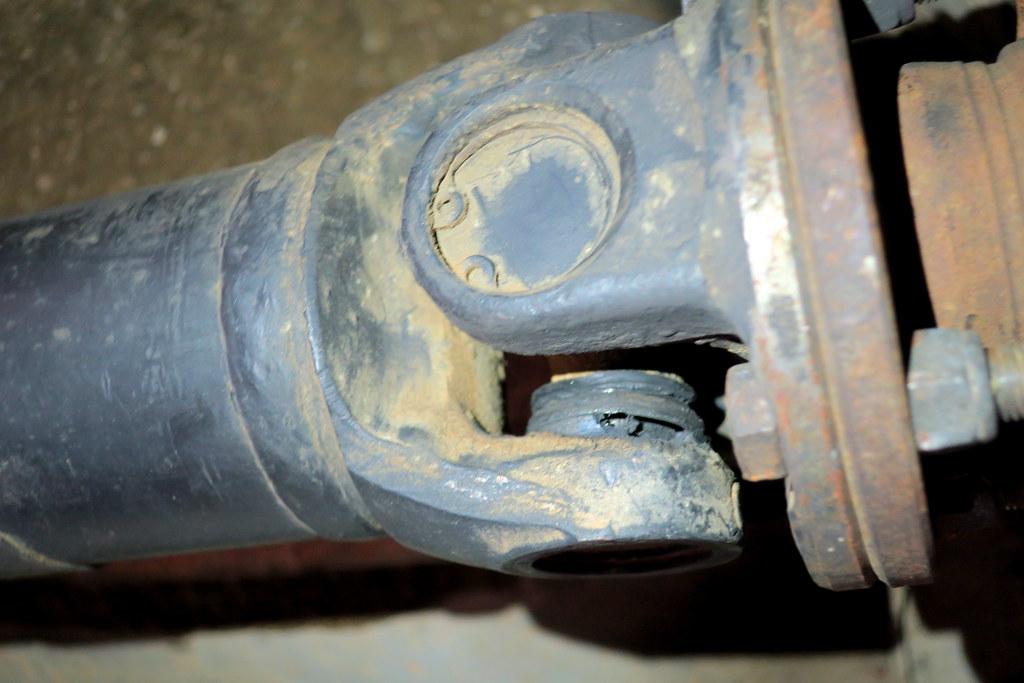
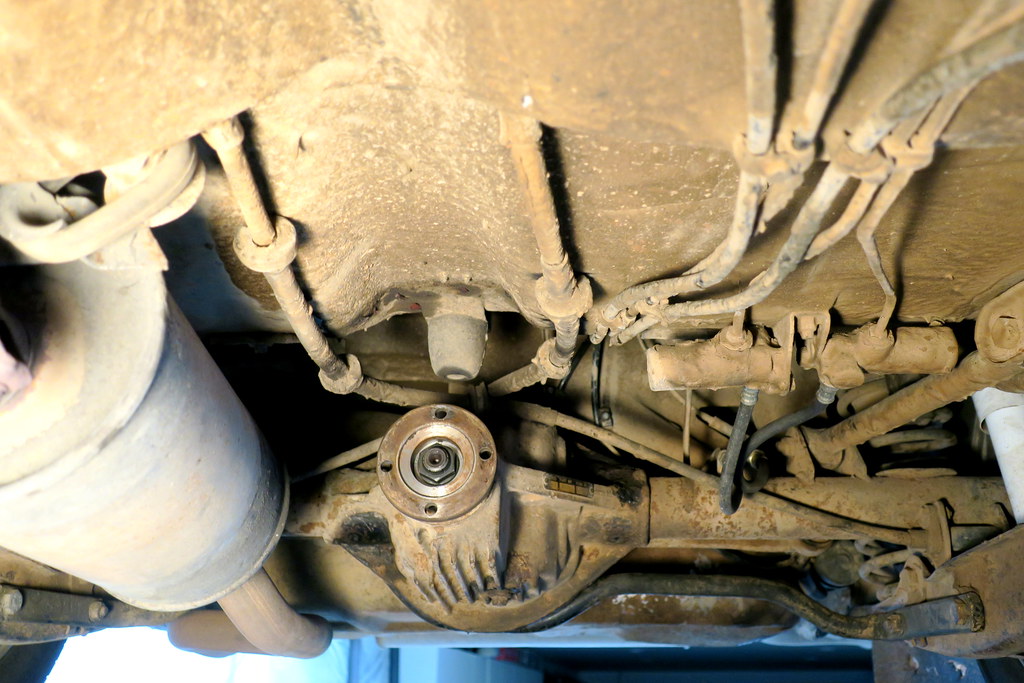
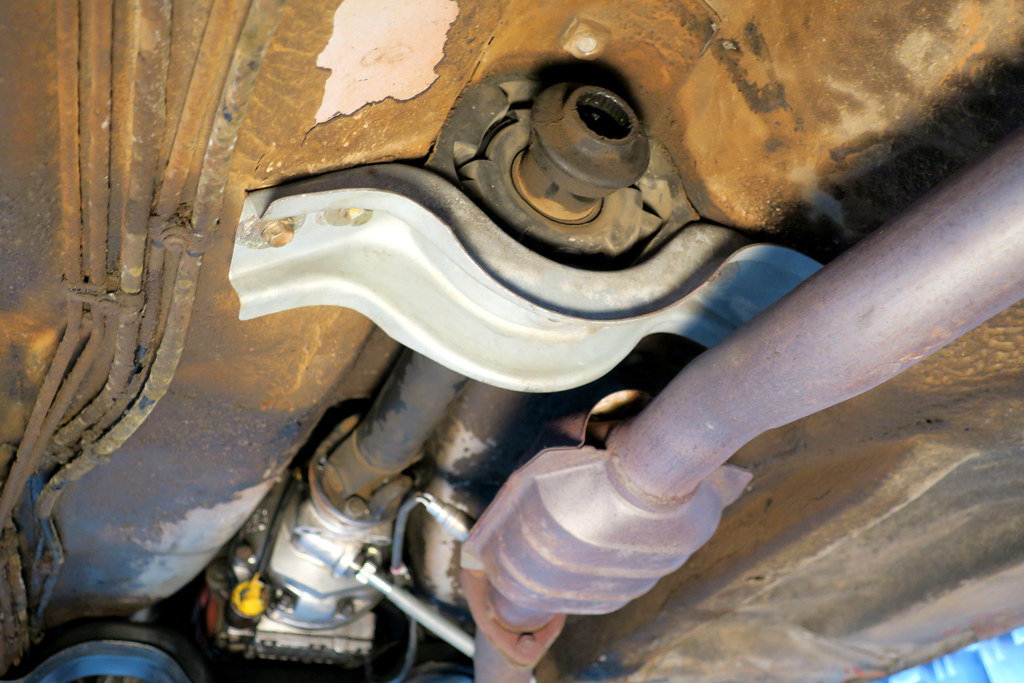
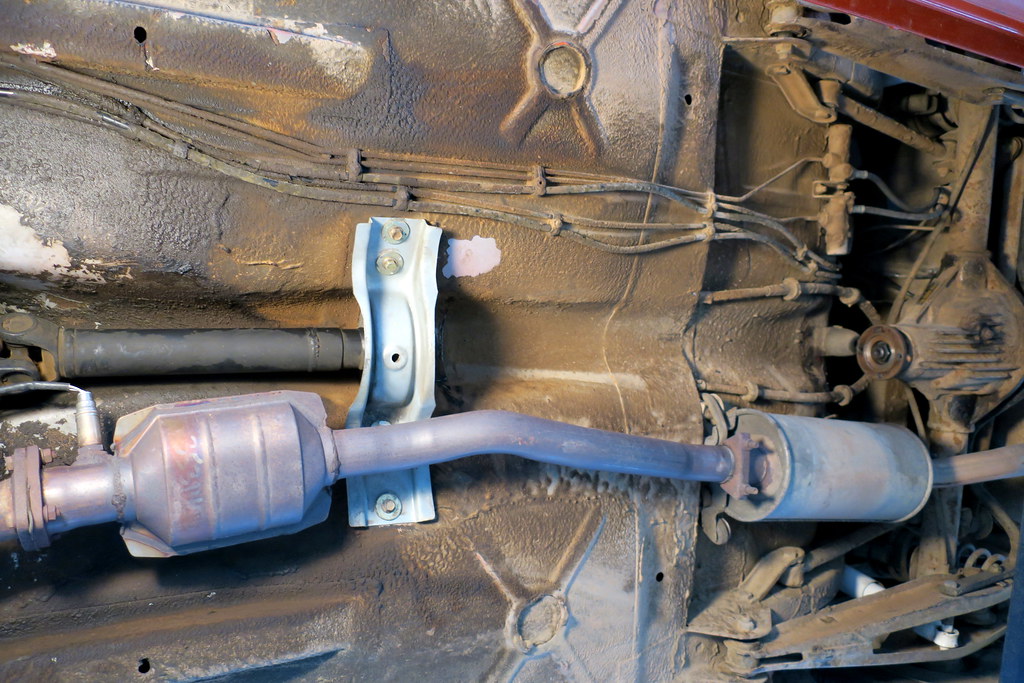
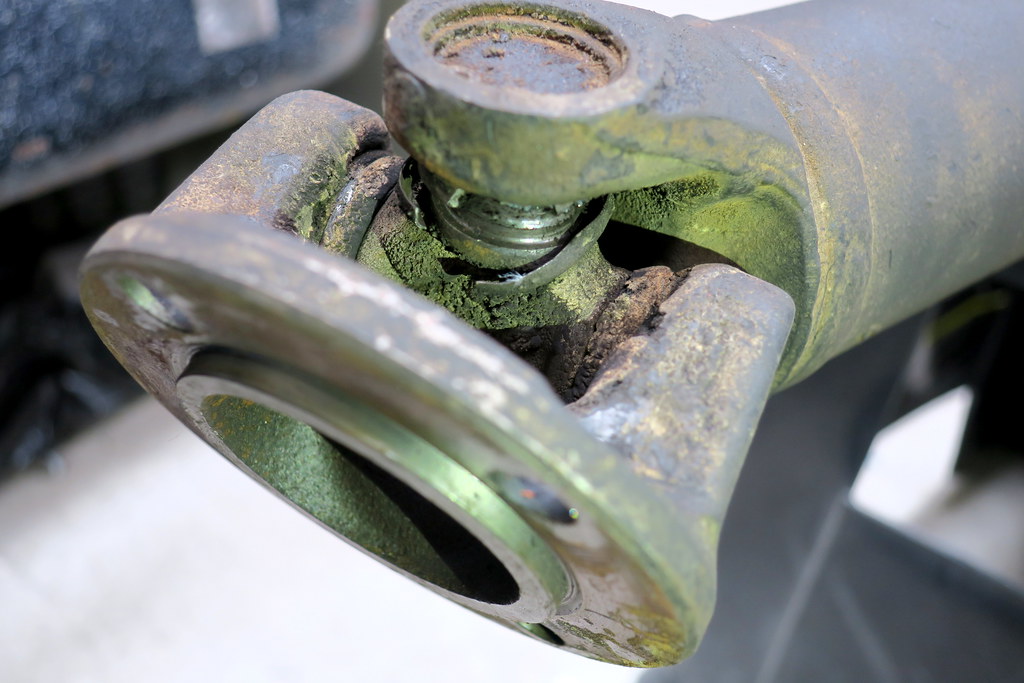
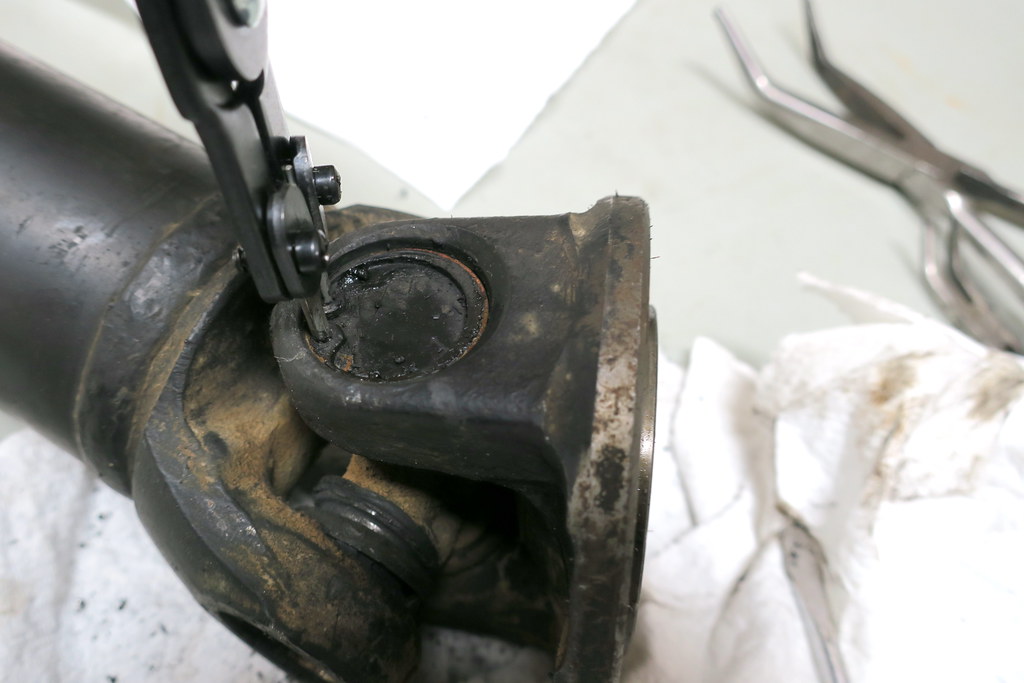
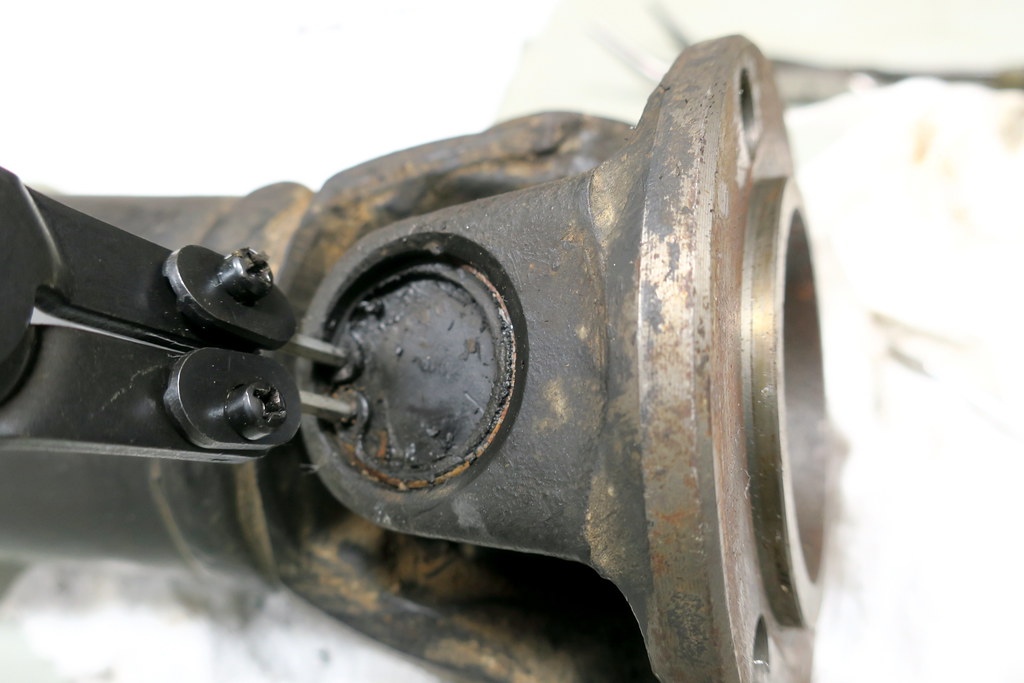
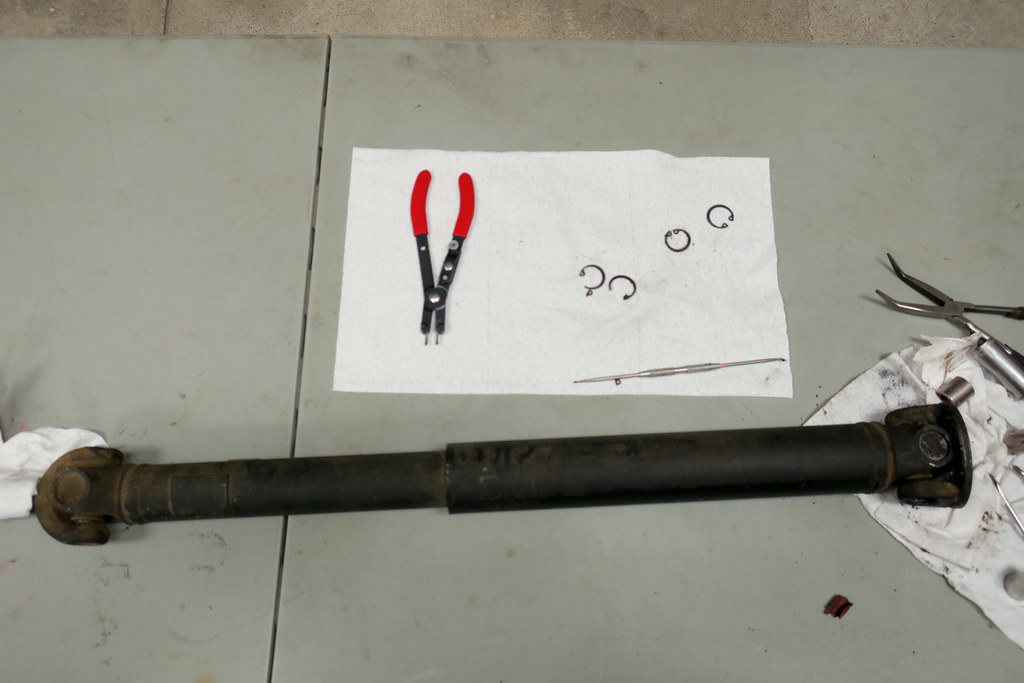
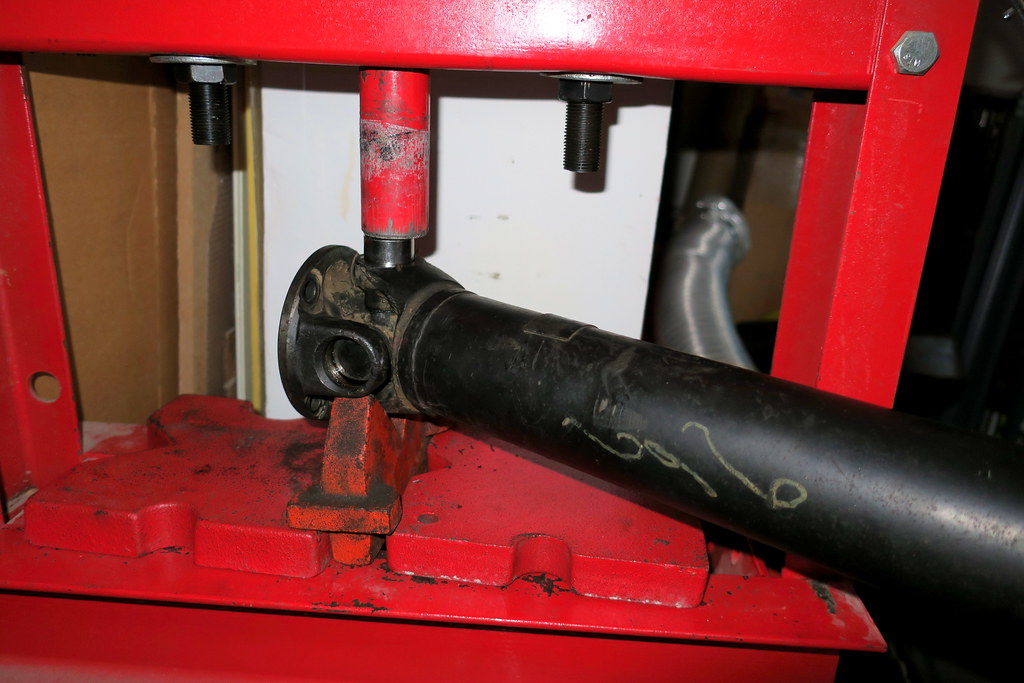
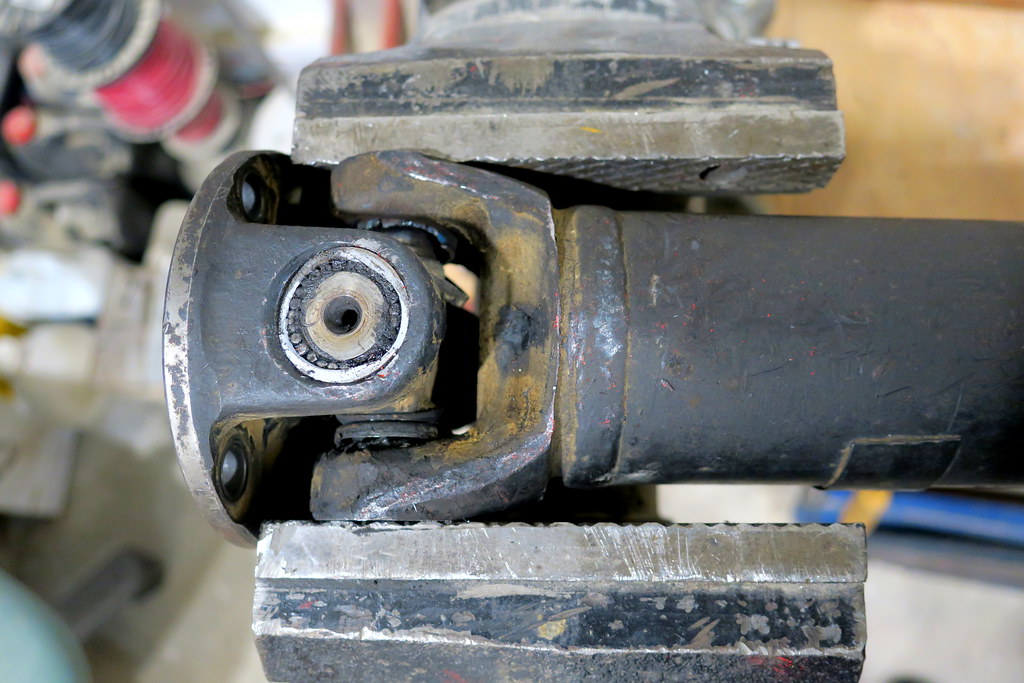
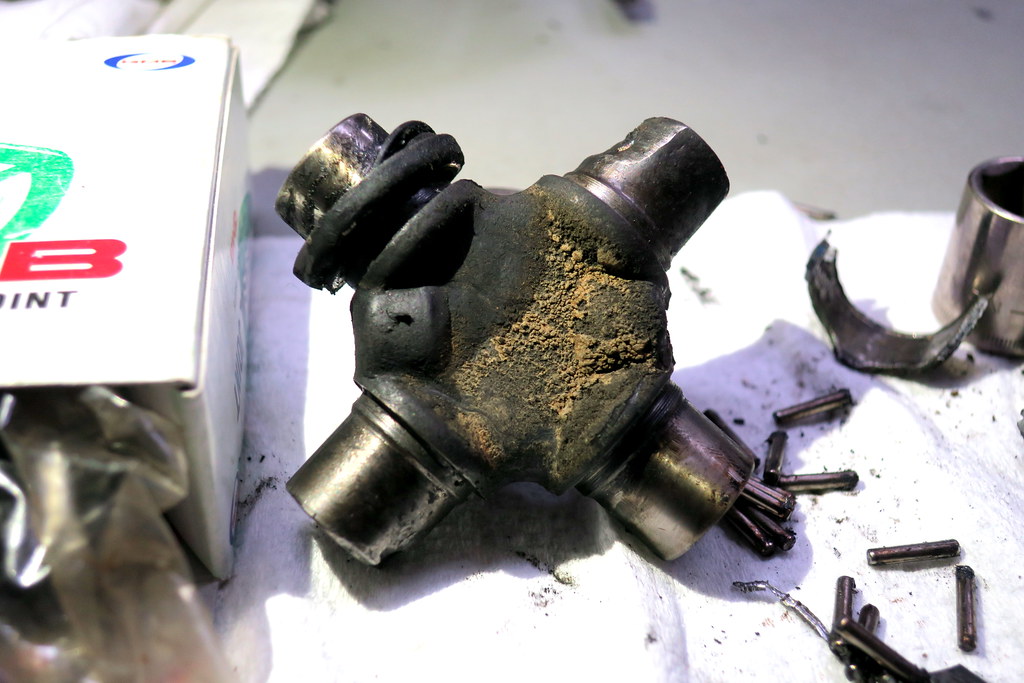
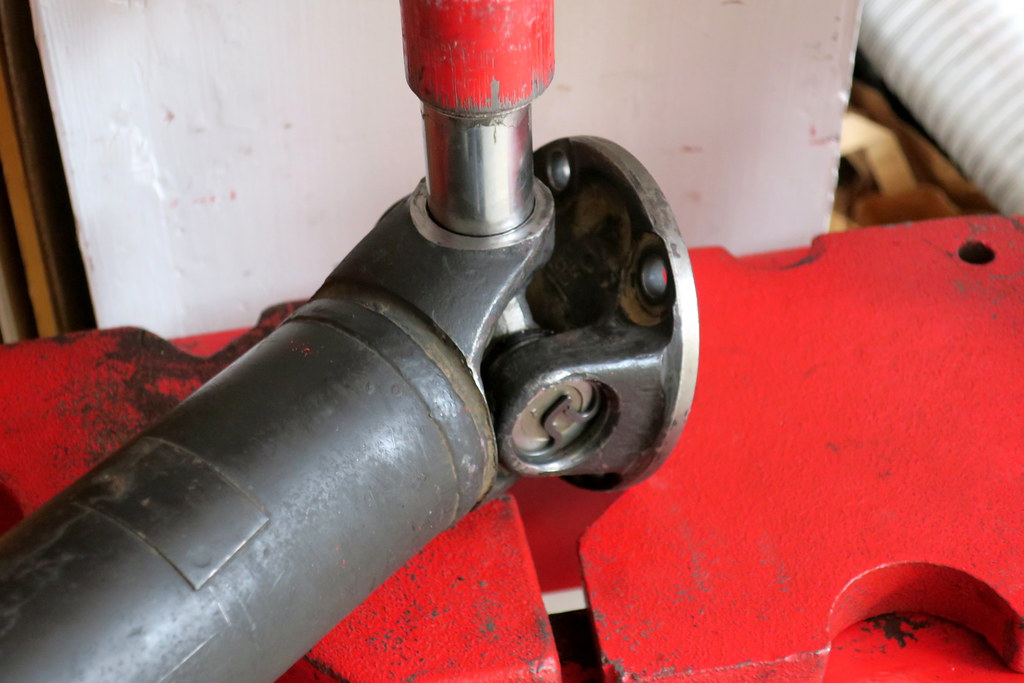
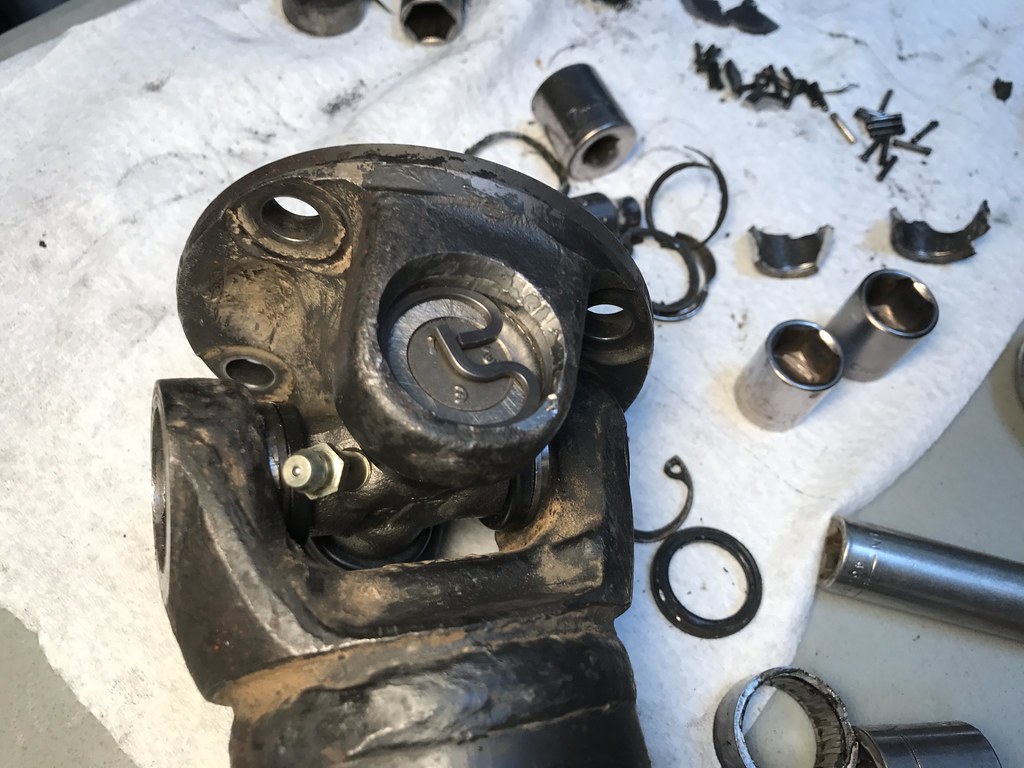
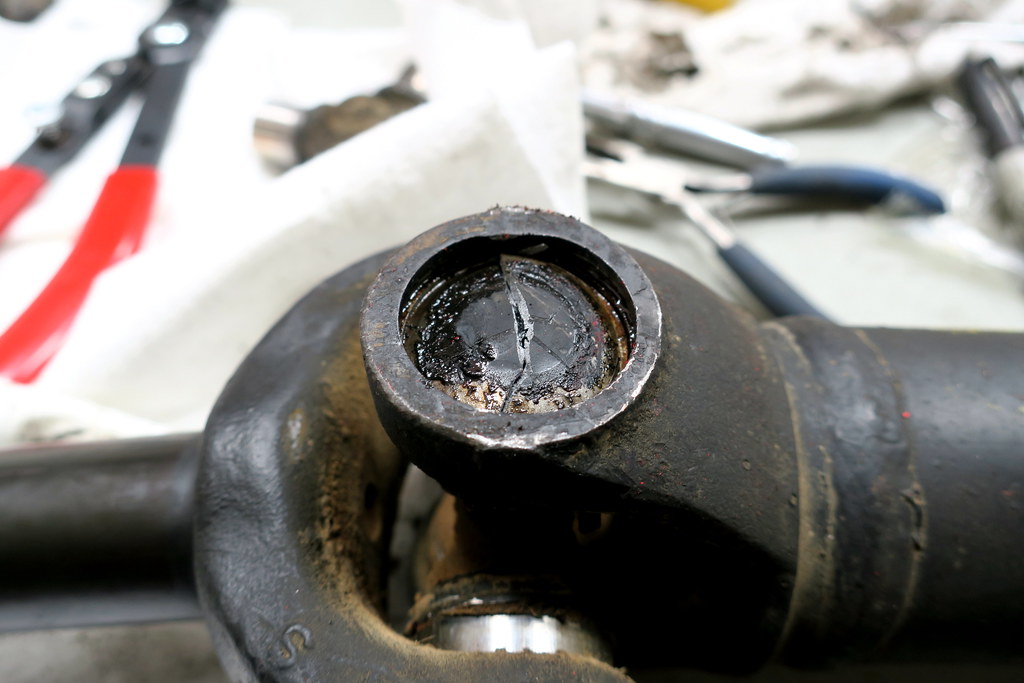
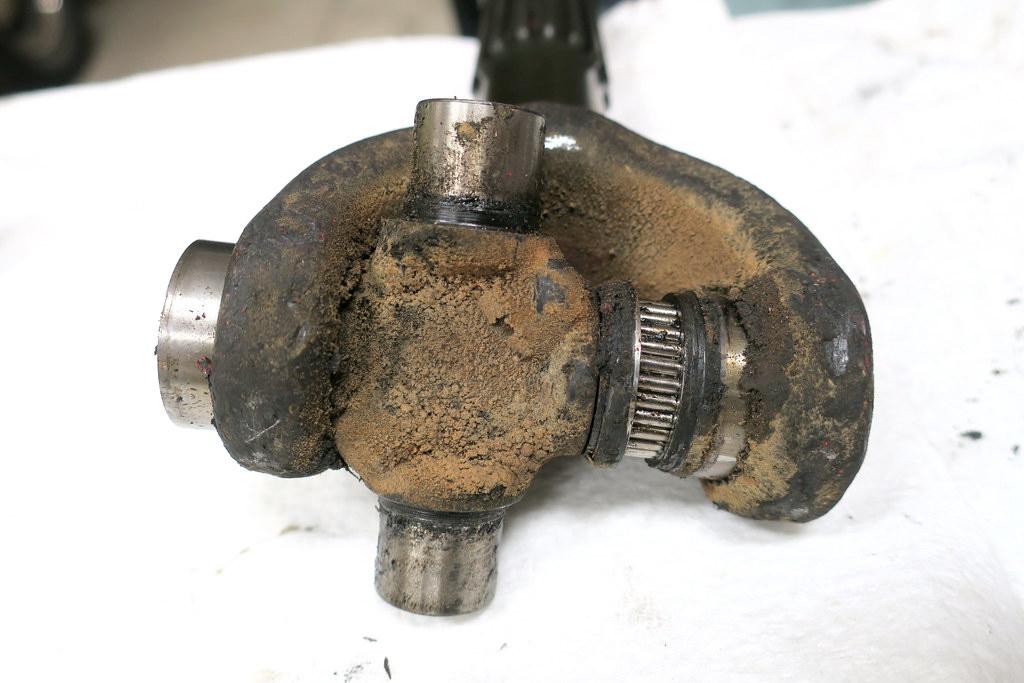
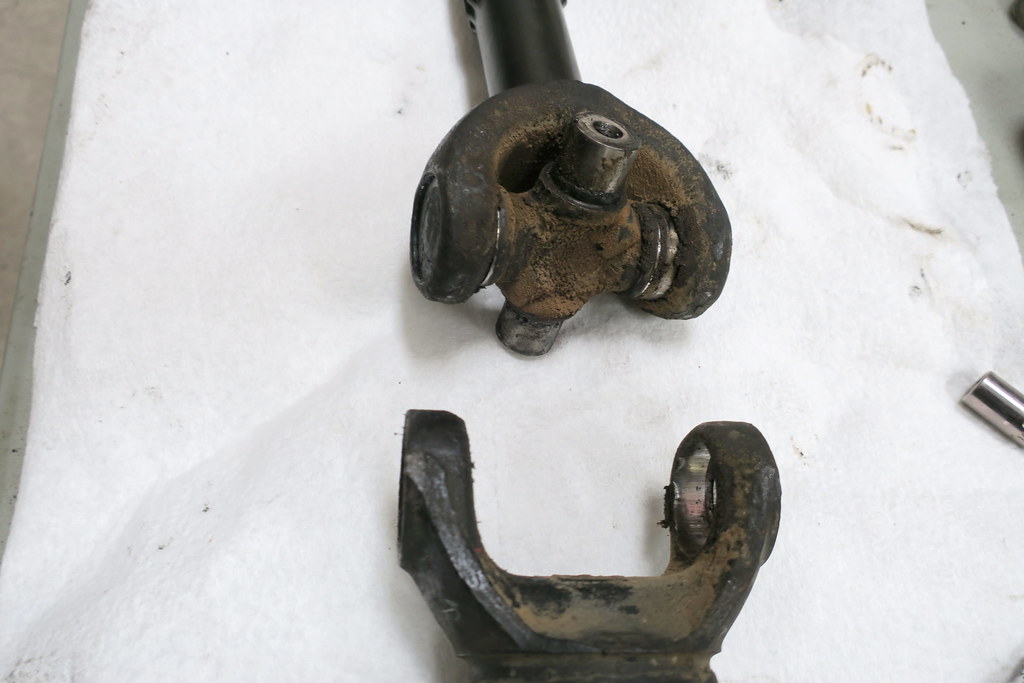
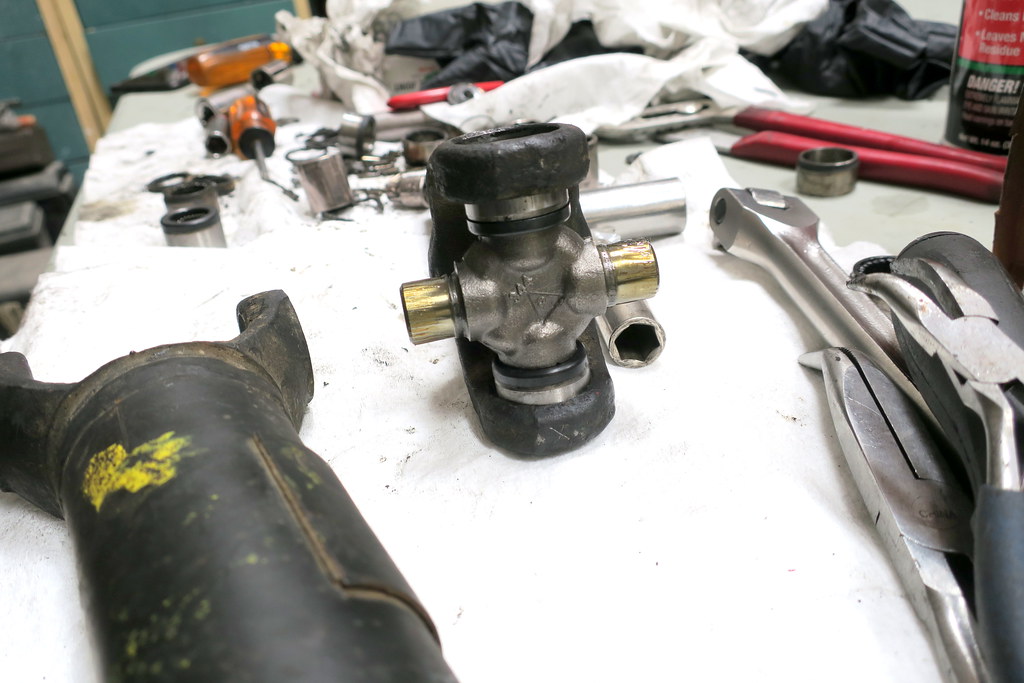
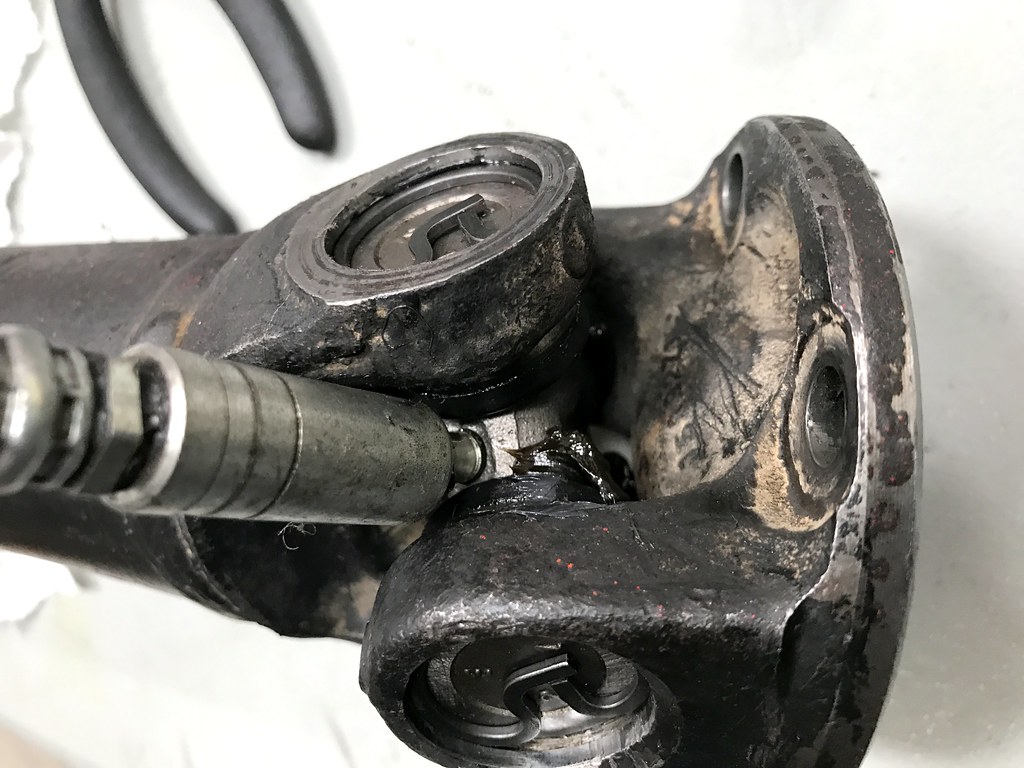
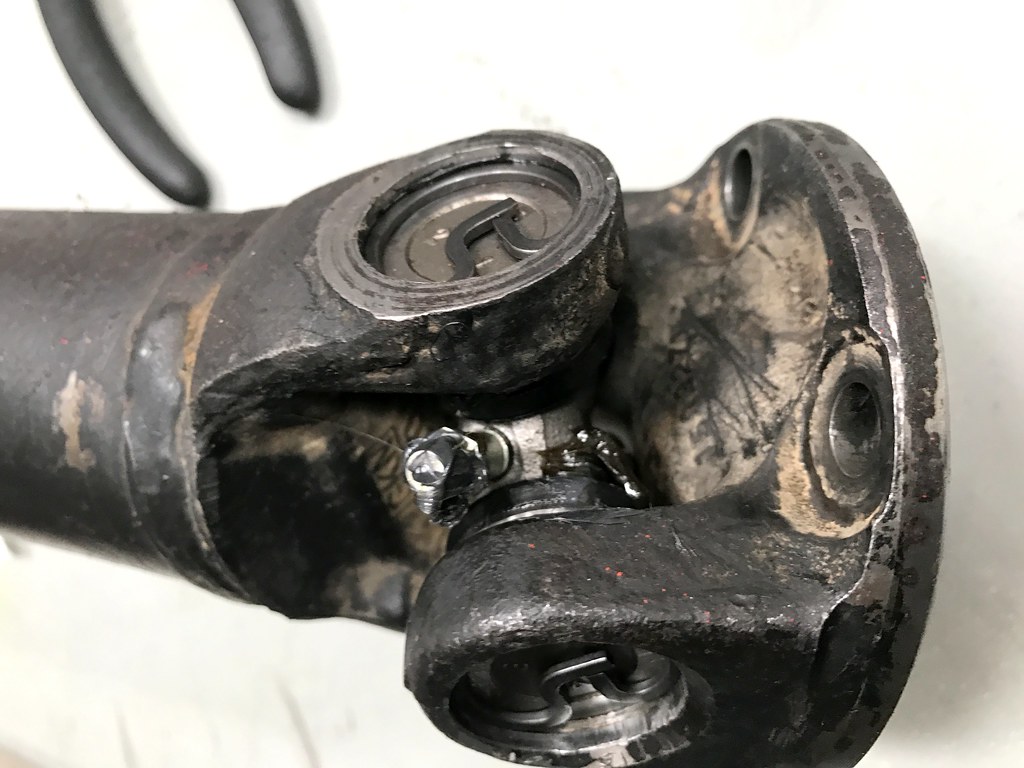
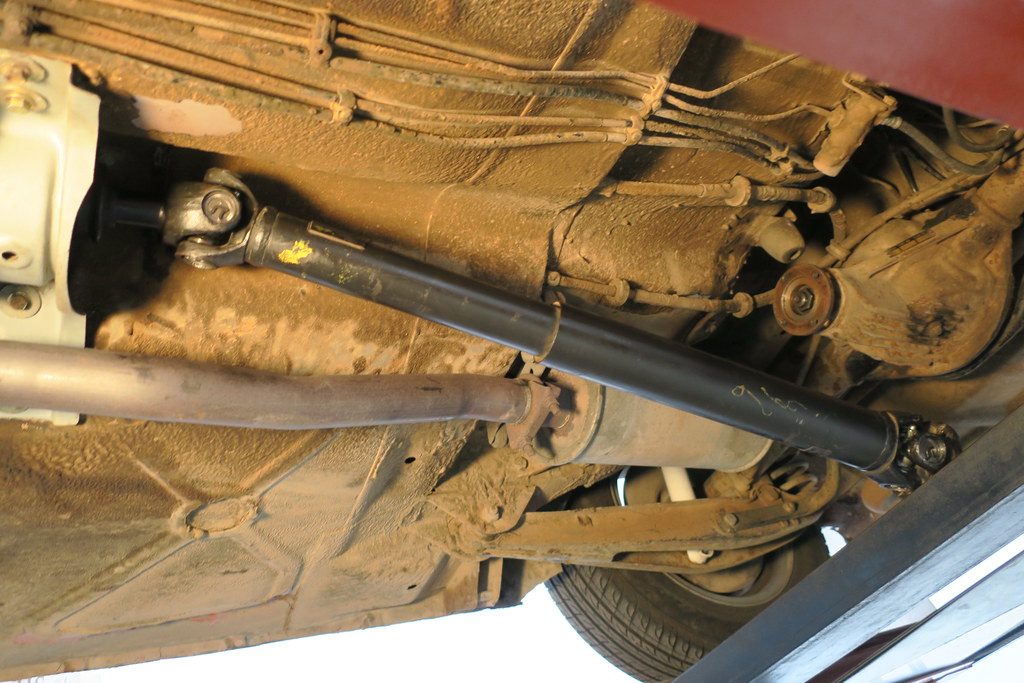
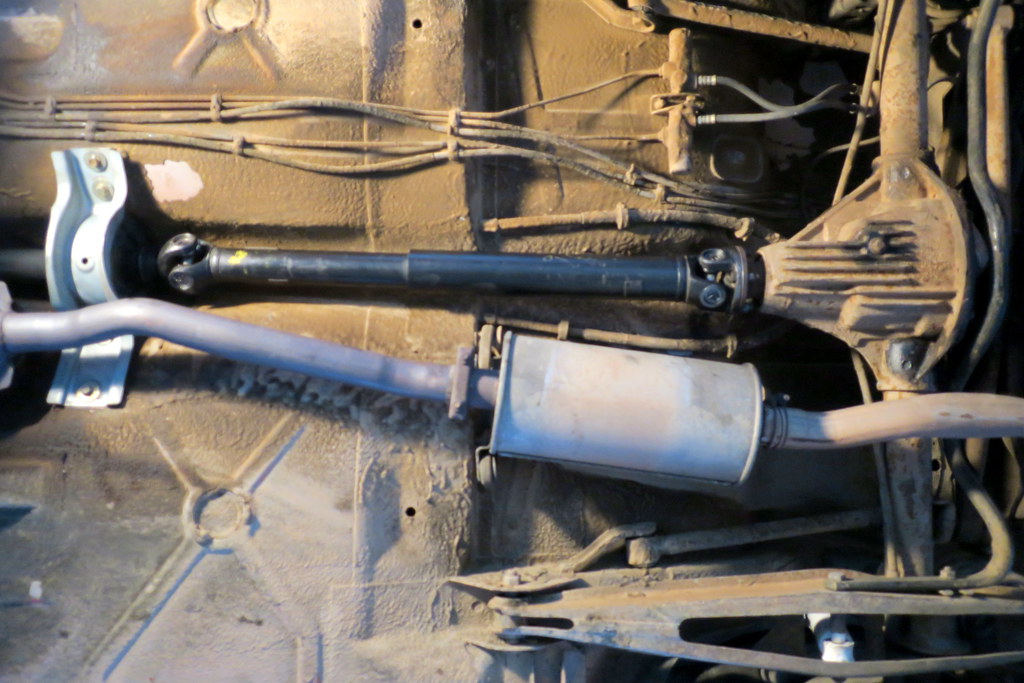
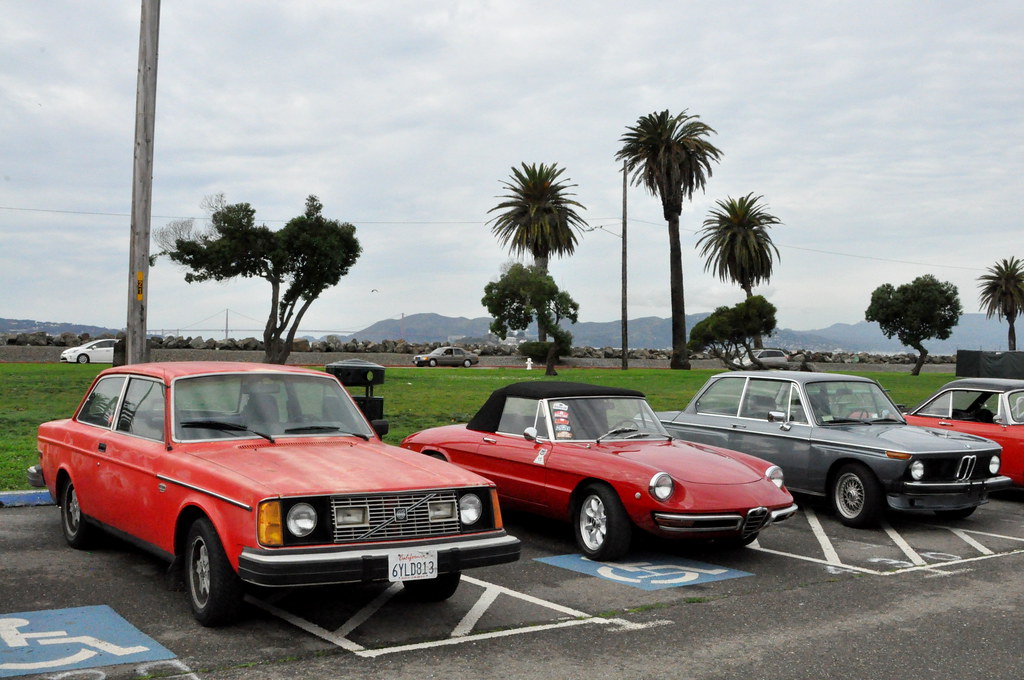
There have been a few more issues in the last two months, such as one of the fuses blowing continually taking out the turn signals. First thinking the problem stemmed from the turn signal stalk or a ground, eventually with pinpointed the issue to a short in the wiring to the reverse switch in the transmission. In mid-December took the 242 on a vintage car day drive through the East Bay, (about 200 miles) and now a clunk seems to be originating in/near the driveshaft. Need to figure out the origin is a bad u-joint or something else around the differential or rear suspension.

31010539764_562717e841_b.jpg


29106678696_61c1bd46c2_b.jpg


30937221774_4af56fc710_b.jpg


30968614803_12a6ba81a2_b.jpg


31778127195_972ce83425_b.jpg


31778114215_b3322e582a_b.jpg


This brings things up-to-date with work and progress on the 242 build. It definitely took longer and more work than anticipated, but then again that can be said about most projects. I wanted to make these posts comprehensive and detailed around the work involved. (FWIW, the word count on this tread tallies up over 11K words in total.) It would be interesting to hear feedback, comments or questions on this write-up and what is helpful or needs further detail.

31729572151_07f113b373_b.jpg


31041640013_359ea6b616_b.jpg


31041212893_949ab1bebc_b.jpg


28517739834_802903c653_b.jpg
 
Last edited:
Awesome account of building this car and the adventures so far. I'd say don't change a thing; you're already putting 100x the effort into this than the average thrown-together thread here! You got me inspired to try one of these vintage road rallies. The Motherlode looks like a blast.

What are your future plans for the car?

Thank you. The Motherlode is one of the better multi-day events. The routes are interesting and not the same ones every year and the organizer does a great job managing the event.

Other events closer or somewhat closer to you would be the Faultline 500 (Holister) in July and the SoCal TT (Los Angeles) in October. The Faultline goes through central CA and has a reputation of being harder on cars (temperatures & more dirt sections.) The SoCal TT I have wanted to check out and is worth looking into.

I have been using the car as my daily driver for the past couple of months and may take it on the Snowball in April. Upcoming work planned will be swapping out the front strut assemblies for vented brake rotors, replace out the rear suspension bushing and a limited slip diff as well.
 
Vintage road rally looks like a load of fun, great cars, enjoyed looking at the photos! Glad to see you are at least putting a lot of love into building this car. I hate to be the biggot, but home many late model 240's had to die to make this happen. I know I am barking up the wrong tree on this forum, but you could have freshened up 2 of those cars and made a ton of money and saved them all at the same time. I am going to start buying every totaled out ( real damage/rear ended cars) RWD Volvos and trade you guys for these solid cars that I can actually fix up and flip. Rant over, sorry it had to be in your thread.........

BTW, love that orange on the old school 240, look forward to seeing this thing get a proper paint job in is original color!
 
Vintage road rally looks like a load of fun, great cars, enjoyed looking at the photos! Glad to see you are at least putting a lot of love into building this car. I hate to be the biggot, but home many late model 240's had to die to make this happen. I know I am barking up the wrong tree on this forum, but you could have freshened up 2 of those cars and made a ton of money and saved them all at the same time. I am going to start buying every totaled out ( real damage/rear ended cars) RWD Volvos and trade you guys for these solid cars that I can actually fix up and flip. Rant over, sorry it had to be in your thread.........!

Understand the sentiment about the donor cars, but also you can?t save every brick sitting out there. Yes, the two donors for this build could have been rehabilitated and put back on the road, but that wasn't going to be me. It would not have made tons of money in the process, especially when living in a city like San Francisco. Rent is big factor in this city, space and work spaces are at a premium. It comes down to I would rather spend my time and work space wrenching to improve my own cars rather than be a flipper/reseller.

Looking through the various pictures, you will see there are three distinct garage spaces utilized during this 242 build all of which I rented. Presently reside in two garages as I had to move out of one with the leaky roof after a new owner bought the building/property 6 months ago. It was dirt cheap to rent because of the roof issue, and there is no way I am going to locate a comparable garage situation. This in a neighborhood where a having single space in a garage is a lucky thing to have and street parking can be cut-throat. If I didn't have the multiple garages I am not sure I would have done this build.

The 1990 sedan and 1985 wagon were both parts cars by the time I acquired them. The ?85 wagon had 290K on it with a seized engine and a lot of hard driving making it a hard sell to the average person. The 1990 might have been more worth reviving because of the mileage. Having to source all the front end body work and lights then go through the fuel system, brakes, etc, it still would be a good bit of time and material costs.

By obtaining donor cars from owners, this gave me info/background on the car and just selling off the B20 and the M40 more than covered the cost of those two cars. Having them in my garage space allowed me to scavenge from a whole car-cass over the course of weeks rather than hours at the junkyards which are a minimum of an hour round-trip anytime I need to drive to them.

I have been down that road before as in the mid-2000?s with what I referred to as a catch-and-release program. This was when the state updated the requirements for the Bay Area?s smog tests to be performed on a dyno. A fair number of $1-300 240s appeared on Craigslist after failing smog tests. Drop $3-400 and you could turn them into $1500 cars provided the bones were solid. I did this with six or so 240 wagons before losing interest and concentrating on selling parts such as headlamps and engine wiring harness which were more lucrative and easier in terms of storage. Much harder to do that now with the CA?s restrictions and stringent inspections on things like catalytic converters.

At the end of the day, there is a definite need for parts cars to support keeping other cars running and on the road. Rehabilitating and flipping cars takes a commitment which only a few people will take on due to various issues. When a hobby or interest takes over your life, its not longer a hobby and will be less enjoyable.
 
Well said, and I think you appropriately argue your point in your final sentence. I guess I think the same way to a certain degree, when did my "hobby" of owning, maintaining and modifying/ upgrading my one (1) 240 turn into rehabilitating and flipping other RWD Volvo's for fun. I guess for me its the pure enjoyment of owning a 240 coupled with the idea of giving 'extended' life to an old worn Volvo. The space issue I think is always the biggest problem for all of us. It wasn't until I bought my own house that I was able to have a third car (+ now), my parents wouldn't have allowed me to have a third vehicle in their dead restricted community. Every time I flip a darn car I say I am going to focus on one of my personal projects, but dang it; I just buy another flip............

I guess at the end of the day the important thing is that they did not get crushed two days after entering the junk yard, something that happens far too often around here with no parts being salvaged off (the yards don't even hang onto them). They allowed other cars to 'roll' on and your enjoying your project.
 
Clunks Are Never A Good Leading Indicator

Early on New Year’s Day drove the 242 out to the Ocean Beach to join up with friends who assembled a vintage car drive. Usually the Anti-Football Run is the driving event in the Bay Area to kick off the year, but in November the organizers decided they were done and being put in the past tense. Several impromptu drives were organized in response and while sitting at a bar on early on New Year’s Eve, received the info on the one starting from San Francisco. Arriving at the parking lot, a dozen of the usual suspects from the NorCal vintage car scene were there as well. After catching up and comparing hang-overs from the night before, the group rumbled on to the Great Highway and headed south.

32004443896_e63752531e_b.jpg


32004437606_98844399aa_b.jpg


32043333345_ee99926f51_b.jpg


31233519093_c0bd438d61_b.jpg


While on Highway 1 going through Pacifica, the driveline noise became much more pronounced and noticeable. Approaching Half Moon Bay, tapping and releasing the throttle produced a telltale clunk and at that point I realized one of the u-joints had now reached its end-of-life. I debated whether or not to keep going or turn around and head back to San Francisco. Decided to keep going but at the same time take it easy and not stress the driveline more than necessary. In the mid-afternoon the 242, returned to San Francisco with the u-joint really complaining and more importantly, still intact.

32043310755_0e1c9e902b_b.jpg


32043272715_531d3b10df_b.jpg


31233485513_fc836f7b1c_b.jpg


31668455250_dbe143b5d0_b.jpg


The 242 went on injured-reserve status as I figured it would not be a safe car to drive much longer. About two weeks later crawled underneath the car and quickly identified the rearmost u-joint as the culprit. Chunks of the journal caps and rubber seal were missing and when twisting the driveshaft it exhibited a fair amount of slop and play. Went back inside and ordered replacement u-joints. The 242 began an unexpected 6-week hibernation as the next several weeks were lost dealing with unforeseen family issues out in Colorado requiring a couple trips out there. At the beginning of March my friend Alex let me get access to his shop space for the weekend as he would be up in Tahoe taking advantage of the recent snow bonanza in the mountains.

32585158524_912ea7a499_b.jpg


Alex’s space is well appointed including a vice and 12-ton press which would be essential for this operation. Gathered my tools, spare parts and cleaning supplies and put them in the trunk. Drove the 242 onto his 4-post lift late on Friday afternoon making sure to clear Saturday & Sunday for the repair operation.

32585159144_e143e8e95a_b.jpg
 
Last edited:
Thanks, the 242 is a fun car.

The owner of the Sprint Speciale has had the car for 10 or so years now. (He is one of the main guys involved with the 24 Hours of Lemons.) I first saw the car back in 2007 while drivin on the California Melee. He bought the car off the previous owner who really didn't want to deal with repairing the body damage (from a hit and run I believe.)

2376879208_22d63e352e_b.jpg


that Alfa...!!

I love your car man
 
The Wrestling Match Begins

Arriving at the garage space late Saturday morning, wrenches are unpacked to begin disassembly of the driveshaft. Knowing the halves of the driveshaft will be separated, I mark the driveshaft in several places to make sure the shafts are still in balance. The bolts holding the driveshaft onto the differential loosened-up and I am pleasantly surprised all four fasteners can be accessed without the need to rotate the rear wheels. Once all those are removed out the rear section of the drive shaft is detached and brought over to the work area.

33272056412_a8d4832d16_b.jpg


32585155994_bdf3346a9f_b.jpg


32585156744_7b006ede0e_b.jpg


32585155134_f690e47bd7_b.jpg


Taking a set of Circlip pliers, try to remove the snap rings after hitting them with some penetrating oil. Bearing down on the pliers, the tips end up bending rather than moving the circlips. The now useless tool is thrown towards the garbage can. Jump in my car and head over to the local Autoparts store and purchase a set of heavier pliers with removable tips. Start the circlip removal process again and each one proves to be a struggle as only one side of the clip would move outward. Using a bladed screwdriver as a lever each one of the clips are wrestled out of its perch. With this brute force process, two of the clips end up breaking at one end.

32585154094_e467453c3f_b.jpg


32585153164_7fa1bd4e82_b.jpg


32585151864_356d9fee4a_b.jpg


33387305296_3e4f50d4ed_b.jpg


33387304856_1c4ec2cb74_b.jpg


The driveshaft section is put into a vice and using a mallet with a 19MM socket, begin to try to hammer loose the u-joint. After 5 minutes it is pretty clear nothing is moving and this approach will not yield results. Move over to the 12-ton press and try again to extract out the part. Once getting the yoke situated and the socket aligned, start pumping the arm and the press cylinder extends down. As it snugs up against the socket, the arm transmits the resistance while continuing to force the cylinder downward. Finally the tension releases as a small “crack” emanates from the yoke area. Releasing the press, the u-joint has definitely moved and when turning it over, find a large crack on the journal cap. My speculation is the edges of the cap bound up against the lip of the circlip channel and the journal continued through the end of the cap causing it to split apart.

33387303366_9dcceb421d_b.jpg


Extracting out the fragments of the cap and taking it back to the press, continue the process to move and remove out the journal caps. In total, end up shattering 3 of the 4 journal caps when trying to press them out. Putting it into the vice, use a mallet to push down the u-joint and pick out the needle bearings with needle-nosed pliers. Going back to the press the u-joint finally stops putting up a fight and free it from the driveshaft. Substantial damage is visible on two opposing journals where they have been ground down and flattened. Using two long 19mm sockets the remnants of the journal caps are pressed out.

33387304406_d23ac11098_b.jpg


33387303856_48f9119658_b.jpg


33387301556_4ce4119001_b.jpg
 
Last edited:
Nice build, and a good read. Cool to see people out driving and getting their cars dirty. Reminded myself I need to do u-joints and how much of a pain they can be sometimes. Keep up the good work.
 
Thank you for the comments, it is good to hear feedback as well. I was looking to make the write-up of this build centered around a narrative with process details & pictures.

This is the first time I have done the work to replace out individual u-joints, which is kind of amazing with the number of bricks I have owned. My first Volvo, a 1981 242DL had a u-joint start to go bad, that one I took to a shop due to lack of time and proper tools to do the job myself. My 84 242GLT also developed a driveline clunk so went to the junkyard to pick up temp driveshaft so I could keep the car running and replace things out at my leisure. Ended up finding a driveshaft in the junkyard with fairly new u-joints so that was just swapped out, and didn't end up actually replacing those out.

Nice build, and a good read. Cool to see people out driving and getting their cars dirty. Reminded myself I need to do u-joints and how much of a pain they can be sometimes. Keep up the good work.
 
Day Two: 30% Faster & 20% Less Swearing

The mounting ears on the driveshaft and yoke are inspected and are surprisingly are free of damage or gouges. All four circlip channels are cleaned out with a dental pick as well as a splash of brake cleaner. The new u-joint is inspected and a dab of grease is put on the outside of the caps for some lubrication when pressing those into place. Installation is pretty much the reverse of removal except I screw up with not aligning the u-joint with one of the journal caps in the press. While checking my work, discover the needle bearings have been disturbed and need to be repositioned back along the circumference in the inside of the journal cap. Once those are back in place, installation resumes and the caps are pressed back into position and new retaining circlips are compressed and fitted into place. Screwed the Zerk fitting into the main body of the u-joint and once that is tightened, the installation is complete.

33427761285_2e34b723f1_b.jpg


33387298966_ee8235552e_b.jpg


Replacing the center u-joint follows the same procedure though it is done a lot faster than the first one. Three of the four journal caps in this one also are shattered apart when initially trying to press them out. When the new one is installed and with Zerk fitting in place, pull out a grease gun to fully lubricate the u-joint. They only come with a minimal amount of grease for storage and not enough for usage.

33387298016_9a23781da9_b.jpg


33387297506_0a362382af_b.jpg


33387297196_ba69a67fbf_b.jpg


33387296726_fd4954b9d5_b.jpg


33387296176_1ae8d94c92_b.jpg


When installing the second u-joint, I ensure the fittings would sit in the same position for easier maintenance in the future. Once grease starts oozing from the seals, which is the signal enough grease has been supplied and the driveshaft is ready to be put back on the car. Aligning the marks with the front section, the rear section is fitted back into place. Bolts are inserted through the yoke to the differential and secured in place with the nuts. The fasteners are snugged then fully tightened down. Due to time constraints, I am not able to replace out the front u-joint during this work session.

33387295306_0b6c6e8537_b.jpg


33387294916_f5a03e05c8_b.jpg


33387294366_5ff91a8d2b_b.jpg


The original u-joints did not have Zerc fittings installed but rather have an insert. Using an Allen key, the insert is removed out of the front u-joint. Removing the grease fitting from the center u-joint this is used to lubricate the front one. When fresh grease appears the insert is reinstalled and the Zerk fitting is replaced back in the middle u-joint. A test drive reveals the driveline clunk had been vanquished and the car goes back to operational status. What I thought would be a 4 or so hour job turned out to a two day, 10-some hour operation. A second set of hands would have helped make things go quicker in general, and this is the first time I have removed and replaced u-joints there is that aspect of a learning curve.

33272057232_0fae933aec_b.jpg


33272055022_1e99b277ca_b.jpg
 
Back
Top