
- Joined
- Jul 16, 2009
- Location
- Monterey/Falun
Wow nice wiper motor 
Hello Guest, welcome to the initial stages of our new platform!
You can find some additional information about where we are in the process of migrating the board and setting up our new software here
Thank you for being a part of our community!
Driveworks filter?!

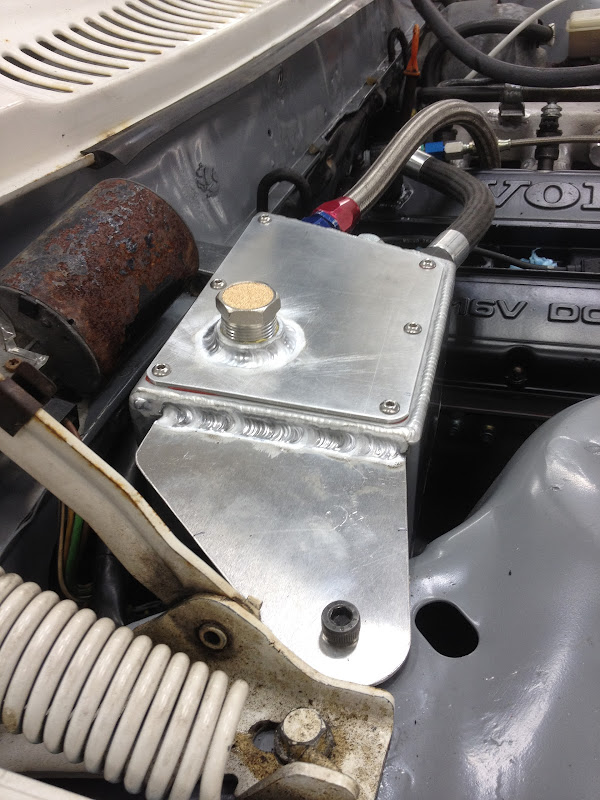
Catch can is done.


What are those gray caps on the end of the fuel and oil pressure lines? Tell me they're just temporary dust caps and not the sensors.
What the !@#$ do I see? Rusty wiper motor case and dirty hinges...how dare you!
I'm sure they'll be replaced by fabbed aluminum billet works of art
Look'n good.
Fixing that stuff is predicated on a desire to do anything about it. Take a look at the rest of the car and it should be pretty obvious why I'm not tripping over myself to clean up the hinges.
What are the coil packs from?
Looking good!
Have you considered welding the first IC pipe elbow directly onto the compressor housing and eliminating that coupler?

Looking good!
Have you considered welding the first IC pipe elbow directly onto the compressor housing and eliminating that coupler?
Thanks!
That's originally what I wanted to do, but there are some clearance issues that make it unattractive. If I want to remove the compressor housing, I need to rotate the housing clockwise so the compressor scroll clears the cylinder 1 exhaust runner. If the elbow was welded to the housing, it would hit the valve cover before clearing the exhaust manifold.
What I'll probably end up doing is either welding the elbow to the charge pipe to eliminate the top coupler or just getting a 90 degree adapter coupler that can come right off the compressor and mate to the 3" charge piping.