M.H. Yount
Active member
- Joined
- Nov 1, 2008
- Location
- Charlotte, NC
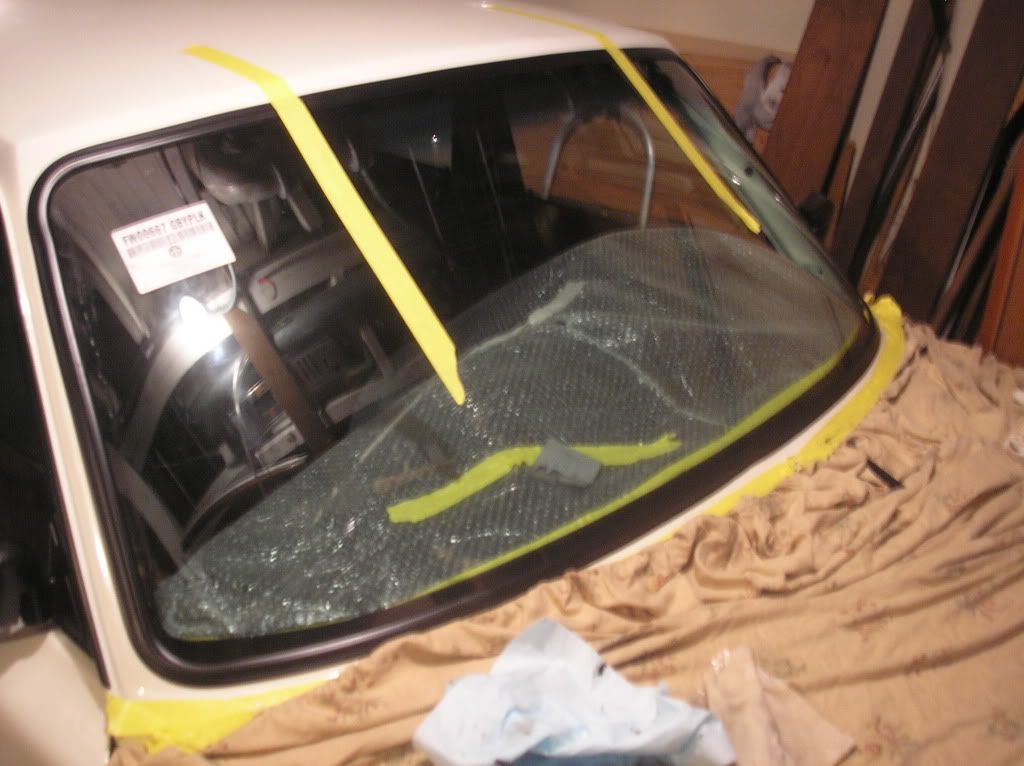
Kinda thought so - I'm at about 74F with the A/C on in the garage and this stuff is pretty "roapy".
Hello Guest, welcome to the initial stages of our new platform!
You can find some additional information about where we are in the process of migrating the board and setting up our new software here
Thank you for being a part of our community!
The thought haunts me......


Wife suggested I use the sticky side of duct tape to try and pull the butyl residue off - worked beautifully. So, wooden tool first; duct tape second; Goo Gone third.
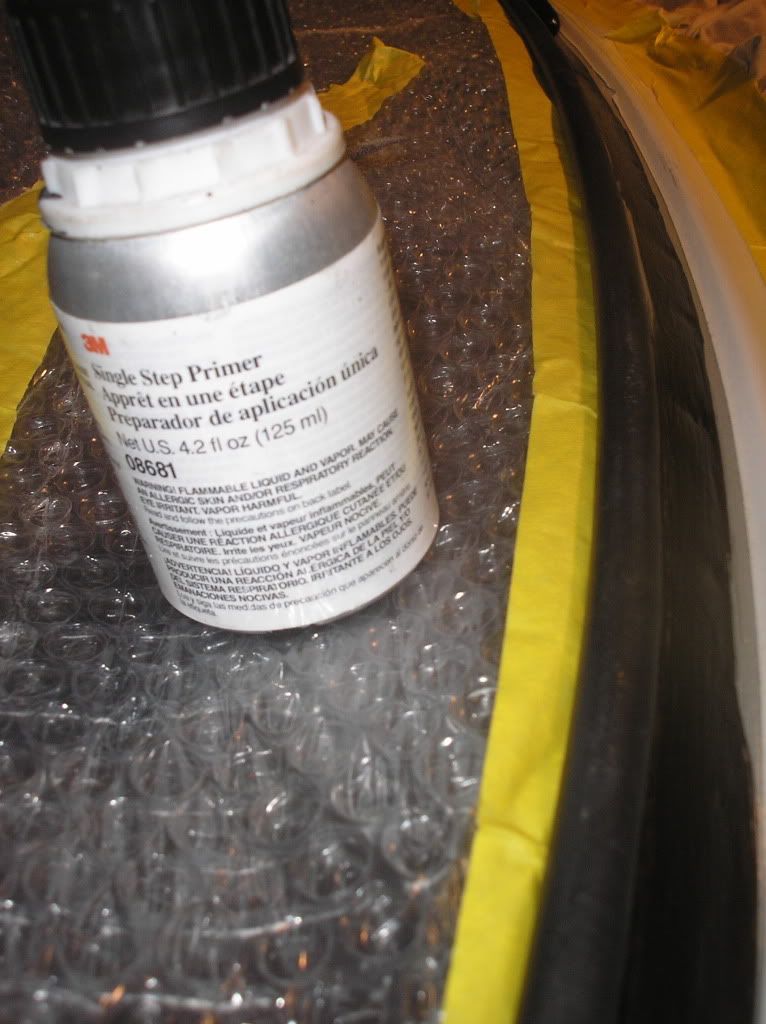
Don't forget to primer both the metal and the glass. That is very clean. I would wipe it all down with acetone before you apply anything. Dries fast and no residue.
Don't forget to primer both the metal and the glass. That is very clean. I would wipe it all down with rubbing alcohol before you apply anything. Dries fast and no residue.
Send videos of you trying to man handle the windshield by yourself.


Ebay on the trim -- I can get the distributor's name if you need it. Manufactured on behalf of Gold Glass (they've got a website). I have 51.5 FEET of trim leftover if someone needs some.....LOL.
"....how long are you waiting for your everything to set in?" Not sure I understand....
The butyl is fully sticky upon touching ANYTHING. It will soften and spread heated by the sun which it will surely be in Texas but it never gets less sticky.
The 'soften and spread' is the reason you need to have locating blocks on the bottom and sides to keep the glass from moving.