• Hello Guest, welcome to the initial stages of our new platform!
    You can find some additional information about where we are in the process of migrating the board and setting up our new software here

    Thank you for being a part of our community!

DET17's "Project cheap thrills" - '92 944T

Looks great! Those cone filter setups drive me nuts, especially when guys mount them directly to the MAF and complain about weird drivability issues. Not to mention that I like the car quiet!
 
Did you remove the restrictor in the air filter box? definitely a recommended upgrade for tuned cars, opens up the intake to the box from aprox. 2-3".
dbtgallery.php
 
Last edited:
Did you remove the restrictor in the air filter box? definitely a recommended upgrade for tuned cars, opens up the intake to the box from aprox. 2-3".
dbtgallery.php

Yes sir, gone. What they put in is actually a converging diverging nozzle.... those who understand something about compressible flow will remember that device.
 
Trouble with YOSHIFAB subframe reinforcement kit.....

Since I was intending to apply more torque to the Dana 1041 rear, I resolved to beef up the flimsy Volvo rear subframe used on the 7/9 cars. With the asymmetric design of our cars rear suspension, the "dogbone" torque rods apply the torque reaction from the rear tires to the vehicle frame. The subframe is the structure that delivers the reaction in compression.

The YOSHIFAB plate kit is fairly obvious as to what pieces must go where..... you'd have to really get creative to get it wrong. As I detailed months ago, I stitch welded the plates into position..... and assumed that the sizes of the plates were sorted out from experience. However, the first time I hit a railroad crossing near work I felt a strange input as the suspension had significant upward travel for the first time. I knew then that something had to be wrong. Well a close inspection after the shake down driving found this:


I'll guess that Yoshifab assumed the user would not lower their vehicles? In fairness to them, for a $100 kit nobody should expect detailed instructions. I've probably got 40mm of lowering using the B&G Progressive springs...... and when the suspension first had some serious travel, the upper dogbone torque rod impacted the steel plate. Well, I didn't fit check to confirm, so ultimately this mistake is mine. With everything removed and a replacement upper torque arm sourced, I straightened out the subframe and began cutting for a closely inspected fit check:


As you can see, I cut out around 40% of the plate length on the first pass. Used a nice Starrett bi-metallic hole saw to ease the corner stress riser and cut the rest with my super handy METABO discs. While my gut said that was plenty, the first full fit check in the sedan said otherwise! Back to the cutting table, and then I ended up relieving the stiffener plate so about 60% of the length was removed. These side views show that the dogbone ends now will will be the only area that will impact what's left of the plate.


So I've made (hopefully) the final install. Double checking where my loaded rear suspension was, I measured about 35mm before the dogbone end of the torque arm would impact the much shortened plate. However the factory rubber bump would require about 60mm of travel to impact the 1041 top of rear housing. It's now painfully obvious that the OE design allowed the dogbone to articulate up between the subframe rails; you really cannot have a plate stiffener on the bottom side without giving up suspension travel.

Here's the final install with the clearance almost visible, full weight on the rear suspension:


Hindsight thoughts: Looking closely at the subframe reaction points, the plastic deformation will be caused by buckling of the subframe. I pulled another 9 series OE subframe from the local Pullapart..... and if I have any further issues caused by full rear suspension travel, I'll build my own reinforcement components to increase the section and better resist buckling.

If you look closely at the Kaplhenke 7/9 subframe, Ben properly modeled the shape and reinforced to greatly resist buckling. The subframe will also be subject to some torsional loads if the rear end is rotated around the driveshaft axis...... but in the intended case of "high torque reaction on level pavement" the structure needs more buckling stiffness.
 
Last edited:
May I ask where you came across your B&G Progressive springs? Not having to much luck as I ordered from ViVA Performance and 60days later with no luck in sight. They refunded promptly which still left me on the search.
 
I bought my B&G's from another TB member; he mistakenly ordered a Sedan kit for his wagon.... and the rear end sat much too low. I know when I was shopping there were several folks "listing" them for sale. You might have to buy from Europe and pay the shipping.
 
"Got them old turbo 4 cylinder 3" exhaust dronin' blues"


Dats right!

Find here the last correction to the final round of changes..... that didn't turn out as hoped.

In the previous version of my DD, I ran a factory 9 series down pipe & CAT, followed by the TME exhaust that IPD sold all those years ago. Never an ill sound came from the exhaust.... it was pretty sweet sounding for a banger. Well with the last hurrah changes of the 3" DP & high flow 3" CAT, then custom connected to that same TME exhaust, something went (as Jeremy Clarkson says) horribly wrong! When cruising the interstate at 70mph, a GOD Awful droning sound came into the cabin, that was unbearable for an old guy like me. The engine would be around 3100 to 3400 rpm when this nasty droning would occur. I simply couldn't drive this sedan to work each day and endure this punishment.

Scouring the web, it seems there are countless stories of turbo 4 cylinder engines, which post "upgrade" to a 3" exhaust all exhibit this irritating tendency. I found two primary solutions; install some fashion of a Helmholz pipe, or add an exhaust resonator to the single muffler. I chose the latter option....


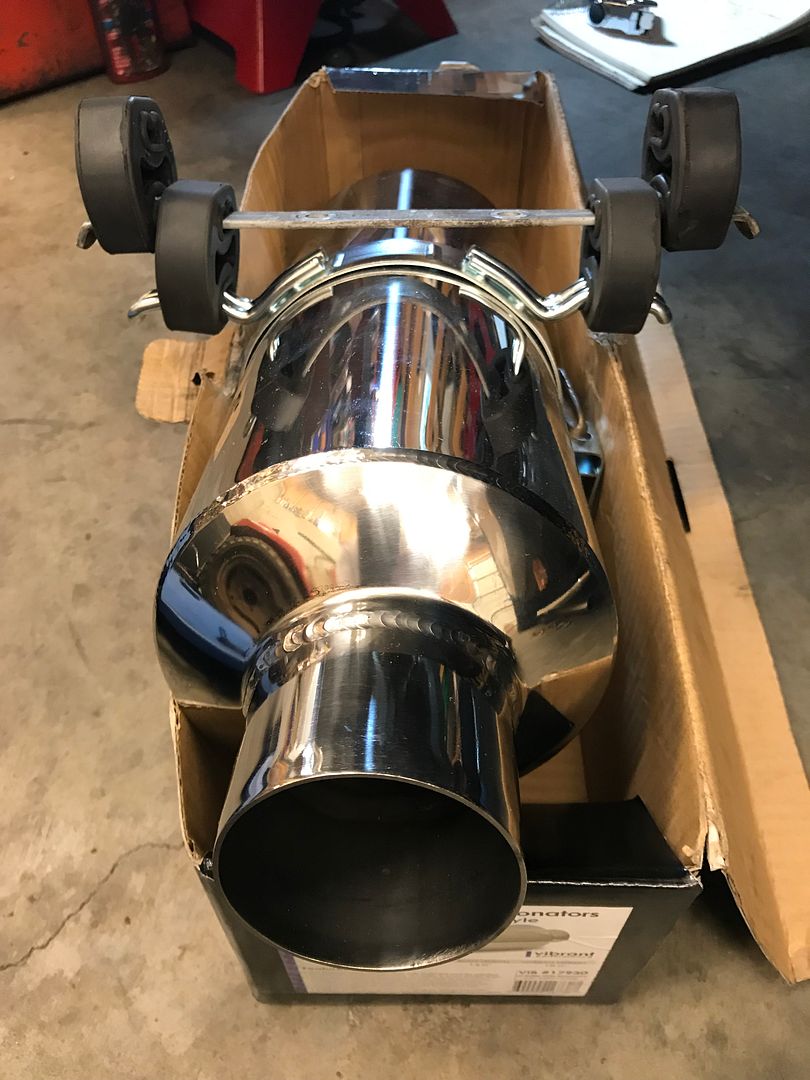
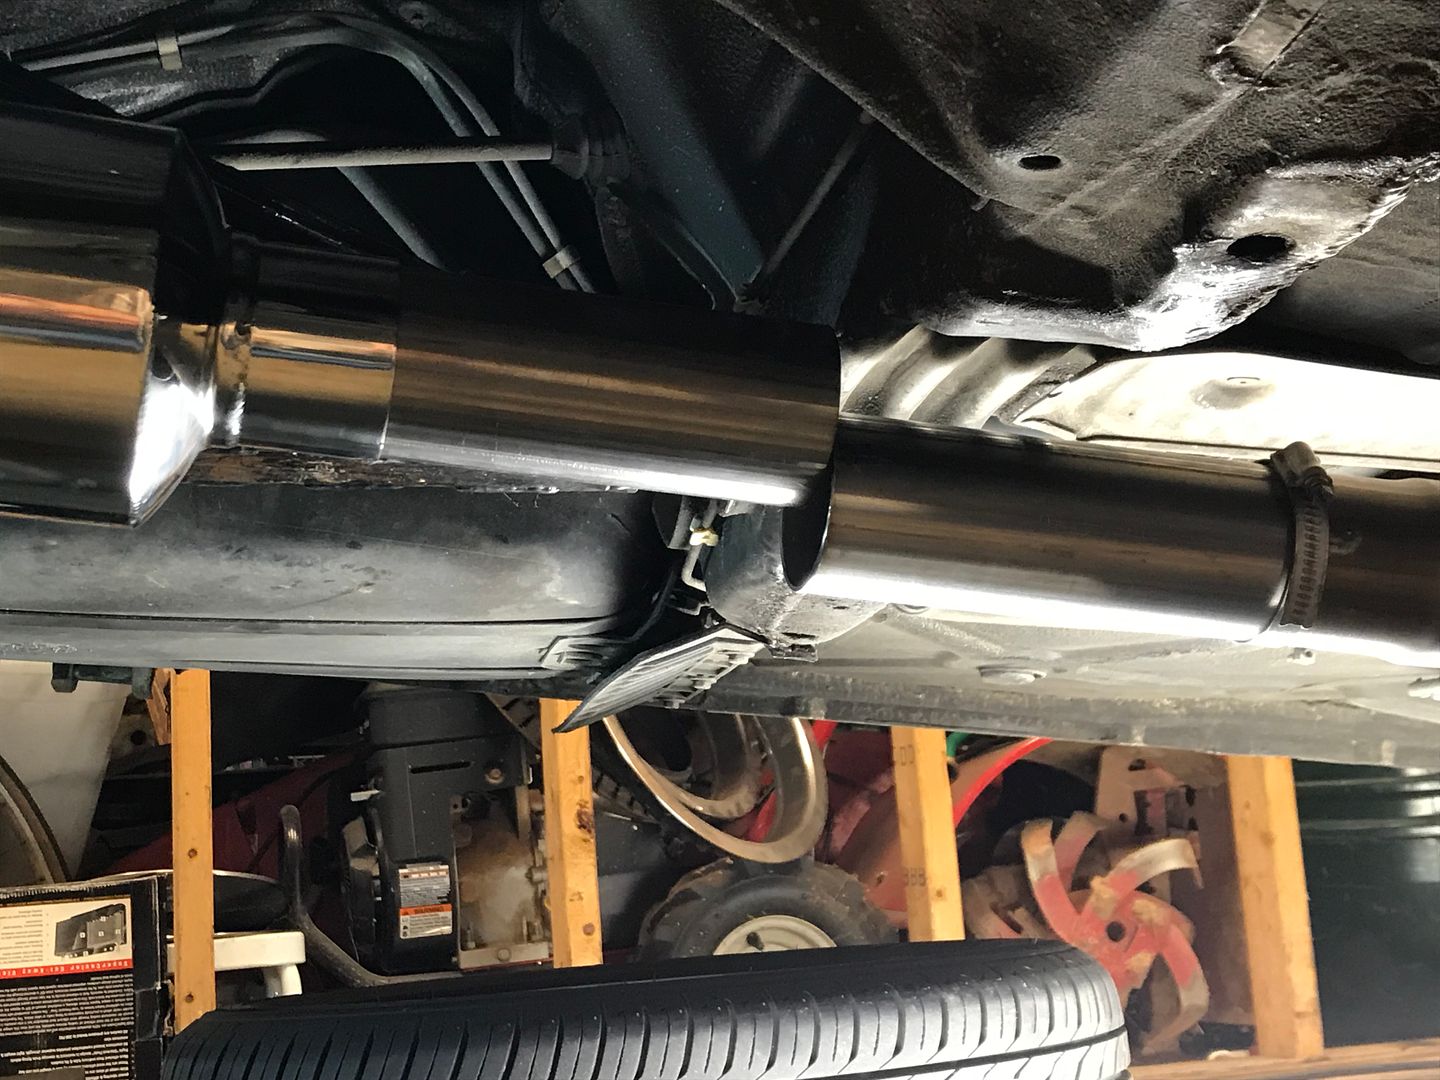
The VIBRANT stainless bottle type 5" got the nod.... reviews were favorable.

The OE location is best to keep the resonator tucked up and away from harm. Subject OE resonator is 6+ inches in diameter, and mine smaller. I bought a replacement resonator mount that I had to reduce diameter, cut & fit so it would clamp tightly on the VIBRANT. I repurposed the old TME pipe hanger with a cascaded set of Volvo factory rubber hangers:


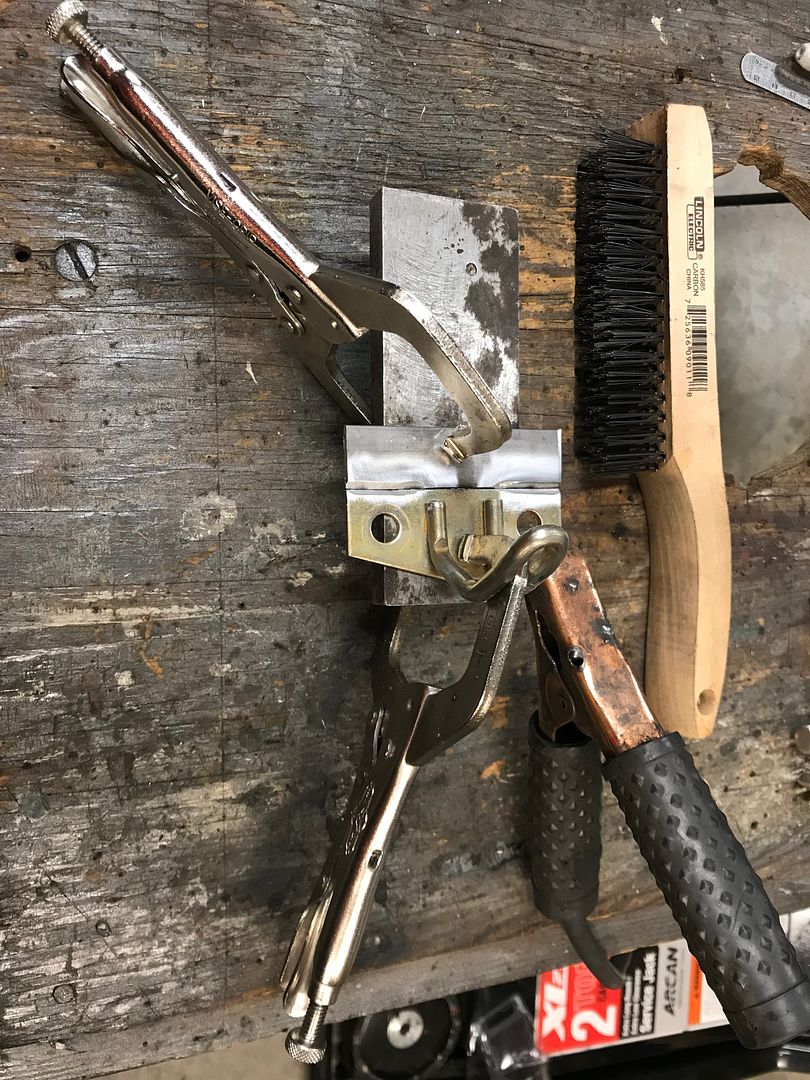
To get the smaller resonator as low as possible (and to fit the basic TME bend in the stainless in front of the axle) I had I had to offset the factory steel hanger mounts about 20mm. Stripped the OE zinc plating in muriatic acid, then welded and finally primer/painted:


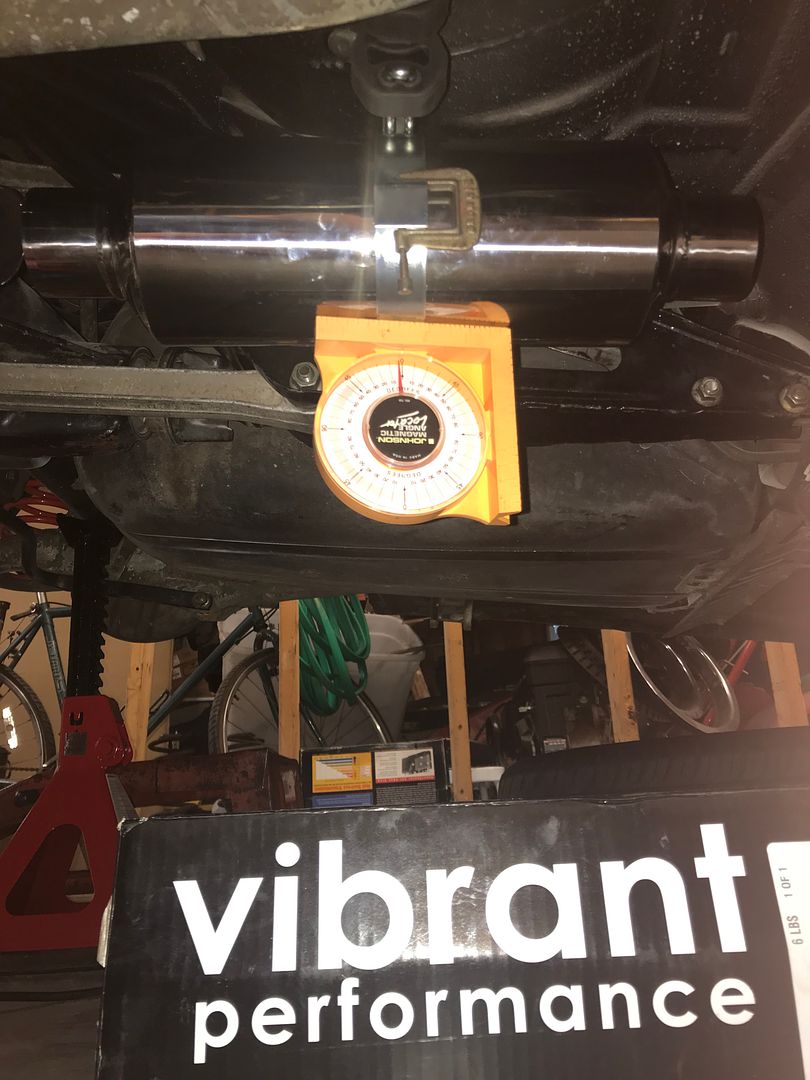
And because anal OCD Engineering behavior, it had to be ~ level as well:


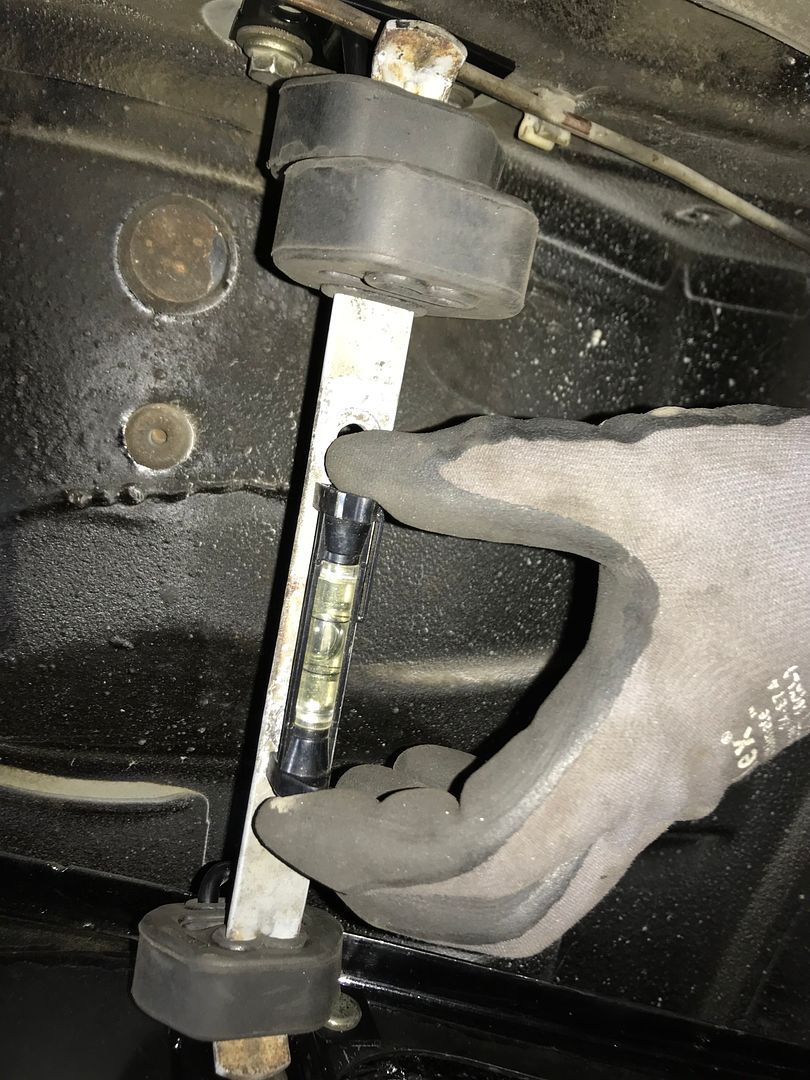
With the resonator now properly supported, I needed to determine how much offset I would need to throw into the stainless pipes to mate up properly with the CAT exit. The solution was staring me right in the face..... "the beauty of this plan is in it's simplicity"....


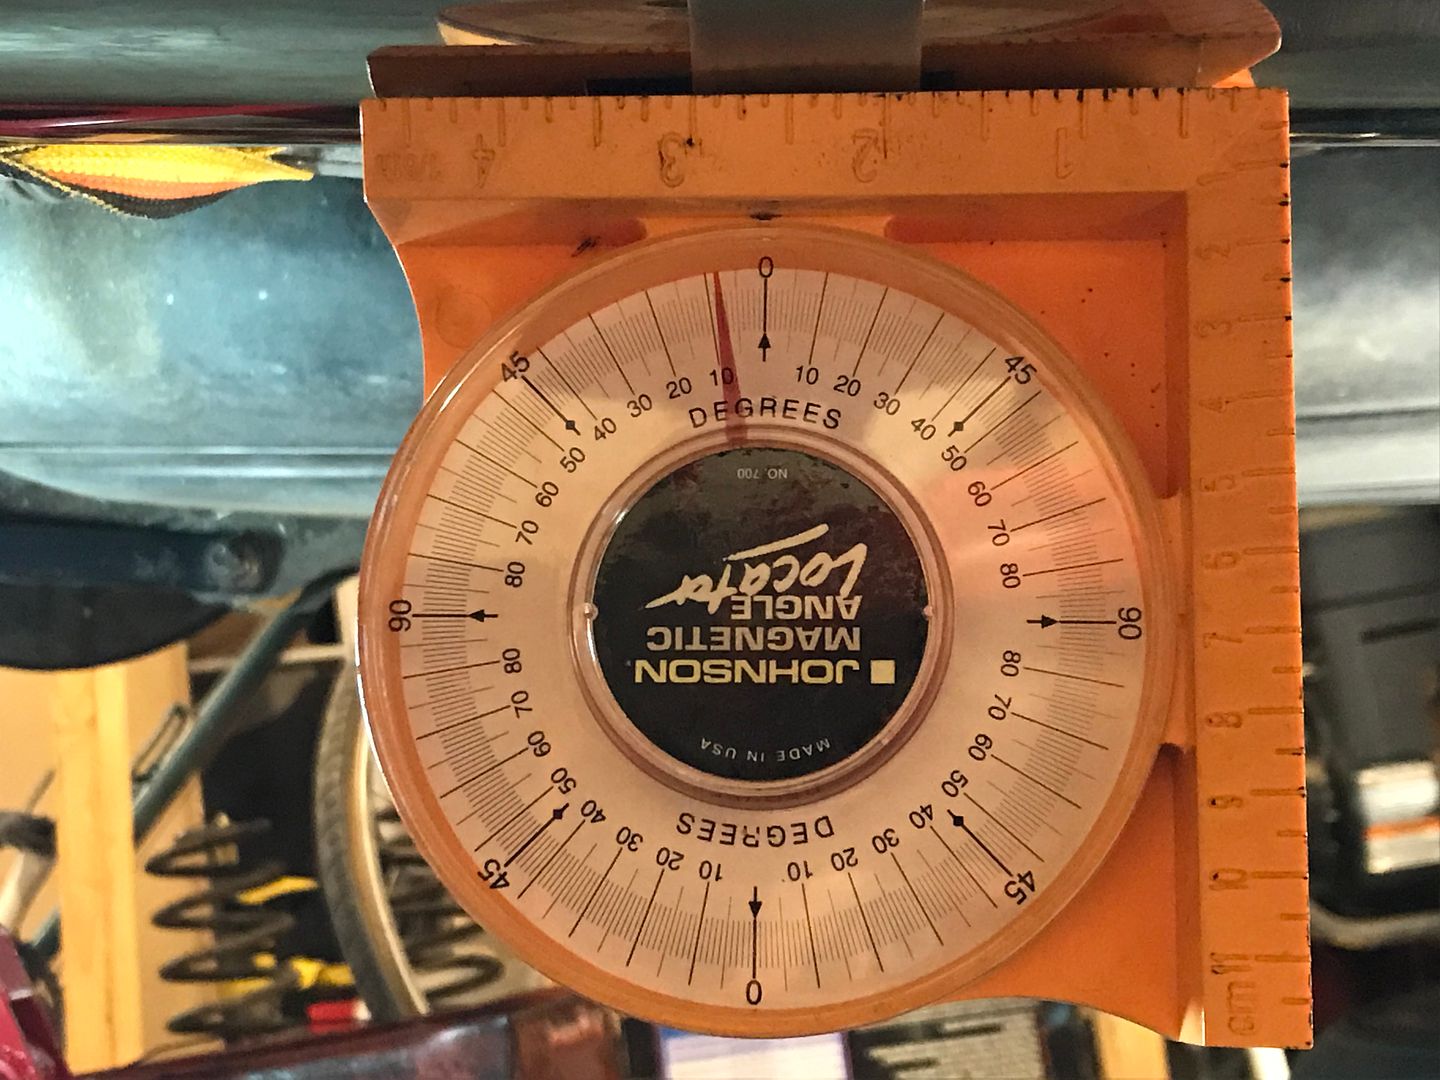
Using the sacrificial straight pipes determine that I needed about 1 1/4" offset, and that amount would level the resonator with the vehicle body. I confirmed the rockers were at about 8* as I had the sedan supported on 6 ton stands; all pipes were properly cut so the TME muffler and Vibrant resonator also hung at 8*.....


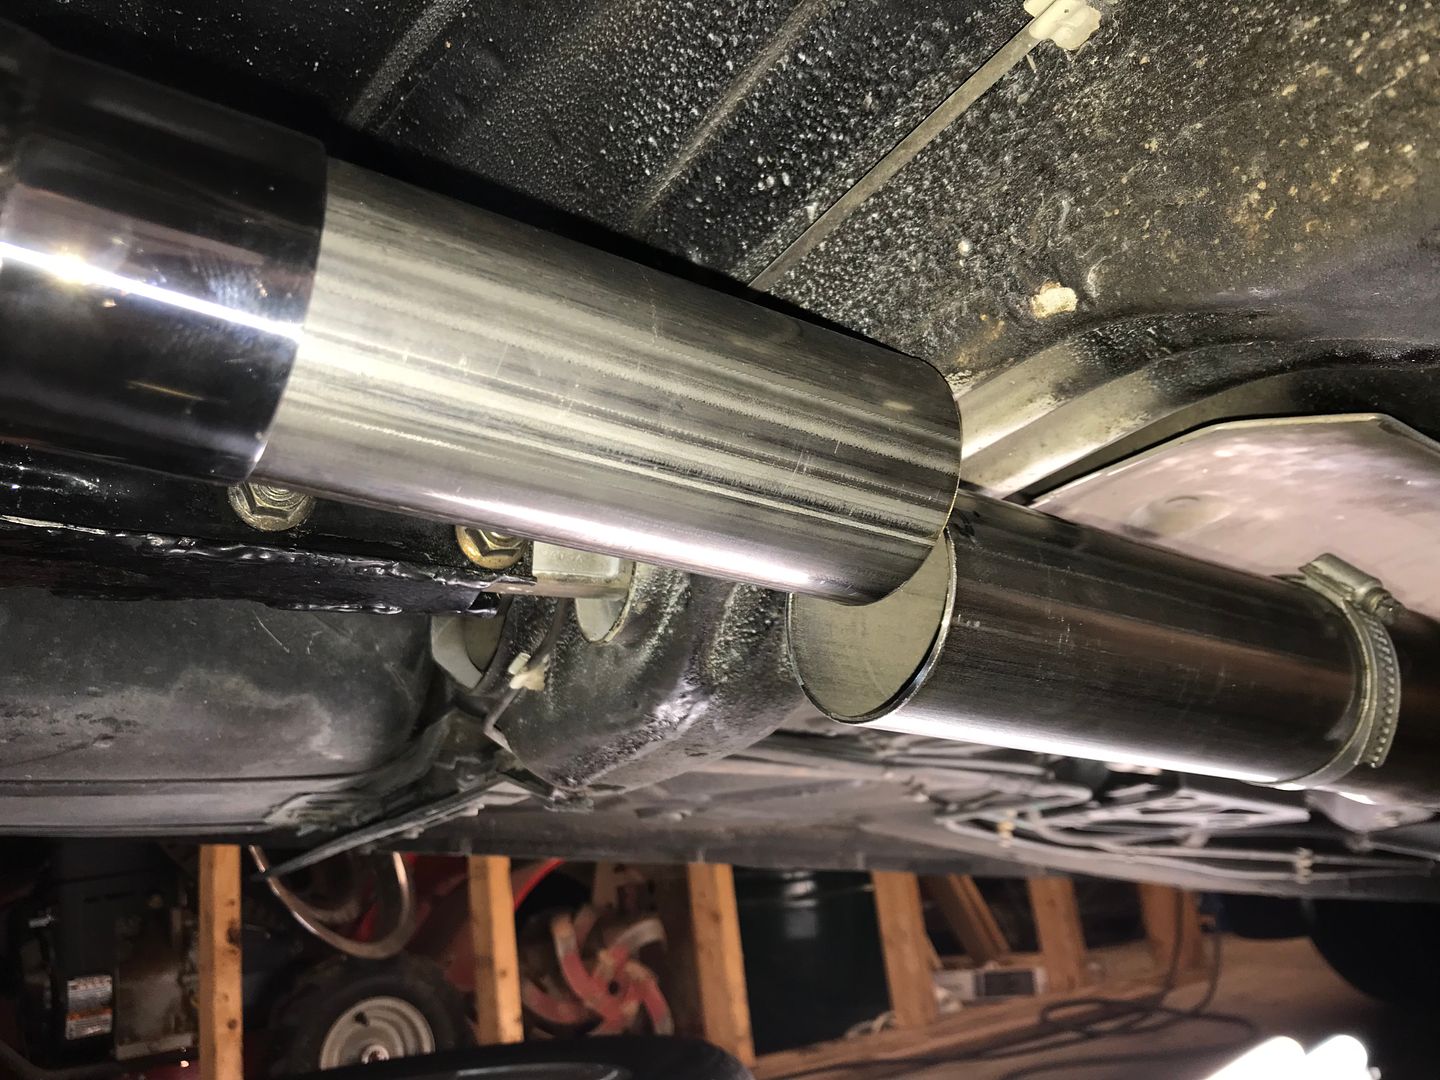
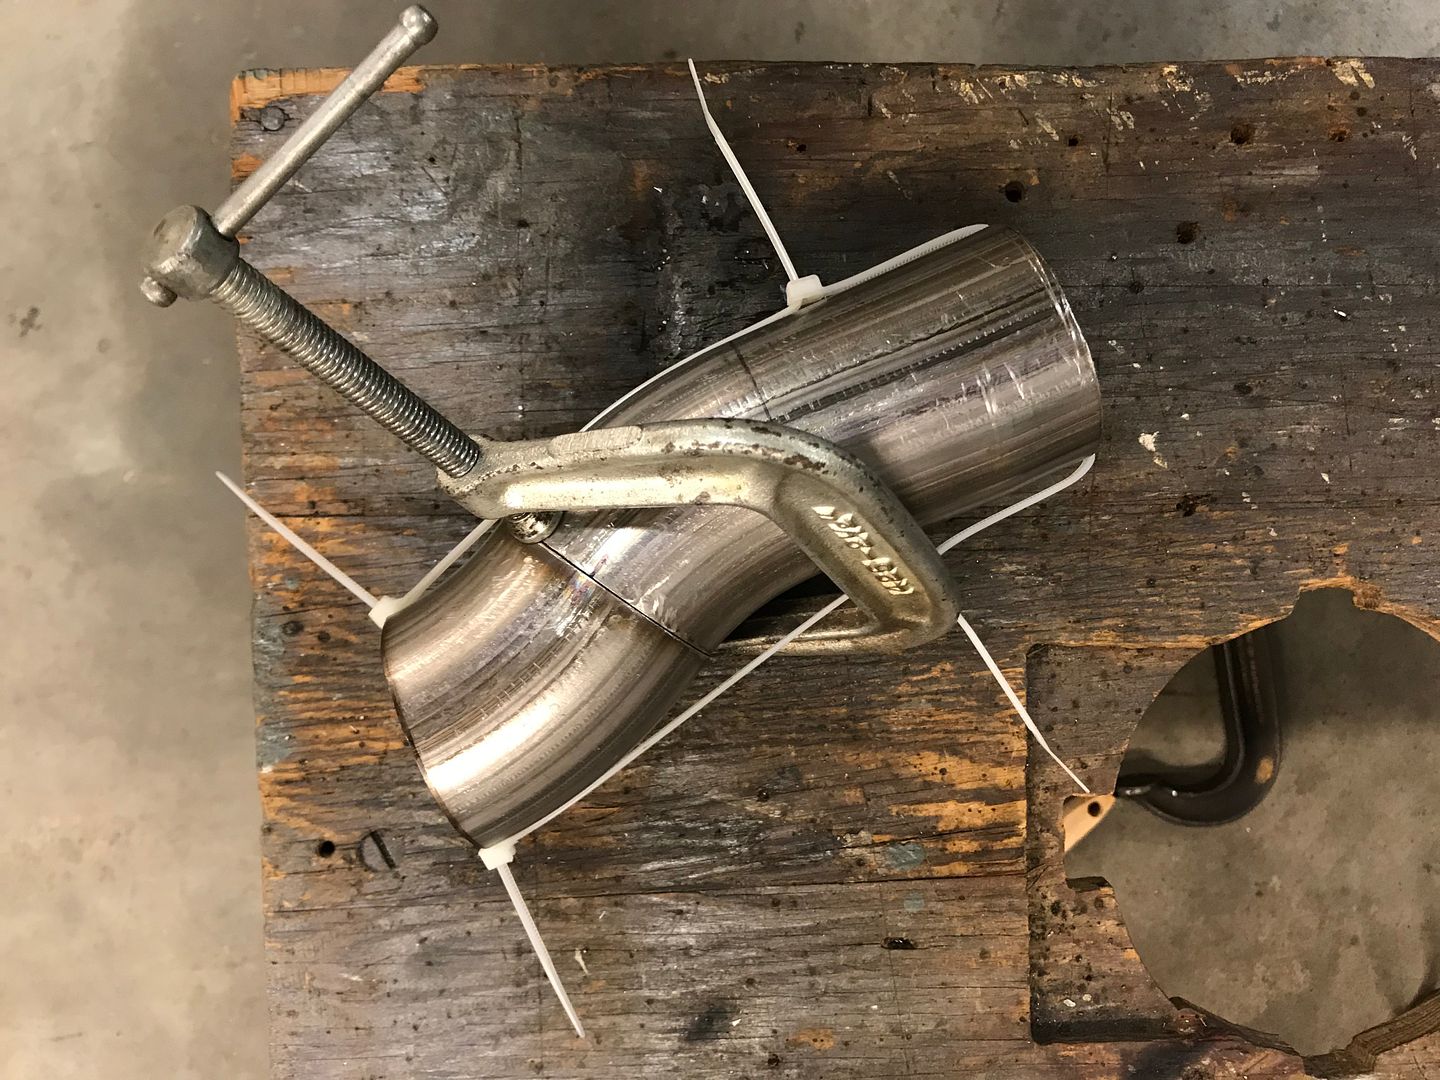
After plenty of measuring & checking, I Metabo free hand cut the 2.5 inch stainless mandrel 180* bend I bought. Wall thickness was barely .055", and I think it was 304 stainless which turned out to be a bitch to weld with my MIG machine. How about this fixturing job to prepare for weld?

 
This was the Helmholz option I considered, but couldn't find the room to fit. Neat and quite old technology to eliminate droning. Articles abound how to calculate the length needed for your particular engine. From what I've read, if you go this route you want to place the resonator as far forward in your exhaust system as possible..... say, right at the down pipe where it planes out below the floorpan.

http://synapseengineering.com/synapseusa/products/nodrone.html
 
Lots of V8 Mustang guys use the 1/4 wave tubes to cancel out drone. At same rpm, IIRC, the 4 bangers take a tube twice as long which is often problematic.
 
Can you get an objective measure of how loud the car is? Decibels at 70 mph seems to be the norm in magazines although obviously sound is pretty complex and decibels hardly tell the whole story.
 
Can you get an objective measure of how loud the car is? Decibels at 70 mph seems to be the norm in magazines although obviously sound is pretty complex and decibels hardly tell the whole story.

If I can get an app installed on the old smart phone, I will gather some data.

Driving the interstate at 70 -75 mph the last days, what's left of the drone is directly proportional to throttle opening. Start climbing a grade, and you can hear it raising it's voice again. The resonator has definitely improved it, but the input is still there.

Once I can determine the peak frequency, I'll look again at the Helmholz J tube solution and see what length would be necessary. Of course, welding this thing to the DP isn't practical as you'd never get it out of the vehicle again without the engine removed. If one were to shorten the DP exit point, and lengthen the entry pipe in front of the CAT, that would be the best location IMO.... if the chassis will handle the length needed.
 
I’ve seen them placed all the way at the back of V8 applications. I don’t think where you make the connection is as important as the length being correct to bounce-back a cancelling sound wave.
 
Been too busy this week, but here's the rest of the install of the VIBRANT resonator.

Once the pipes were all cut and properly fitted, including my 1.25" offset, I assembled it all in final position and tacked everything in place. Every time I do this type of work, I dream of a car lift in the Swedish underground garage! Here, the resonator tacked up:


While the MIG stainless welds are fully functional (it won't fall apart, good penetration), but they certainly don't provide the visual beauty of a proper TIG weld. I won't zoom in on my MIG welds for the shame of it...... but function is what I'm after here for a DD.


The complete installed resonator tucks up nicely in nearly the stock position. I have retained a slip joint at the CAT exit, and the V band clamp at the CAT entrance makes it all removable.


My original TME remains...... I can't imagine fitting a larger muffler in the rear position; you might gain another couple inches of OAL but that would be it.


With the machine on the concrete, the VIBRANT is tucked up at nearly the height of the fuel tank right behind it. My DP exit hanger is the lowest point of the entire system. Now both the TME and the VIBRANT are level when the vehicle is sitting at ride height...... my original TME install had an odd angle of the exhaust tip which always annoyed me. My Engineering brain is satisfied.

 
How does the ride compare with the B&G springs and Konis vs. the IPD springs and Bilsteins vs. stock? I'm planning on a handling upgrade for my car eventually but don't want to compromise its inherent comfiness. The progressive rate springs seem ideal in theory, but of course theory often differs from practice.
 
Back
Top