• Hello Guest, welcome to the initial stages of our new platform!
    You can find some additional information about where we are in the process of migrating the board and setting up our new software here

    Thank you for being a part of our community!

The DIY Panhard and Torque Rod Thread

Ben what rod ends do you use? I only have a few thousand miles one ones I bought from you and a few rod ends are shot. also a set of the busings cracked in half where they are thin, i think because the bearing got sloppy and let the rear end slap around. The Bearings never saw dirt, rain, salt ect.
 
240 is 1/2" bore to 12mm bushing but i used a 5/8 shanked rod end so its much stronger than a normal 1/2" shank rod end

takes some skill to make bushings that thin ;-)

trick is to do the inside first, then the outside, then part off ;)

but in the end, i just said **** it and made new bolts lol. the only thing i wanna change, is adding a grease nipple some how. the male ends are tricky because there isn't much meat to drill into and the end is buried inside the rod.

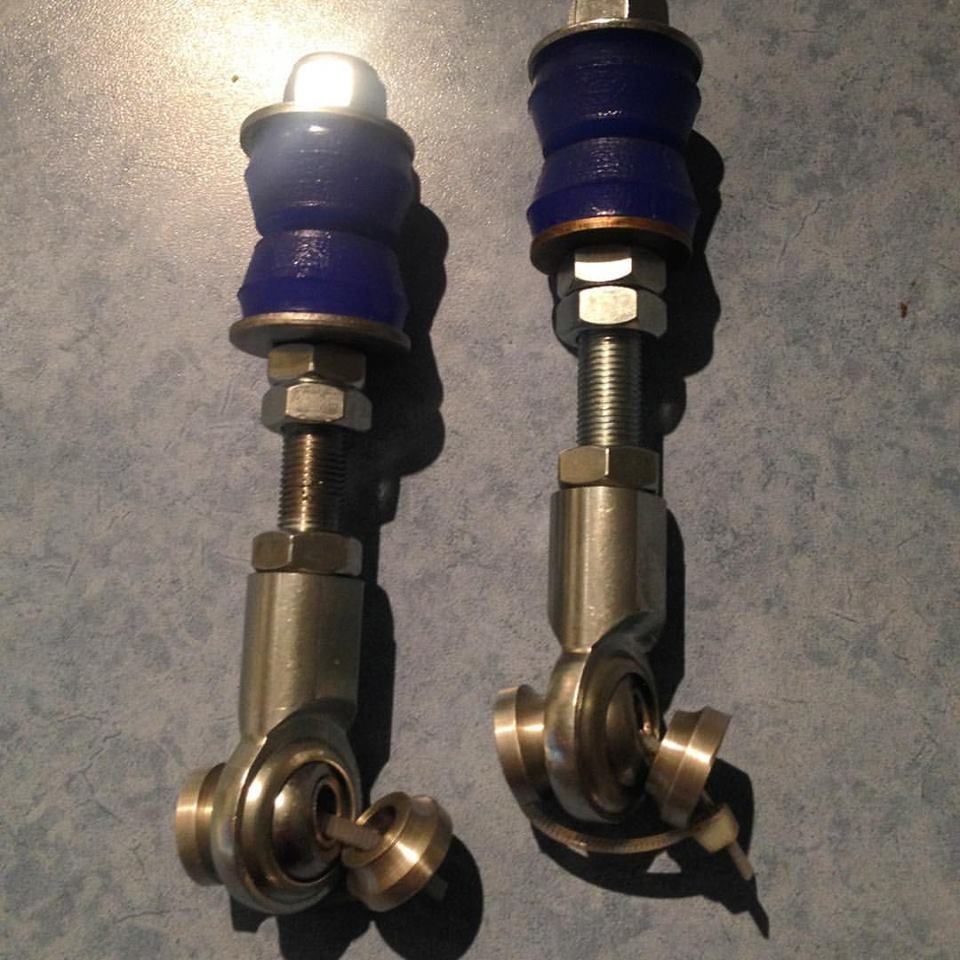
i made a set of sway bar links too, and i noticed the female end links come with a small hole drilled all the way thru the inside on the rod end into the bearing. my plan is to drill a small hole down the middle of the threaded rod and tap the very top for a grease nipple. that way it will work all the way down the rod, into the bearing and flow through the little grease groove built in. not quite sure just yet what I'm gonna do about the male ends

14390867_10154685031802952_2647727082850134856_n.jpg

its hard to see in the picture, but i made sleeves for these. since the rod ends are 1/2" again, and the stock hardware is 10mm, it left quite a bit of meat to work with. so i made one spacer with a built in sleeve attached and the second just a spacers width.
 
Ben what rod ends do you use? I only have a few thousand miles one ones I bought from you and a few rod ends are shot. also a set of the busings cracked in half where they are thin, i think because the bearing got sloppy and let the rear end slap around. The Bearings never saw dirt, rain, salt ect.

Ive used a few varieties over the years. I used to use a lower preload which gives better grip and less friction but had a lower service life. Ive since changed to a higher preload which sacrifices a little bit of grip for a longer and quieter service life.
 
My progress so far. M16 Fluro rod ends, inserts, 30x2mm seamless tubing, weldable M16x60 bolts (relatively low alloyed), half nuts etc sourced. Going for poly bushing in original size at the bodywork side. If i want it different I can always make new ends for that side. Either rod ends or some different rubber bushing.

WoLpiFzy99BtWIj9vW_y2wO8O0c3RLlDN9AjwF5OMpWs3NfkQ3oh5zNvIxB_zN4jKFaS5MqiwCoCWw=w1200-h675-rw-no


UXI7wZ4EkInVy4xZ2V8_YXBEylwW-LvWabT-tkH5LQw1547p70YPpnwWXG7Ze1A8QbbIU4sc12Kc9Q=w675-h1200-rw-no


More when I finally figure out why the VFD of my lathe is acting up.

oh and, sourcing the parts here, in good quality, is an expensive hobby. Better buy them from the obvious sellers or cobble together with existing parts if you are concerned about cost. The Fluro stuffs with the halfnuts, covers and inserts and short section of good tubing is ~150 euro easily.
 
Last edited:
One end Fluro M16 rod ends, other side sized for poly (or stock rubber) bushings.


IMG_20161223_190340_zpszgjx8cr9.jpg


Radiused the bolt heads on the lathe, just because.


IMG_20161226_141001_zpsh0yecp5c.jpg


The Poly bushing side. Made the wall thickness of the shell 5mm. The stock ones were getting oval.. Seamless tubing used.
Bolts that were welded to them made from a weldable alloy (hot formed class 5.6). Thread length 60mm so I can adjust for all kinds of changes or modfy the rods (maybe for if i shorten trailing arms).


IMG_20161226_165822_zpstnmkao4f.jpg


Primered. Rod ends LHD, bolts RHD. Adjustable when installed.

IMG_20161227_114600_zpsxpxhobmh.jpg


Spacers. Some high gloss paint too. And hopefully these rubber thingies keep the salt/water out. Added some grease to the inside of the covers.

Still need to properly adjust them but first impression is very good. Less slop in drive line (duh), less vibrations (old ones were stock, non adjustable), no noise, axle feels more planted, follows bumps in the road better, especially when road inclination changes (like sideways speed bumps, driveways). Driven about 200 Km now.
Still need to test high speeds and adjust them but the first short trips seem to be promising!

Got me this little digital angle gauge to check driveshaft alignment:

http://www.dx.com/nl/p/zndiy-bry-dx...WYy0CNPNvI9Q4IhoFCgAYaApHC8P8HAQ#.WHX7xlXhCpo

Nice little unit. Beats using the phone and destroying it in the process. Seems to work good. No changes in value after 24 hours stuck to the bed of my lil 6 ton lathe. Front is a bit flimsy, which is a shame, for the rest it is good value for $ (paid less elsewhere).
Only I managed to destroy the display back lighting. Must have dislodged a connection. Prob no warranty from the Chinese as usual so wil fix it myself.
 
Back
Top