Crazychopstick
(/// _ - )
- Joined
- Dec 22, 2004
Keep in mind that this thread will be edited frequently for corrections, pictures, and additional information
Skilled required for this job 1/10 (easy but time consuming).

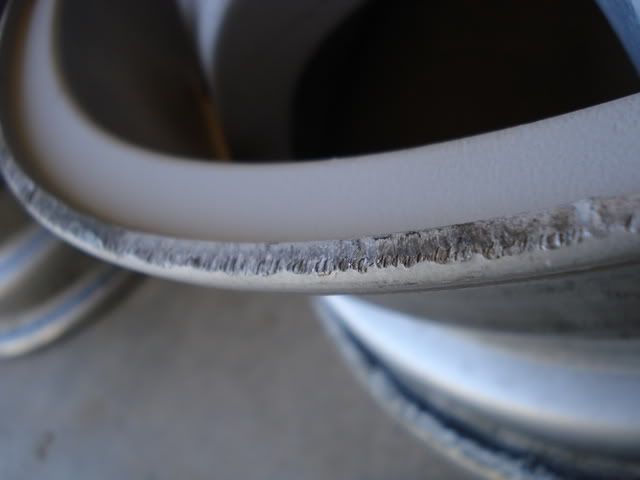
Potholes. Sometimes you can’t avoid them.
Depending on the type of wheel you have (forged, cast, 3 piece, etc) there are many businesses that specialize in repairing your busted wheels. The bends can be straightened (perhaps) and the curb rash and chipping clear coat, refurbished to that nice “back to new” shine. Professional wheel repair is always the best choice, but it does come at a cost. Averaging $100-250 a wheel can be quite the bankbreaker, especially if your whole set of wheels cost just a crisp Benjamin. And seeing as you’re already reading this thread, I think it’s safe to assume that a professional fix just isn’t in the budget.
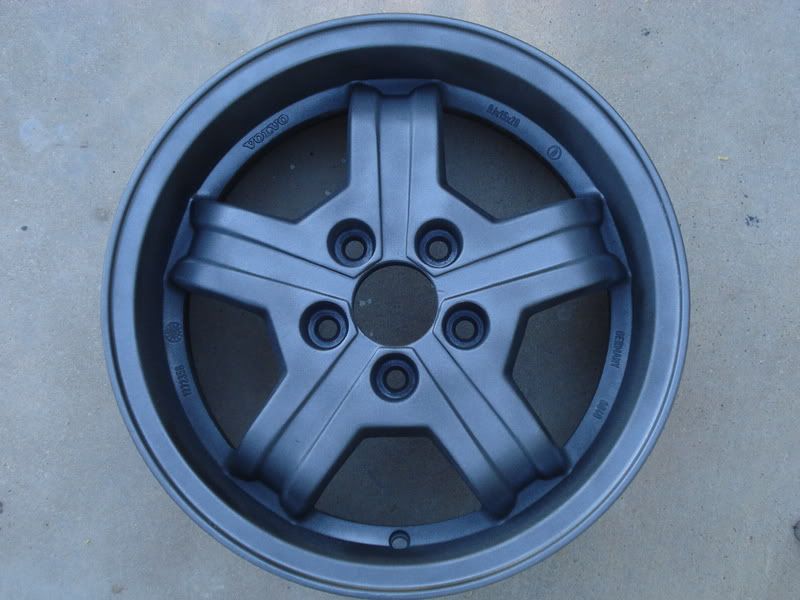
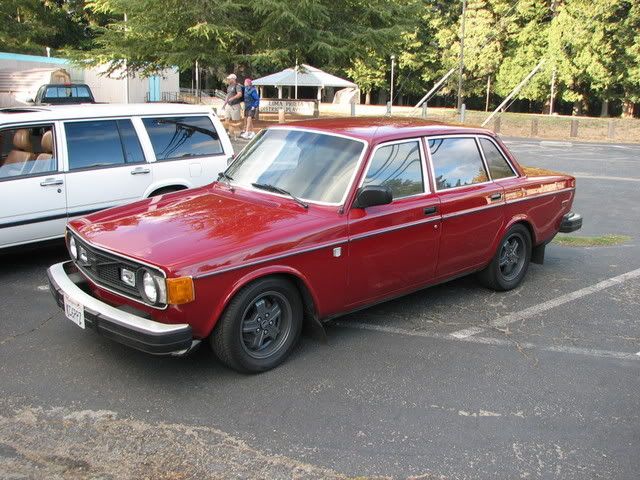
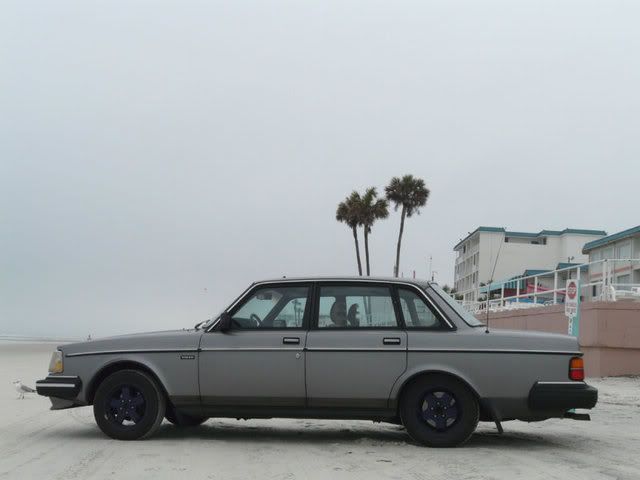
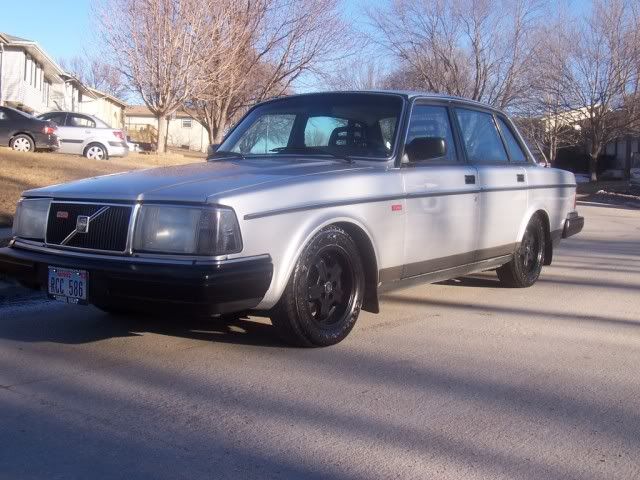
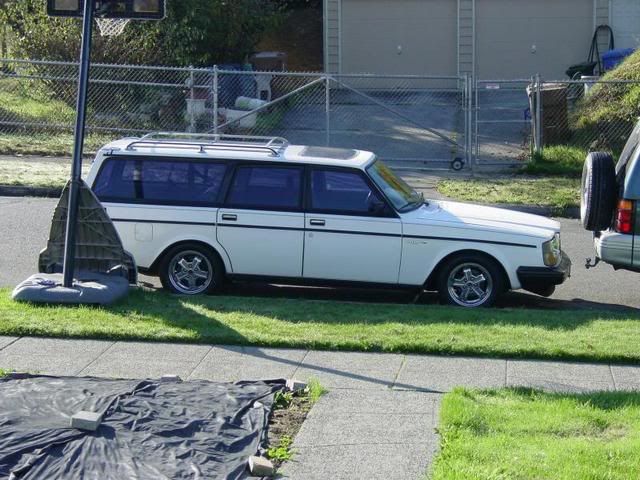
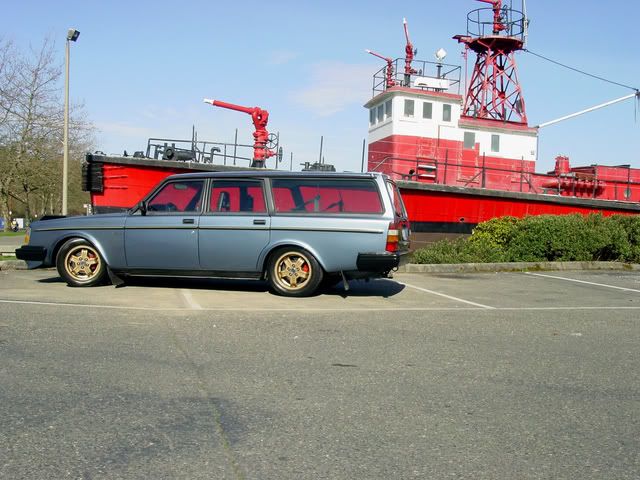
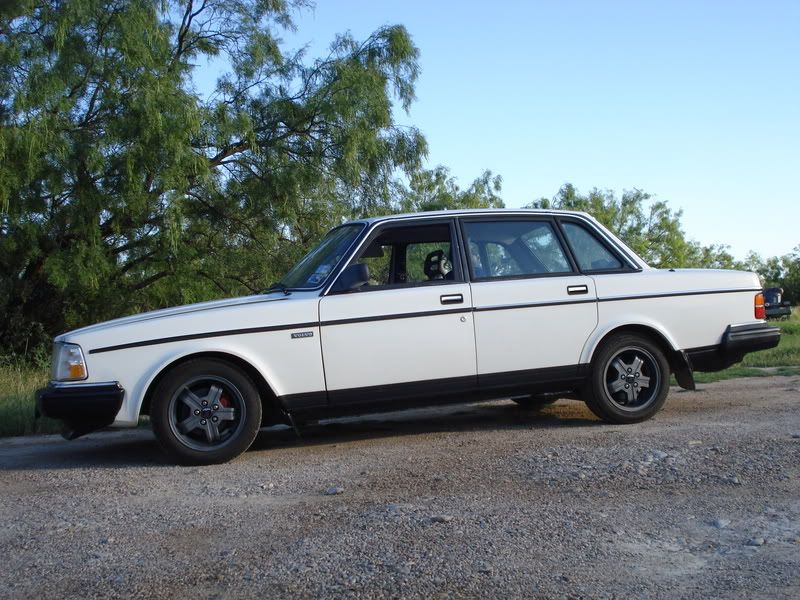
Enter the Virgo, the quintessential RWD Volvo wheel. The Virgo is a five spoke 15x6 wheel with a proper 20 offset, making it a popular choice among the 240 crowd. They have been imprinted with “GERMANY” and “NORWAY” depending on the country of origin and there are minor casting details among the wheels such as “Volvo” lettering size and hub thickness (weight is consistent I believe) not to mention the iPD replicas that came in 14” and 15” sizes. The wheel was commonly found on late model 242GTs and Turbo models. Their style is distinctly 80s, complementing most any 240 it’s mounted on. And because of the lack of availability of RWD wheels in a 5x10⁸ bolt pattern, it’s not uncommon to find the Virgo mounted on 140s, 740s and 940s as well.
P1800 owned by Vol-Tech in Austin

P1800 owned by resa850
144 owned by gsellstr (Virgos powdercoated graphite)
244 owned by towerymt (Virgos painted blue)
244 owned by OldSchoolEuro (Virgos painted gloss black)
245 formerly owned by Two245Turbos (polished Virgos)
245 owned by Two245Turbos (factory gold colored Virgos)
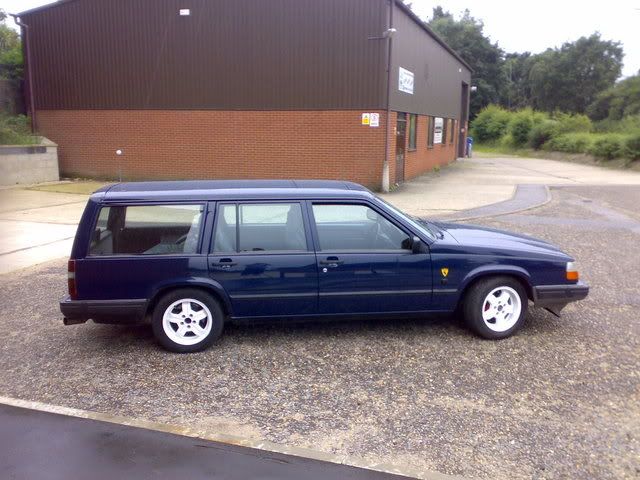
945 owned by WAGONRACER (Virgos painted white)
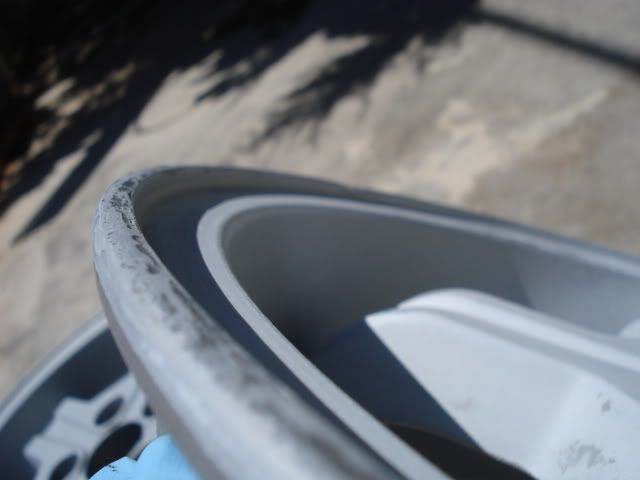
While abundant and cheap, in most junkyards they are commonly found thrashed and bent. A set at my local yard cost me $25/a wheel, including the one with the gnarly dent in it. I put that wheel aside for further inspection and ordered a single (and the nicest of the bunch) Virgo from California putting the total a bit over $160 so far.
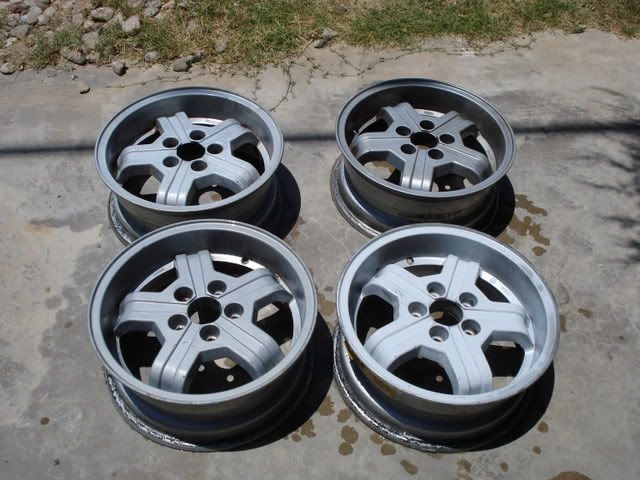
(Four Virgos, four different hues of silver)
So here we have four Virgos. All straight enough to hold air, all different shades. We’re about to repair and repaint these four wheels into something respectable for the 240 to wear. This thread is basic Virgo repair. The first thing you’re going to want to do is to jot down this short supply list:
-JB Weld or similar strength epoxy
-Toothpicks
-Pliers
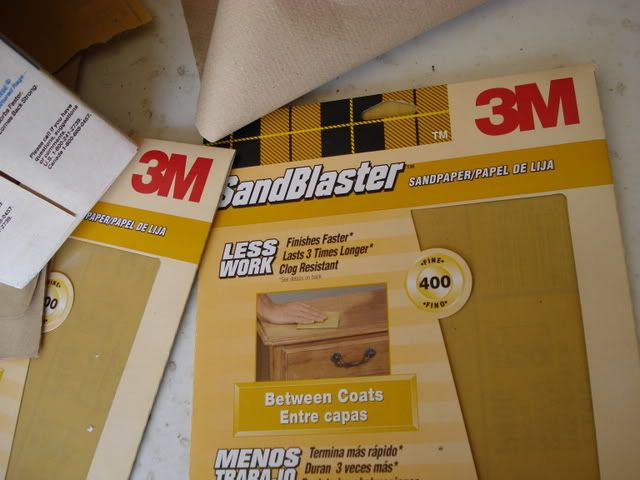
-100grit and 400grit sandpaper (2-3 packs)
-Duplicolor wheel paint(2-4 cans)
-Superclean “All wheel cleaner”
-Wax and grease remover (found at automotive paint stores)
-Old newspapers and painter’s tape
-Nice shop towels
What this thread is going to show you is how to sand and fill in minor curb rashes and gouges to the face of the wheel, then repaint them to a nice uniform (sort of) finish.
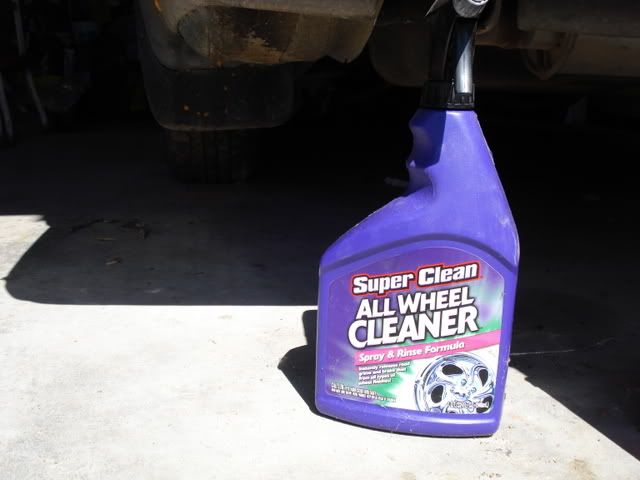
(Superclean)
First of all you need remove any wheel weights (pliers will do nicely) and give your nasty wheels a little wash. I like to presoak the wheel in Super clean, then scrub with a scotch pad, I also wash the back first so I can finish and dry on the face side. Make sure you clean the insides of the gouges carefully so your JB Weld will have a nice clean surface to adhere to, you can scuff it a bit with sandpaper to smooth out the scratches, but I never did and it stuck fine.
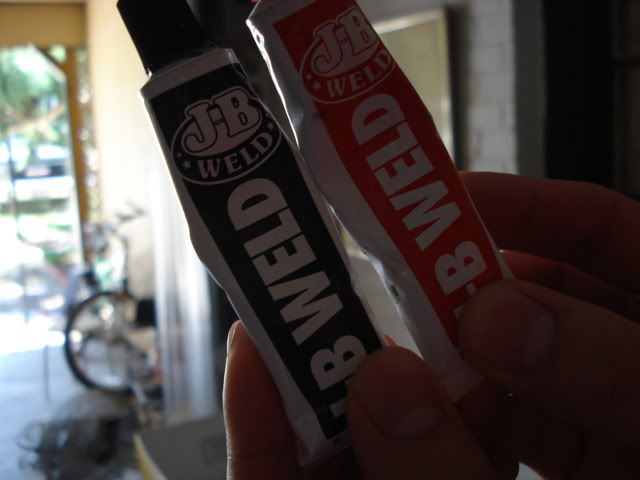
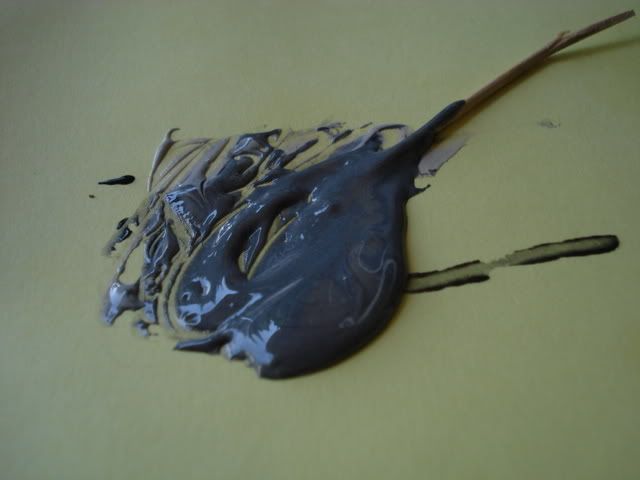
(JB Weld, made from magic)
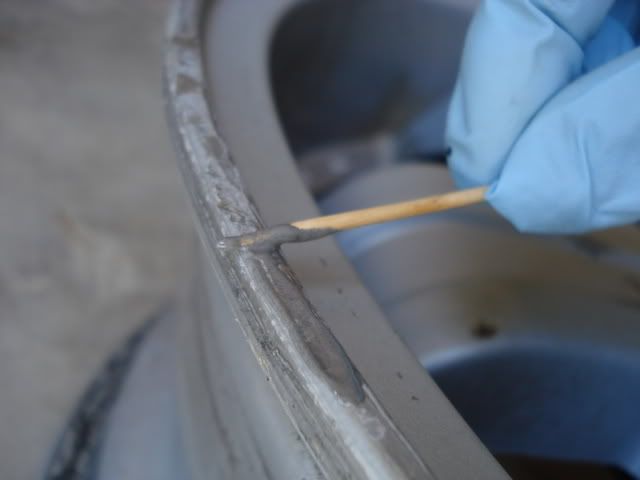
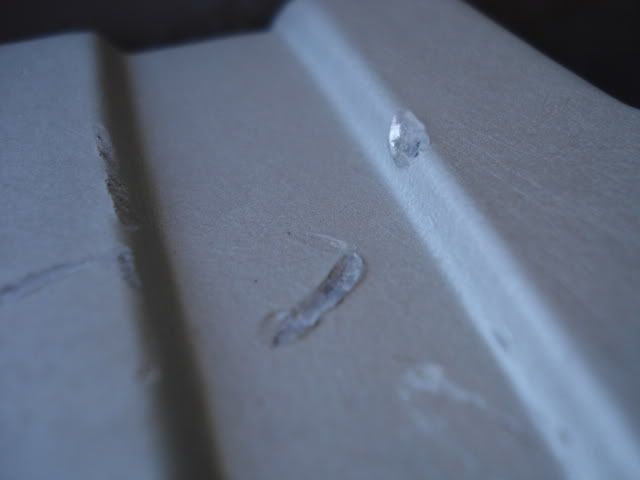
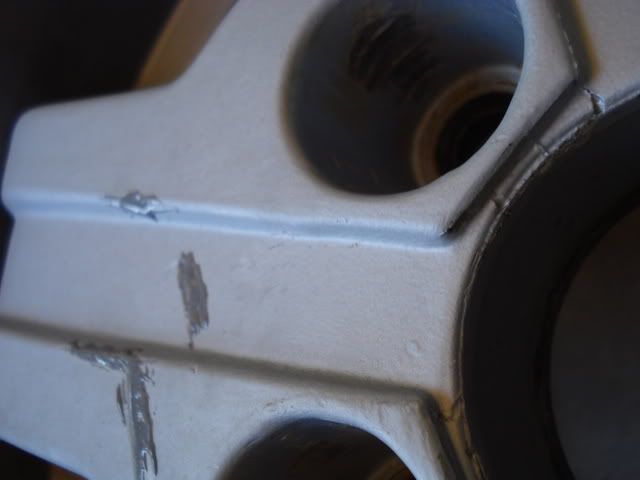
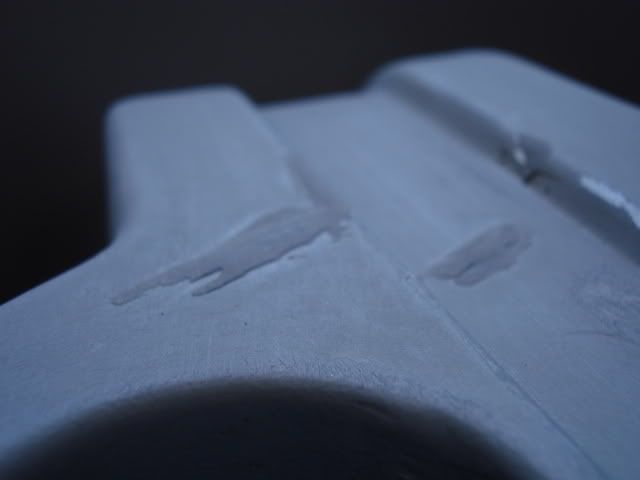
If you’ve never used JB Weld before (shame on you) it is a two part epoxy mixture that hardens when the two contents are mixed together, creating a tough yet sand-able and paintable surface that can withstand road debris and even high pressure washes. Take a scrap sheet of paper or a paper plate and squeeze small and equal amounts of both tubes onto the sheet. Using your toothpicks, or a similar type of mixer, swirl the gray and black together, once fully mixed together, you have a limited amount of time before the mixture becomes too tacky to apply. Work quickly but carefully. Start by filling in the edges of the wheel where curb rash has occurred, build the epoxy up until it’s a little higher than the edges of the wheel, a little over globbing is okay here. When finished with the edges, move on the face of the wheel where any deep scratches might have occurred. Once again, fill in the scratches, but try to keep it just barely thicker than the face of the wheel, be careful here because when it comes time to sand, too much JB weld on the face will make it difficult to blend.
(1. Two parts mixed together)
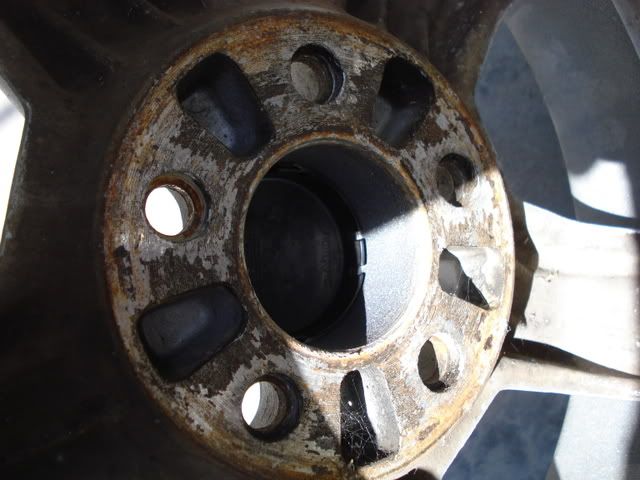
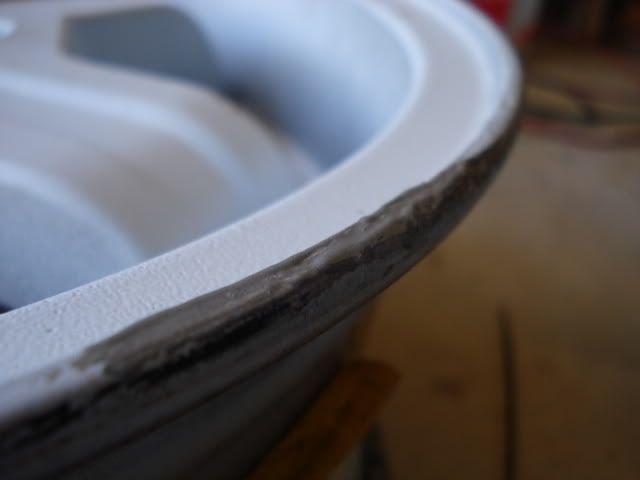
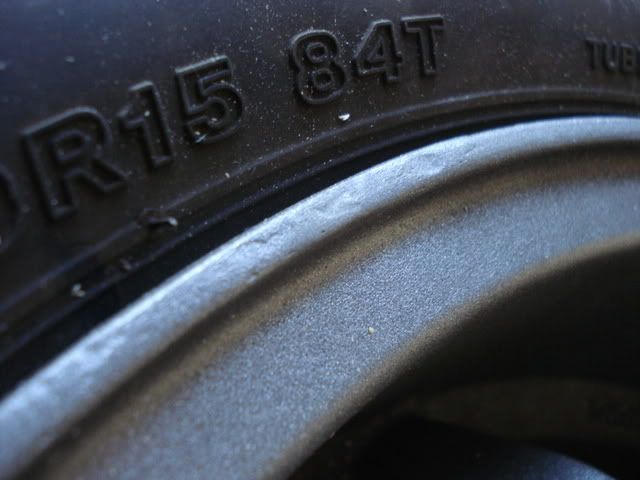
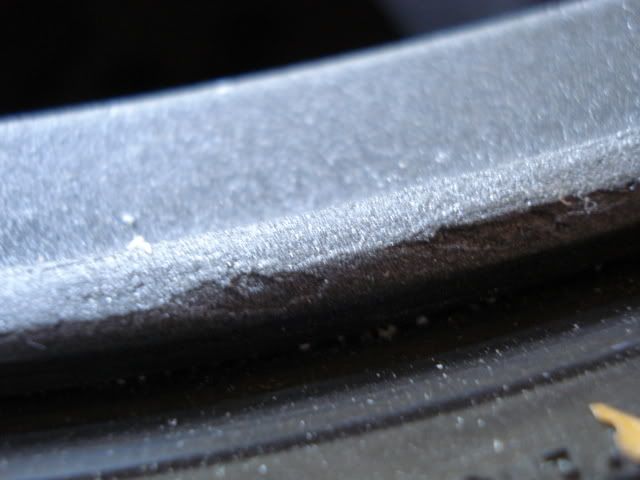
(2. The rash)
(3. application of epoxy)
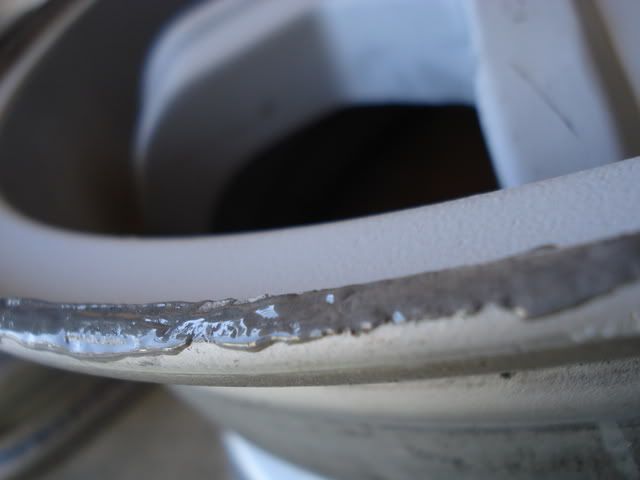
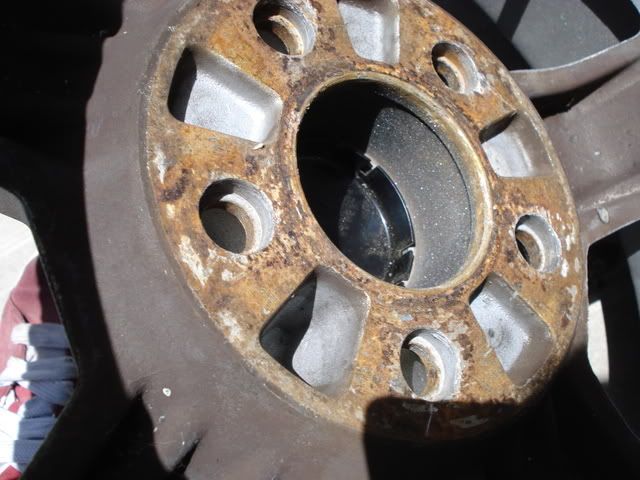
(4. globbed on)
(Before)
(After)
(Before)
(After)
JB Weld takes a good 24 hours to cure so put the wheels aside for the time being and surf Turbobricks for a while.
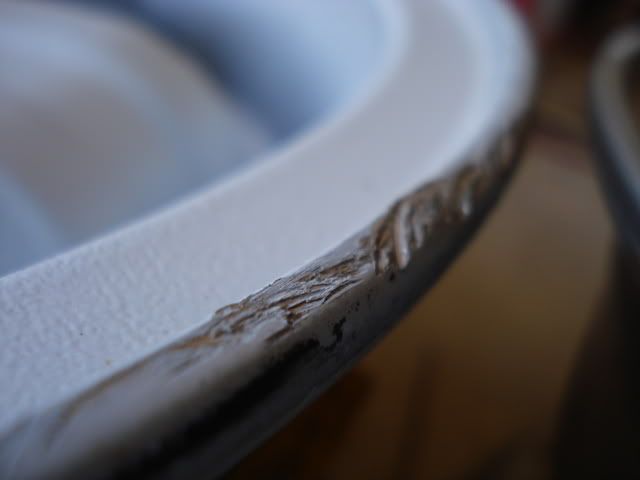
After the epoxy has dried and cured, you will find that it is very hard, almost too hard to sand with ease. No problem, dig out that 100grit sand paper and go to work on it. Around the edges you want to give it firm even pressure while “rounding” the sandpaper on the lip to match the repaired area with the rest of the lip, your sanding strokes should be following the circumference of the wheel, not perpendicular to the lip. Precision here is not necessary, since it’ll be up against the tire when mounted, just make it as pretty as you like. After a bit of sanding, it’ll become difficult to eye the sanded area to see if it blends in with the rest of the wheel, feel it out and if it feels a bit bumpy, hit it with the sandpaper again. What you’re hoping for here is that the JB Weld has filled in the “valleys” of the curb rash, everything else on the surface is just excess that you need to sand down.
(Lip sanding)
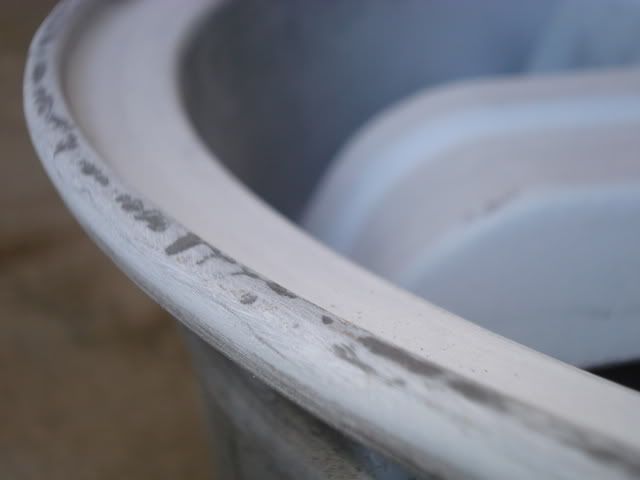
(Lip sanding)
(Lip sanding)
When finished with the lip, move on to the face and spokes of the wheel. This is where eyeballing your sanding gets a little difficult, you really have to feel the depth of the JB Welded area since the visuals are harder to base judgment on. The same technique applies however, 100grit to the hardened epoxy, sand it down to the point where the surface is even with the rest of the wheel.
(Spoke, sanded, left not fully sanded for article)
Once you’re satisfied with the amount of sanding your wheels have endured, give them another wash, nothing cheap and quick either. Presoak with the wheel cleaner, scrub, and rinse. Make sure you get off all the JB Weld dust. Your Virgos are officially repaired in a budget sense. No more scratches or rashes.
(400 grit shown)
These next steps will cover loosely how to repaint the wheels so they are all the same shade. Choose your color, any color! Alternatively, you could send your wheels to be powdercoated or have them professionally sprayed at a body shop, both of these options may have better results but will definitely be more expensive (factor about $2-300). Anyways back to the spraypaint, let the wheels dry and bring them into a shaded and well ventilated surface, don’t breathe in the fumes and wear gloves since this stuff can be pretty toxic. Apply the wax and grease remover to a clean rag or spray bottle and wipe or spray on the wheel, then use a clean side to wipe off, any liquid left on the wheel should evaporate shortly. What this product does is it brings impurities that are lodged into the wheel, up to the surface so you can wipe them away, paint thinner is said to do the same thing, but you run the risk of “softening” the previous factory coat of the wheel, so unless you’re beadblasting and hot tanking your Virgos down to the bare metal, stick with the wax and grease remover to be safe.
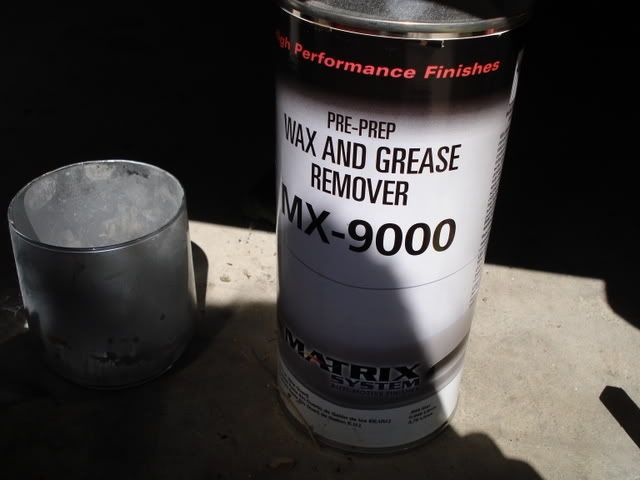
(wax and grease remover, I poured it in a spray bottle for ease of application)
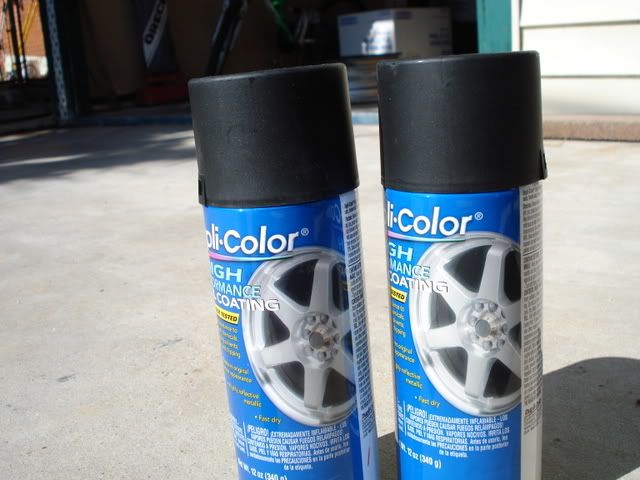
(Black Duplicolor wheel paint shown, wheels were painted graphite however)
Here’s where your choice of sanding comes into play, you can either start low (100 grit) and move up slowly to a smoother sandpaper (400 grit or more) or you can sand with 400 grit only. I’ve tried both methods and found that a single grade sandpaper nets the same results with less effort. Effort meaning that every time you sand your wheel, you will have to wash, dry and degrease before using the next grade of sandpaper. For this article we’ll stick with the single 400 grit.
Sand the wheel all over in any areas that are to be painted. Take your time and dispose of sandpaper generously, don’t think of it as wasting the paper, think of it as saving yourself from wasting your time, once the sandpaper is done, it’s not going to do as much scuffing onto the wheel, it’s easier to just grab another sheet.
Your wheels should be nice and “hazy” once you’re done sanding (we didn’t paint the inside of the wheel, but if you wish to, apply similar methods and avoid the area where the mounted wheel contacts the hub of the brake rotor) give the wheels another thorough wash and dry then wipe on and off some of that grease remover. Let the wheels fully dry and they will be ready for painting.
Some people prefer to primer the wheel before painting. I’ve never done so with exceptional results. If you are going to sand and blast the wheel down to the bare material, then a primer would be necessary, but since we are essentially painting over the stock coating, I feel it is an unnecessary step. Feel free to add this step in though, if you think differently! Since you’re painting from a rattle can, the paint works best when it’s been shaken well and a shaded area when the humidity is low. The spray exits the can most efficiently when the rattle can is in a upright position. If there was a way to mount your wheel upright, I would suggest doing so, we didn’t have the means so we laid it out flat.
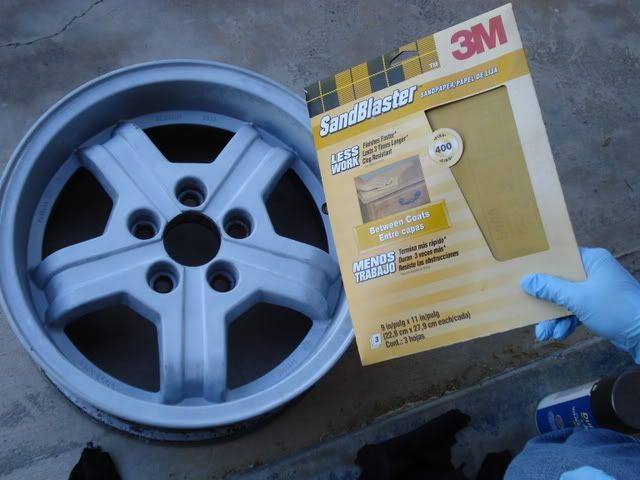
(only used one grade of sandpaper, 400grit, wheel is sanded and ready for paint)

(coat 1, cat 1)
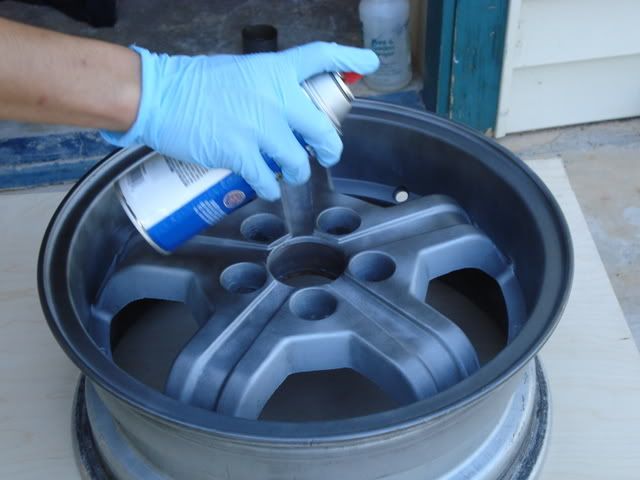
(coat 2)
(coat 3)
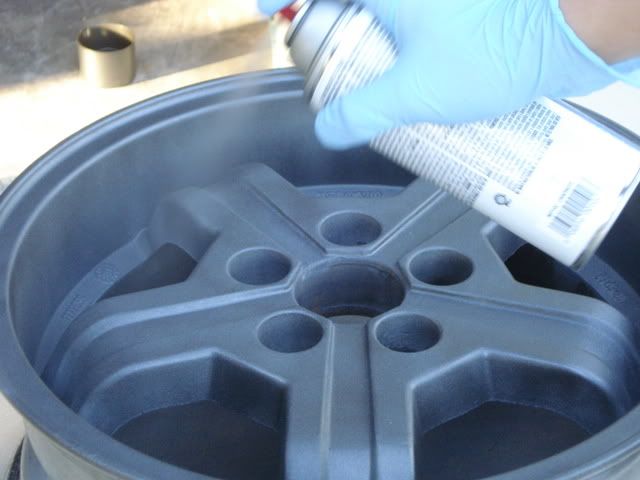
(Final coat)
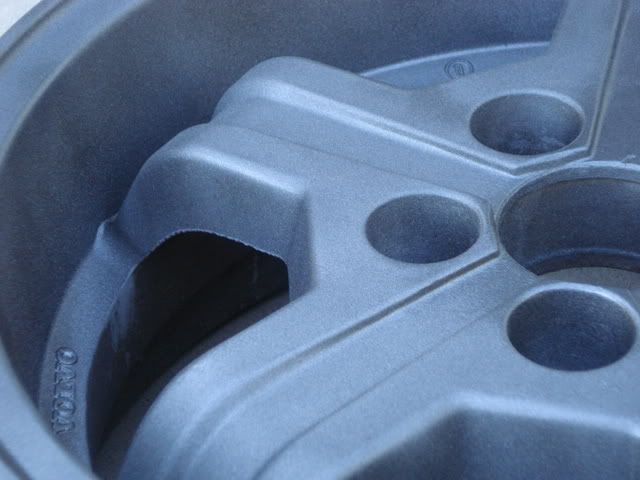
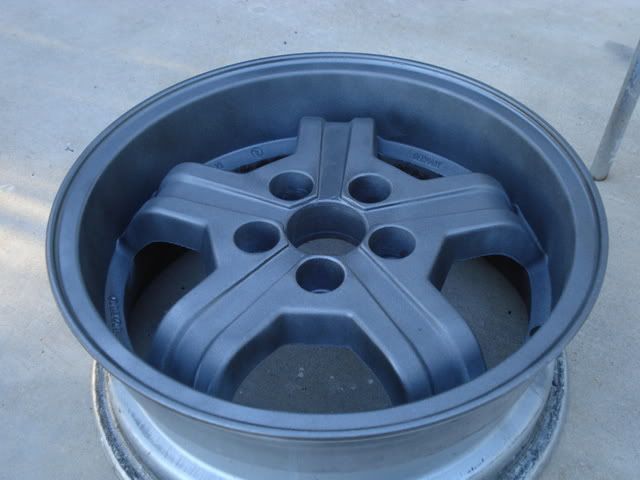
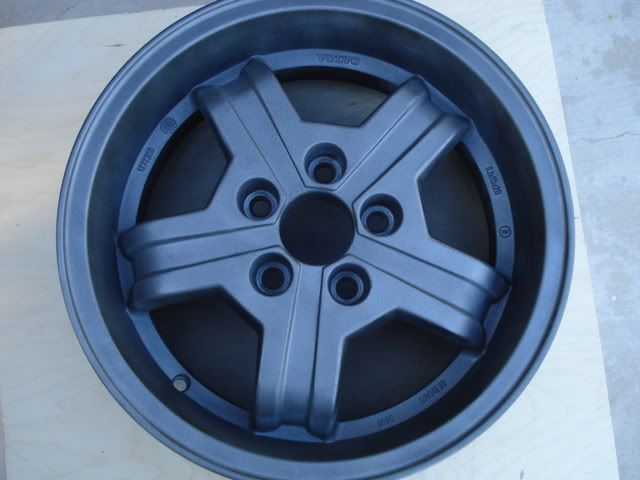
When painting your wheels you want to spray light and even coats. Spray it too heavy and the paint will become runny and not stick very well. I spray three to four coats total, leaving ten minutes in between each coat, if you’re efficient with your timing you can get to all four wheels within an hour. For this set of Virgos, no clearcoat was applied, but when applying clear follow the same procedure with light even coats leaving 10 minutes in between coats.
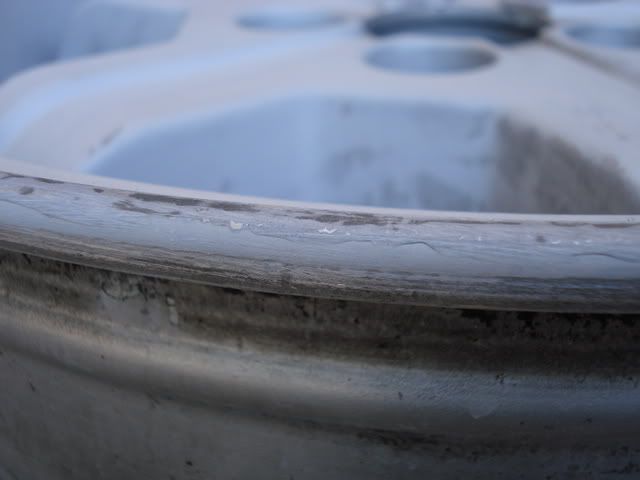
In the end some areas were a bit splotchy (too heavy) particularly on the lip, but the end result is pleasing.
Here you can compare the original rash with the sanded and painted areas (I made sure to not fully sand some areas for comparison photos).
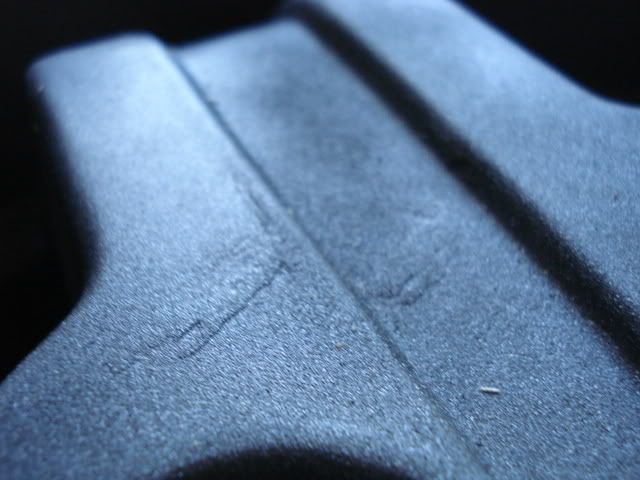
(before/after)
(before/after)
(before/after)
Thanks for reading my article and I hope you the best of luck in repairing and painting your Virgos or any other kind of alloy wheel for the matter, and remember neither I not Turbobricks can be liable for any injuries you might (but probably won't) sustain following these instructions.
Good luck!
P.S. My research on wheel painting methods were aided by Tenacious Todd, YLD244, and towerymt in this thread.
I have also written an article concerning CD player installation on a 240 here.
Skilled required for this job 1/10 (easy but time consuming).
Potholes. Sometimes you can’t avoid them.
Depending on the type of wheel you have (forged, cast, 3 piece, etc) there are many businesses that specialize in repairing your busted wheels. The bends can be straightened (perhaps) and the curb rash and chipping clear coat, refurbished to that nice “back to new” shine. Professional wheel repair is always the best choice, but it does come at a cost. Averaging $100-250 a wheel can be quite the bankbreaker, especially if your whole set of wheels cost just a crisp Benjamin. And seeing as you’re already reading this thread, I think it’s safe to assume that a professional fix just isn’t in the budget.
Enter the Virgo, the quintessential RWD Volvo wheel. The Virgo is a five spoke 15x6 wheel with a proper 20 offset, making it a popular choice among the 240 crowd. They have been imprinted with “GERMANY” and “NORWAY” depending on the country of origin and there are minor casting details among the wheels such as “Volvo” lettering size and hub thickness (weight is consistent I believe) not to mention the iPD replicas that came in 14” and 15” sizes. The wheel was commonly found on late model 242GTs and Turbo models. Their style is distinctly 80s, complementing most any 240 it’s mounted on. And because of the lack of availability of RWD wheels in a 5x10⁸ bolt pattern, it’s not uncommon to find the Virgo mounted on 140s, 740s and 940s as well.
P1800 owned by Vol-Tech in Austin
P1800 owned by resa850
144 owned by gsellstr (Virgos powdercoated graphite)
244 owned by towerymt (Virgos painted blue)
244 owned by OldSchoolEuro (Virgos painted gloss black)
245 formerly owned by Two245Turbos (polished Virgos)
245 owned by Two245Turbos (factory gold colored Virgos)
945 owned by WAGONRACER (Virgos painted white)
While abundant and cheap, in most junkyards they are commonly found thrashed and bent. A set at my local yard cost me $25/a wheel, including the one with the gnarly dent in it. I put that wheel aside for further inspection and ordered a single (and the nicest of the bunch) Virgo from California putting the total a bit over $160 so far.
(Four Virgos, four different hues of silver)
So here we have four Virgos. All straight enough to hold air, all different shades. We’re about to repair and repaint these four wheels into something respectable for the 240 to wear. This thread is basic Virgo repair. The first thing you’re going to want to do is to jot down this short supply list:
-JB Weld or similar strength epoxy
-Toothpicks
-Pliers
-100grit and 400grit sandpaper (2-3 packs)
-Duplicolor wheel paint(2-4 cans)
-Superclean “All wheel cleaner”
-Wax and grease remover (found at automotive paint stores)
-Old newspapers and painter’s tape
-Nice shop towels
What this thread is going to show you is how to sand and fill in minor curb rashes and gouges to the face of the wheel, then repaint them to a nice uniform (sort of) finish.
(Superclean)
First of all you need remove any wheel weights (pliers will do nicely) and give your nasty wheels a little wash. I like to presoak the wheel in Super clean, then scrub with a scotch pad, I also wash the back first so I can finish and dry on the face side. Make sure you clean the insides of the gouges carefully so your JB Weld will have a nice clean surface to adhere to, you can scuff it a bit with sandpaper to smooth out the scratches, but I never did and it stuck fine.
(JB Weld, made from magic)
If you’ve never used JB Weld before (shame on you) it is a two part epoxy mixture that hardens when the two contents are mixed together, creating a tough yet sand-able and paintable surface that can withstand road debris and even high pressure washes. Take a scrap sheet of paper or a paper plate and squeeze small and equal amounts of both tubes onto the sheet. Using your toothpicks, or a similar type of mixer, swirl the gray and black together, once fully mixed together, you have a limited amount of time before the mixture becomes too tacky to apply. Work quickly but carefully. Start by filling in the edges of the wheel where curb rash has occurred, build the epoxy up until it’s a little higher than the edges of the wheel, a little over globbing is okay here. When finished with the edges, move on the face of the wheel where any deep scratches might have occurred. Once again, fill in the scratches, but try to keep it just barely thicker than the face of the wheel, be careful here because when it comes time to sand, too much JB weld on the face will make it difficult to blend.
(1. Two parts mixed together)
(2. The rash)
(3. application of epoxy)
(4. globbed on)
(Before)
(After)
(Before)
(After)
JB Weld takes a good 24 hours to cure so put the wheels aside for the time being and surf Turbobricks for a while.
After the epoxy has dried and cured, you will find that it is very hard, almost too hard to sand with ease. No problem, dig out that 100grit sand paper and go to work on it. Around the edges you want to give it firm even pressure while “rounding” the sandpaper on the lip to match the repaired area with the rest of the lip, your sanding strokes should be following the circumference of the wheel, not perpendicular to the lip. Precision here is not necessary, since it’ll be up against the tire when mounted, just make it as pretty as you like. After a bit of sanding, it’ll become difficult to eye the sanded area to see if it blends in with the rest of the wheel, feel it out and if it feels a bit bumpy, hit it with the sandpaper again. What you’re hoping for here is that the JB Weld has filled in the “valleys” of the curb rash, everything else on the surface is just excess that you need to sand down.
(Lip sanding)
(Lip sanding)
(Lip sanding)
When finished with the lip, move on to the face and spokes of the wheel. This is where eyeballing your sanding gets a little difficult, you really have to feel the depth of the JB Welded area since the visuals are harder to base judgment on. The same technique applies however, 100grit to the hardened epoxy, sand it down to the point where the surface is even with the rest of the wheel.
(Spoke, sanded, left not fully sanded for article)
Once you’re satisfied with the amount of sanding your wheels have endured, give them another wash, nothing cheap and quick either. Presoak with the wheel cleaner, scrub, and rinse. Make sure you get off all the JB Weld dust. Your Virgos are officially repaired in a budget sense. No more scratches or rashes.
(400 grit shown)
These next steps will cover loosely how to repaint the wheels so they are all the same shade. Choose your color, any color! Alternatively, you could send your wheels to be powdercoated or have them professionally sprayed at a body shop, both of these options may have better results but will definitely be more expensive (factor about $2-300). Anyways back to the spraypaint, let the wheels dry and bring them into a shaded and well ventilated surface, don’t breathe in the fumes and wear gloves since this stuff can be pretty toxic. Apply the wax and grease remover to a clean rag or spray bottle and wipe or spray on the wheel, then use a clean side to wipe off, any liquid left on the wheel should evaporate shortly. What this product does is it brings impurities that are lodged into the wheel, up to the surface so you can wipe them away, paint thinner is said to do the same thing, but you run the risk of “softening” the previous factory coat of the wheel, so unless you’re beadblasting and hot tanking your Virgos down to the bare metal, stick with the wax and grease remover to be safe.
(wax and grease remover, I poured it in a spray bottle for ease of application)
(Black Duplicolor wheel paint shown, wheels were painted graphite however)
Here’s where your choice of sanding comes into play, you can either start low (100 grit) and move up slowly to a smoother sandpaper (400 grit or more) or you can sand with 400 grit only. I’ve tried both methods and found that a single grade sandpaper nets the same results with less effort. Effort meaning that every time you sand your wheel, you will have to wash, dry and degrease before using the next grade of sandpaper. For this article we’ll stick with the single 400 grit.
Sand the wheel all over in any areas that are to be painted. Take your time and dispose of sandpaper generously, don’t think of it as wasting the paper, think of it as saving yourself from wasting your time, once the sandpaper is done, it’s not going to do as much scuffing onto the wheel, it’s easier to just grab another sheet.
Your wheels should be nice and “hazy” once you’re done sanding (we didn’t paint the inside of the wheel, but if you wish to, apply similar methods and avoid the area where the mounted wheel contacts the hub of the brake rotor) give the wheels another thorough wash and dry then wipe on and off some of that grease remover. Let the wheels fully dry and they will be ready for painting.
Some people prefer to primer the wheel before painting. I’ve never done so with exceptional results. If you are going to sand and blast the wheel down to the bare material, then a primer would be necessary, but since we are essentially painting over the stock coating, I feel it is an unnecessary step. Feel free to add this step in though, if you think differently! Since you’re painting from a rattle can, the paint works best when it’s been shaken well and a shaded area when the humidity is low. The spray exits the can most efficiently when the rattle can is in a upright position. If there was a way to mount your wheel upright, I would suggest doing so, we didn’t have the means so we laid it out flat.
(only used one grade of sandpaper, 400grit, wheel is sanded and ready for paint)
(coat 1, cat 1)
(coat 2)
(coat 3)
(Final coat)
When painting your wheels you want to spray light and even coats. Spray it too heavy and the paint will become runny and not stick very well. I spray three to four coats total, leaving ten minutes in between each coat, if you’re efficient with your timing you can get to all four wheels within an hour. For this set of Virgos, no clearcoat was applied, but when applying clear follow the same procedure with light even coats leaving 10 minutes in between coats.
In the end some areas were a bit splotchy (too heavy) particularly on the lip, but the end result is pleasing.
Here you can compare the original rash with the sanded and painted areas (I made sure to not fully sand some areas for comparison photos).
(before/after)
(before/after)
(before/after)
Thanks for reading my article and I hope you the best of luck in repairing and painting your Virgos or any other kind of alloy wheel for the matter, and remember neither I not Turbobricks can be liable for any injuries you might (but probably won't) sustain following these instructions.
Good luck!
P.S. My research on wheel painting methods were aided by Tenacious Todd, YLD244, and towerymt in this thread.
I have also written an article concerning CD player installation on a 240 here.
Last edited: