
One of the first things on this now 5 year voyage to restore a 32 year old car was to clean the interior. It had remained outside for 8 years after it quit running before it got garage space and then for a few more years inside.
This passenger seat felt like cardboard when I started on the leather restoration. It was much worst than the driver seat because that seat had a sheepskin cover on it through much of its life and all of its storage time. I used nearly 2 quarts of Leatherique Rejuvenator over several weeks to soak the leather back from cardboard. Put soaked cotton cloths over the worst areas, covered with black trash bags and left in a warm car for days at a time soaking the leather. I would have never believed Leatherique's description of what floats to the surface with the use of the Rejuvenator until I saw it for myself. Several cleanings with Pristine Clean restored the surface to nearly new condition . . . in places. In other places it still looked 32 years old.
The initial treatment of the leather occurred over 4 years ago and now that the car is in daily use it is time to finish with the dye process.
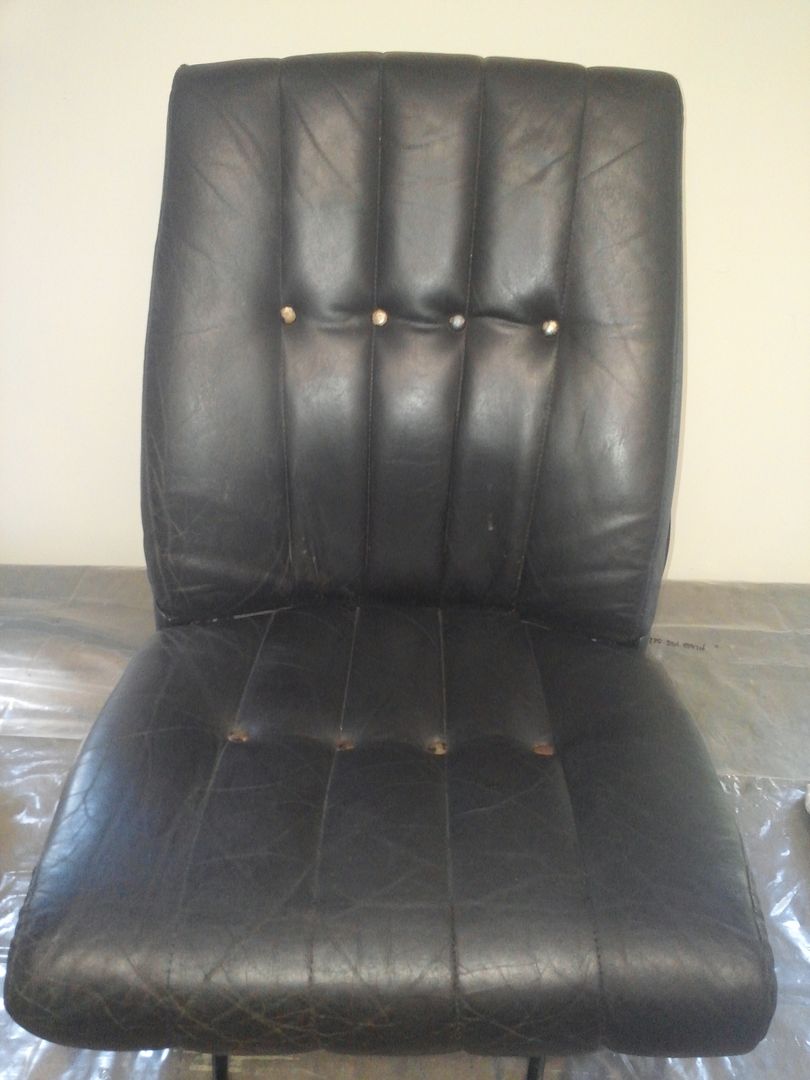
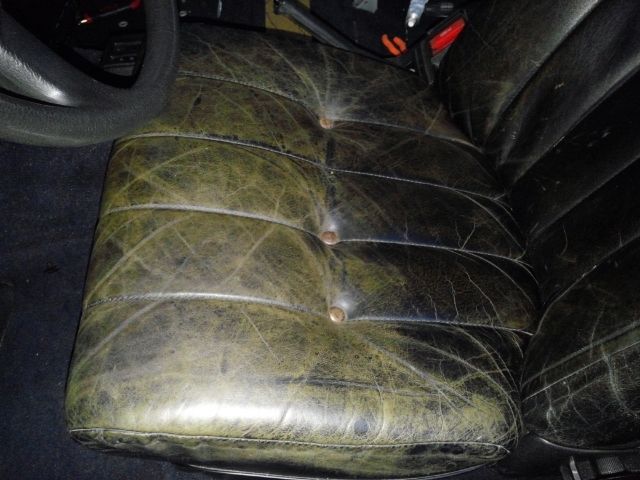
The passenger seat is about as bad as my leather gets even after the Rejuvenator and Pristine Clean and where I started. This photo was taken before the old dye stripping and what I was trying to bring back from the dead.

Here is the whole passenger seat before starting.
. . . and an hour later after stripping:
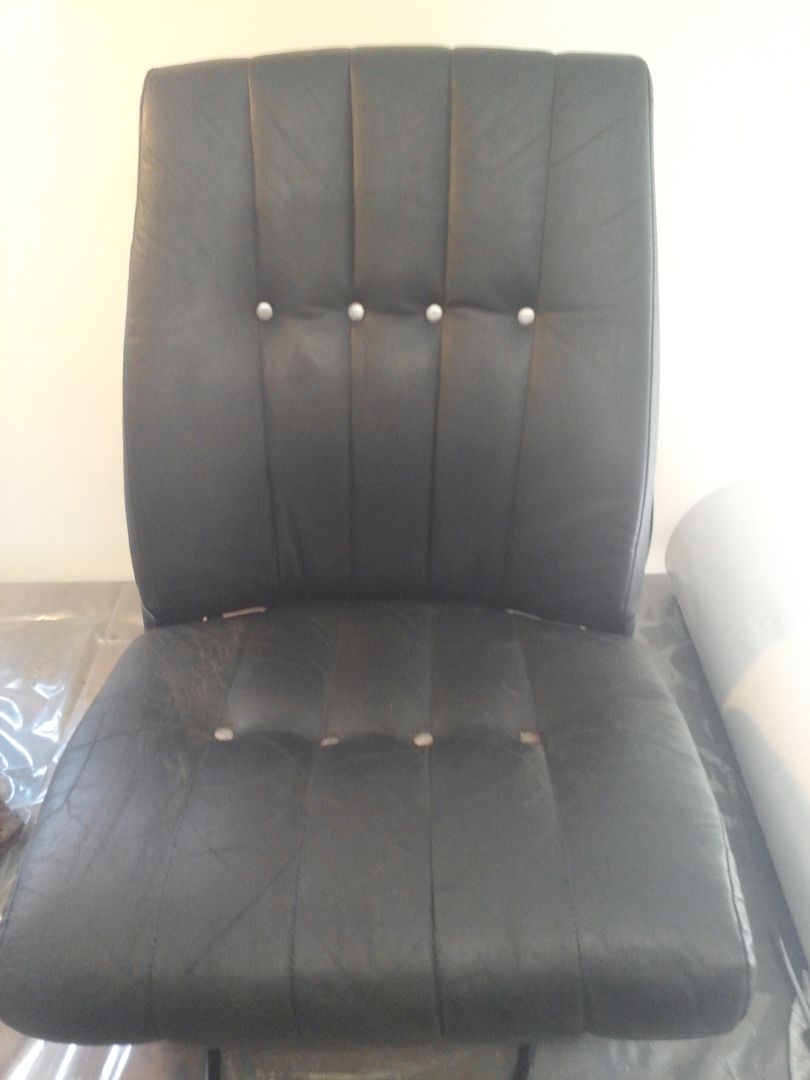
I was amazed at how much of the surface dye the solvent removed. It does not appear to be petroleum based but sure does loosen the black stuff and even quickly removed what was left of the black finish on the steel buttons. The leather cleaned in places to nearly the original brown tanned hide color. The majority remained with a black color but seemed to be at the point that little addition black pigment was coming off on the cleaning rag with additional application of the Prepping Agent. The Leatherique instructions say to use 600 grit wet or dry paper with a block but I had some of the finest grit auto paint scuff pads which might be more like 400 grit and that worked much better than the paper. I was careful not to scratch the leather.
I used a damp cloth to clean the areas scuffed with the solvent and rinsed it in a bucket of water. What came off the leather was a lot of dye/lacquer finish that not only blackened the rinse water but left a lot of sediment in the bottom of the bucket. George at Leatherique suggests using only a slightly damp cloth to pick up the residue and not to add dampness to the leather.

Leatherique suggested in their instructions that the use of an 1" artist brush is appropriate. I tried that and chose instead a 2" 'chip' brush. It doesn't carry as much dye as the smaller brush and can effectively spread the dye around. You are not painting but dying and you do not want to leave a surface coating of dye on the leather. Quoting from Leatherique's website instructions: Nothing is more glaring and obnoxious than leather that looks like vinyl due to heavy build up of surface colorant and improper prepping. It is intended to be soaked into the pours of the leather brushing in a cross hatch manner to eliminate all but what soaks in.
This would be a good time to mention that the instructions recommend that rubber/latex/nitrite gloves be used with these products. I did not in the cleaning process and it only took about 4 days to get the 32 year old black dye from around my fingernails. I know that you expect if not demand that the Leatherique dye last a long time on your upholstery and therefore I would remind you that your skin is nothing more than leather that hasn't been tanned yet. If you don't want permanent Leatherique tattoos I would suggest that you follow the instructions.
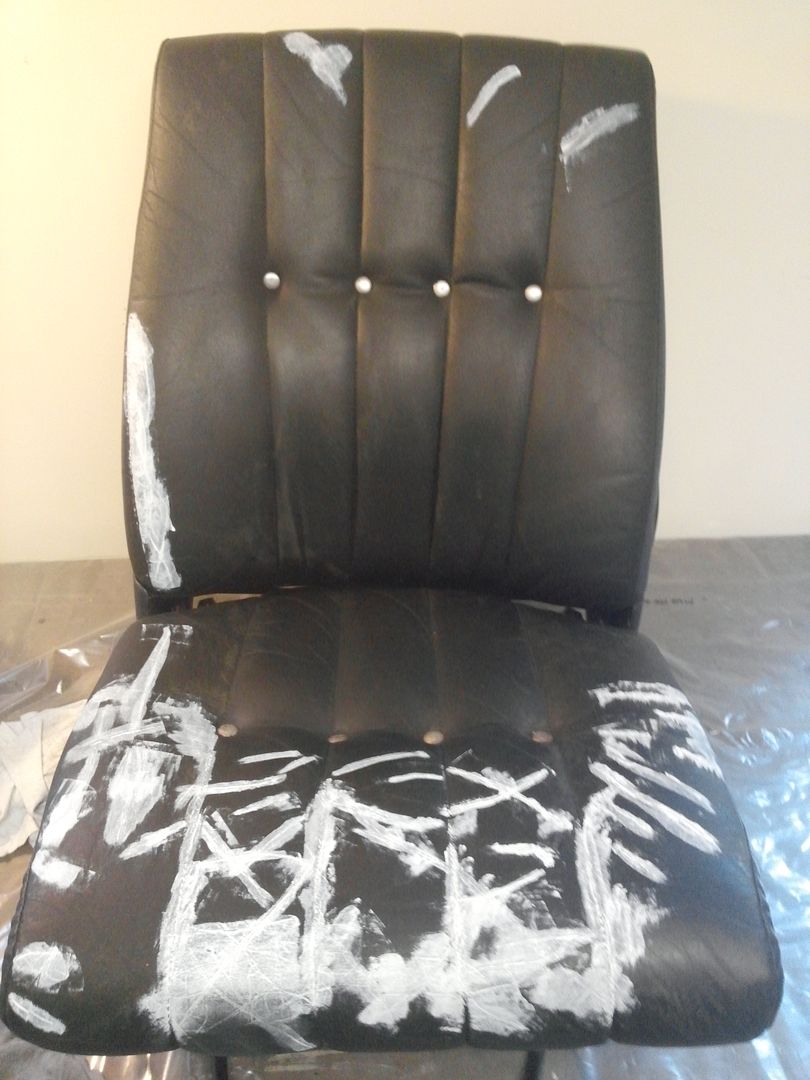
There were no real through-the-leather cracks and this was the worst area of the entire interior. The seats have been soaked with the Leatherique Rejuvenator, cleaned with their Pristine Clean extensively at this point and cleaned with their Prepping Agent. The leather is back to nearly hide condition and in places the original black dye has been removed so as to show the brown 'tanning' color of natural leather.
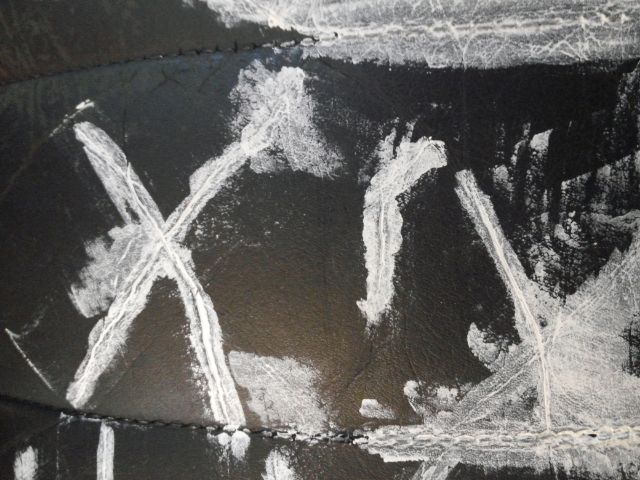
Dye would probably suffice for my project but I have a small jar of Leatherique's crack filler. The instructions say to paint the filler into the cracks with a small brush but it is impossible to keep inside all the lines. Then I resorted to a small plastic squeegee to get the filler into the cracks. Of course, that left a lot of the un-cracked leather with white filler on it. The thought being that if the finish dye is going to color the white filler in the cracks then it will color the filler left on top of the leather. Leatherique suggests adding a drop of dye to the filler when working with dark colors but I used so little filler that there was a concern that it would be thinned too much. Even with all the repairs in the photo I probably didn't use a half teaspoon of the stuff.
Then I got the 600 grit paper and block out and finished sanding the leather surface to a final finish ready, I hope, for the dye.


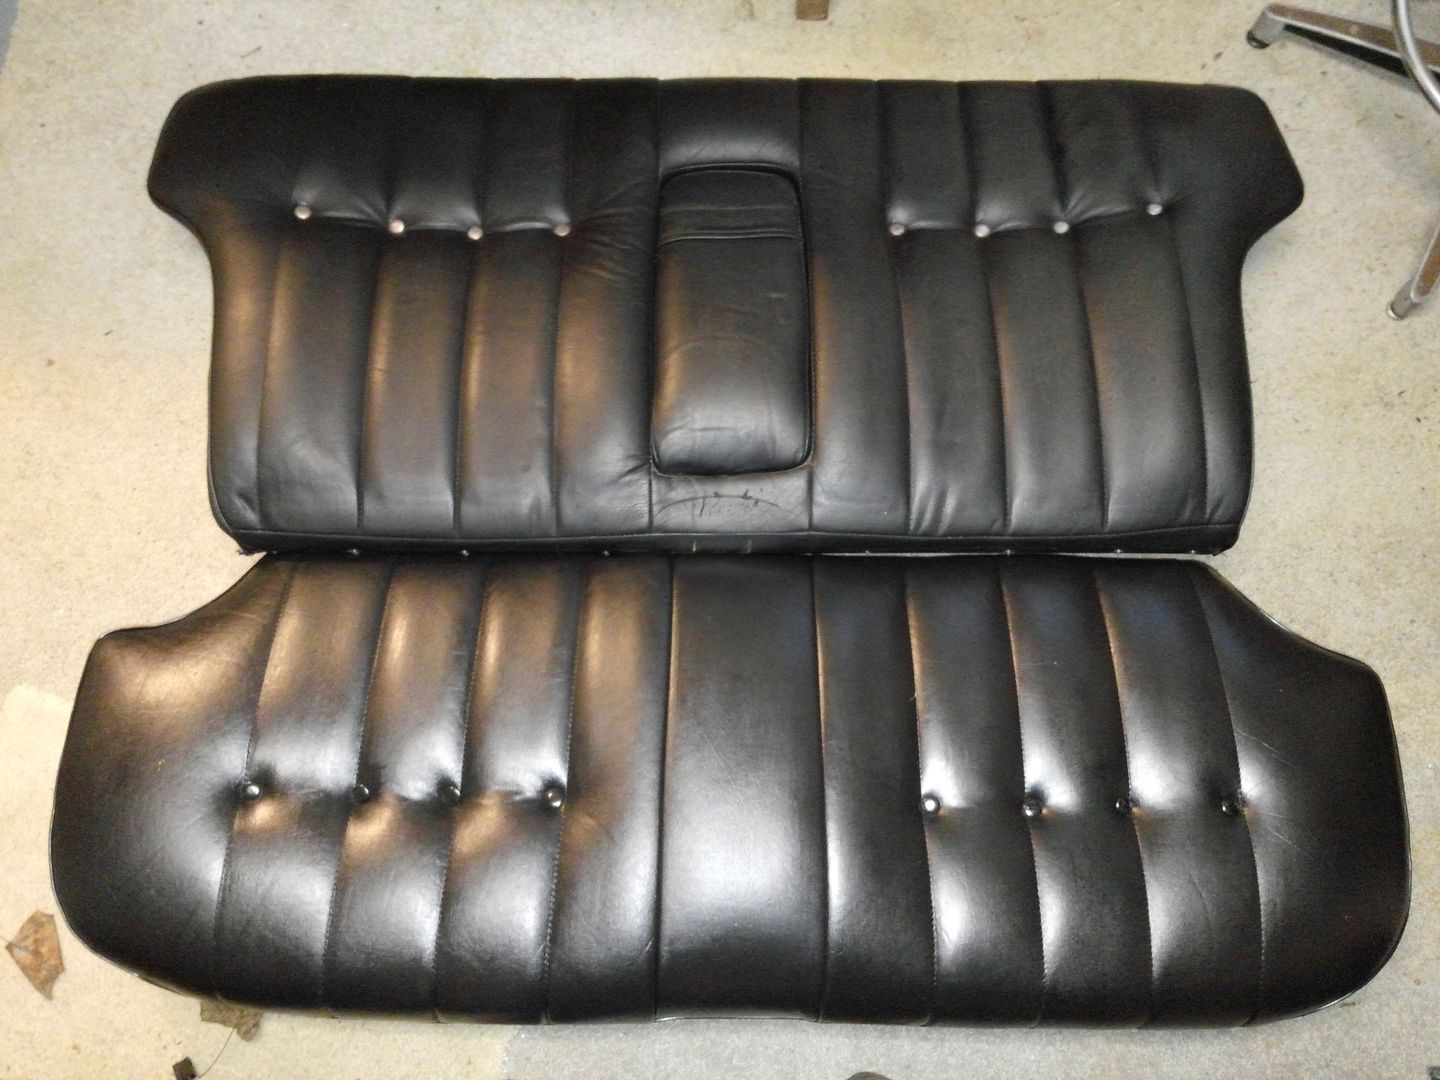
The rear seat is almost perfect as far as cracks are concerned but is still a little hard even after numerous treatments with Rejuvenator. I discussed with the good folks at Leatherique and they are very helpful on the phone. They suggested that the stripping could be done first and then the use of the Rejuvenator would be more effective but the leather would need to be cleaned with alcohol before application of the dye. This makes perfectly good sense and probably would be appropriate after the Prepping Agent but is not mentioned in their instructions. I normally apply a little alcohol before working on this and other hobby's in the evening but that probably does not count.
The driver seat is crack-less and as mentioned earlier covered with sheepskin for much of its life. The sheepskin leather both protected and has rubbed the black dye off much of the area over the years. That should make the stripping of that area easy.
If the dye is anything like the other Leatherique products so far this is going to be a magical leather restoration.
This is after one coat of the dye but it is still damp to the touch and has a shine that reduces as the dye dries:

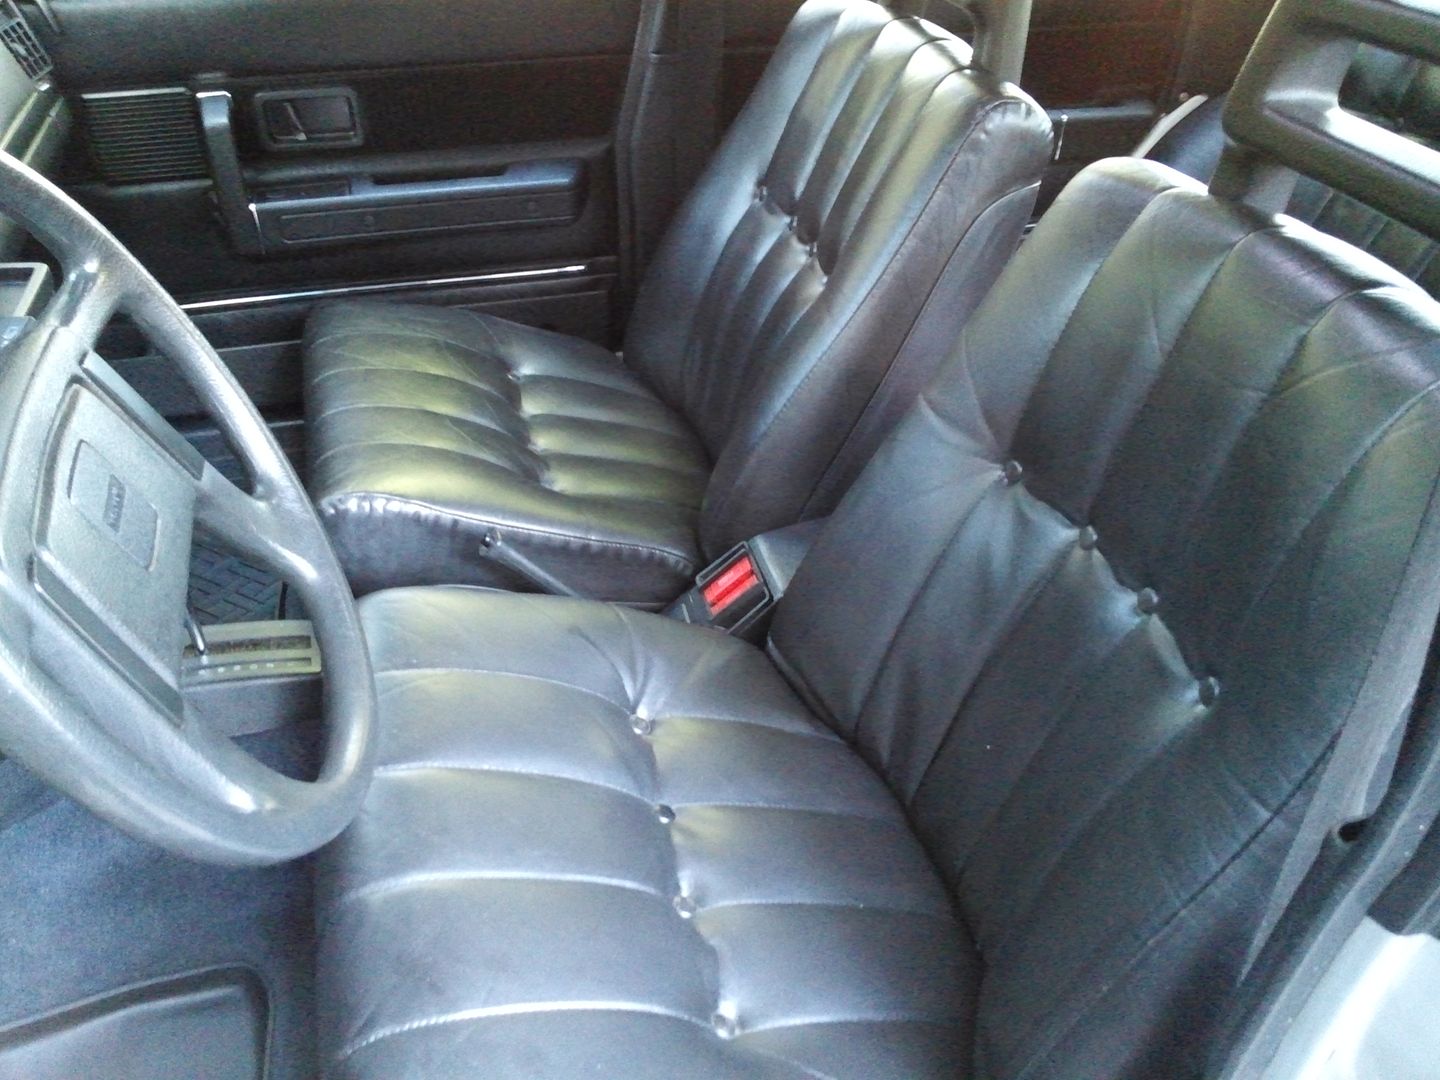
And here is the driver seat that started out in better condition and has dried for several hours:

Leatherique folks advises that the dye will take up to 4 days to fully cure in our current 80% humidity.
At this point I took on the rear seats that, as I mentioned, are in much better condition than the more used front ones. I took Leatherique's advice and quit using a damp cloth for Prepping Agent clean up and moved to paper towels . . . lots of paper towels. Three scrubbing efforts still produced some black lifted off but a substantial amount of the leather was getting back to its original tan condition. I then tried the alcohol cleaning that had been recommended and even more old dye came off. That was enough cleaning.

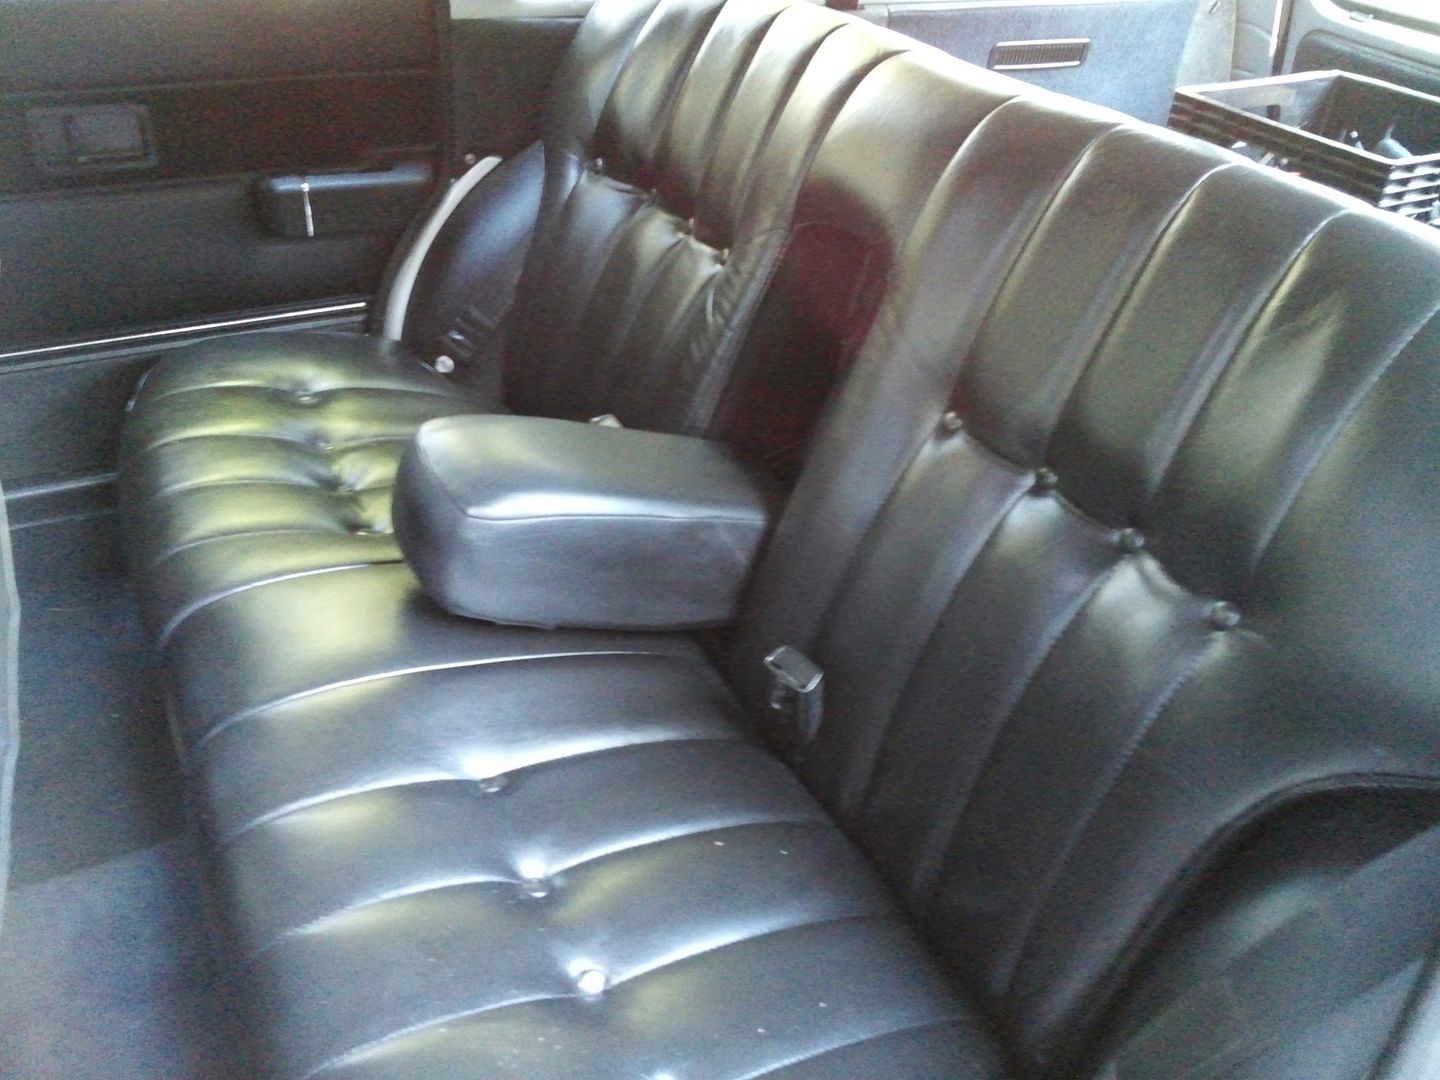
Here are the rear seat and back after application of dye to the seat and the back cleaned and ready for finish tomorrow morning.
I have to comment that the leather looks even better in person than depicted in the photos.
A serious Thank You! to the good folks at Leatherique for putting such a fine product in the market, usable by first time amateurs such as myself.
The parent document to this thread can be found here: http://forums.turbobricks.com/showthread.php?t=250257
This passenger seat felt like cardboard when I started on the leather restoration. It was much worst than the driver seat because that seat had a sheepskin cover on it through much of its life and all of its storage time. I used nearly 2 quarts of Leatherique Rejuvenator over several weeks to soak the leather back from cardboard. Put soaked cotton cloths over the worst areas, covered with black trash bags and left in a warm car for days at a time soaking the leather. I would have never believed Leatherique's description of what floats to the surface with the use of the Rejuvenator until I saw it for myself. Several cleanings with Pristine Clean restored the surface to nearly new condition . . . in places. In other places it still looked 32 years old.
The initial treatment of the leather occurred over 4 years ago and now that the car is in daily use it is time to finish with the dye process.
The passenger seat is about as bad as my leather gets even after the Rejuvenator and Pristine Clean and where I started. This photo was taken before the old dye stripping and what I was trying to bring back from the dead.

Here is the whole passenger seat before starting.

. . . and an hour later after stripping:

I was amazed at how much of the surface dye the solvent removed. It does not appear to be petroleum based but sure does loosen the black stuff and even quickly removed what was left of the black finish on the steel buttons. The leather cleaned in places to nearly the original brown tanned hide color. The majority remained with a black color but seemed to be at the point that little addition black pigment was coming off on the cleaning rag with additional application of the Prepping Agent. The Leatherique instructions say to use 600 grit wet or dry paper with a block but I had some of the finest grit auto paint scuff pads which might be more like 400 grit and that worked much better than the paper. I was careful not to scratch the leather.
I used a damp cloth to clean the areas scuffed with the solvent and rinsed it in a bucket of water. What came off the leather was a lot of dye/lacquer finish that not only blackened the rinse water but left a lot of sediment in the bottom of the bucket. George at Leatherique suggests using only a slightly damp cloth to pick up the residue and not to add dampness to the leather.

Leatherique suggested in their instructions that the use of an 1" artist brush is appropriate. I tried that and chose instead a 2" 'chip' brush. It doesn't carry as much dye as the smaller brush and can effectively spread the dye around. You are not painting but dying and you do not want to leave a surface coating of dye on the leather. Quoting from Leatherique's website instructions: Nothing is more glaring and obnoxious than leather that looks like vinyl due to heavy build up of surface colorant and improper prepping. It is intended to be soaked into the pours of the leather brushing in a cross hatch manner to eliminate all but what soaks in.
This would be a good time to mention that the instructions recommend that rubber/latex/nitrite gloves be used with these products. I did not in the cleaning process and it only took about 4 days to get the 32 year old black dye from around my fingernails. I know that you expect if not demand that the Leatherique dye last a long time on your upholstery and therefore I would remind you that your skin is nothing more than leather that hasn't been tanned yet. If you don't want permanent Leatherique tattoos I would suggest that you follow the instructions.
There were no real through-the-leather cracks and this was the worst area of the entire interior. The seats have been soaked with the Leatherique Rejuvenator, cleaned with their Pristine Clean extensively at this point and cleaned with their Prepping Agent. The leather is back to nearly hide condition and in places the original black dye has been removed so as to show the brown 'tanning' color of natural leather.
Dye would probably suffice for my project but I have a small jar of Leatherique's crack filler. The instructions say to paint the filler into the cracks with a small brush but it is impossible to keep inside all the lines. Then I resorted to a small plastic squeegee to get the filler into the cracks. Of course, that left a lot of the un-cracked leather with white filler on it. The thought being that if the finish dye is going to color the white filler in the cracks then it will color the filler left on top of the leather. Leatherique suggests adding a drop of dye to the filler when working with dark colors but I used so little filler that there was a concern that it would be thinned too much. Even with all the repairs in the photo I probably didn't use a half teaspoon of the stuff.


Then I got the 600 grit paper and block out and finished sanding the leather surface to a final finish ready, I hope, for the dye.


The rear seat is almost perfect as far as cracks are concerned but is still a little hard even after numerous treatments with Rejuvenator. I discussed with the good folks at Leatherique and they are very helpful on the phone. They suggested that the stripping could be done first and then the use of the Rejuvenator would be more effective but the leather would need to be cleaned with alcohol before application of the dye. This makes perfectly good sense and probably would be appropriate after the Prepping Agent but is not mentioned in their instructions. I normally apply a little alcohol before working on this and other hobby's in the evening but that probably does not count.
The driver seat is crack-less and as mentioned earlier covered with sheepskin for much of its life. The sheepskin leather both protected and has rubbed the black dye off much of the area over the years. That should make the stripping of that area easy.

If the dye is anything like the other Leatherique products so far this is going to be a magical leather restoration.
This is after one coat of the dye but it is still damp to the touch and has a shine that reduces as the dye dries:

And here is the driver seat that started out in better condition and has dried for several hours:

Leatherique folks advises that the dye will take up to 4 days to fully cure in our current 80% humidity.
At this point I took on the rear seats that, as I mentioned, are in much better condition than the more used front ones. I took Leatherique's advice and quit using a damp cloth for Prepping Agent clean up and moved to paper towels . . . lots of paper towels. Three scrubbing efforts still produced some black lifted off but a substantial amount of the leather was getting back to its original tan condition. I then tried the alcohol cleaning that had been recommended and even more old dye came off. That was enough cleaning.

Here are the rear seat and back after application of dye to the seat and the back cleaned and ready for finish tomorrow morning.

I have to comment that the leather looks even better in person than depicted in the photos.
A serious Thank You! to the good folks at Leatherique for putting such a fine product in the market, usable by first time amateurs such as myself.
The parent document to this thread can be found here: http://forums.turbobricks.com/showthread.php?t=250257
Last edited:


