
CHESH740R
lacking enthusiam
- Joined
- Jun 17, 2003
****Please Note this is now a Complete article***
Please tell me anything i may have missed and i will update.
So you want to lower your 700/900 Volvo and install some nice firm shocks and whilst your there uprate or replace the braking power. Well here's how.
The car used in the sequence of photo's is Griz's 1996 945 Komfort Wagon which has a solid live axle. (please note this does not cover cars with multilink rear suspension)
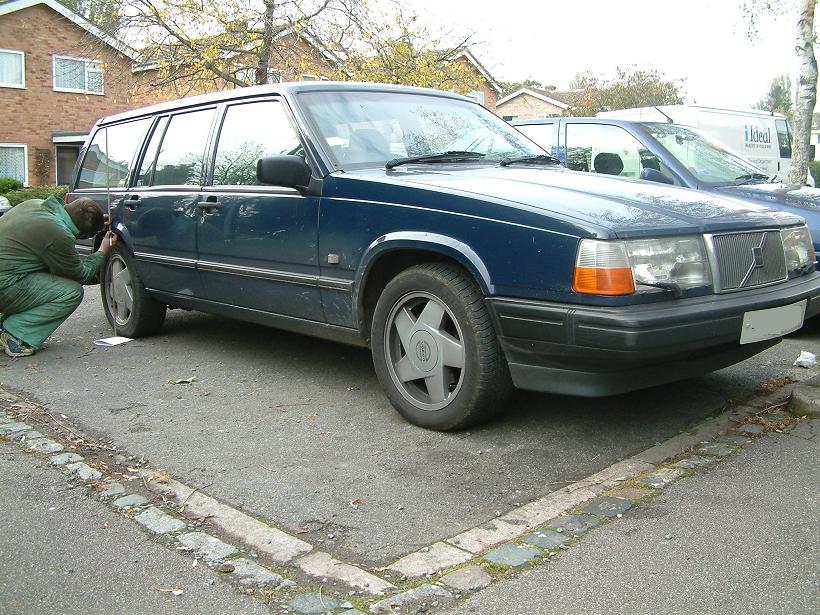
Here we can see me going round and measuring the height to wheel arch with a stick to assatain the exsisting ride height. (At the time no calibrated unit was available)
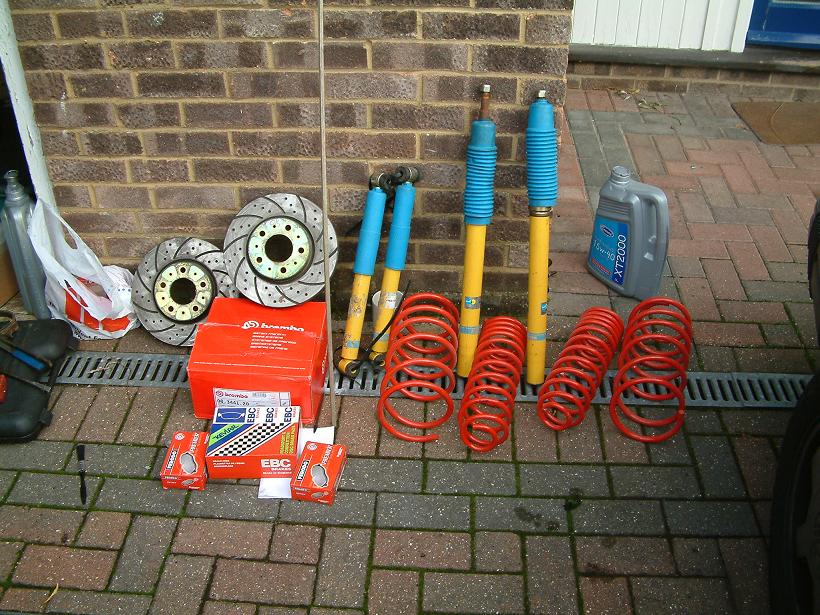
Blitz the credit card and spend a crap load on parts.
Ok First the Rear Suspension and Brakes.
Tools Required for job
19mm Socket and Spanner
17mm Socket and Spanner
15mm Deep Socket
13mm Socket and Spanner
10mm Socket and Spanner
Rachet
Several Extension Bars
Torque Wrench
Flatblade Screwdrivers
G Clamp
Hammer
Trolley jacks and Axle Stands.
Take ya 19mm socket and loosen wheel nuts.
Chock front wheels and Jack car up and place Axle stand under chassis.
Remove Wheel nuts and road Wheel. Send Griz off to clean alloy wheel
Take a Hammer and knock out caliper Retaining Pins taking note how the brake pad spring is fitted.
Now remove brake pads from caliper and unbolt the two 13mm caliper to axle bolts. Rest or tie up caliper out of way.
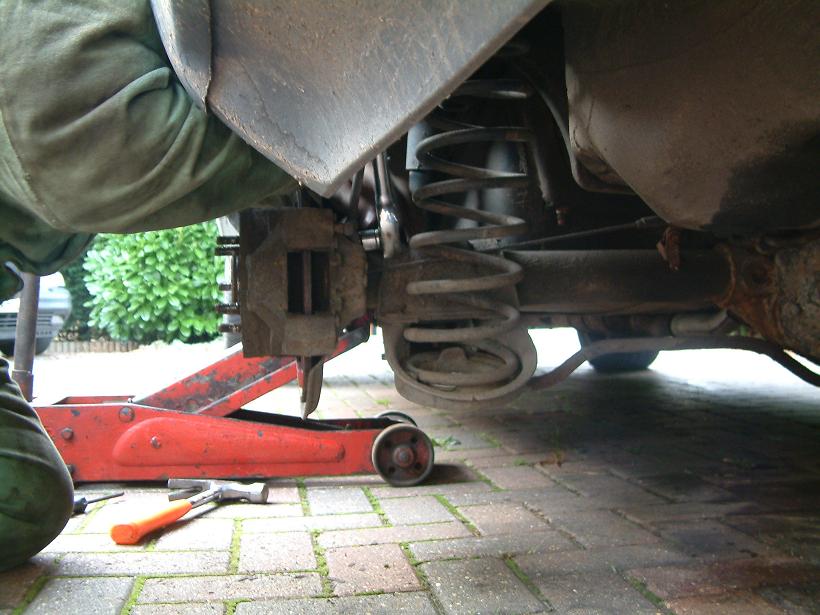
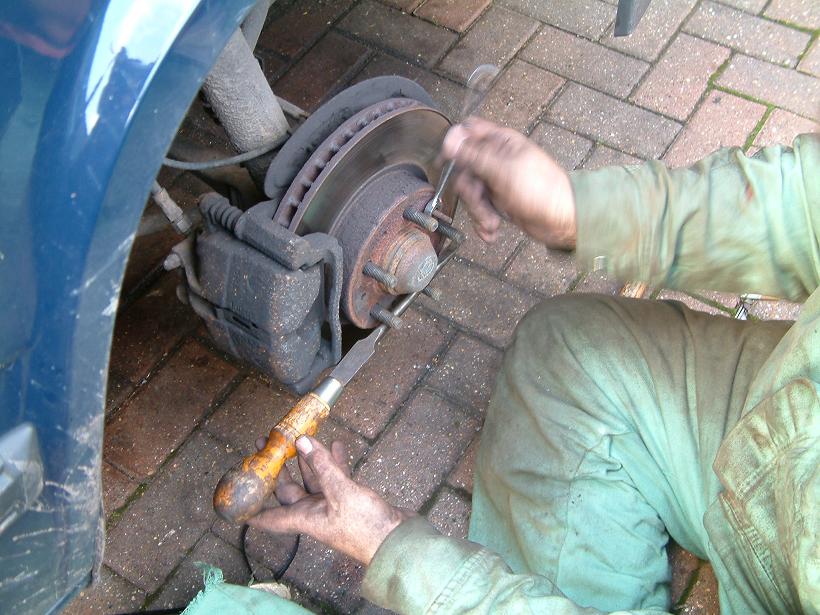
Taking a 10mm Spanner undo Disc retaing bolt.
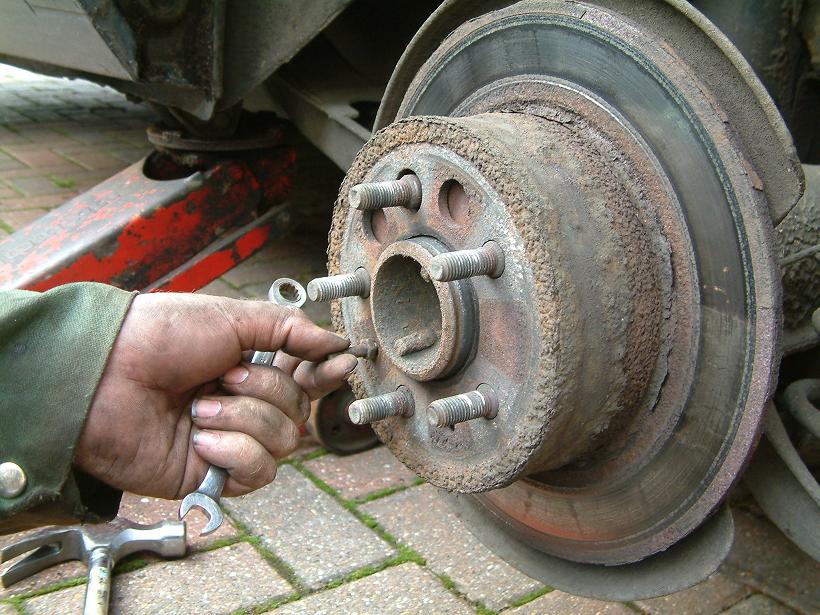
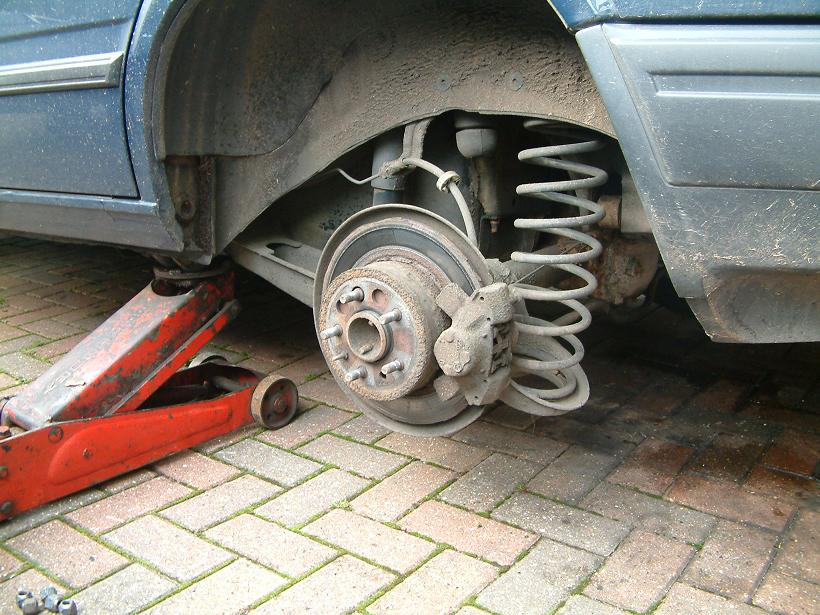
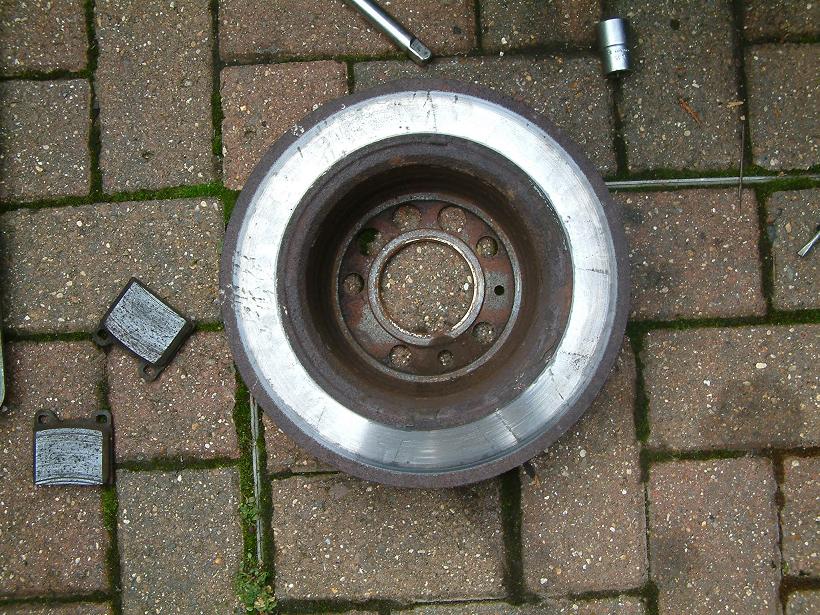
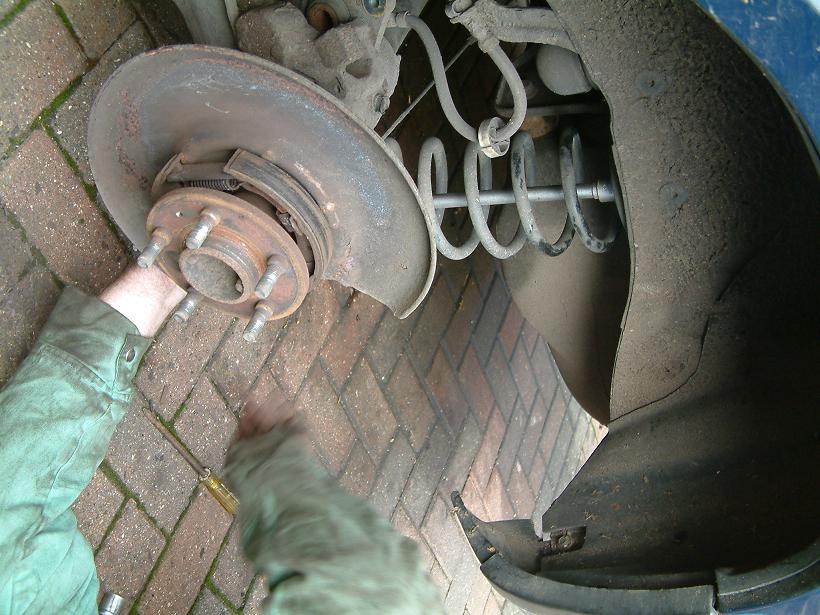
Let Handbrake off and remove disc. Note how ****e Griz's discs were.
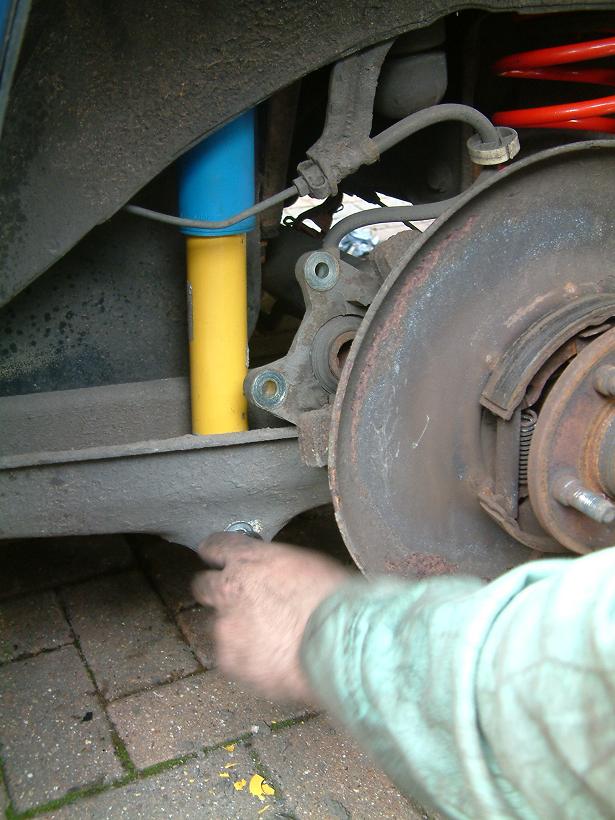
Remove the rubber bung to expose the Top Shock Absorber bolt. Loosen with a 17mm Socket. Loosen the bottom Shock absorber bolt using a 18mm on the outside nut and a 17mm on the inside bolt.
Using the 15mm Deep socket and several extension bars, Loosen the upper spring mount.
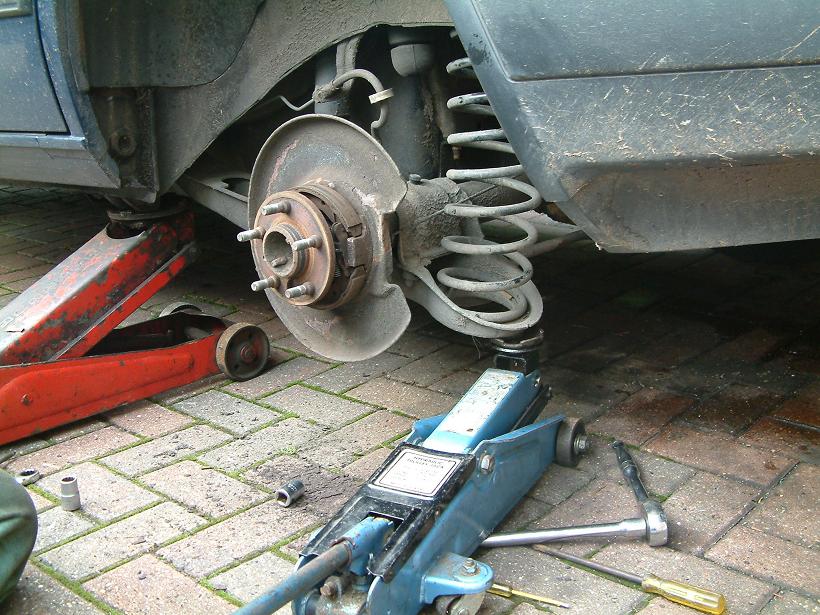
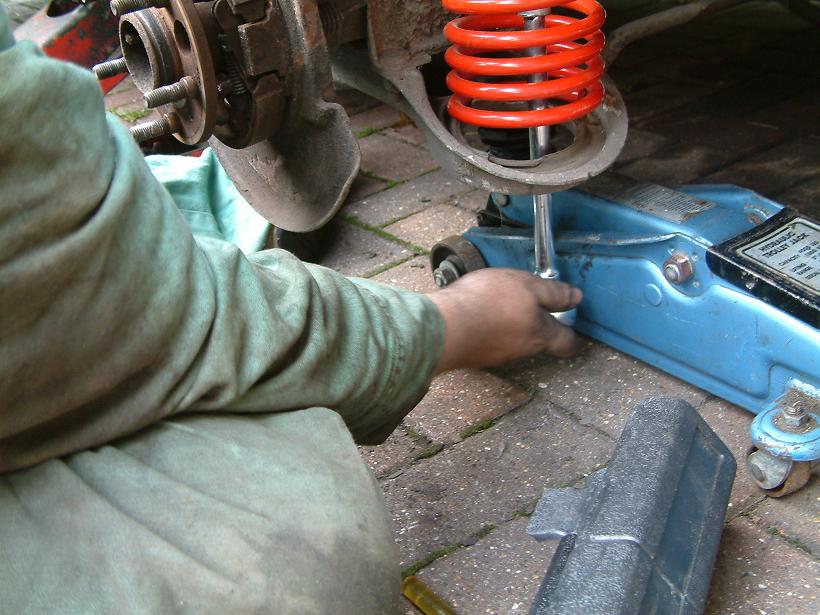
Place a jack under the trailing arm as shown and jack the axle up to take tension of the shock abosorber.
Undo the upper and lower Shock absorber bolts and remove the knackered shock, laugh at how little rebound it has!!
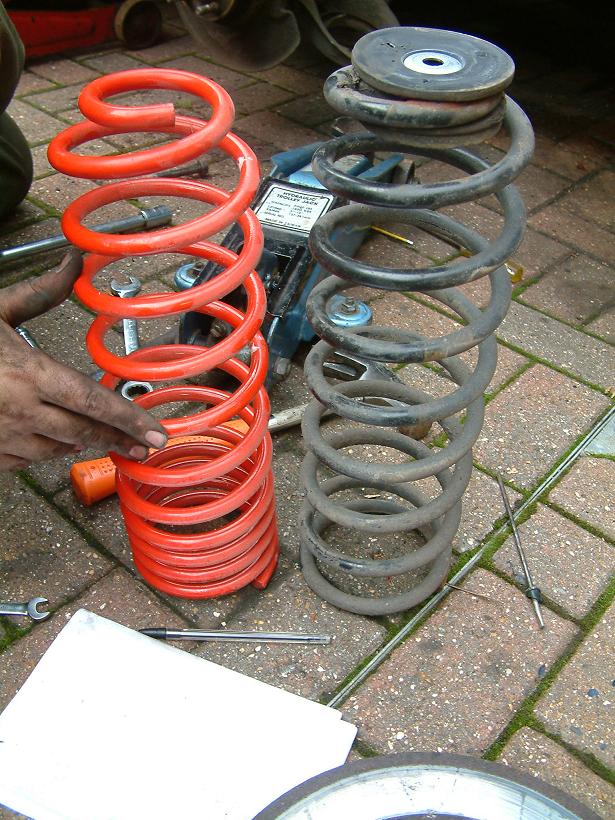
Remove the jack from under the trailing arm and remove the bolt from the upper spring mount. Now remove the Spring by pushing the axle down slightly, Marvel at how much shorter your lowering springs are.
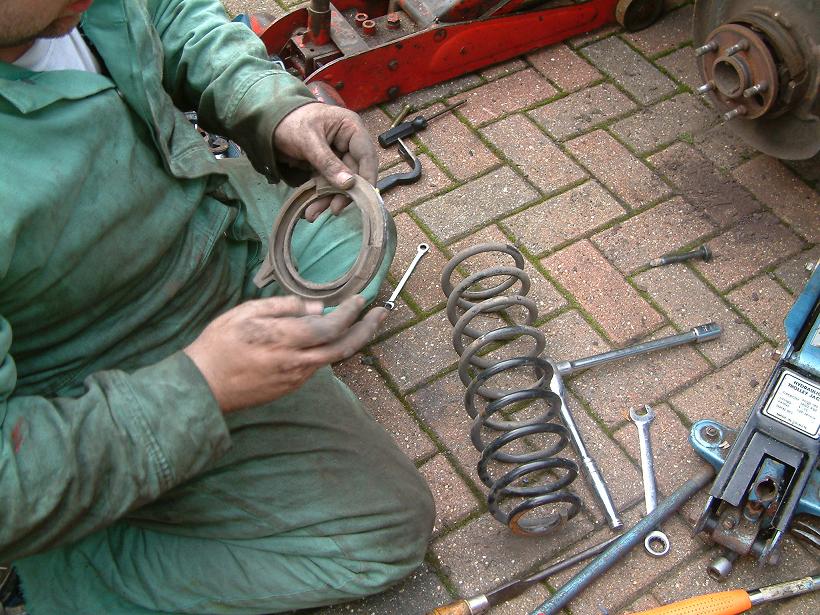
Note how the upper Spring mount is fitted to the old spring and remove it and replace it on the new spring.

Looking back at the car, look at the trailing arm to where the spring was seated, pull out the bottom rubber mount and fit to new Spring
Now once the mounts are correctly installed so that the ends of the coils are against the stops on the mount, refit the spring to the car. Jacking the trailing arm up again helps compress the spring making getting the upper spring mount nut back on easier.
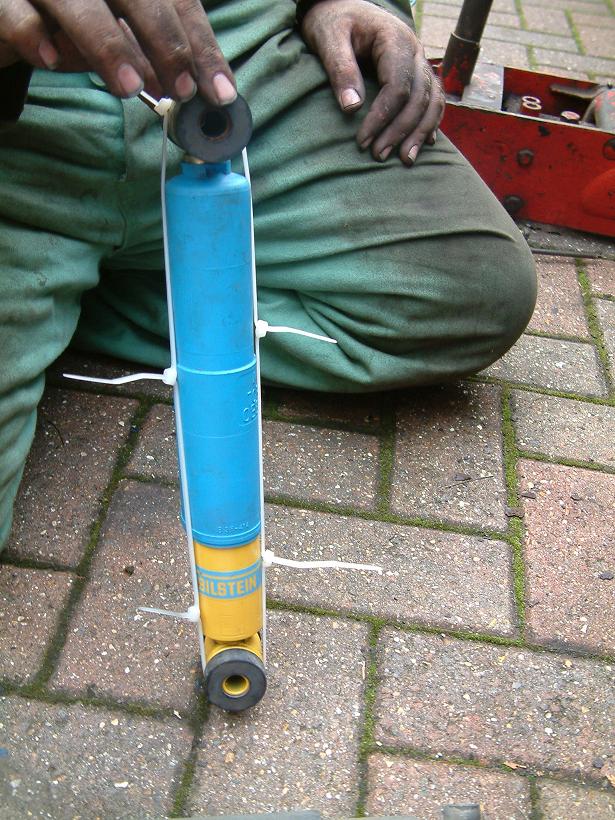
Now to fit your new Shock Absorber. As this will be much harder to compress than your knackered one, compress the shock and use cable ties to keep it compressed.
Install the shock into the car, by first getting the top bolt in. Then cutting the cable ties, will allow the shock to uncompress and you will be able to fit the bottom bolt.
Now using your torque wrench tighten the 3 bolts you have undone. You may wish to purchase and fit new nuts and bolts. (we did cos they cost pennies to buy and are better than the old rusty ones)
Upper Shock Bolt. Torque to 85NM or 63 Lbs/ft. The Volvo Part number for this bolt is 965196.
Lower Shock Bolt. Torque to 85NM or 63 Lbs/ft. The Volvo Part number for the bolt is 946473 and the nut is 971099.
Upper Spring Bolt. Torque to 48NM or 35 Lbs/ft. The Volvo part no for this nut is 969322.
Time to Reassemble the brakes now, Make sure if fitting new discs to use Brake Cleaner or meths to remove the anti rust coating on all friction surfaces (including the handbrake Drum part)
Refit disc and replace Disc Retaining screw.
Using a G Clamp compress the pistons back into the caliper.
Now Refit the caliper to the axle Torqueing the 13mm Bolts to 58NM or 43 Lbs/ft
Fit the New Brakepads and refit the brakepad spring and retainer pins.
Sit back and admire your new Fully Uprated Suspension and Fresh Brakes.

Now refit the road wheel and torque wheel nuts to 85NM or 63 Lbs/ft.
Lower car to ground. Now go repeat for the other side.
We will Cover the Front tommorrow, but Griz managed to lock us out of the house so we packed the tools up and went to the pub to have some beers whilst we waited for some Keys to Turn up.
Ok Wake up a little later in the day due to drinking until 3am.
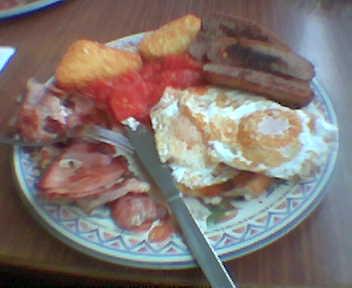
You need energy and to cancel out the Fosters Lager, so time to pop out and have a Full English Breakfast.
You will need,
2 Sausages,
2 Rashers of Bacon
2 Eggs
2 Hash Browns
2 Slices of Fried Bread
2 Plum Tomatoes
1 Cup of Tea, Milk or Sugar added to taste.
Burp!!!!
Mmm anyway back to the Front Suspension and Brakes.
Tools Required for this Job.
24mm Spanner
19mm Socket and Spanner
18mm Socket and Spanner
17mm Socket and Spanner
15mm Socket and Spanner
12mm Socket and Spanner
10mm Socket and Spanner
10mm Allen Key
7mm Allen Key
5mm Allen Key
Rachet
Hammer
Large Prybar
Large Breaker Bar or Pipe.
Wirebrush
Flatblade screwdrivers
BallJoint Splitter
Trolley Jack
Axle stand
Spring Compressors.
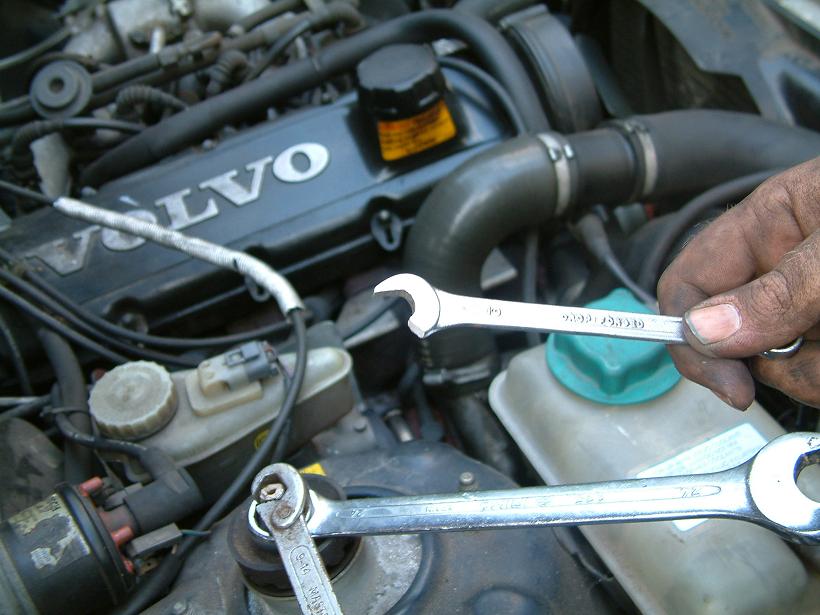
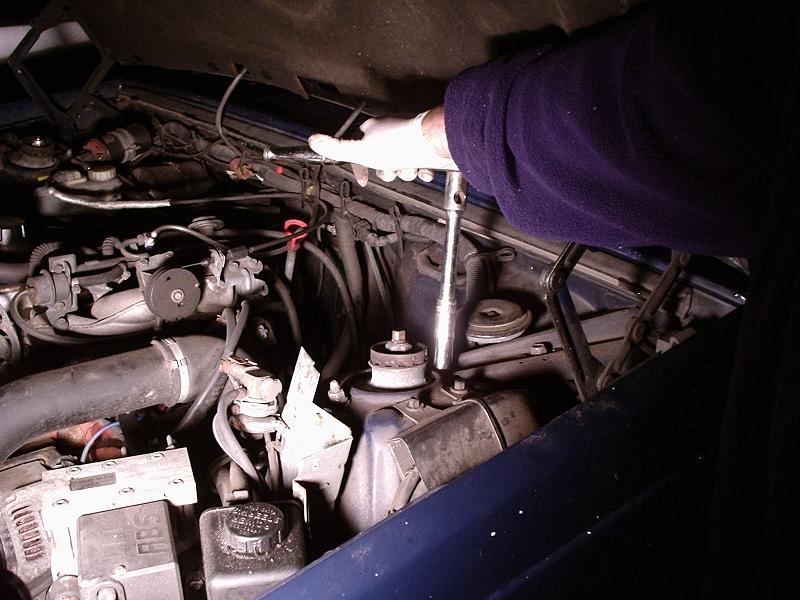
Now Before jacking the car up, open bonnet and using the 24mm Spanner and a 10mm spanner or some Molegrips loosen off the Top Shock Nut. These can be extremely tight, air tools can help undo this but i used a bar and sheer strength.
Note how the 10mm shattered under the load. Just Loosen this off do not fully remove the nut.
Now Take ya 19mm socket and loosen wheel nuts.
Chock rear wheels and Jack car up and place Axle stand under chassis.
Remove Wheel nuts and road Wheel. Send Griz off to clean alloy wheel.
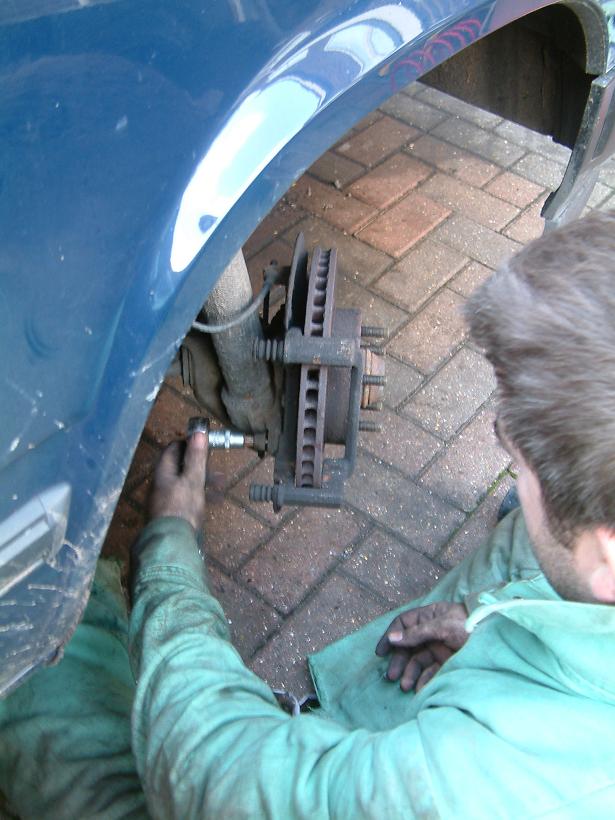
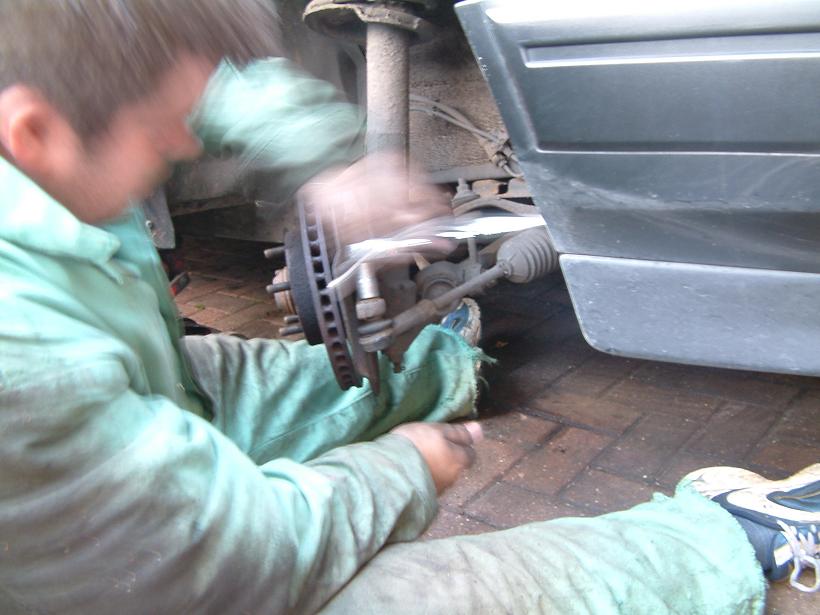
Taking a 10mm spanner undo the disc retaining bolt, either have someone stand on the brakes or use a large screwdriver to stop the disc from turning.
Now turn the steering whichever way that getting to the caliper is made easier.
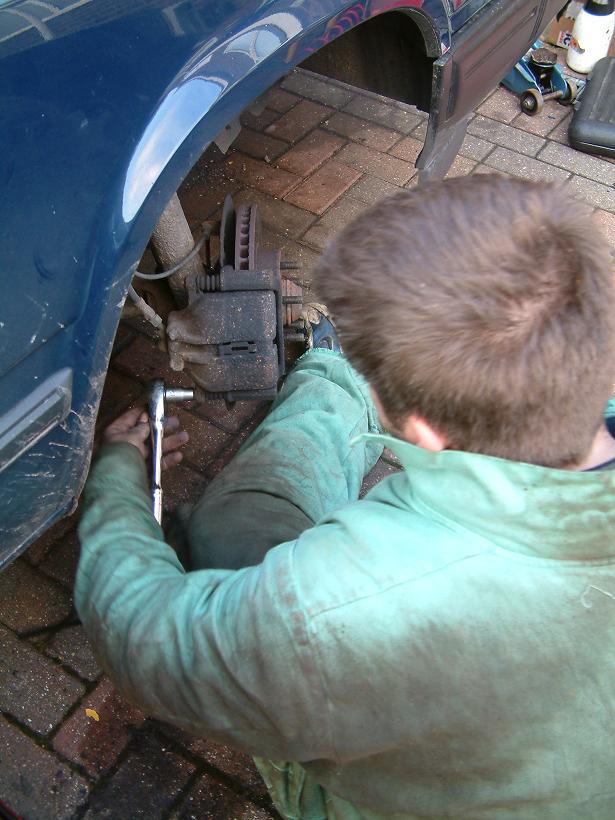
Take a 12mm socket or spanner and undo the 2 caliper bolts
Remove the brake caliper and brake pads. Now take your 10mm Allen Key and undo the 2 Brake Caliper Carrier bolts and remove the carrier.
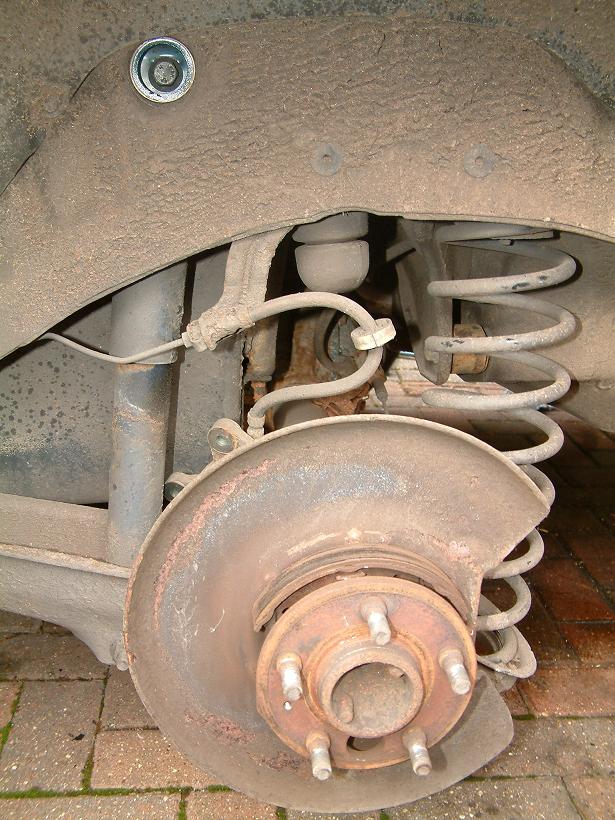
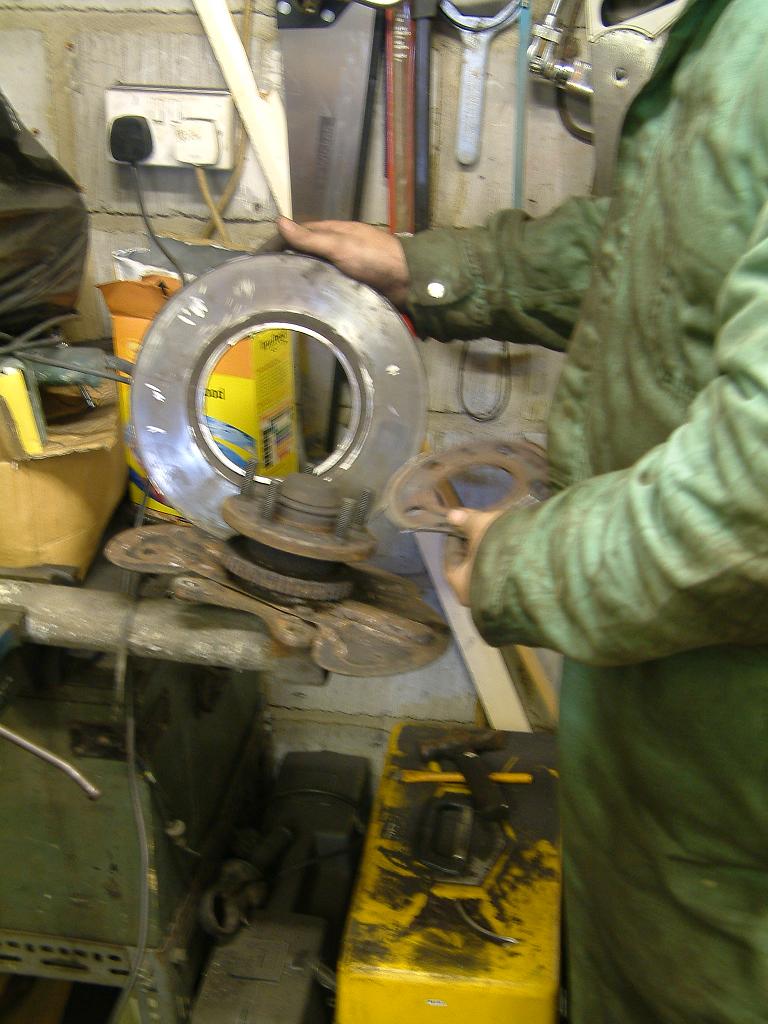
At this point you should be able to remove the disc, Now Griz's car has seperate Hubs, Please note that some 700's the disc is the hub. If just changing the springs you can leave the Disc on.
We wernt so lucky in that one disc was rusted solid to the hub and i had to grind it off when the strut was on the bench.
Now turn the steering back the other way so that you can get easy access to the steering tie rod end.
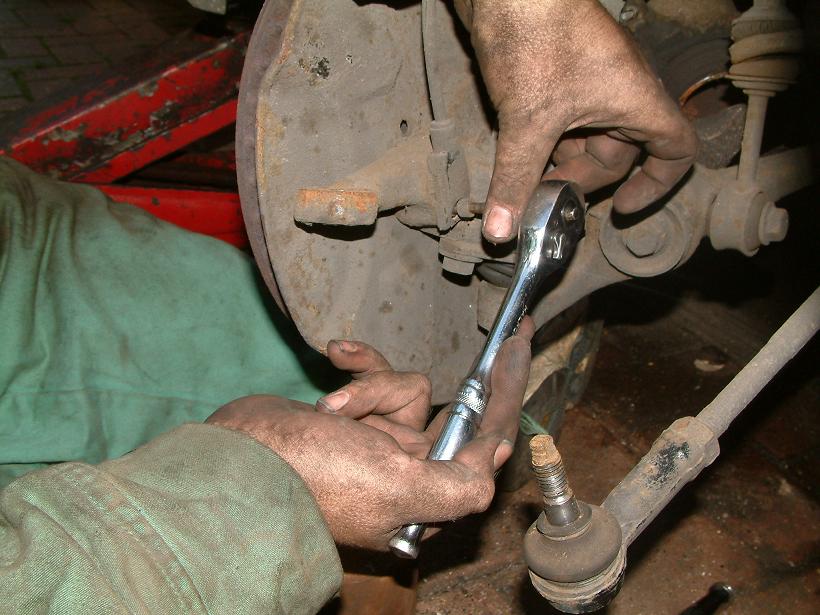
Remove any split pins if fitted and take a 18mm Socket and undo the nut.
Now you may find that the nut keeps spinning as it gets stuck on the thread.
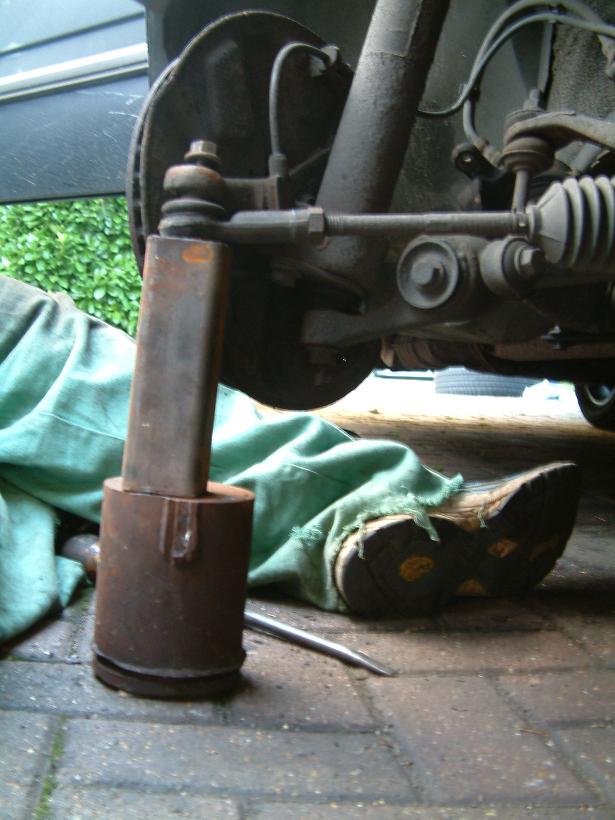
Getting some solid material, would or metal. Place under the track rod end and carefully lower the weight of the vehicle onto it.
This should push the track rod end back into the hub and allow you to wind the nut off.
You might not have the problem of the nut getting stuck, but find you cant seperate the ball joint from the hub.
Use your ball joint splitter to seperate the joint.
Now take your 5mm Allen and undo the ABS sensor if fitted and remove it.
You may find like i did that the sensor will not come out. So simply trace the wire through the wheel arch and unplug it from the engine bay connector.
*** ENSURE YOU DO NOT SWITCH IGNITION ON IF SENSOR IS DISCONNECTED AS YOU MAY TRIGGER ABS WARNING LIGHT****
Taking a 17mm Socket undo the 2 Bottom Balljoint Bolts.
Now go back up top and loosen the two 15mm Nuts. Dont undo Fully just yet.
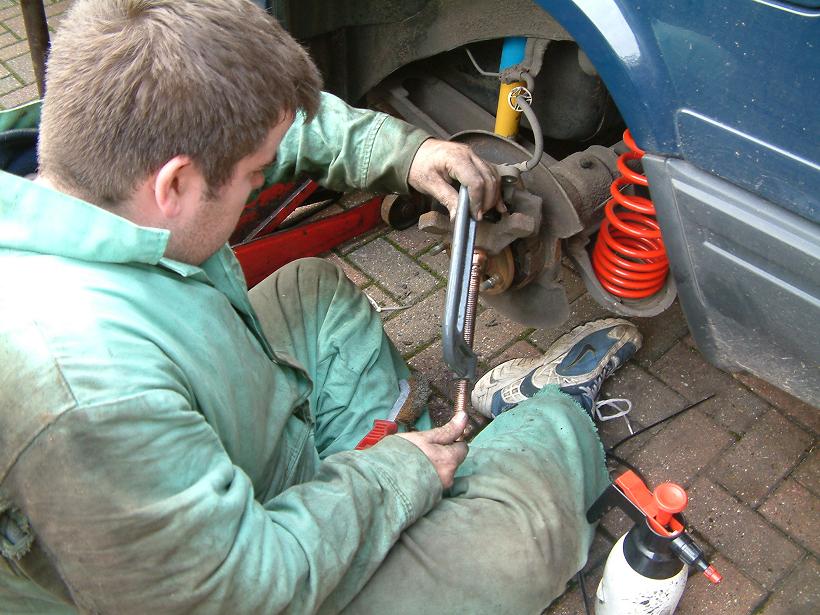
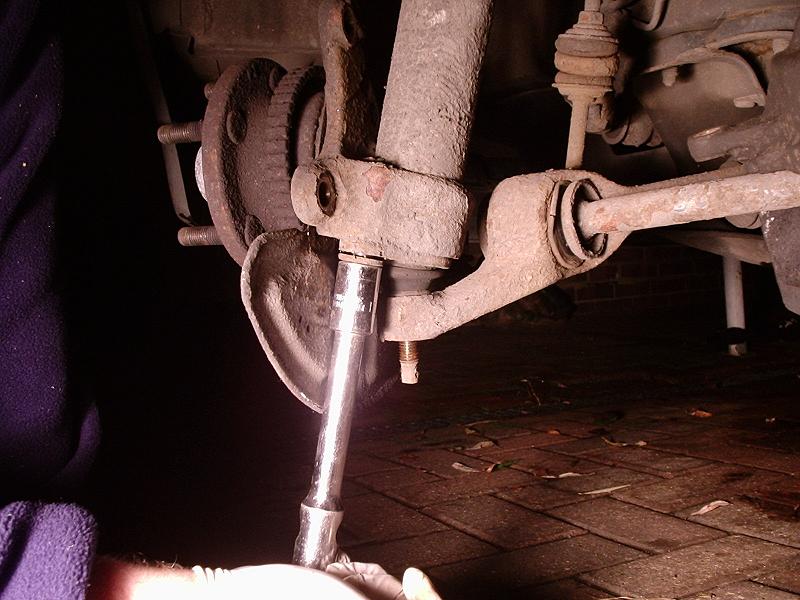
Now taking a long Prybar or piece of pipe, position the bar as show and lever down.
You should now pop the strut off the bottom Ball joint.
Now go back up top and loosen the two bolts whilst holding the strut.
Be carefully it is heavy!!! Now remove the strut from the car and take it to your work bench or Floor.
Now Take note of how the spring sits against the various stops on its top and bottom mounts.
Take your spring compressors and wind them up unti you have taken the tension off the top mount.
Try to get ya compressors over at least 3 or 4 coils on the spring.
Be Extremely carefull when using Spring Compressors ass a Compressed Coil Spring holds a lot of power.
MAKE SURE THEY ARE HOOKED ON TO THE COILS WELL!!!!
Seek advice from someone who's done it before if unsure.
Once your spring is compressed, take your 24mm spanner and undo the top shock nut which was the first thing you loosened.
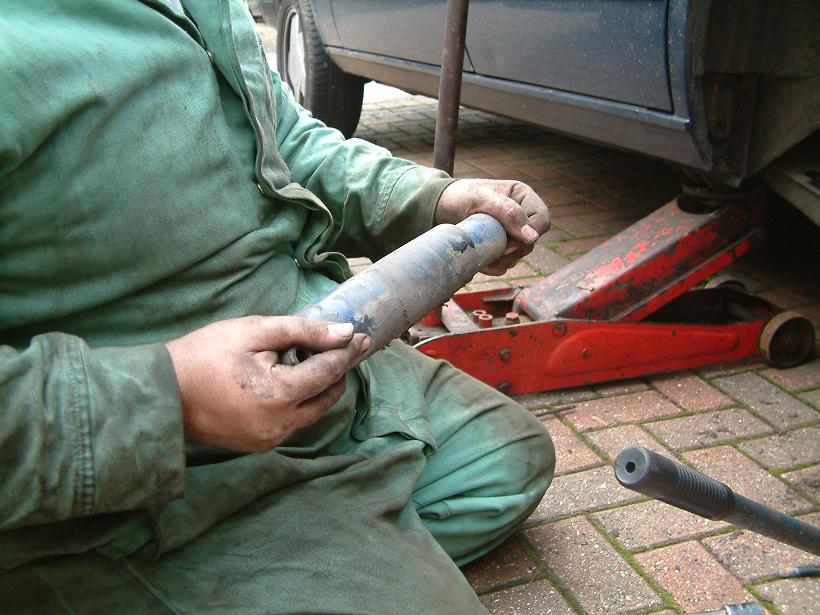
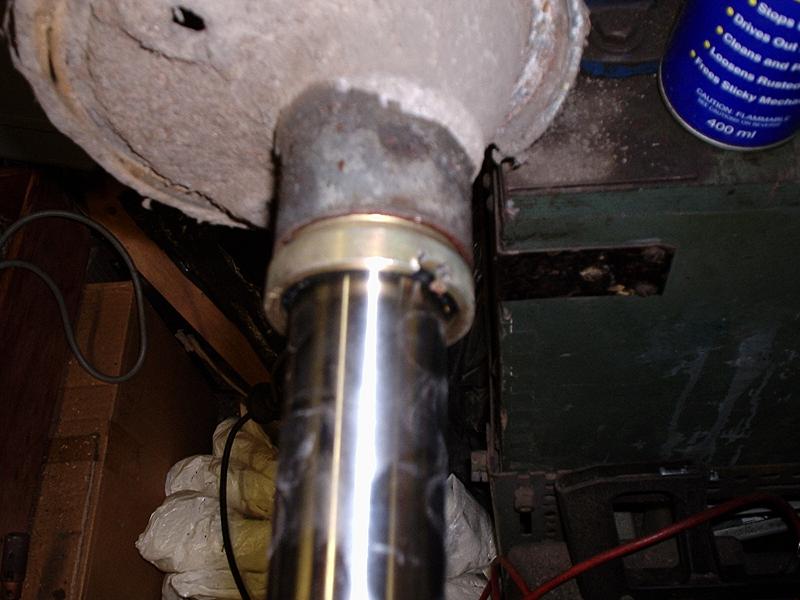
I am using a pair of mole grips to grip the shock tube whilst undoing the nut as the shocks are being changed. Use your 10mm or molegrips on the top if keeping shocks.
Now remove the Top Mount noting how the components go together.
Remove the spring from the strut.
Now soak the shock retainer screw in Monkey Piss AKA WD40.
Either use a Pair of Stilsons or a C Spanner to undo them. I Could find neither of mine so I used a punch and hammer to get them loosened.
Undo and remove shock from the strut.
Put your new shock in and tighen the Shock Retainer.
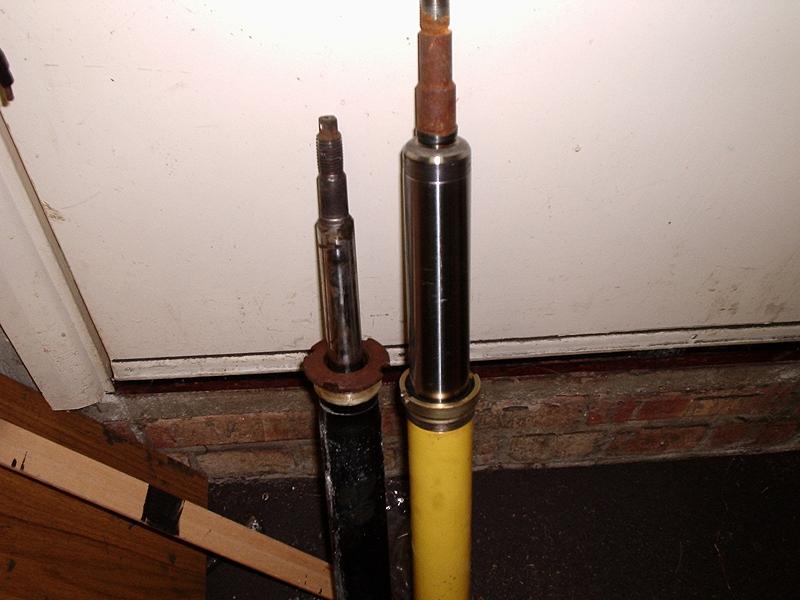
Look how much thicker the Bilsteins are to the stock ones.
I apologise for the Lack of Photo's now on reasembly but i was working to a tight deadline.
Now Compress your new Springs and refit to the shock along with the topmount. Making sure the ends of the coils are against there stops.
Replace your 24mm shock Nut and tighten up as much as possible, using your 24mm spanner and 10mm spanner/molegrips or in the case of the bilsteins a 7mm Allen.
Release your spring compressors carefully.
Now take your fully assembled Strut back to the car.
Offer the complete Stut up and attach the two 15mm Nuts on the strut Tower, so the strut is held up again.
Using your bar again, lever down the lower arm so that you can get the strut back onto the bottom balljoint.
Replace the two 18mm Bolts and tighten to 30NM or 22lb ft. You then need to further tighten them 90 Degrees. But best to do this when the car is back on its wheels.
Replace the 18mm Steering trackrod End nut and tighten to 60NM or 44lb ft lbs. (again if it nut spins on the thread use the trick of lowering the weight of the car onto it to tighten.)
Now refit your brake Disc and replace the 10mm Disc retainer Bolt.
Replace the Caliper Carrier with its 2 10mm Allen Bolts, Tighten these to 100NM of 74lb ft.
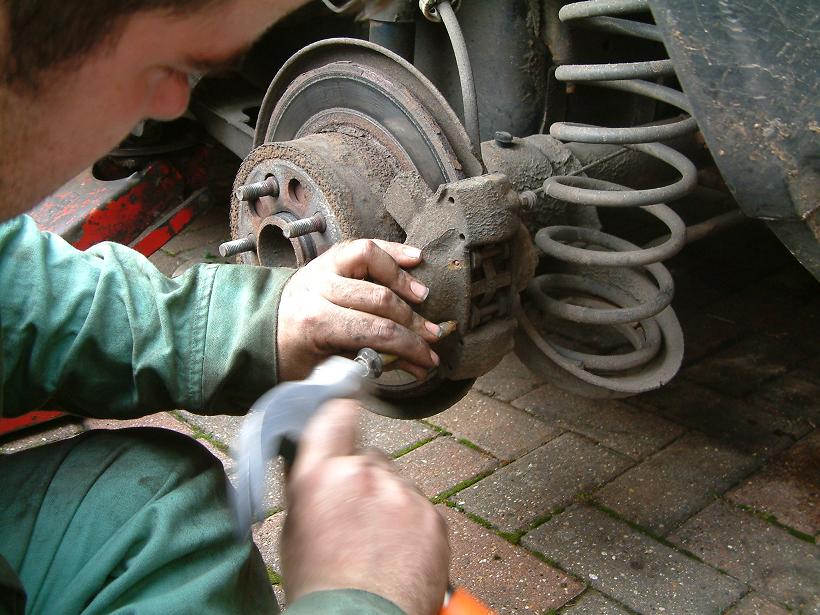
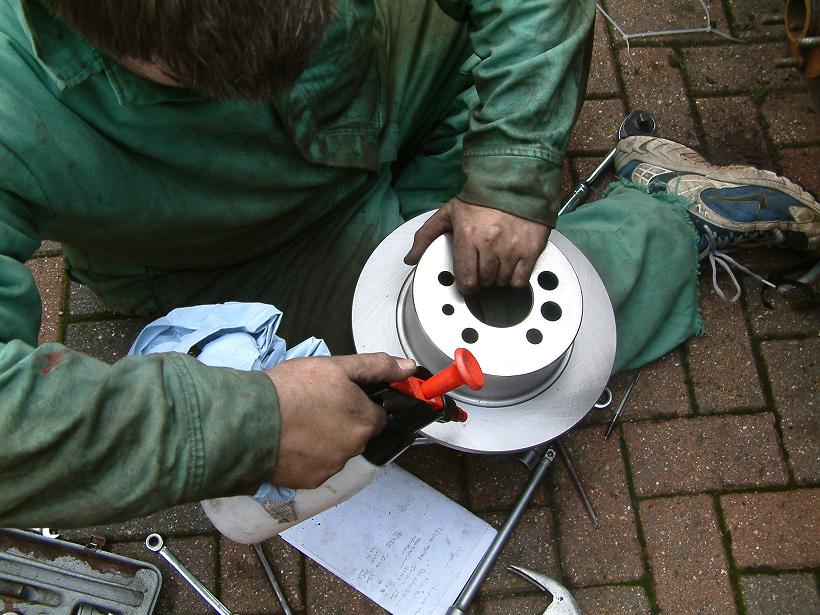
If fitting new pads, use a G clamp to compress the Piston back into the caliper.
***NOTE Rear Caliper pistons shown being Compressed here.***
Refit your brake pads, using Copper Grease on any metal to metal surfaces, being carefull not to get any on friction surfaces.
Refit the 2 12mm brake caliper bolts and tighten to 58NM or 43ft lb.
Now depress the brake pedal several times to reseat the pads.
Replace the ABS sensor or run the wire back through and reconnect it.
Replace the Road wheel and lower the car to the ground, tightening wheel nuts to 85NM or 63 lb ft.
Tighten the 2 15mm Nuts that hold the strut top to the body to 40NM or 30ft lbs.
Using your 24mm Spanner and either your 10mm Spanner or in the case of the bilsteins a 7mm Allen tighen the strut piston rod nut to 150NM or 111lb ft.
Dont forget to go underneath and angle tighten the bottom ball joint bolts mentioned earlier.
And thats it, get out there and drive.
In fact take the car out for a test drive listening for any knocks, be carefully if fitted new Brake pads or discs as they will need time to bed in.
Enjoy your nice handling brick.
Please tell me anything i may have missed and i will update.
So you want to lower your 700/900 Volvo and install some nice firm shocks and whilst your there uprate or replace the braking power. Well here's how.
The car used in the sequence of photo's is Griz's 1996 945 Komfort Wagon which has a solid live axle. (please note this does not cover cars with multilink rear suspension)
Here we can see me going round and measuring the height to wheel arch with a stick to assatain the exsisting ride height. (At the time no calibrated unit was available)
Blitz the credit card and spend a crap load on parts.
Ok First the Rear Suspension and Brakes.
Tools Required for job
19mm Socket and Spanner
17mm Socket and Spanner
15mm Deep Socket
13mm Socket and Spanner
10mm Socket and Spanner
Rachet
Several Extension Bars
Torque Wrench
Flatblade Screwdrivers
G Clamp
Hammer
Trolley jacks and Axle Stands.
Take ya 19mm socket and loosen wheel nuts.
Chock front wheels and Jack car up and place Axle stand under chassis.
Remove Wheel nuts and road Wheel. Send Griz off to clean alloy wheel
Take a Hammer and knock out caliper Retaining Pins taking note how the brake pad spring is fitted.
Now remove brake pads from caliper and unbolt the two 13mm caliper to axle bolts. Rest or tie up caliper out of way.
Taking a 10mm Spanner undo Disc retaing bolt.
Let Handbrake off and remove disc. Note how ****e Griz's discs were.
Remove the rubber bung to expose the Top Shock Absorber bolt. Loosen with a 17mm Socket. Loosen the bottom Shock absorber bolt using a 18mm on the outside nut and a 17mm on the inside bolt.
Using the 15mm Deep socket and several extension bars, Loosen the upper spring mount.
Place a jack under the trailing arm as shown and jack the axle up to take tension of the shock abosorber.
Undo the upper and lower Shock absorber bolts and remove the knackered shock, laugh at how little rebound it has!!
Remove the jack from under the trailing arm and remove the bolt from the upper spring mount. Now remove the Spring by pushing the axle down slightly, Marvel at how much shorter your lowering springs are.
Note how the upper Spring mount is fitted to the old spring and remove it and replace it on the new spring.
Looking back at the car, look at the trailing arm to where the spring was seated, pull out the bottom rubber mount and fit to new Spring
Now once the mounts are correctly installed so that the ends of the coils are against the stops on the mount, refit the spring to the car. Jacking the trailing arm up again helps compress the spring making getting the upper spring mount nut back on easier.
Now to fit your new Shock Absorber. As this will be much harder to compress than your knackered one, compress the shock and use cable ties to keep it compressed.
Install the shock into the car, by first getting the top bolt in. Then cutting the cable ties, will allow the shock to uncompress and you will be able to fit the bottom bolt.
Now using your torque wrench tighten the 3 bolts you have undone. You may wish to purchase and fit new nuts and bolts. (we did cos they cost pennies to buy and are better than the old rusty ones)
Upper Shock Bolt. Torque to 85NM or 63 Lbs/ft. The Volvo Part number for this bolt is 965196.
Lower Shock Bolt. Torque to 85NM or 63 Lbs/ft. The Volvo Part number for the bolt is 946473 and the nut is 971099.
Upper Spring Bolt. Torque to 48NM or 35 Lbs/ft. The Volvo part no for this nut is 969322.
Time to Reassemble the brakes now, Make sure if fitting new discs to use Brake Cleaner or meths to remove the anti rust coating on all friction surfaces (including the handbrake Drum part)
Refit disc and replace Disc Retaining screw.
Using a G Clamp compress the pistons back into the caliper.
Now Refit the caliper to the axle Torqueing the 13mm Bolts to 58NM or 43 Lbs/ft
Fit the New Brakepads and refit the brakepad spring and retainer pins.
Sit back and admire your new Fully Uprated Suspension and Fresh Brakes.
Now refit the road wheel and torque wheel nuts to 85NM or 63 Lbs/ft.
Lower car to ground. Now go repeat for the other side.
We will Cover the Front tommorrow, but Griz managed to lock us out of the house so we packed the tools up and went to the pub to have some beers whilst we waited for some Keys to Turn up.
Ok Wake up a little later in the day due to drinking until 3am.
You need energy and to cancel out the Fosters Lager, so time to pop out and have a Full English Breakfast.
You will need,
2 Sausages,
2 Rashers of Bacon
2 Eggs
2 Hash Browns
2 Slices of Fried Bread
2 Plum Tomatoes
1 Cup of Tea, Milk or Sugar added to taste.
Burp!!!!
Mmm anyway back to the Front Suspension and Brakes.
Tools Required for this Job.
24mm Spanner
19mm Socket and Spanner
18mm Socket and Spanner
17mm Socket and Spanner
15mm Socket and Spanner
12mm Socket and Spanner
10mm Socket and Spanner
10mm Allen Key
7mm Allen Key
5mm Allen Key
Rachet
Hammer
Large Prybar
Large Breaker Bar or Pipe.
Wirebrush
Flatblade screwdrivers
BallJoint Splitter
Trolley Jack
Axle stand
Spring Compressors.
Now Before jacking the car up, open bonnet and using the 24mm Spanner and a 10mm spanner or some Molegrips loosen off the Top Shock Nut. These can be extremely tight, air tools can help undo this but i used a bar and sheer strength.
Note how the 10mm shattered under the load. Just Loosen this off do not fully remove the nut.
Now Take ya 19mm socket and loosen wheel nuts.
Chock rear wheels and Jack car up and place Axle stand under chassis.
Remove Wheel nuts and road Wheel. Send Griz off to clean alloy wheel.
Taking a 10mm spanner undo the disc retaining bolt, either have someone stand on the brakes or use a large screwdriver to stop the disc from turning.
Now turn the steering whichever way that getting to the caliper is made easier.
Take a 12mm socket or spanner and undo the 2 caliper bolts
Remove the brake caliper and brake pads. Now take your 10mm Allen Key and undo the 2 Brake Caliper Carrier bolts and remove the carrier.
At this point you should be able to remove the disc, Now Griz's car has seperate Hubs, Please note that some 700's the disc is the hub. If just changing the springs you can leave the Disc on.
We wernt so lucky in that one disc was rusted solid to the hub and i had to grind it off when the strut was on the bench.
Now turn the steering back the other way so that you can get easy access to the steering tie rod end.
Remove any split pins if fitted and take a 18mm Socket and undo the nut.
Now you may find that the nut keeps spinning as it gets stuck on the thread.
Getting some solid material, would or metal. Place under the track rod end and carefully lower the weight of the vehicle onto it.
This should push the track rod end back into the hub and allow you to wind the nut off.
You might not have the problem of the nut getting stuck, but find you cant seperate the ball joint from the hub.
Use your ball joint splitter to seperate the joint.
Now take your 5mm Allen and undo the ABS sensor if fitted and remove it.
You may find like i did that the sensor will not come out. So simply trace the wire through the wheel arch and unplug it from the engine bay connector.
*** ENSURE YOU DO NOT SWITCH IGNITION ON IF SENSOR IS DISCONNECTED AS YOU MAY TRIGGER ABS WARNING LIGHT****
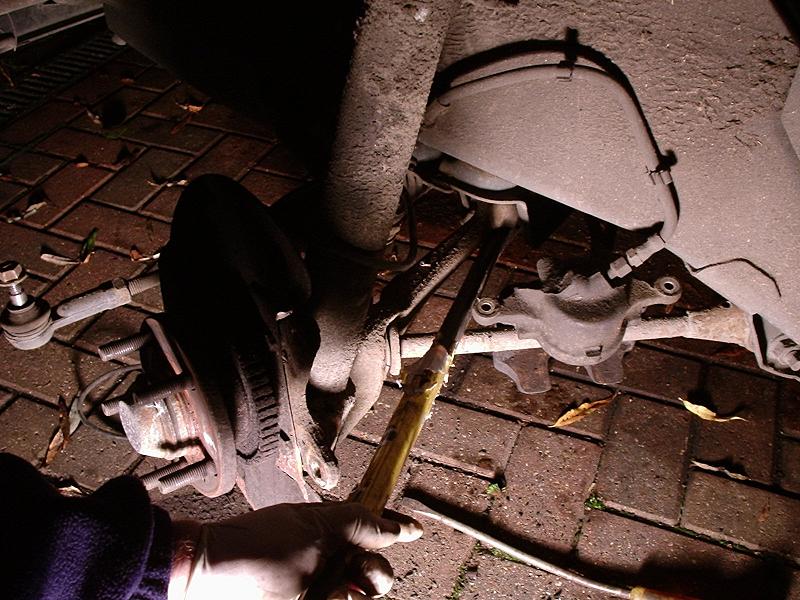
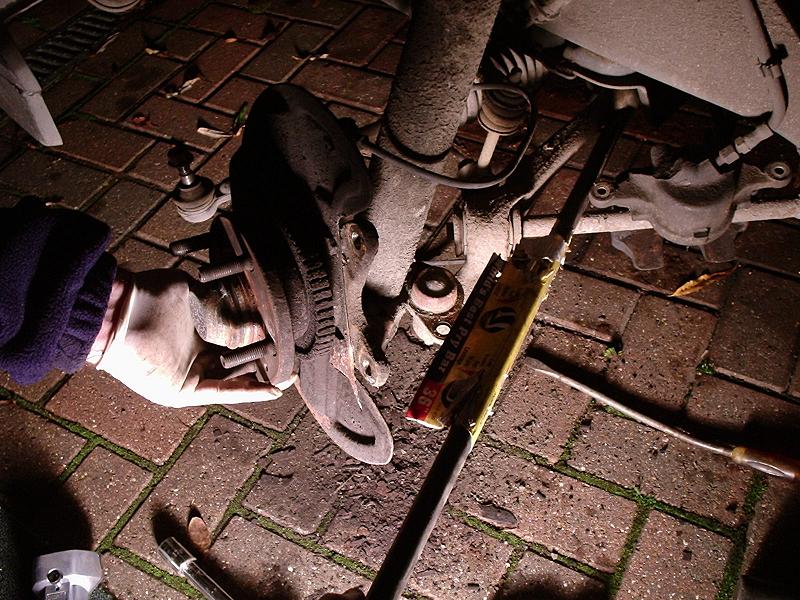
Taking a 17mm Socket undo the 2 Bottom Balljoint Bolts.
Now go back up top and loosen the two 15mm Nuts. Dont undo Fully just yet.
Now taking a long Prybar or piece of pipe, position the bar as show and lever down.
You should now pop the strut off the bottom Ball joint.
Now go back up top and loosen the two bolts whilst holding the strut.
Be carefully it is heavy!!! Now remove the strut from the car and take it to your work bench or Floor.
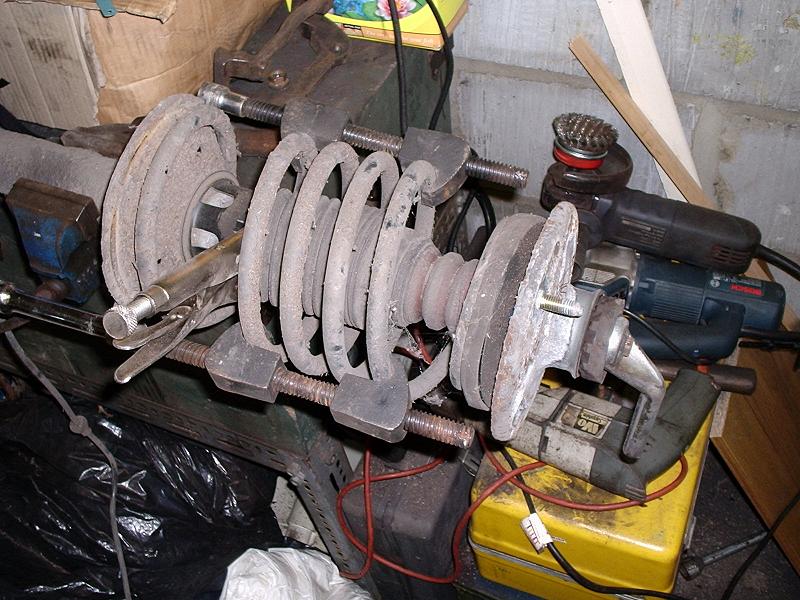
Now Take note of how the spring sits against the various stops on its top and bottom mounts.
Take your spring compressors and wind them up unti you have taken the tension off the top mount.
Try to get ya compressors over at least 3 or 4 coils on the spring.
Be Extremely carefull when using Spring Compressors ass a Compressed Coil Spring holds a lot of power.
MAKE SURE THEY ARE HOOKED ON TO THE COILS WELL!!!!
Seek advice from someone who's done it before if unsure.
Once your spring is compressed, take your 24mm spanner and undo the top shock nut which was the first thing you loosened.
I am using a pair of mole grips to grip the shock tube whilst undoing the nut as the shocks are being changed. Use your 10mm or molegrips on the top if keeping shocks.
Now remove the Top Mount noting how the components go together.
Remove the spring from the strut.
Now soak the shock retainer screw in Monkey Piss AKA WD40.
Either use a Pair of Stilsons or a C Spanner to undo them. I Could find neither of mine so I used a punch and hammer to get them loosened.
Undo and remove shock from the strut.
Put your new shock in and tighen the Shock Retainer.
Look how much thicker the Bilsteins are to the stock ones.
I apologise for the Lack of Photo's now on reasembly but i was working to a tight deadline.
Now Compress your new Springs and refit to the shock along with the topmount. Making sure the ends of the coils are against there stops.
Replace your 24mm shock Nut and tighten up as much as possible, using your 24mm spanner and 10mm spanner/molegrips or in the case of the bilsteins a 7mm Allen.
Release your spring compressors carefully.
Now take your fully assembled Strut back to the car.
Offer the complete Stut up and attach the two 15mm Nuts on the strut Tower, so the strut is held up again.
Using your bar again, lever down the lower arm so that you can get the strut back onto the bottom balljoint.
Replace the two 18mm Bolts and tighten to 30NM or 22lb ft. You then need to further tighten them 90 Degrees. But best to do this when the car is back on its wheels.
Replace the 18mm Steering trackrod End nut and tighten to 60NM or 44lb ft lbs. (again if it nut spins on the thread use the trick of lowering the weight of the car onto it to tighten.)
Now refit your brake Disc and replace the 10mm Disc retainer Bolt.
Replace the Caliper Carrier with its 2 10mm Allen Bolts, Tighten these to 100NM of 74lb ft.
If fitting new pads, use a G clamp to compress the Piston back into the caliper.
***NOTE Rear Caliper pistons shown being Compressed here.***
Refit your brake pads, using Copper Grease on any metal to metal surfaces, being carefull not to get any on friction surfaces.
Refit the 2 12mm brake caliper bolts and tighten to 58NM or 43ft lb.
Now depress the brake pedal several times to reseat the pads.
Replace the ABS sensor or run the wire back through and reconnect it.
Replace the Road wheel and lower the car to the ground, tightening wheel nuts to 85NM or 63 lb ft.
Tighten the 2 15mm Nuts that hold the strut top to the body to 40NM or 30ft lbs.
Using your 24mm Spanner and either your 10mm Spanner or in the case of the bilsteins a 7mm Allen tighen the strut piston rod nut to 150NM or 111lb ft.
Dont forget to go underneath and angle tighten the bottom ball joint bolts mentioned earlier.
And thats it, get out there and drive.
In fact take the car out for a test drive listening for any knocks, be carefully if fitted new Brake pads or discs as they will need time to bed in.
Enjoy your nice handling brick.
Last edited:


